Bluenose - Robertd [COMPLETED BUILD]

Joined
Jan 18, 2021
Messages
683
Points
403

Location
Church Point (Sydney) NSW
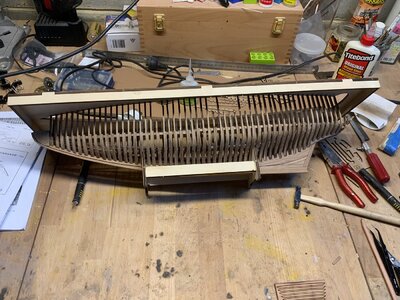
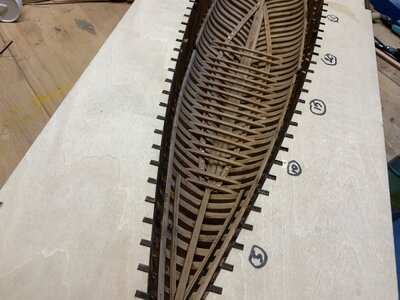
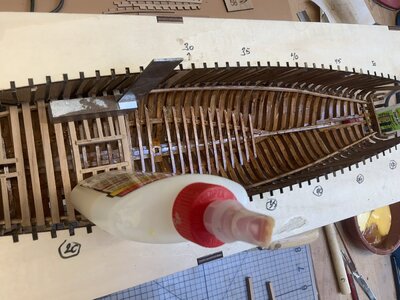
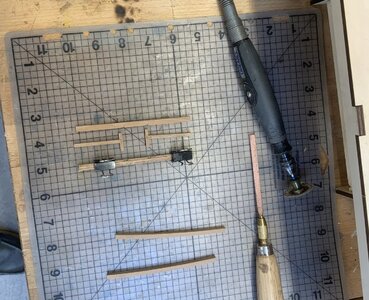
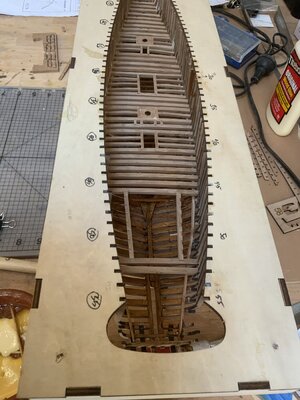
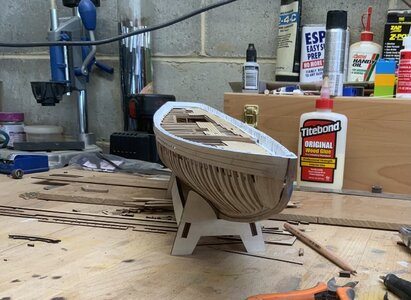
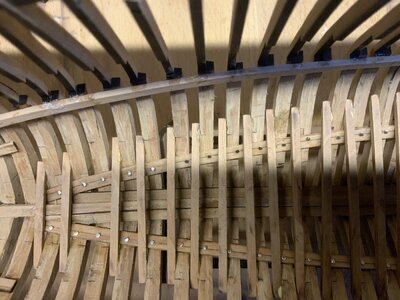
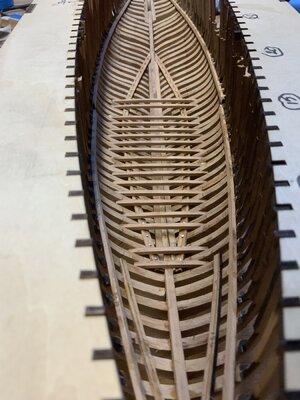
So far my built, not 100 % perfect but passible , my mistake was not paying a greater attention to sanding the notches on the jig , soon learnt , the forum is a valuable source of information no doubt and I follow Dean’s achievements every move not to make mistakes , it sure is a challenge .I found sanding and more sanding is a must during the built to get rid of the ‘charcoal’ , more to follow
467554C8-A290-45F1-9D4A-E67381537DE9.jpeg0321DE07-5622-4F11-90B2-8512634FCFE0.jpeg059332DB-9702-4EB7-9770-E0F7CC9AE116.jpeg6F13383A-B46F-4E2A-BC1A-357B501AA896.jpeg
 
Looking good Robert. You are making some real progress! Good to see your build log started. :)
Thanks Dean , you are my inspiration for sure , anyway almost ready for the deck beams , I will varnish the results with a clear varnish as we go along ,I ignored the instructions to use their copper thread as bolts , I still had a pile of copper nails from a previous job and used them instead , used a 1mm drill bit to allow the nails to be inserted and sanded them down to create a more realistic bolt.
 
Thanks Dean , you are my inspiration for sure , anyway almost ready for the deck beams , I will varnish the results with a clear varnish as we go along ,I ignored the instructions to use their copper thread as bolts , I still had a pile of copper nails from a previous job and used them instead , used a 1mm drill bit to allow the nails to be inserted and sanded them down to create a more realistic bolt.
Yes, be sure to clear coat everything inside prior to installing the deck beams. ;)
 
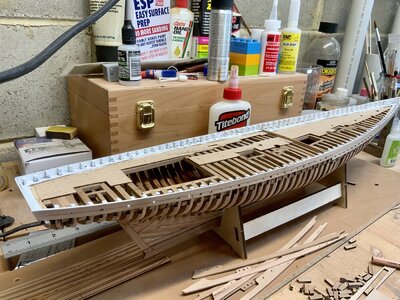
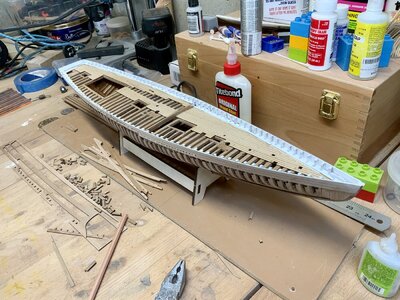
Test fit the frame 41-49, and using a hobby mat for right angles and yes I use a dremel with EZ lock sanding discs and of course the superb file to complement the arsenal of tools , gave the under deck a coat of varnish , so far the progress , the deck frames will be completed by tomorrow and up to the next challenge the Deck925AE010-5A2B-4B97-AB27-EBADC1877180.jpeg955DF29F-7CE1-4742-BFC3-3E25BED8C80B.jpegAF71C89E-DF86-4079-BAB0-ED141F606813.jpeg
 
Test fit the frame 41-49, and using a hobby mat for right angles and yes I use a dremel with EZ lock sanding discs and of course the superb file to complement the arsenal of tools , gave the under deck a coat of varnish , so far the progress , the deck frames will be completed by tomorrow and up to the next challenge the Deck
You are moving along very quickly Robert! Good job!
 
Test fit the frame 41-49, and using a hobby mat for right angles and yes I use a dremel with EZ lock sanding discs and of course the superb file to complement the arsenal of tools , gave the under deck a coat of varnish , so far the progress , the deck frames will be completed by tomorrow and up to the next challenge the Deck
Nice progress Robert. With filling up the hull with the deck beams.
Regards, Peter
 
Decided to use the deck sheet , I will give it a clear coat , painted the bulwarks and sort of follow the colour scheme by Gene Bodnar , writer of the Queen of the North Atlantic , as Dean said ‘the artistic personal touch , I ordered 5mm Cherry Wood strips , so the Hull planking has to wait for the time being , question :
The bowsprit , a bit confused , what length and the diameter , I closed of the forward section of the bow and will drill a hole as soon as I know the right diameter and position .
I messed up the stern section so ripped it all apart and rectified it from scratch , so far you wouldn’t know the difference , needless to say I follow Dean’s progress with admiration , well done!BC5620DB-A782-4E5C-BAC7-855CFAD5D0E2.jpeg229F255F-4B88-430E-994B-FE841ECEAA0F.jpeg2C92D1C3-3CEA-4032-AADE-78B33EF9097C.jpeg
 
Decided to use the deck sheet , I will give it a clear coat , painted the bulwarks and sort of follow the colour scheme by Gene Bodnar , writer of the Queen of the North Atlantic , as Dean said ‘the artistic personal touch , I ordered 5mm Cherry Wood strips , so the Hull planking has to wait for the time being , question :
The bowsprit , a bit confused , what length and the diameter , I closed of the forward section of the bow and will drill a hole as soon as I know the right diameter and position .
I messed up the stern section so ripped it all apart and rectified it from scratch , so far you wouldn’t know the difference , needless to say I follow Dean’s progress with admiration , well done!View attachment 227188View attachment 227189View attachment 227190
Wow! You build fast Robert! As you know I’m not a fan of the deck sheets, but they use a 3mm wide simulated plank. So if you order some 3mm x 1mm thick beechwood planks, you can fill in as you choose on the uncovered areas. I would fill the upper deck area you left unplanked, because the opposite side is open. But that’s just my logic. It’s your ship and your decision.
On the bowsprit, they have pre-tapered dowels provided for all required. Each has a dash number. The bowsprit is -1. I used it as is on the length and diameter. I just tapered the nose a little more and made it look like the original.
You will obviously need the Sampson post in place as well. So I got it ready and then I installed the bowsprit from inside because it is larger in diameter inside the ship, and once in place put the Samson post behind it to attach to. So you have to place both at the same time, in that order. Hope that helps.
 
Last edited:
Wow! You build fast Robert! As you know I’m not a fan of the deck sheets, but they use a 3mm wide simulated plank. So if you order some 3mm x 1mm thick beechwood planks, you can fill in as you choose on the uncovered areas.
I already ordered the Cherry Wood and yes 5mm dia unfortunately , I should have checked anyway if it looks pretty good , I will use it on the Hull
 
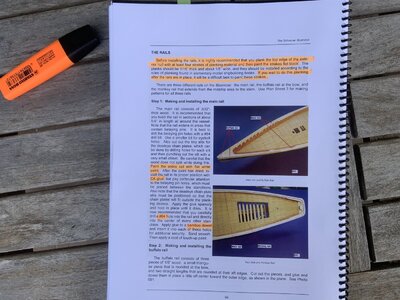
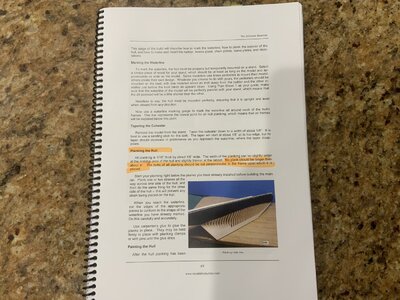
ReadIng the POF practicum it is recommended to plank the top edge of the exterior hull at least four strokes of planking material and paint them black , actually I use dark blue/black , this is done before installing the painted rails ( white) , for extra security it is recommended to glue bamboo dowels into the rails
 

Attachments

  • 744FAEA3-80D3-42E2-A15B-1B5B878D18D4.jpeg
    744FAEA3-80D3-42E2-A15B-1B5B878D18D4.jpeg
    327.9 KB · Views: 19
ReadIng the POF practicum it is recommended to plank the top edge of the exterior hull at least four strokes of planking material and paint them black , actually I use dark blue/black , this is done before installing the painted rails ( white) , for extra security it is recommended to glue bamboo dowels into the rails
The supplied bulwarks should be installed first. Then paint inside white. And then add the cap railing. So you’re fine. You can even wait until you plank the hull. But anytime after bulwarks is fine.
 
Wow! You build fast Robert! As you know I’m not a fan of the deck sheets, but they use a 3mm wide simulated plank. So if you order some 3mm x 1mm thick beechwood planks, you can fill in as you choose on the uncovered areas. I would fill the upper deck area you left unplanked, because the opposite side is open. But that’s just my logic. It’s your ship and your decision.
On the bowsprit, they have pre-tapered dowels provided for all required. Each has a dash number. The bowsprit is -1. I used it as is on the length and diameter. I just tapered the nose a little more and made it look like the original.
You will obviously need the Sampson post in place as well. So I got it ready and then I installed the bowsprit from inside because it is larger in diameter inside the ship, and once in place put the Samson post behind it to attach to. So you have to place both at the same time, in that order. Hope that helps.
Thanks Dean , makes sense to have the Samson post in place first up
 
The supplied bulwarks should be installed first. Then paint inside white. And then add the cap railing. So you’re fine. You can even wait until you plank the hull. But anytime after bulwarks is fine.
What is you suggestion Dean ? Go for the full length supplied or follow these recommendations just curious what works best
 

Attachments

  • 1EB0FA93-46EF-4530-B941-D80A9C496DCE.jpeg
    1EB0FA93-46EF-4530-B941-D80A9C496DCE.jpeg
    293.1 KB · Views: 12
Back
Top