Just found your post. Read your entire progress and as a guy new to ship model building i picked up a few tips. I have 2 AL ships at present. I feel i jumped into the deep end with the AL Virgina 1819 but i really enjoy the challenge. On the shelf waaiting is AL L'Hermiane La Fayette. I have found some miss labeling on the picture book and a bit short on 2 pieces of lumber but otherwise all is well. Not to the point of rigging yet so I don't know how that will go. I need to learn how to create a log like yours and others. I might pick up more help. Great work ! Hope mine turns out that well.
-

Win a Free Custom Engraved Brass Coin!!!
As a way to introduce our brass coins to the community, we will raffle off a free coin during the month of August. Follow link ABOVE for instructions for entering.
-

PRE-ORDER SHIPS IN SCALE TODAY!
The beloved Ships in Scale Magazine is back and charting a new course for 2026!
Discover new skills, new techniques, and new inspirations in every issue.
NOTE THAT OUR FIRST ISSUE WILL BE JAN/FEB 2026
You are using an out of date browser. It may not display this or other websites correctly.
You should upgrade or use an alternative browser.
You should upgrade or use an alternative browser.
Thank you Patrick, I have learnt so many things from reading other build logs so it's pleasing that you have learnt something from reading this build log. I don't have any friends where I live and my family are not interested in my hobby so I rely a lot on Internet modelling forums and this friendly, helpful forum helps me to continue with my model building. Looking forward to seeing some of your builds,Just found your post. Read your entire progress and as a guy new to ship model building i picked up a few tips. I have 2 AL ships at present. I feel i jumped into the deep end with the AL Virgina 1819 but i really enjoy the challenge. On the shelf waaiting is AL L'Hermiane La Fayette. I have found some miss labeling on the picture book and a bit short on 2 pieces of lumber but otherwise all is well. Not to the point of rigging yet so I don't know how that will go. I need to learn how to create a log like yours and others. I might pick up more help. Great work ! Hope mine turns out that well.
Cheers Andy
Thank you Patrick, I have learnt so many things from reading other build logs so it's pleasing that you have learnt something from reading this build log. I don't have any friends where I live and my family are not interested in my hobby so I rely a lot on Internet modelling forums and this friendly, helpful forum helps me to continue with my model building. Looking forward to seeing some of your builds,
Cheers Andy
G'day Andy
I know what you mean mate. I live about one and half hour away from the closest model club. That's not far really, but I'm disabled and it too far for for me to drive. My wife tolerate my hobby, but don't understand what I'm doing. My friends here listen to me when I talk about what's going on with my model, but you can tell they are only being polite. No one is really interested.
Amywaymate happymodeling and keep on posting, you've got an interested family here.
Havagooday
Greg
Thanks Greg,
I decided that instead of putting off the fitting of the Rudder, I should just get on and get it done. I used the plan sheet to mark the position of the lower Rudder Hinge. I glued the Hinge to the Rudder, drilled 4 holes and fitted the pin head rivets. I made the Tiller from 4mm square Walnut strip with one end filled down a little bit. After I had glued it to the Rudder I painted it black. Above the upper Rudder Hinge there are 3 eyepins, 1 fits to the Rudder, the other 2 fit on the Hull. I fitted the Rudder eyepin and then the Rudder Hinge pin followed by the Hull eyepins.
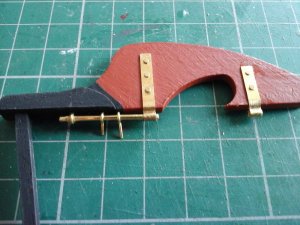
The Rudder was then fitted to the Hull and then I fitted the lower Hinge pin and the 2 lower Hinges that go on the Hull, these were a little bit of a pain to fit because they needed to be curved to match the Hull.
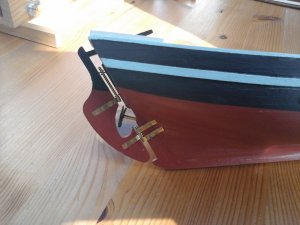
I just need to give the Rudder another coat of red paint and match up the waterline. I ran a drill through the holes in 4 Deadeyes and then attempted to fit their strops and Chain Plates. The pre-shaped strops were not big enough and there was no way that I was going to get the Chain Plates to fit. I used some 1mm diameter Brass wire and made my own strops. The Chain Plates are made from 2mm Brass strip and folded over between the Deadeye and the strop.
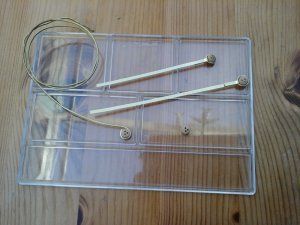
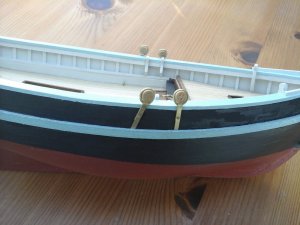
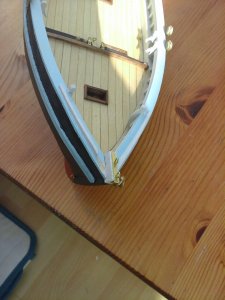
The Chain Plates were cut to length, a hole drilled in each one, and they were then glued to the Hull. I drilled a hole through each Chain Plate making sure I didn't go through the Hull and then fitted a pin head to secure it. Whilst I was in the mood for drilling and gluing, I fitted a few more eyepins to the Hull.
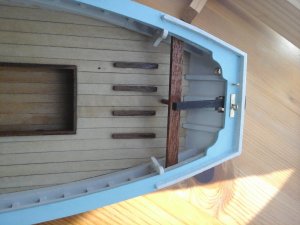
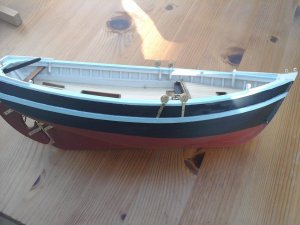
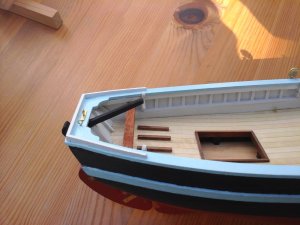
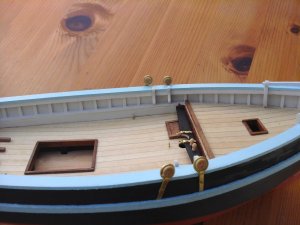
Cheers Andy
I decided that instead of putting off the fitting of the Rudder, I should just get on and get it done. I used the plan sheet to mark the position of the lower Rudder Hinge. I glued the Hinge to the Rudder, drilled 4 holes and fitted the pin head rivets. I made the Tiller from 4mm square Walnut strip with one end filled down a little bit. After I had glued it to the Rudder I painted it black. Above the upper Rudder Hinge there are 3 eyepins, 1 fits to the Rudder, the other 2 fit on the Hull. I fitted the Rudder eyepin and then the Rudder Hinge pin followed by the Hull eyepins.

The Rudder was then fitted to the Hull and then I fitted the lower Hinge pin and the 2 lower Hinges that go on the Hull, these were a little bit of a pain to fit because they needed to be curved to match the Hull.

I just need to give the Rudder another coat of red paint and match up the waterline. I ran a drill through the holes in 4 Deadeyes and then attempted to fit their strops and Chain Plates. The pre-shaped strops were not big enough and there was no way that I was going to get the Chain Plates to fit. I used some 1mm diameter Brass wire and made my own strops. The Chain Plates are made from 2mm Brass strip and folded over between the Deadeye and the strop.

The Chain Plates were cut to length, a hole drilled in each one, and they were then glued to the Hull. I drilled a hole through each Chain Plate making sure I didn't go through the Hull and then fitted a pin head to secure it. Whilst I was in the mood for drilling and gluing, I fitted a few more eyepins to the Hull.


Cheers Andy
Very good progress you are sharing with us. She is coming out nicely.
Maybe you install a second pin head on each chainplate. On a real boat they would not have used only one, due to stability of the connection......
Maybe you install a second pin head on each chainplate. On a real boat they would not have used only one, due to stability of the connection......
Thanks Uwe, I still have a bit more of each Chain Plate to fit below the Rubbing Strake which also has a pin through it. I agree at the moment it doesn't look correct.
Cheers Andy
Cheers Andy
Hi Andy, you are doing a hell of a great job at Bon Retour and will continue to follow your further construction with great interest
greetings from Ostend (belgium)
Dj
greetings from Ostend (belgium)
Dj
Dank u Dj.
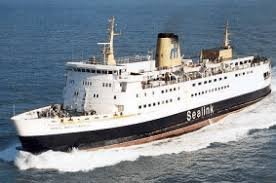
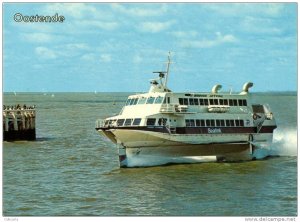
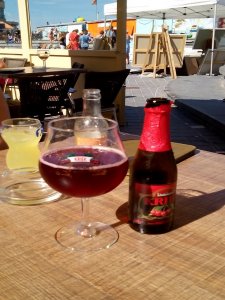
I am getting close to starting the rigging and sails, the part I enjoy the most. I have been to Ostend several times on the Ferry or Jet foil from Dover to catch the train to Germany, on one occasion I spent an enjoyable afternoon walking along the seafront and found a nice little Bar to have a beer whilst waiting for the Ferry,
Cheers Andy
Hi Andy, you are doing a hell of a great job at Bon Retour and will continue to follow your further construction with great interest
greetings from Ostend (belgium)
Dj
Thanks Dj, it certainly brought back some memories, although I am not a big fan of fruit beers. Are there any ferry services into Ostend nowadays? I don't think you can go there from Dover now.
Cheers Andy
Cheers Andy
no Andy, this has all disappeared largely due to the arrival of the chunnel, although there is a group that wants to bring the ferries back to Ostend, but not at Dover but at Folkestone, but I think this will remain with an ilusion.Thanks Dj, it certainly brought back some memories, although I am not a big fan of fruit beers. Are there any ferry services into Ostend nowadays? I don't think you can go there from Dover now.
Cheers Andy
The last time I was at Folkstone, a couple of years ago, the ferry terminal had all been demolished so it would take a lot of work at the harbour there. I remember getting an overnight train from Munich to Ostend, 10 minutes later I was on the ferry, arriving at Dover Western Docks 4 hours later, through customs and straight onto the train at Dover Marine station, it was so easy,no Andy, this has all disappeared largely due to the arrival of the chunnel, although there is a group that wants to bring the ferries back to Ostend, but not at Dover but at Folkestone, but I think this will remain with an ilusion.
Cheers Andy
I have been busy building an ai*cr*ft the last couple of weeks but I have found some time to complete all the work required on the Hull and Decks. I had previously made the Mast, Bowsprit, upper and lower Gaffs and the part that the Bowsprit bolts onto. This was glued to the Fore Deck with a pin for extra strength and left overnight to set. The Bowsprit was then glued and pinned in place and once dry the Brass plate that attaches the Bowsprit to the Stem was made and fitted. The boat was then glued and pinned to the Stand that is provided in the kit.
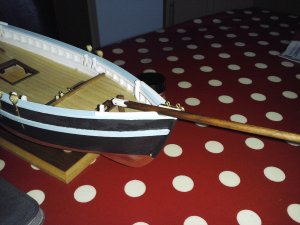
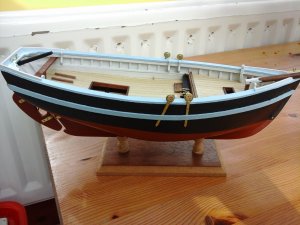
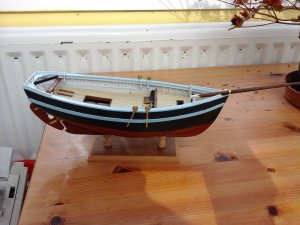
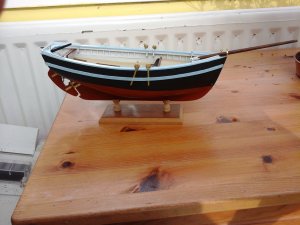
Before fitting the Mast I have decided to tie on the Blocks that are needed for the rigging. I started off by attaching some rigging thread to the Blocks and then fitting them to the Mast.
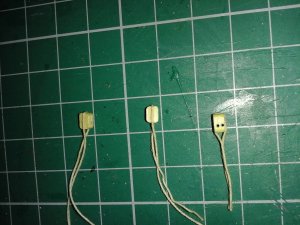
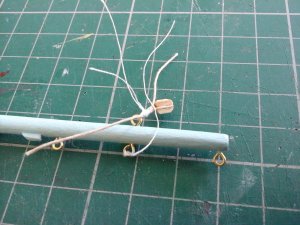
Cheers Andy


Before fitting the Mast I have decided to tie on the Blocks that are needed for the rigging. I started off by attaching some rigging thread to the Blocks and then fitting them to the Mast.


Cheers Andy
Looking great Andy!
Been a busy boy, I see. Your are going great guns mate.
Hsppymodeling
Greg
Been a busy boy, I see. Your are going great guns mate.
Hsppymodeling
Greg
Good to see, that you prolonged the chain plates and added a second bolt......and very good progress
She is coming out nicely !
She is coming out nicely !
Thanks Greg and Uwe, I've not been as busy on this as I would like, I was in the south of England over Easter at my Parents, building an Airfix Spitfire and now the weather is improving, playing tennis,
Cheers Andy
Cheers Andy
very nice job Andy....are you getting ready for Wimbledon?

Thanks DJ, yes I am thinking of playing tennis at Wimbledon either this summer or next summer, there are some public hire tennis courts in Wimbledon Parkvery nice job Andy....are you getting ready for Wimbledon?
I have now got the 3 blocks attached to the Mast and then I decided it would also be easier to fit the 2 sets of Shrouds and the Fore Stay whilst the Mast was still lying flat on my workbench. The plans and instructions are not clear on how the Fore Stay is fitted so I looped the thread round the Mast and tied it off in 3 places similar to the way the Shrouds are tied to a Dead Eye. The starboard Shrouds were then fitted and tied off in one place, followed by the port Shrouds.
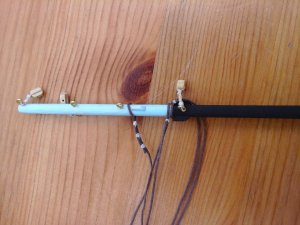
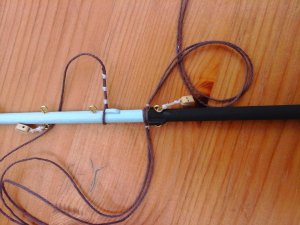
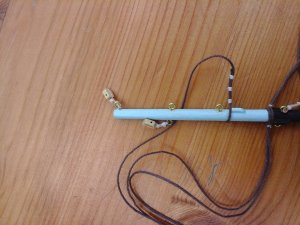
Once the PVA that I used to seal all the knots was dry I trimmed any loose ends and then Mast was fitted.
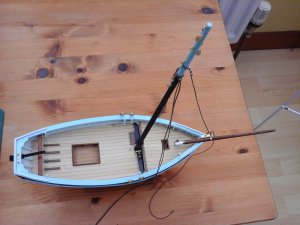
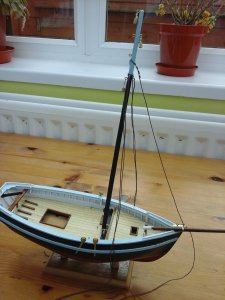
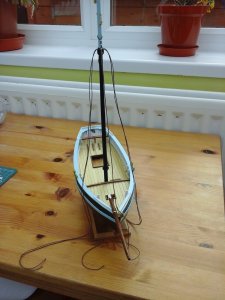
Cheers Andy
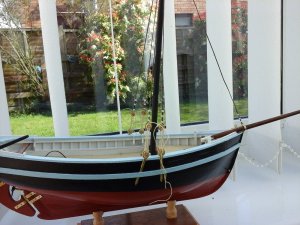
With the Shrouds fitted it was now time to fit the upper Dead Eyes. Seeing as there are only 2 Shrouds on each side I decided not to make up a jig to get the gap between the Dead Eyes the same, I used a ruler instead. I started with the Starboard forward Shroud wrapping it round a Dead Eye and then clamping the Shroud using a Crocodile Clip, are they called Alligator Clips in the USA? I then gradually adjusted the length of the Shroud until it was the correct length. It was then tied off in 3 places and the knots sealed with PVA. Once it was dry the loose ends were trimmed with a pair of nail clippers. I used some cotton to temporarily rig a Lanyard to help me get the other Dead Eyes lined up.
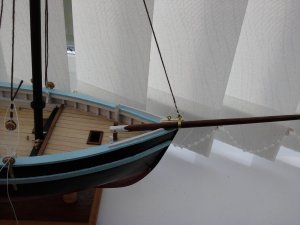
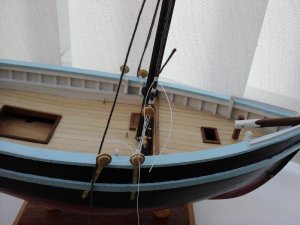
The other 3 Shrouds were then rigged with Dead Eyes. I brushed the 4 Shrouds with acrylic varnish to smooth down any loose fibers. I have fitted the Lanyards but I will wait until I have the Sails fitted before I tighten the Shrouds.
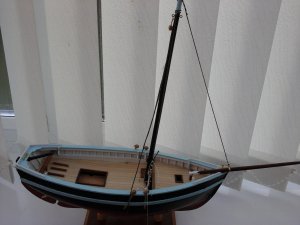
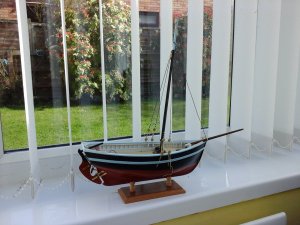
Cheers Andy


The other 3 Shrouds were then rigged with Dead Eyes. I brushed the 4 Shrouds with acrylic varnish to smooth down any loose fibers. I have fitted the Lanyards but I will wait until I have the Sails fitted before I tighten the Shrouds.


Cheers Andy
nice Andy


