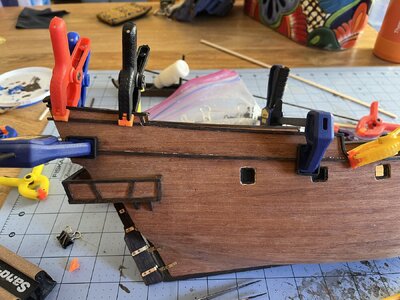
Buccaneer 1:100 by Occre - Build log

Thanks for the kind words. At first I was like “huh?” about the hearing aids but then I looked at the pics. My mother in law like to hear about my model building and she sent me some money for my birthday to be used specifically on my ships. I took the picture for her, and included the hearing aid to give her a better sense of the size.

Can’t wait to see your updates.
Welcome back to your Molino, Hugh!

I haven't been getting SOS emails lately so didn't even know you snuck back in here. Good to "see" you again. Hey, is the hearing aid a part of your tool kit, too? ;)

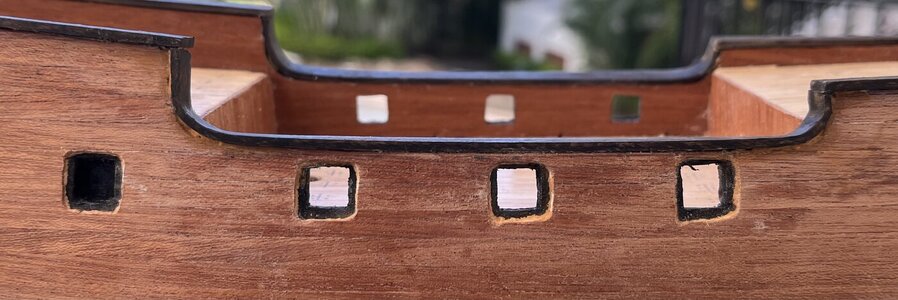
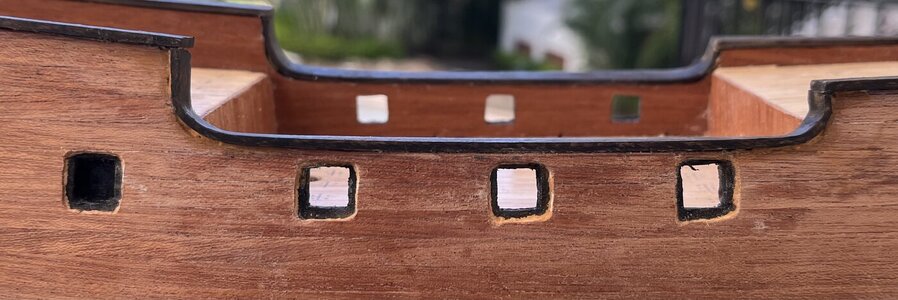
Your ship is coming along beautifully. I really, really like the frames you got. I'm looking forward to seeing them all installed. I had to put frames on my gun ports to hide my crappy exacto job (had no idea you could buy them) but I'm just feeling so-so about them. Yours are going to look so good.

Very nice work. You sure do come up with some creative ideas on how to get everything right. Excellent.

I'll be posting another update on mine probably this week sometime. It's nice to have somebody to build side-by-side with.

Hope to see another post from you soon
 
4/7 to 4/14
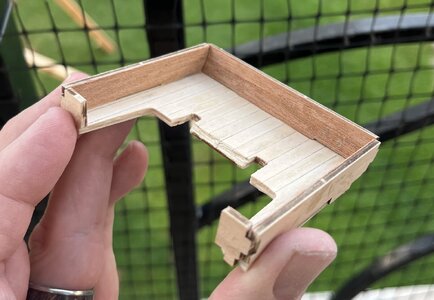
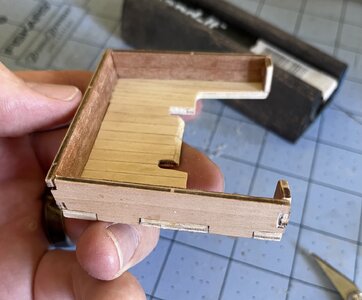
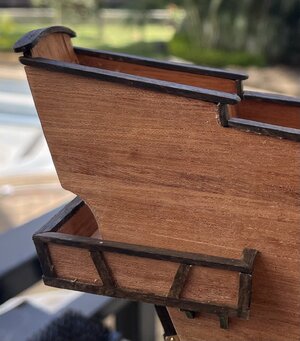
With the hull done, it’s time to create the balcony. Each of the 6 pieces will need to be double planked (plus the 6 supports will be stained/painted to match the keel). Other than the supports, they all will be planked on both sides with the same planking as the hull while the base will be planked on one side with the hull planking and the other with the deck planking.

After cutting out the pieces and some light sanding I planked them on one side.

For the deck planking, I used a pencil on the edges to simulate deck grouting before gluing them to the base.
20240407_01.jpg
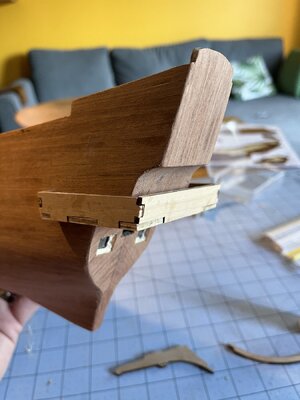
Once the glue was dried, I trimmed off the excess pieces and then sanded them, test fitting the pieces together until they all fit together as expected. They were glued together and once dry, the completed balcony was glued in place.
20240407_02.jpg
20240407_03.jpg
The exterior sides still need to be planked.

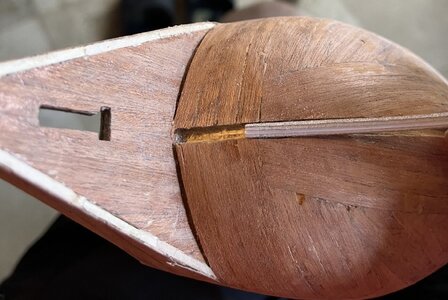
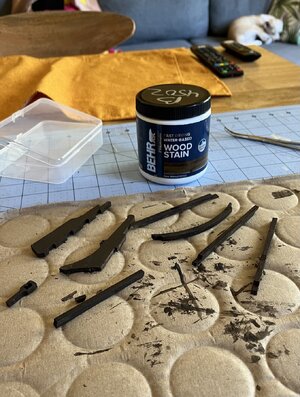
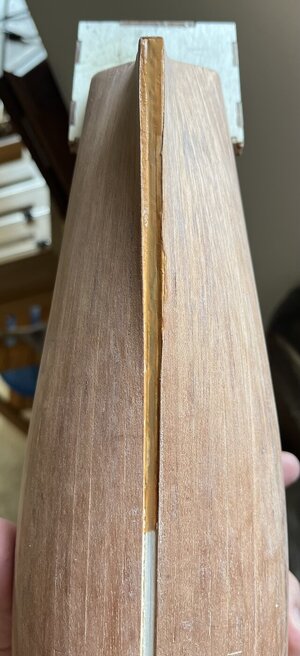
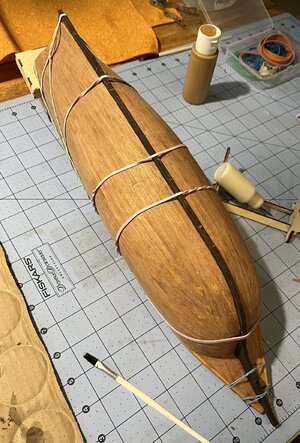
I then started in on the keel/stem pieces. After sanding both the groove (that was created while planking) and the keel/stem pieces until they all went into place, I realized that they need to be stained. Two light coats of walnut stain with a light sanding between coats and they were ready to be installed. At the last minute I decided to paint the gap/groove with paint that matches the hull. By doing this, any small parts of the groove that are not covered with planking or by the keel/stem will not stand out.
20240407_04.jpg
20240407_05.jpg
20240407_06.jpg
Once the paint is dry, the keel/stem parts are glued in place.
20240407_07.jpg
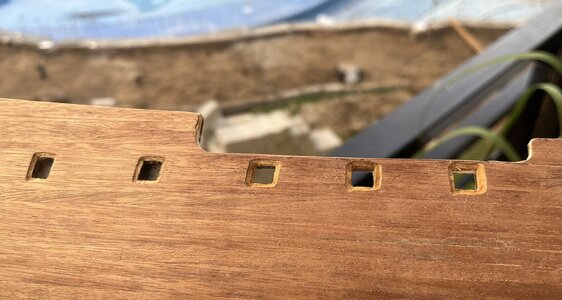
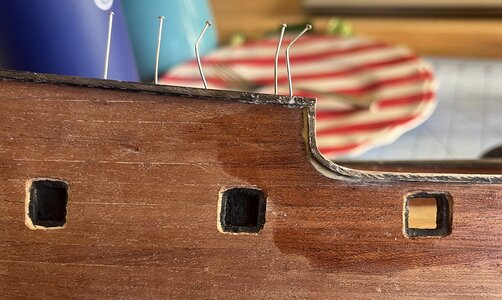
I decided to paint the balcony with the paint that matches the hull - same reason - so anything not covered by planking doesn’t stick out. I also painted around the gun ports where I needed to open them up to fit the aftermarket gunport frames and lids.
20240407_08.jpg
Planking the balcony was very straightforward with the only real concern is that since you want the corners to align, it takes multiple sessions to complete as the glue needs to dry before trimming and moving on to the next portion.

I first planked the bottom which is the largest. Then the 2 small front sections and the rear. Then I wrapped up by doing both sides.

A little trimming and sanding and then the 6 braces under the balcony are sanded, stained and glued in place.
20240407_09.jpg
20240407_10.jpg
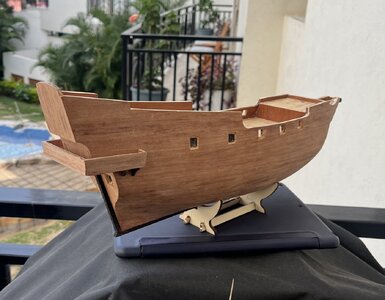
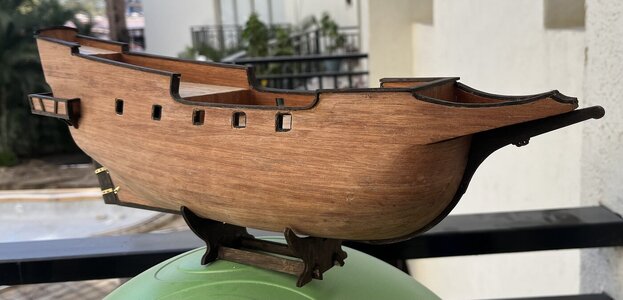
Over all, the Molino is looking pretty good.
20240407_11.jpg
Time for this portion: 9 hours
Total time to date: 114.5 hours
 
Last edited:
Oh my gosh, Hugh. That doesn't just look pretty good. She looks gorgeous!

Beautiful work. Honestly, I am looking so forward to seeing this ship built. The aftermarket parts you have, most especially those frames, are going to look so good.

I see that you planked the underside of the bow. I was pretty surprised that the instructions left that out cuz it looks pretty ugly w/o planking. lol

You're moving at a good clip. You'll be caught up to me in no time (yay....then you can help me with my rigging and sails). lol

Really, really nice work.
Thanks for the kind words, but I doubt I catch up to you. Not saying I’ll slow down on purpose but I might spend a bit more time at the beach… yeah, that’s my story.

Another thing OcCre left out were stairs to the poop deck. I’ll be adding some in while building the rest of my stairs.

And I know it’s corny and cliché-ish, but I want to add a “plank” as well. Just in case someone talks too much smack. But since they probably weren’t too real, I can’t figure out where to put it.


hahaha...I believe you. :D

You're right about the missing stairs but, man, those suckers were so hard to build. I'm not even going there again.

Ohhhhhh, nobody better get sassy around you cuz planks actually did exist. From Wikipedia:

"For the amusement of the perpetrators and the psychological torture of the victims, captives were bound so they could not swim or tread water and forced to walk off a wooden plank or beam extended over the side of a ship."

Link: https://en.wikipedia.org/wiki/Walking_the_plank#:~:text=For the amusement of the,the side of a ship.


ARGHHHHHHHHHHHHHHHHHHHHHH!!!!!!


tumblr_96129eb66437e661437e18a72b442ad0_b3c302a7_500.jpg
 
Quick question while I start searching for an answer…

The pics below are my first attempt with brass and also using super glue. I’m not super happy with the glue as it ran a bunch.

Is there a way to clean this up (maybe sanding)? And more importantly how do I avoid it in the future when using super glue?
IMG_6777.jpeg
IMG_6778.jpeg
 
Sanding did ok but any advice on how to avoid this issue in the future? Maybe thicker glue and applicator tips?


Same problem here. I bought these 20 gauge tips that happen to fit on top of the 20 gram Gorilla glue bottles. They work pretty well but I think I could have gone even smaller, like maybe 25 gauge. I'm having to use a pin to seal the tip of the needle between sessions. Been meaning to try and find rubber tip covers but haven't gotten around to it yet.


Using a smaller gauge needle has reduced the amount of overflow and mess but I still have to scrape a little off with an exacto blade. Then, like you, sand a bit to get a uniform surface.
 
4/16 to 4/19
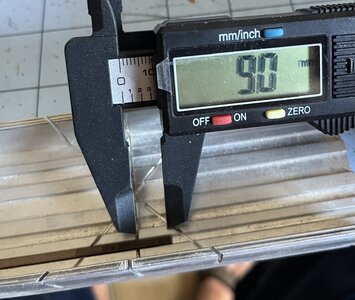
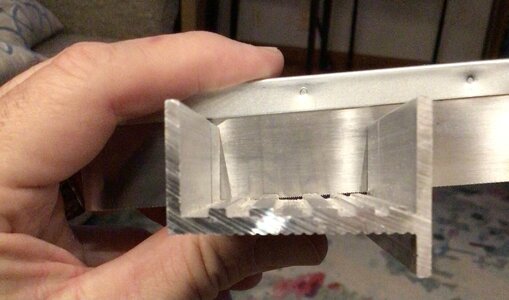
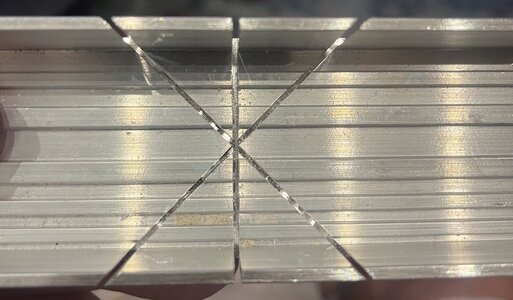
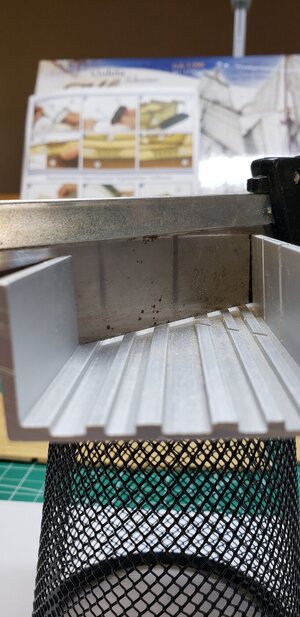
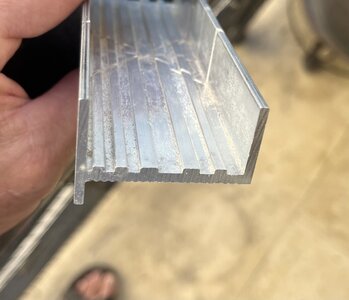
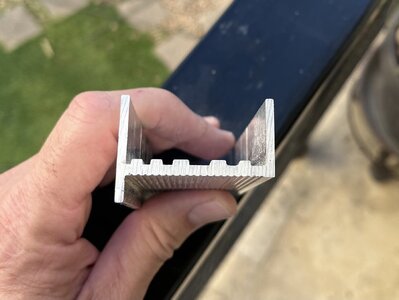
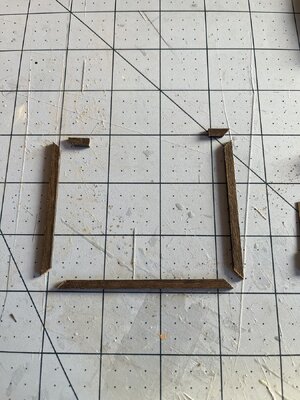
The balcony railing is up next, and will require 45 degree miter cuts at each corner. The cutting goes smoothly and while doing so I learned something that is pretty helpful about the miter box that I have. Its floor has multiple grooves of varying sizes.
IMG_6748.jpeg
I hadn’t even noticed this before but today I noticed that the grooves matched common board sizes, allowing me to hold the board more securely.
IMG_6747.jpeg
Very cool little unknown feature, at least to me.
IMG_6742.jpeg
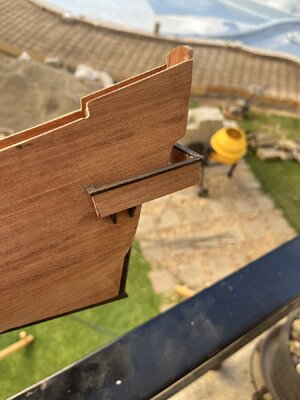
After cutting and sanding the rails, they were glued in place. Once dried, a little sanding and staining and they are looking sweet.
IMG_6746.jpeg
Next up is the rudder which will include 2 things that I have not done before… metal work and using CA glue (super glue).

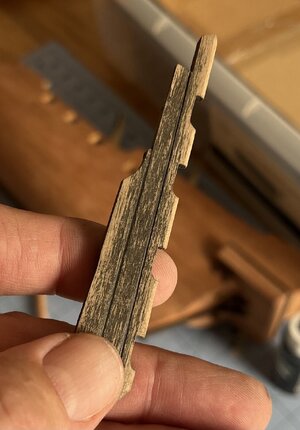
I had already stained the rudder (when I stained the wood for the balcony railing) but now I notice that I should have marked it off to simulate planks.
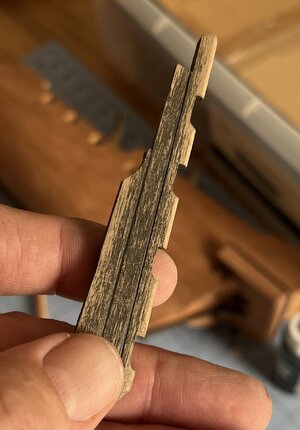
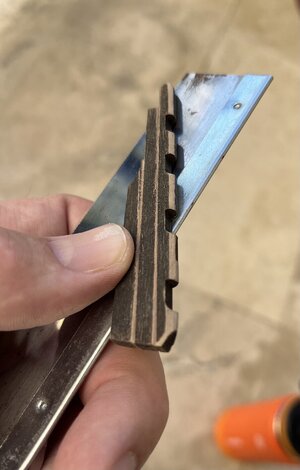
At first I tried using my fine saw to cut the 2 grooves and then used a pencil to color them in. The grout lines were barely visible.
IMG_6760.jpeg
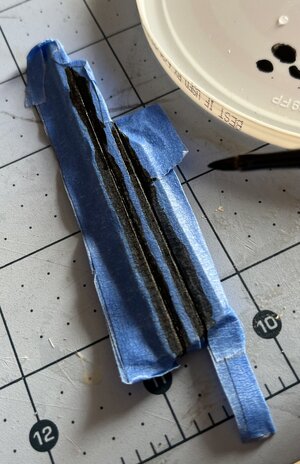
So then I cleaned the grooves up again with the saw and then taped them off and painted them black. Still barely visible.
IMG_6762.jpeg
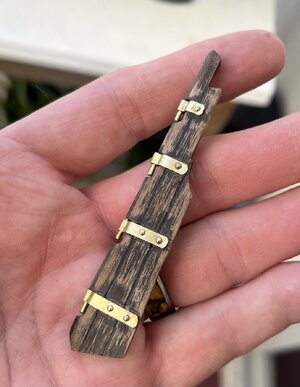
My third attempt was a light sanding followed by using the pencil again followed by touching up the stain. Still barely visible but I’m done trying. It’s as good as it is going to get.
IMG_6765.jpeg
Metal Work and Super Glue - Heads up… the next section is long winded, even for me, so be prepared.

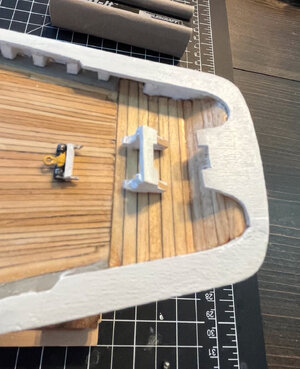
Other than one small part on my Bluenose (a small sheet buffer that is mostly hidden under a wooden platform), the brass hinges will be my first work with metal. Then add the fact I’ll be using super glue for the first time and the rudder is something I’ve definitely been concerned about for a while.
IMG_0873.jpeg
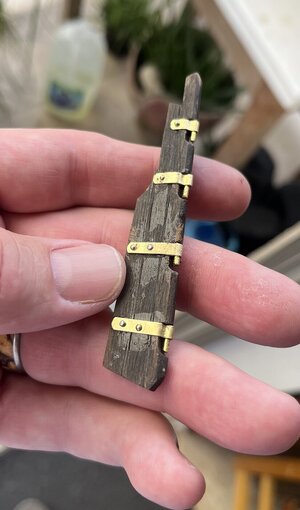
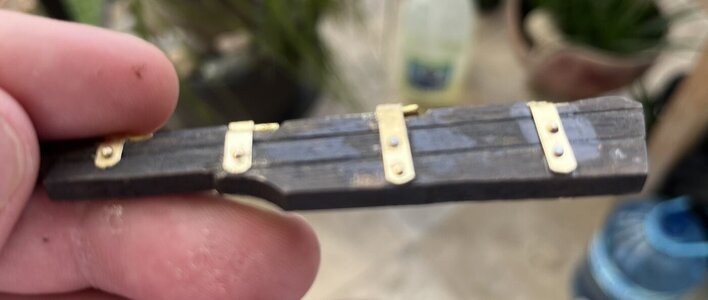
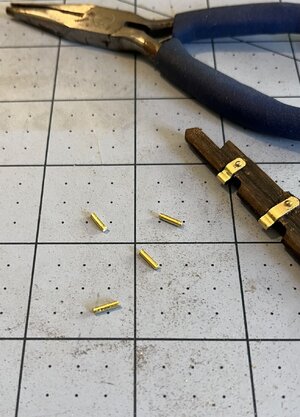
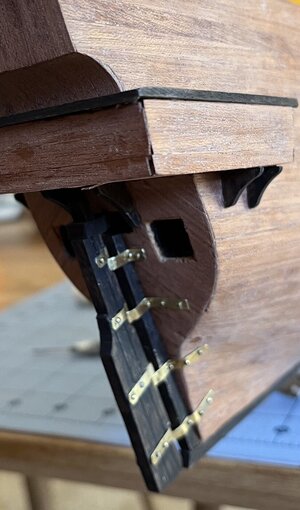
There are 4 hinges, each consisting if 3 pieces. Two small (preformed) strips of brass and then a small piece of brass 3/64” round stock. The hinges all start off looking the exact same, but each of the 8 pieces end up being different. The only thing that stays the same is the round stock. For each hinge, I determine that I need a piece of the round stock about 6mm.
IMG_6776.jpeg
Each hinge will also need either 2 or 4 nails. These nails are cut down so the go into the rudder but not through the rudder.

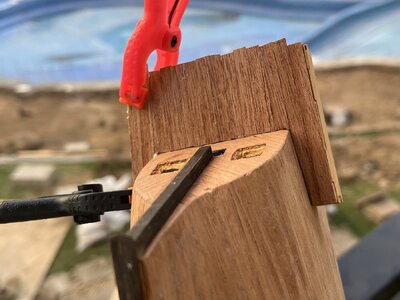
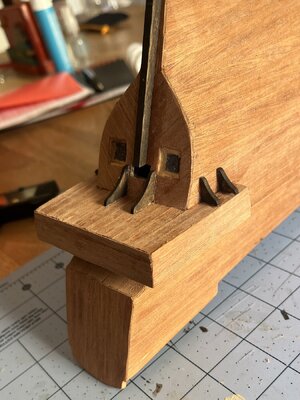
On the rudder-side of the hinges, the hinges get longer as they get lower on the rudder. The top one gets cut off right about the 1st pre-drilled hole. The cut ends gets sanded to a rounded tip, and then the fun begins.
IMG_6768.jpeg
IMG_6769.jpeg
IMG_6770.jpeg
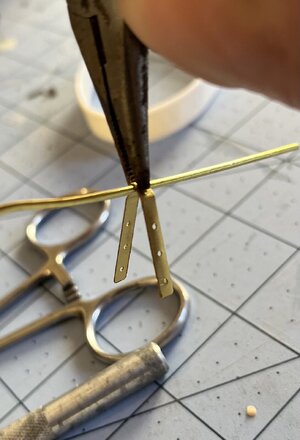
I determine where the nail needs to go on the strip and drill a very tiny hole into the brass. I didn’t measure the diameter of the hole, but ideally you want it just a little bit smaller than diameter of the nail.
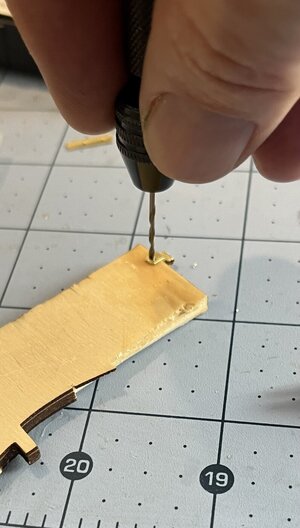
IMG_6771.jpeg
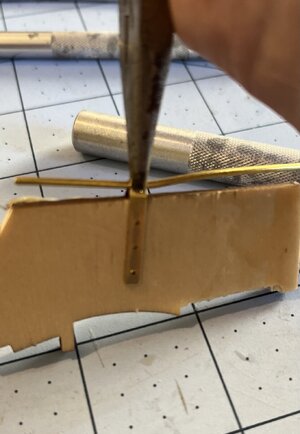
The hinge needs to go over/around the rudder which is 3/16” thick. The round brass stock gets held in the bend or crook of the hinge. So you gently pinch the round stock in crook of the hinge using a small pair of needle nose pliers. Then you form the initial bends in the hinge by pushing it against a scrap piece of 3/16” board. I used a scrap piece of wood to reduce the possibility of breaking the rudder. Gently move the pliers back and forth until the round stock is as close to the edges of board as possible.
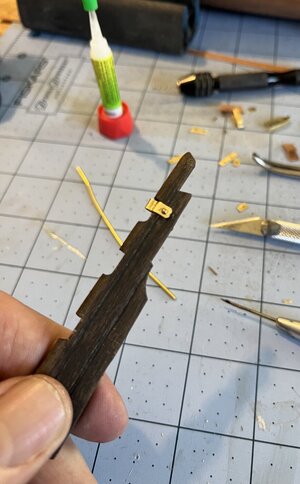
IMG_6773.jpeg
Returning the hinge to the rudder, see if the round stock has been moved close enough to the edge of the rudder. If it sticks out of the cut-out, it needs to be bent a bit more on the scrap board.

Once the hinge has been manipulated to fit correctly, hold it in place and drill a hole into the rudder through the holes you just drilled in the hinge.

Now I get to use super glue for the first time… using a toothpick I add the super glue to the back (or inside) of the hinge. I push it into place and then using a set of hemostats, I hold the hinge against the rudder, leaving access to the hole. I then put a nail into the hole and tap/push it into the rudder. I then add the nail on the other side. I remove the hemostat and gently tap the nail fully down.

One rudder-side hinge down (3 more to go).

It is at this point that I notice the super glue has bleed/ran a bit. Nothing I can do right now. Some quick research shows that I probably need to get some thicker glue plus some applicator tips. I post the question of how to fix this in my build log. More on this later.

The other 3 hull-side hinges went the same except that each one is a little different in length plus they each have 4 nails (2 per side).
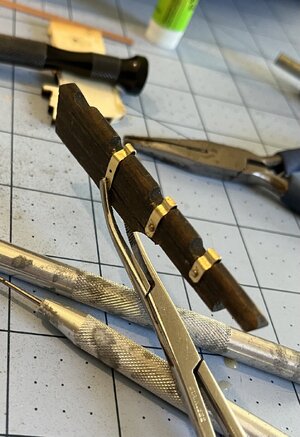
IMG_6775.jpeg
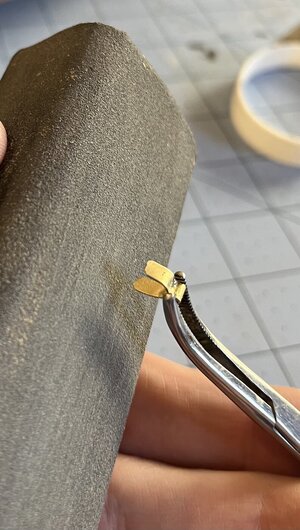
Once all 4 were done, I needed to install the round stock in each one. A little bit of finagling and they were in. A drop of super glue on each one while using the needle nose pliers to hold it in place and the rudder-side hinges are done.
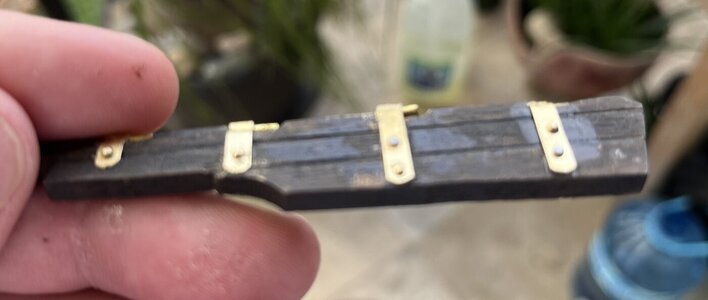
IMG_6778.jpeg
To start the hull-side hinges I held the rudder in place and used a pencil to mark where each hinge needs to be. Three of the four hinges will be the same length. The top most hinge needs to be quite a bit shorter as it’s located right at the gun ports for the chase guns that I added.
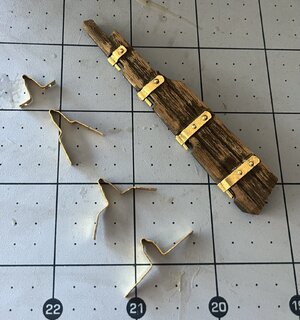
IMG_6784.jpeg
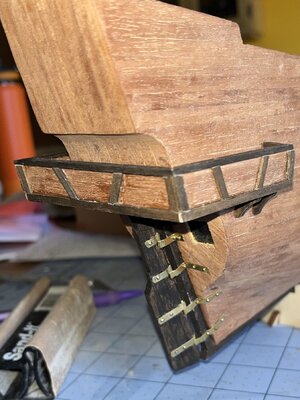
Each hinge varies in shape because of where it will attach to the hull. I bend the ends of each hinge at approximately 5mm from the crook of the hinge to reach from the round stock and then wrap around the 4mm thickness of the sternpost. I then place the hinge at the marks of where each will be and then bend the ends against the hull.

In order to get the correct length of the top most hinge, I needed to put the gunport frame in place. In addition to get the length, I noticed that the inner portions of where I had widened the gun ports out were still very noticeable since the center of each dummy gunport was painted black. The outer edge was fine as I had painted them to match the hull. So I took this break (while waiting for any recommendations/answers on my posted super glue question) and painted the sides of all of the gun ports black plus touched up the back of the dummy gun ports.
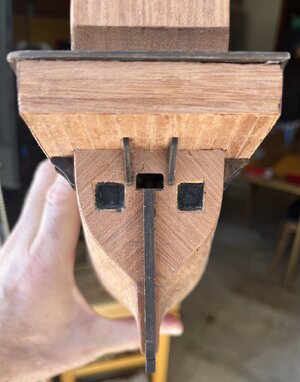
IMG_6785.jpeg
The super glue bleed issue… Surprisingly no one offered any advice when I posted the question earlier in the day other than a couple of “likes” which I will assume was to my “maybe sanding?” as the fix. So I did some sanding and touched up the stain.

I slide the 4 pre-bent hull-side hinges through the opening between the round stock and the rudder, keeping the shape as much as possible. Using hemostats, I gently pinched the hinges around the round stock. While keeping the hemostats attached to the hinge, I used the needle nose pliers to open up the hinge so it will slide over the stern post.
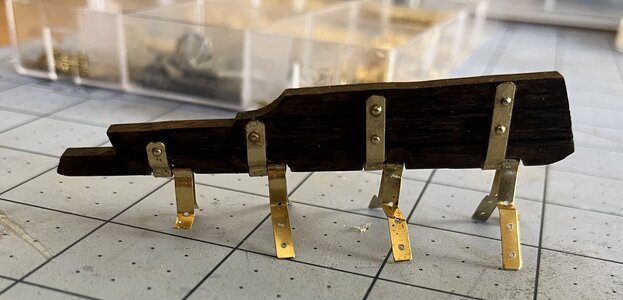
IMG_6793.jpeg
After aligning the hinges with the marks that I had previously made, I slowly pushed in the nails in every pre-drilled hole. Given my previous problems using super glue, I only used the nails to hold the hinges in place. I know I’m taking a risk with them falling out over time, but my thought is to buy thicker glue and tips in the States and add it after the fact.
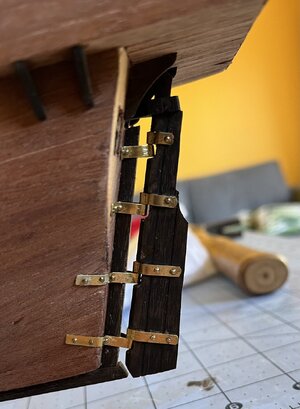
IMG_6794.jpeg
All in all, the hull-side hinges were a lot easier than I expected.
IMG_6797.jpeg
Time for this portion: 5 hours
Total time to date: 124.5 hours
 
I like your attention to detail. Your build log is going to help a lot of people in the future who will be building the Buccaneer.

Unlike myself, I see that you've got your tiller on correctly. Mine was backwards. lol

Pick yourself up some Gorilla Gel super glue. There's no run. There's still "squish" as you apply pressure but no run.

As far as the miter box goes, my problem with that particular box is that you can only cut halfway thru the wood and then you have to flip it to cut the other side. Once it's flipped you can't really see where the first cut is so, for me, getting an accurate cut on the flip side to match the cut on the 1st side never went very well. Unless I'm missing something? Very likely that I am.

I really love the look of your rudder at this point in your build. It looks old, used, and worn. Someday I'd like to build an entire ship with that sort of look. Long way down the road for me, if it ever happens, but something I aspire to.

IMG_6765.jpeg

Beautiful work. She's going to be a beauty!
 
As far as the miter box goes, my problem with that particular box is that you can only cut halfway thru the wood and then you have to flip it to cut the other side. Once it's flipped you can't really see where the first cut is so, for me, getting an accurate cut on the flip side to match the cut on the 1st side never went very well. Unless I'm missing something? Very likely that I am.
As always, thanks for the kind words. My personal problem with modeling is that I’m a perfectionist (even though I know I have a lot of room for improvement) and I probably take longer to do something than it should take (that’s where I see I can improve the most).

Strange about your miter box not letting you cut all the way through a board. I have 2 of these (I’m sure they are from different manufacturers), and neither has that problem.

If you haven’t tried already, try cutting the slots that the saw blade goes into, making them just a bit deeper.
 
4/22 to 4/28
Using 1mm x 3mm stained boards, I created the trim work for the balcony.
IMG_6814.jpg
Once glued in place I sanded the entire balcony and touched up the stain.

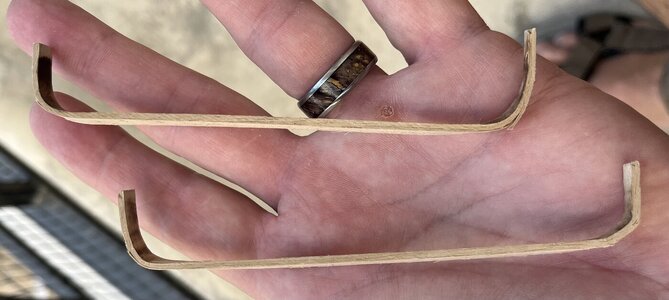
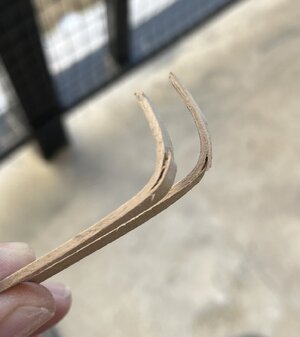
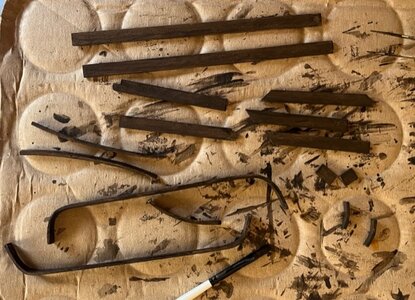
I then started in on all the gunwales. The gunwales are made up of walnut 16 boards… 14 of them are 2mm x 7mm boards and are a pain to bend. The one at the stern needs a nice gentle curve and it wasn’t too bad, but the two at the main deck each require two sharp 90 degree bends. These are the difficult ones.

I had been thinking of not using a single board with the two bends (instead making 2 small pieces with the bends an small straight board between them), but after creating the 1st bend, I felt a bit daring and thought I’d give the single board a try. Worse case, I have to cut one end off and make the 2nd bend.

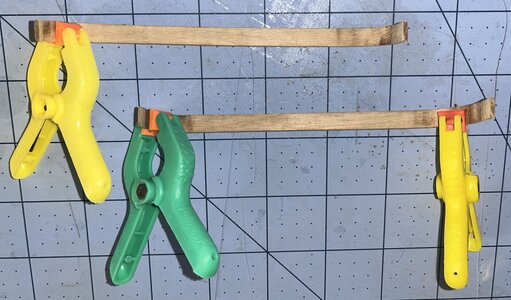
Lots of soaking and using the electric plank bender followed by more soaking and bending.

Once I got them close, I soaked them one more good time and then used rubber bands and clips to hold the boards in place and gently “forced” the boards into the corners - and left it overnight.

There was some minor splitting/cracking but it was on the side where it will be glued and not seen. I put a little glue into the splits/cracks and used a clamp to hold the splintered pieces together until the glue dries.
IMG_6831.jpg
IMG_6833.jpg
IMG_6835.jpg
The remaining 4 pieces are all on the forecastle and are made using 2mm x 4mm walnut boards. All of these need some gentle bending and it’s not too difficult to get them how I want them.

I then stain all of the boards. I know I’ll need to do some cutting and sanding to get them all installed and looking good, but I believe (ok hope) that the tough stuff is behind me.
IMG_6837.jpg
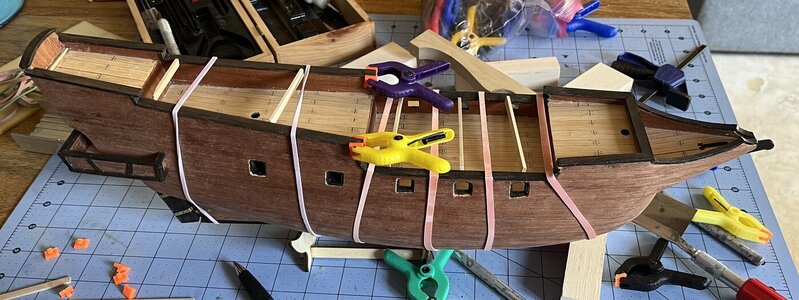
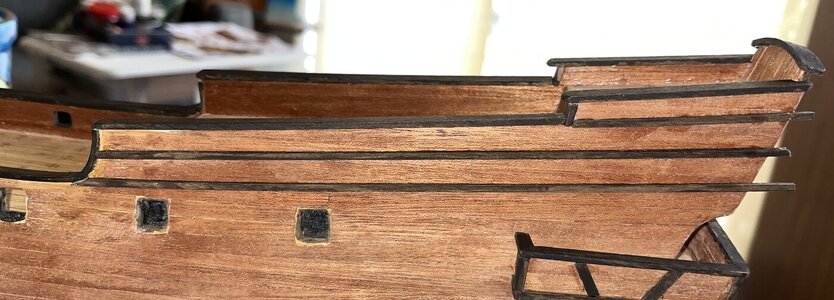
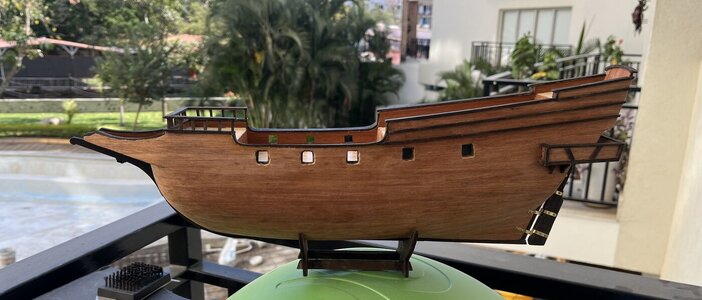
I tackled the installation of the gunwales in a leap-frog manner… meaning I glued the little pieces up front, then leap-frogged over the next section, then glued the 3 pieces that will be the base of the galley, then leap-frogged over main deck, then glued the long pieces on the quarterdeck, then leap-frogged over the poopdeck, and then wrapped up the first pass of the gunwales by gluing the curved piece on the stern. Once the glue was dried, I trimmed up the pieces to allow the second set of gunwales to be glued into place.
IMG_6877.jpg
The 2 on the poopdeck should have been easy, but somehow I cut both of them too short. So I re-cut and stained them. OcCre gives plenty of stock so I should be okay. I decided to make these about 2mm longer than needed to over lap the gunwales on the quarterdeck as I like the look.
IMG_6945.jpg
I trim up the forecastle gunwales and glue them into place.

The main deck gunwales have tight curves at both ends, and I should have glued them in place as part of the first set of gunwales as they need to be trimmed to fit “under” the adjacent gunwales. Since the adjacent gunwales are already glued, it’s a bit difficult to get the main gunwales in place. I end up removing the adjacent sections to make it easier.

I then use clamps and rubber bands to hold everything in place while the glue dries.
IMG_6891.jpg
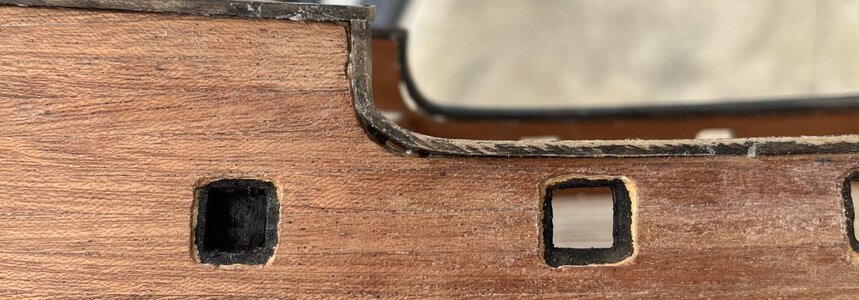
The next day I did some sanding and for the most part I’m pleased with how the gunwales look - except for the starboard quarterdeck gunwale and the corners of the tight bends at the maindeck…there ended up being gaps at these corners.

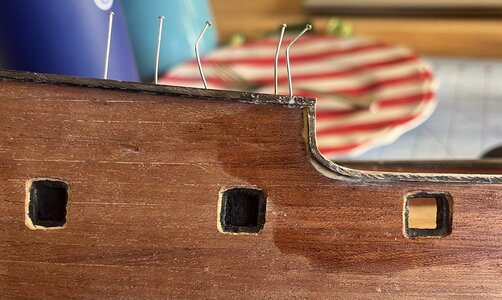
The quarterdeck gunwale is a fairly easy fix as it is just not laying down flat. A little glue and a few pins to hold it in place while it dries.

The gaps at the corners of the tight bends are something that I either remove the gunwales and start over or figure out an alternative. The gunwales look pretty good other than the gaps in the corners so I don’t want to pull them up. I come up with 3 possible solutions.
IMG_6913.jpg
I could fill the gaps with:
  • Matching planking (a bunch of work for such a small gap)
  • Glue and saw dust (better than planking)
  • Wood puddy/filler and paint with the paint that matches the planking
I decide to go with the wood filler and paint as in addition to it being the easiest of the three, I’ve already had good results with the paint. I use a small plastic card as a puddy knife to put the filler into the gaps and clean up any that got on the hull with a few q-tips and water.
IMG_6918.jpg
IMG_6944.jpg
A little touch up paint and stain on the spots that need it and the Molino is beginning to look seaworthy.
IMG_6949.jpg
IMG_6950.jpg
Time for this portion: 10 hours
Total time to date: 134.5 hours

IMG_6918.jpg

IMG_6944.jpg

IMG_6921.jpg
 
4/29 to 5/3
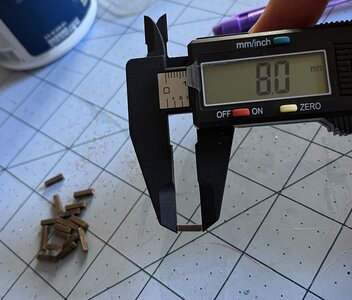
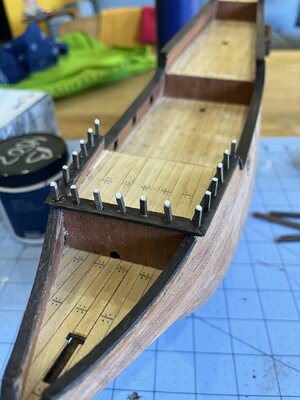
Sanded and stained a 2mm x 2mm walnut board and cut 17 roughly 8.5/9mm boards and then sanded them down to 8mm. These will be used as the balusters on the forecastle.
IMG_7022.jpeg IMG_7018.jpeg
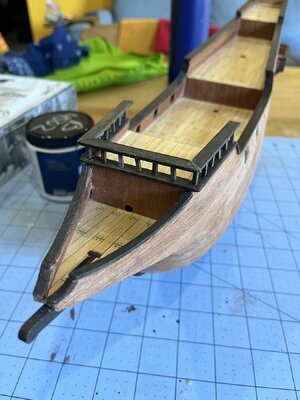
Glued the balusters in place and then topped them with 2mm x 7mm boards. In prepping for more of these, I realized that there is not a rail, or even a set of stairs to the poop deck. When it comes time to work on the poop deck, I’ll be adding them. I’m pretty sure my “walk the plank” will be up here as well.
IMG_7028.jpeg IMG_7029.jpeg
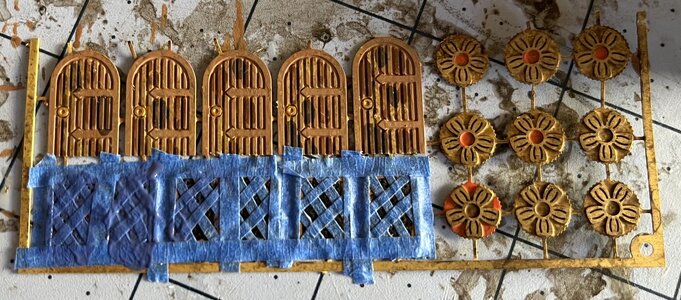
Started the day by painting the windows and door for the balcony. Did a mixture of various browns on the door plus did some taping to the windows, trying to do something like “Sorinul75” did in part 3 of his video log on YouTube
IMG_7031.jpeg
Additionally after reading ModernViking’s build log on Model Ship World and seeing how he did his balcony decorations (he added a little black to the decorations), I’ve decided to add a little color by adding the colors of the Mexican flag (green and red) to the balcony decorations. It won’t be much, but I hope they’ll make the decorations “pop”.
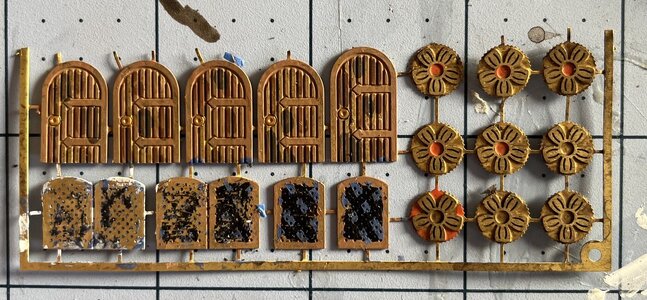
Ok, back to the windows and door. My first attempt didn’t work the greatest as the tape pulled off everything on two of the windows. The other 2 look almost ok. I clean and primer the 2 that the tape pulled everything off and the repainted the black portion.
IMG_7032.jpeg
Before re-taping, I tried hand painting the blue… did not work too well. I cleaned the blue off and touched up the black.
IMG_7043.jpeg
Re-taping and repainting did not help. I’m going to put the windows to the side for now and take them home to Colorado when I return this weekend. I have 2 possible solutions… first I have narrower tape and second I have this idea about using some fine screen material glued over a blue background - guess I’ll wait to see which one jumps out to me.

Now onto the wales.
The first is a short wale that only covers the poop deck section, The next three are on the rear of the ship (all 2mm x 2mm) from the curve gunwale to the stern. These go smoothly except that I needed to splice two boards together to get (hopefully) the last of the long ones (the middle starboard wale), but even that goes smoothly.
IMG_7047.jpeg
The directions say there should be 10mm spacing between these 3 wales that run from mid-ship back. Unfortunately, my spacings are a little different. Instead of make one 10mm, and the other being whatever is left, I measure the spacing at multiple locations and put the middle one directly in the center. I know this will make the triangular decorations slightly smaller but I’d prefer them being the same.
IMG_7056.jpeg
Once dried, I trim the wales at the stern and then sand a little wherever the boards meet.
IMG_7061.jpeg
A little stain and the Molino is done for this trip as I leave Vallarta this afternoon for a quick 1-week trip to Colorado to visit my daughter. She goes to school in California and just wrapped up her semester and drove to Colorado for a visit with family and friends before having to return before the start of fire season as she’s a wild-land firefighter.

The trip aligns with the Rocky Mountain Shipwright’s May workshop. It will be nice to catch up with the club.

Time for this portion: 5 hours
Total time to date: 139.5 hours
 
As always, thanks for the kind words. My personal problem with modeling is that I’m a perfectionist (even though I know I have a lot of room for improvement) and I probably take longer to do something than it should take (that’s where I see I can improve the most).

Strange about your miter box not letting you cut all the way through a board. I have 2 of these (I’m sure they are from different manufacturers), and neither has that problem.

If you haven’t tried already, try cutting the slots that the saw blade goes into, making them just a bit deeper.

I think model ship building and perfectionism are a good combination. It already shows in the work you've done so far.

The miter box thing is very strange and I just can't figure it out. I have a little aluminum Excel. If I rest the blade in the blade slots without any wood on the tray and hold it up to the light, I can see a gap underneath and that's why it doesn't cut all the way through. What happens with your miter box if you do the same....can you see a gap, too?

You are really moving along pretty fast now. Wow. And it looks fantastic!

The windows look like they're tricky to paint but I'm not surprised. I sanded and primed some of the metal parts and the paint still wouldn't stick. I finally bought some Testors enamel and that worked okay. Not great, but okay.

Even though your wales aren't 10mm apart your decorations will still look fine. Mine weren't either and I think the end result looks alright. I did have to redo one strip though because I didn't keep the widths of the triangles the same and it looked "off". The height needs to be customized but the widths need to stay the same otherwise it ends up looking weird.

I hope you're enjoying your quick zip home. At least it's not snowing anymore. :) Have a good one, Hugh. I'll be looking forward to more of your entries. I love what you're doing with the Molino. Nice work!
 
The miter box thing is very strange and I just can't figure it out. I have a little aluminum Excel. If I rest the blade in the blade slots without any wood on the tray and hold it up to the light, I can see a gap underneath and that's why it doesn't cut all the way through. What happens with your miter box if you do the same....can you see a gap, too?
I dug out my miter box out here in Colorado and looked at a pic from mine in Vallarta and the groove for the saw blade for both definitely goes beneath the lowest part of the box, allowing it to cut through the board.

In the 1st picture the blade is at a slight angle to show that it goes all the way down.
IMG_0951.jpeg
In this picture each of the 3 grooves goes past the bottom of the box, allowing the saw to cut all the way through the board.
IMG_7100.jpeg
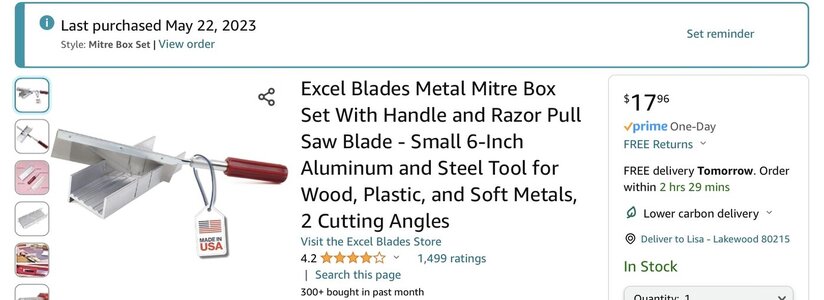
Here’s a screenshot of the one I have in Colorado, from Excel Blades.
IMG_0952.jpeg
 
I dug out my miter box out here in Colorado and looked at a pic from mine in Vallarta and the groove for the saw blade for both definitely goes beneath the lowest part of the box, allowing it to cut through the board.

In the 1st picture the blade is at a slight angle to show that it goes all the way down.

In this picture each of the 3 grooves goes past the bottom of the box, allowing the saw to cut all the way through the board.

Here’s a screenshot of the one I have in Colorado, from Excel Blades.

Thanks for that, Hugh. Now I know there has to be something wrong with mine. Check this out, my saw is as far down as it can go:

20240506_071506.jpg

I bought it at Michaels, too. I guess I'm going to be buying a new miter box.
 
5/6 to 5/7
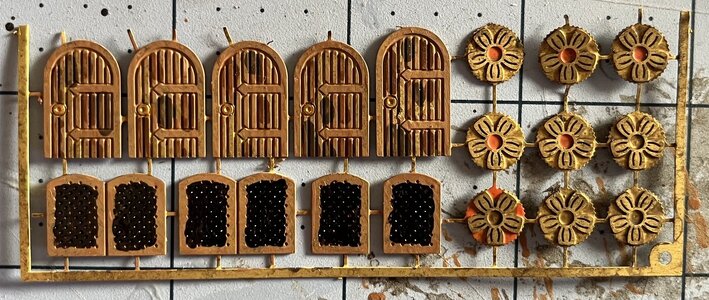
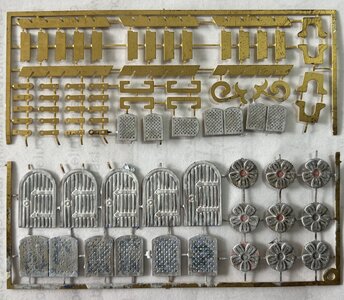
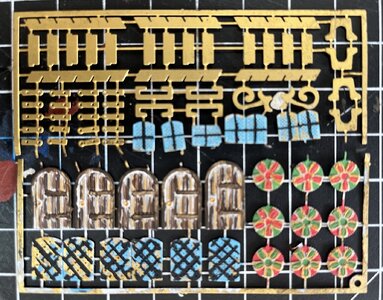
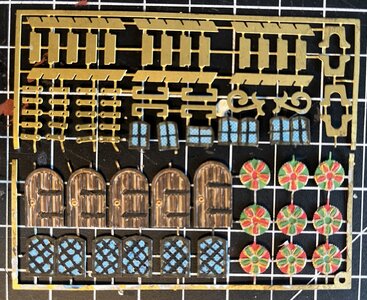
Even though I’m in the states, I brought the brass windows, doors, and decorations with me from Mexico to paint them.
IMG_7106.jpeg
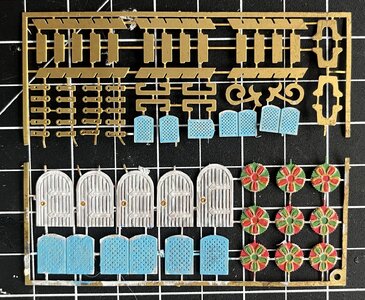
The balcony decorations went fairly smooth this time. There are 9 of them and I’ll be painting 4 of them with one pattern (set 1) and the other 5 in 2nd pattern (set 2), using the colors (red and green) of the Mexican flag.

After cleaning and applying primer, I painted the center on set 1 red as well as the space between the “leaves” on set 2. I then did the opposite with green (center on set 2 and between the leaves on set 1).

I painted the “design” on all 9 gold.

After drying, I painted the “leaves” of set 1 red, and the “leaves” of set 2 green, matching the colors of the centers with colors of the “leaves”. They look nice.

Time for the doors…
Cleaned and applied primer and picked out 4 different shades of brown. I set the darkest aside to be used on the frames of the doors (and windows too). I the switched between the other 3 shades on each “board” on the doors. Once they were dry, a made a brown wash and painted over everything - covering where ever the primer was showing.

Painted the frames with the dark brown and then painted the hinges black. Overall, very nice.

Now on to the windows which I’ve had nothing but problems with. As my last post showed, I had tried painting them about four times, and I just couldn’t get it to look like I wanted them to.

After re-thinking the entire painting process, the order I’m going to use this time is: clean, primer, blue paint, tape, black paint, remove tape, then paint the frames. I’m also really going to take my time and let the paint dry between each step.

Before starting, I checked with “Sorinul75” from YouTube (as it is his windows I’m trying to duplicate) and asked if my painting process was correct. He verified that it was, but with one clarification… Tape to paint the black strips in one direction and paint, then remove the tape and re-tape in the opposite direction and paint the second set of black strips.

Now that I have a plan of attack, I cleaned and applied primer. And let it fully dry.

I then painted the blue (that will become the glass of the windows), and waited again.
IMG_7114.jpeg
On the large windows that will be on the balcony, I applied four strips of 1/16” tape in a diagonal pattern on the big windows and 2 strips in a vertical pattern on the small windows. I then painted a thin line of black between the tape. And waited until it was all dry.
Pulled the tape (I’ll need to do some touch up) and re-taped in the opposite diagonal direction on the big windows and in a vertical pattern on the small windows. Then pained thin black lines again. And waited again for the paint to dry.

There was quite a bit of touch up needed on both the blue and black after pulling the tape, all of which I did by hand. Took couple of rounds between blue and black to get it okay.
IMG_7123.jpeg
I then used the dark brown on the frames. Not as nice as I wanted, but I’ll live with it.

A quick coat of varnish to protect them, and they are done.
IMG_7132.jpeg
Now to wait a few days before returning to Mexico.

Time for this portion: 5.5 hours
Total time to date: 145 hours
 
Back
Top