New kit "Captain John Smith's Shallop"

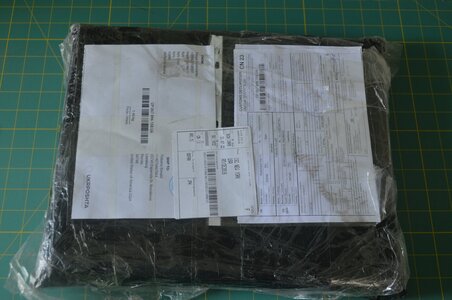
Twenty-one days after placing my order I received a box today.
Shipped from Kyiv to my doorstep in the US and considering what's happening in that part of the world I think that was excellent.
Probably took longer to get from the port in NY to Florida then it did from the Kyiv to NY.
I won't do an extensive box opening as both Pavel & Olha have done so here on SOS and YouTube.

Wouldn't attempt to compete with Olha's photography anyway.
;)


03_Nameplate.jpg


01_As received.jpg
Package as received.


02_Bubble wrapped envelope.jpg
Bubble wrapped envelope


04_ Carton.jpg
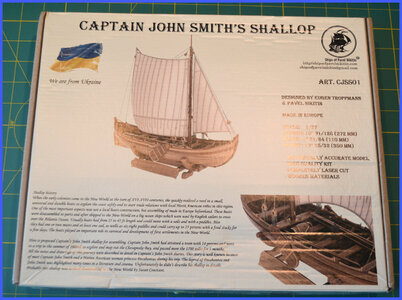
The carton itself


05_Goodies.jpg
First peek inside the box


06_Components.jpg
The goodies :D

Ok Don it's time to begin the 'Geriatric' Build. ;)
 
Now I am looking forward to see the first building log in our forum.....
The kit is looking very good
 
I did set aside time last night to peruse the instruction manual and found it to be very well done. There are no written instructions except for the first page explaining the symbols on the illustrations. Kind of reminds me of the past paint by numbers we had as aspiring artists. :)
Between the illustrated manual, the (4) separate drawings and the excellent videos, I look forward to starting the build. Now if only I can resist the temptation to begin prior to finishing my current project. :rolleyes:
In any case, I believe it will take me a tad longer to construct the framing fixture then it did Olha in her video. I certainly look forward to her next video segment on this build.
Most likely I will delve into the fixture assembly shortly. Just to see how everything fits together. ROTF
 
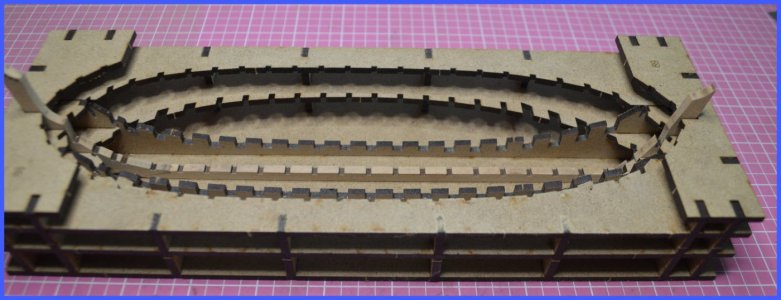
Well temptation overcame me. Even though I’m in the middle of a building project I couldn’t resist, at least, to assemble the fixture/jig for building of the John Smith’s Shallop.
Tomorrow I’ll post some photos and give some of my first expressions of Pavel’s kit.
 
As promised here are some thoughts after constructing the jig.

All pieces released from carrier w/o issue

I do recommend dry fitting before gluing together as some cleanup of slots is required to adjust the fit.
(I did notice that on Olha’s video she apparently test fit the assembly also)

Needle files very handy for this assembly

I found that most pieces slotted together very nicely. None were a loose fit rather most were a snug fit. When testing/adjusting any slot, I used a piece of the carrier to test the fit adjusting the slot as necessary

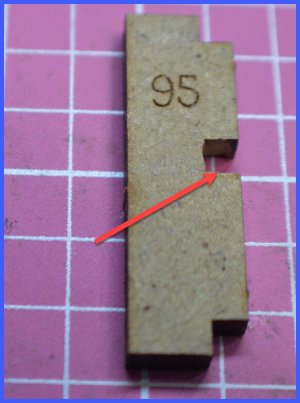
One part, (actually all 8 pieces) #95 required the most adjusting as its slot was too narrow. Using my square needle file to open the slot worked the best.

For reference:

Material thickness is 3.2mm

Part #94 (similar piece) slot width was 3.1mm which made for a snug but workable fit

Part #95 was the one requiring the most ‘adjusting’ of the slot width as its slot width was 3.0mm.

01_Part #95.jpg


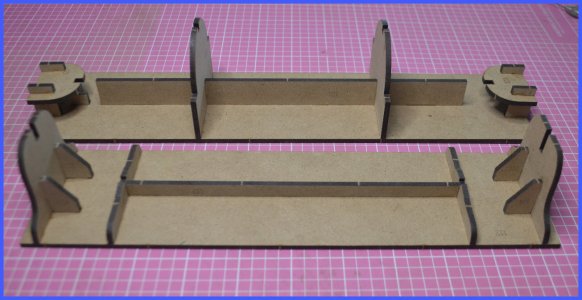
04_Jig with scale.jpg


All in all, it went together well and makes for a right & tight jig for constructing the Shallop.

Now, if I can't fight temptation to continue the build concurrently with my present build, I will start a new build log for Pavels John Smith Shallop. Looks to be an interesting project. :eek:

I did watch Olha's last video where she planked the boat/ship (Not sure what category this fits into)
Wonderful video Olha First Place Metal

One of these days I'll ‘Get a Bigger boat' ;)
 
Last edited:
I succumbed to temptation (Humm, must be some biblical connotation hidden in there somewhere) so I guess this will turn into a build log after all. :oops:

05_Additional Jigs.jpg
Assembled the two remaining jigs. one for the skeleton and one for planking.


06_Keel laid.jpg
Assembled the keel


07_Keel in fixture.jpg
Placed the keel into the jig
Decided to jump around a bit and assemble the display stand. Removing the char was the time-consuming part as I will probably stain the stand when finished.


08_Tab.jpg
Part of the display stand are (14 pieces 2x2x6 mm square pegs.
To remove the char, I cut a slot into a piece of wood with my table saw, stacked the pegs into the slot which allowed me to sand off the char. Flipped the pieces over and cleaned the other side.

09_Tabs in fixture.jpg
Pegs lined up in the slot ready for sanding


10_Tabs sanded.jpg
Flipped over and sanded the opposite side. I made the slot deep enough so I wouldn't sand off too much and not have a good fit when assembling.
 
Gorgeous craftsman Olha Batchvarov has started building our new set "Captain's John Smith shallop". This is the first release, it's already amazing! And the presence of such a mustachioed assistant, the construction will go much faster))
I am in the process of building this, nice quality materials, however, i have noticed with my kit two minor issues, when compared to the kit Olha is constructing the Ribs do not protrude from the jig as in her video, also the parts 28 29 30 do not fit flush straight from board 3p also shown in the video.
 
After gluing the ribs and parts 28,29,30 for board 3p, I had to carefully dismantle it to make adjustments to all ribs to allow the parts to sit flush
 
I am in the process of building this, nice quality materials, however, i have noticed with my kit two minor issues, when compared to the kit Olha is constructing the Ribs do not protrude from the jig as in her video, also the parts 28 29 30 do not fit flush straight from board 3p also shown in the video.
You still have to take into account that this is not a LEGO set, and Olga processes every detail with the help of grinding and repeated fittings. And the parts in the sets are exactly the same, you can be sure of that.
 
You still have to take into account that this is not a LEGO set, and Olga processes every detail with the help of grinding and repeated fittings. And the parts in the sets are exactly the same, you can be sure of that.
Hi Pavel,

Im not complaining, im happy with the kit, having fun building it, just wanted to point it out, so others don't make the same mistake i made, Having been a subscriber of Olha utube channel for a number years she makes everything look so easy, but doesn't always show all the work she puts into her creations, newer model makers (myself included), will all try and build following the instructions, then get disheartened, disillusioned with the model when it doesn't fit together, it is only recently that I have started customising builds, and I still have lots to learn, which is one of the reasons I bought your kit. As I said the Kit is great, Good quality materials, instructions etc, I would definitely buy another of your kits.
Thanks for the kind words. I understand what you will have to face when building my kit, and I also understand very well that Olga does not show everything in her films. It's just that Olya is a professional of a very high level, and many moments do not seem important to her. In my kits, I try to bring the building process to the level of an ordinary amateur, so that the model will be built for sure by everyone who bought my kit.))
 
Thanks for the kind words. I understand what you will have to face when building my kit, and I also understand very well that Olga does not show everything in her films. It's just that Olya is a professional of a very high level, and many moments do not seem important to her. In my kits, I try to bring the building process to the level of an ordinary amateur, so that the model will be built for sure by everyone who bought my kit.))
Wise words Pavel.
Referring to Olha’s video one of the most important parts was at the beginning where she showed a set of needle files. They will be your friend during this build. That being said, so far I’ve found this to be a well designed and produced kit. Thoroughly enjoying this build.
 
Back
Top