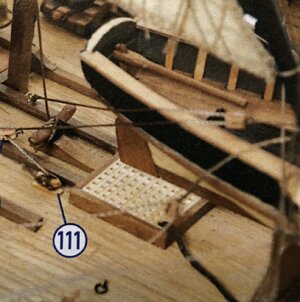
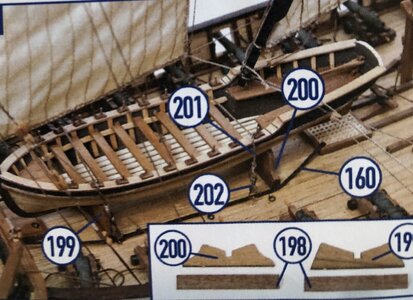
Great job, full of details, excellent manual skills.
I really like how you built the gun carriagges
I really like how you built the gun carriagges
 |
As a way to introduce our brass coins to the community, we will raffle off a free coin during the month of August. Follow link ABOVE for instructions for entering. |
 |
 |
The beloved Ships in Scale Magazine is back and charting a new course for 2026! Discover new skills, new techniques, and new inspirations in every issue. NOTE THAT OUR FIRST ISSUE WILL BE JAN/FEB 2026 |
 |
What are you using for the round head "nails" into the stock? The one with the tweezers looks like the handle end of a small belaying pin but I doubt that is it. Maybe just a small diameter brass rod cut off but how would that end be finished? RichMade a little more progress on the anchors today. Next is finishing and putting on ship with pulley and ropes...
View attachment 201102
Adding tiny nails...
View attachment 201104
Happy Holidays to all!View attachment 201106View attachment 201107
To get texture on the anchors, I dip the paint brush in paint and dab on repeatedly and build up in multiple applications, so it shows when dry brushed. That way it looks like a casting.
That is per instructions once again...I’m not taking liberties on this stuff.I am wondering about leading the anchor cables through a small grating corner hole? It doesn't seem right as a larger/wider opening would be required to feed the cable in and out. Just wondering if there is such an open hatch with cover missing. Rich


Rich, I used tiny “nails”... purchased at Hobby Lobby.What are you using for the round head "nails" into the stock? The one with the tweezers looks like the handle end of a small belaying pin but I doubt that is it. Maybe just a small diameter brass rod cut off but how would that end be finished? Rich
Well summarized and I would agree that the ship's boat is a small POF for which you are well capable. Rich (PT-2)Thanks again for all of the compliments and the advice. Even though I am no stranger to model building or wood working, I am still learning about boats. My first ship I had to learn all of the terminology, and there are still things I don’t know. And as far as shipwright practices go, and historical accuracy, I have a lot to learn in that area! So I mostly trust the instructions to guide me to build a general representation of the ship. I realize they take liberties and I am learning to try to correct some of those as I go. But I also still use some artistic license.
Like on the anchors for example. They showed using brass rod as pins on the wooden stock. I looked online to do some research, and the range of anchor types and methods is staggering! Some used rope, some used metal straps, some used bolts, some combined those. So I chose to use rope and bolts because I thought it looked nice. I also left the pins gold because it fits the black and gold theme on the ship. I dry brushed the bronze highlights on the anchor to have contrast against the black railing. So I sometimes make decisions based on how I want my ship to look.
Is that how the Spanish navy built their ships when they built the Cazador? I have no idea? I have never seen pictures of the actual ship. So I have to ask myself, is it plausible they would have done it this way? I think it is.
In conclusion, I am still learning daily, and I hope to eventually know what is historically accurate, and at least be able to make a judgement call on how I want to approach that. For now I am winging it the best I can...lol.
Happy Holidays,
Dean
You have had it mastered for a long time. . . no modesty required. Nice tight work. Rich (PT-2)One side of first planking done and rough sanded...
View attachment 201313View attachment 201314
No filler needed...I might be getting the hang of this!
Thank you Rich, however I did use some filler on the first layer of planking on the main ship. Not a lot, but I still needed it on the bow area due to a few low spots.You have had it mastered for a long time. . . no modesty required. Nice tight work. Rich (PT-2)
That no filler goal is one that we all have but I don't know if it is realistic as anything can happen that may not be noticed until too far along to remove planking to get back to that point. We can only try. RIch (PT-2)Thank you Rich, however I did use some filler on the first layer of planking on the main ship. Not a lot, but I still needed it on the bow area due to a few low spots.
It's my goal not to have to use filler at all!
 s are too visually prominent to get wrong and your approach seems like a simple way to accomplish the look of a proper casting.
Thanks much, Dean. My kit supplies two anatomically correct anchors but they look too good. I think your anchors turned out great and I fully intend to 'borrow' your technique when I get that far. As always, I follow your build with admiration.@dockattner ...
One more thing, as the paint starts to cure, the dabbing action will create more texture than when first applied. The paint naturally wants to puddle and smooth out when first applied. But you don’t let it do that by continuing to dab it, even after all paint is on. It’s a learned technique that I’m sure you will be able to perfect with practice.
I too will be using the dry brush dabbing in finishing my Bluenose anchors. RichThanks much, Dean. My kit supplies two anatomically correct anchors but they look too good. I think your anchors turned out great and I fully intend to 'borrow' your technique when I get that far. As always, I follow your build with admiration.
Thank you Heinrich, It is very small. But was actually fun!Great work Dean - especially so on that ship's boat! That is real craftsmanship to get it looking that neat!
