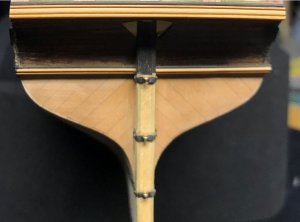
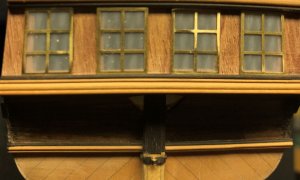
Charles Royal Yacht, 1674, Scale 1:64, by Woody Joe (Japan)

Hi Jim,

You are doing a great job with your Royal Yacht.

I have built a couple of models from Woodyjoe and I have always enjoyed the quality of their kits.

Regarding the quality of the wood, Woodyjoe is generally using 'Hinoki", which is a luxurious Japanese cypress.
Hinoki was used in Japan for its solidity over the time to build temples, but also traditional ships during the Edo period (1600-1868) as the wood doesn't' rot. Some temples like the Horyu-ji in Nara which was built 1200 years ago were made of Hinoki wood.
It is still used these days in Japan as a material for the interior (floor, walls), but also traditional bathtubs, furniture...
Its natural lemon scent is also highly appreciated in Japan for its effects as it can help to relax, release stress, reduce tiredness, and stimulate the mind.
The only problem with Hinoki is the colour, it is very white.
One Japanese modeller I met during a model exhibition ( I live in Osaka) recommended me to use Castor Oil to give a more 'golden colour' to the wood.
I used it on my Higaki Kaisen ship in order to give it a nicer colour close to the real ship and was very happy with the result.
You can have a look at the result on the attached picture.
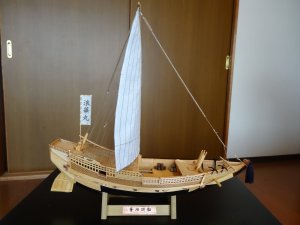
DSC08193.JPG

All the best with your build, I will follow it with interest.

Cheers

Marc
 
@ Mike (Big):), Uwek, Ekis, Zoly, Greg, Don, Martin, Ron and Paulv1958 sorry if I missed someone - thank you all for the likes and interest in the logExclamation-Mark
@ Greg, Oh..., apart from marriage (35 years and still),:) I lost my sleep when I start building ship models LOL. You are 100 % correct naming Ebony a brittle wood. Also, it is very stiff and hard to file down and fabricates parts from. However, it is also a very fine grain and once properly finished, you will NOT find another wood to look the same. Well...almost no substitutions...I did find one and running a little ahead of the log, I will soon reveal the secret about the possible Ebony substitution. Be sure to come back, and read part of the log called ' A tale for the wale.' If you want to solve the mystery about fiasco on stained wales of Charles Royal Yacht.

Thanks again for making this log interesting.
 
You are doing a great job with your Royal Yacht.
Thank you for the kind of words @Marcojp .
My obliging fellows SOS mentors, Uwek and Zoly recommended to I to open a personal building log, I would encourage you to do the same. We will all benefit from your hight shipbuilding skills, as wells as the great knowledge of Woody Joe kits. Also, as a side project, you may do a kit review, for one of those ships you have had built. :cool: We are the SOS mates will much be appreciated. Welcome aboard of SOS!
 
Last edited:
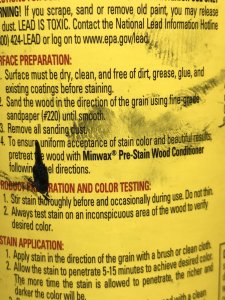
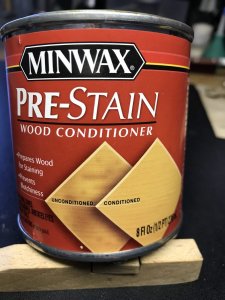
Thank you for your valuable comments, Don. Hmm..., sounds really strange, that product marked as 'penetrating' doesn't actually penetrates. Isn't it? To add to this mix, I followed the Minwax recommendations and applied their 'pre-stain product (see below).

IMG_2299.jpeg IMG_2300.jpeg

I thought this the wood problem, but as both of us have the same issue it might be a product itself. I wish I could know the answer.
 
Last edited:
I wish I knew myself, The Gel Stain works but you have to stir it until i becomes pasty keep stiring it make sure you stir the bottom, I do not seem t be able to use a brush, but a cloth rag works well make sure you wipe it down before it drys use another coat if neccessary, and try it on a scrap piece.Don
 
Greetings Willy,
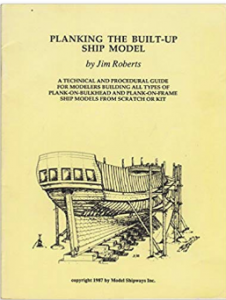
Thank you for your feedback. Patience is a very important helper in our craft. Each manufacturer has its own hull planking methods, you should follow. But there are also many others that are used by most modellers who build their models from scratch. There are so many books available to explain how to plank the hull. One of them I use is: Planking the Built-Up Ship Model by Jim Roberts


1542048613635.png

Happy modelling!
 
I too have used this book one of the best for planking, for me the best results I have gotten is using the spiling method, My only problem is holding the bond paper or other material in place while scribeing, I also dislike the double planking, can not see how you can cut the veneers and shape such thin material, will not use this until I can see how the veneers are shaped, just my thoughts,would like coments. Don
 
Ik think i am done with veneer. Next boat i will use only normal wood. Veneer is easy to bent but it is easy destroyed with to hard sanding or cutting. Want to take my building to the next level with next ship. Love your planking m8.
 
Greetings fellow shipmates! Before I will continue, I would like to thanks everyone who stopped by this log. Today we are making our own mouldings. (YAY)

Whether you are a kit builder or make you models from scratch, consider the idea of personalizing your work by adding wooden mouldings. So, what is the moulding (spelled molding in the US), also known as coving (the UK and Australia)? Here is the definition by Wikipedia. Moulding is a strip of material with various profiles used to cover transitions between surfaces or for decoration. It is traditionally made from solid milled wood or plaster but may be of plastic or reformed wood.

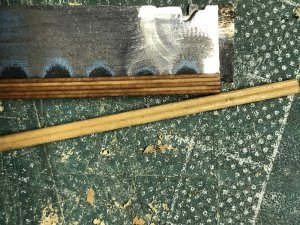
The idea is using old\broken hacksaw blades and various abrasive wheels to make our own scrapers, so we can fabricate mouldings of our choice and desire.

A word of cautions: Since we will be cutting metal in high speed with abrasive disks. Please be careful, always use protective goggles and wear face protective mask, to avoid abrasive dust inhale.

Tools will be used:
  • Any variable speed grinder that you can comfortably hold in your hand. Flexible shaft with a handpiece attached and foot-pedal control is desirable but not necessary. I will be using one of the cordless grinders from Dremel
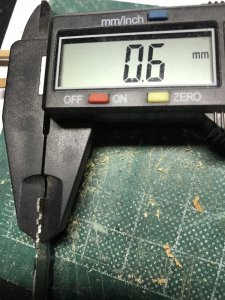
  • Cut out wheels, grinder stones (different grit, diameter and thickness) and mandrels to hold wheels
  • Dressing stone (to shape wheels\stones)
  • An old, dull or broken hacksaw blade
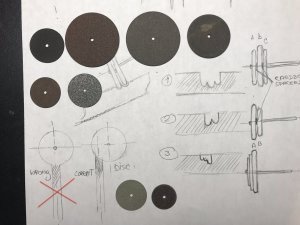
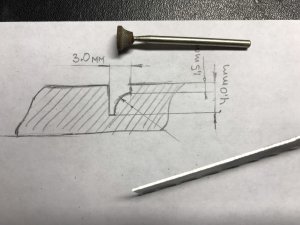
Using the plans or kit building manual find out the moulding pattern you will need, and sketch it out on a paper. Make it large enough so you can visually understand how many groves, how wide\deep and geometry of those grooves should be. Transfer all measurements from a plan into your sketch. The next step is to find cutting wheels suitable for this tool. Assemble wheels on the mandrel using your sketch as the guide. I use paper washers as spacers between the wheels to play with the desired size\shape. To finish assembly, tighten the thread firmly (don’t overtighten). The tool should be ready.

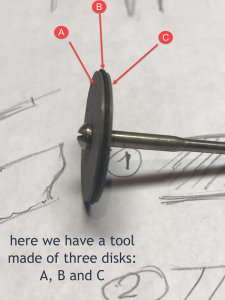
Look at the first picture below. This tool has 3 disks (A.B.C). Disk A and C the same thickness, and the same diameter. Disk B is thicker and larger diameter. Let’s say we need to make a scraper with profile we made in this tool.

IMG_2280.jpeg IMG_2283_1.jpeg IMG_2292.jpeg


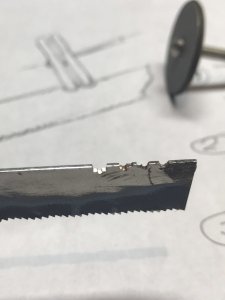
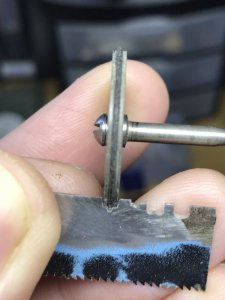
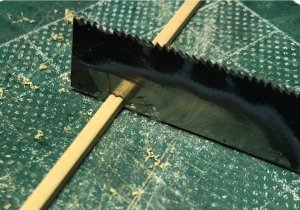
Insert the tool in the collet, tighten and get the rotary tool ready. Take in the left hand your hacksaw workpiece. Move the cutting tool to the workpiece edge at a 90-degree angle until a spark appears. Do it again, plunge the tool slowly until you see the grooves left on the workpiece edge. Repeat the process by constantly venturing on a little bit until the desired size and shape archived. It will be tough and impossible for me to explain (with my broken English) al the gotchas, and I am afraid my friend - Google translator will add to this mess. Observe my pictures, if you need more explanations please ask. I will be more than glad to help.

IMG_2281.jpeg IMG_2301_1.jpeg IMG_2288.jpeg

Once happy with scraper size\shape it is time to make mouldings. Now we will need to cut the wood strips. I use boxwood, Pearwood and Ebony for my mouldings. The size of the strips is determined by the width and height of the working surface of the tool we made. It is imperative to cut wood strips precisely with the exact size of your scraper

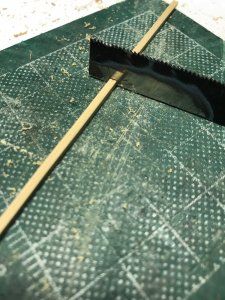
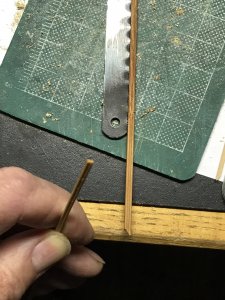
Before you begin, determine the direction of the wood fibres. To do this, put the tool at the beginning of the strip, press lightly against the strip and scrape wood towards the opposite end. If the tool moves freely and the chips curl, this means you move in the right direction. If not, start from the opposite end of the strip and repeat the same procedure. The cutter (scraper) should glide easily, and shaving wood should curl. Attach the strip with double-sticky tape to a board and start scraping.

IMG_2284.JPGIMG_2289.jpegIMG_2293.jpegIMG_2294.jpeg

  • Move scraper only one direction from start to the end of the strip
  • Apply equal amount of pressure while moving along the strip.
  • DO NOT remove a lot of material by one run, Slowly but surely!
  • The scraper should move freely, without excessive force
  • Check the shape\size after a couple of runs. Make sure the surface is smooth
  • If you are getting a ‘rip’ cut instead of smooth, most likely scraper is not sharp enough. Hacksaw blades are made of a carbon steel and should hold an edge. However, as with any cutting tool, it will require re-sharpening (occasionally).
IMG_2053_1.JPG IMG_2054_1.JPG
Now, try to make your own first-class mouldings! ;) Start with a simple shape moulding. A single, round grove scraper is a good example. I use such moulding for Charles Royal Yacht to decorate gun ports area.
Once master the single grove, try two groves, three groves of different size. You can use dressing stone to shape cutting wheels. The more you practice, the more pleasant the result will be. Good luck, and remember, if you have questions - please ask.


Happy Modelling!
 
Last edited:
I too have used this book one of the best for planking, for me the best results I have gotten is using the spiling method, My only problem is holding the bond paper or other material in place while scribeing, I also dislike the double planking, can not see how you can cut the veneers and shape such thin material, will not use this until I can see how the veneers are shaped, just my thoughts,would like coments. Don
Thank you both, Pat and Don!

@ Don
If you don't like double-planking, consider use fillers between the bulkheads. You can use Balsa wood for this purpose. As for the veneer, I have never work with this material. As a suggestion, you may use steam of hot fan to shape plank first before glueing to the hull. Also, I am using a hot water to soak wood before bend it to the desired shape.

Best regards,
 
Jim Nest POB I will use Balsa fillers, the method for bending planks was to soak it in hot water and use a remington hair curler to bend to shape, on my latest build of the gunboat Philadelphia i decided to use the method of hot water and clamping to the hull until dry, check my build on this forum this seemes to work extremly well have done it with beech, poplar walnut, etc so far it works GREAT, will post some more pictures of my build tommorrow this will be the ceiling planking. Don
 
Gonna try to make scraper tomorrow if my leg wound wil allow it. Have the materials so gonna play with powertools. Fun to do.
 
Back
Top