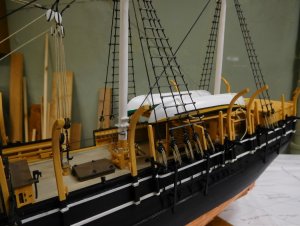
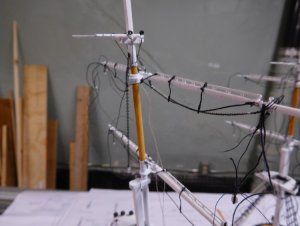
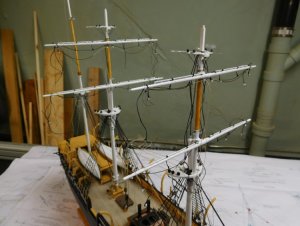
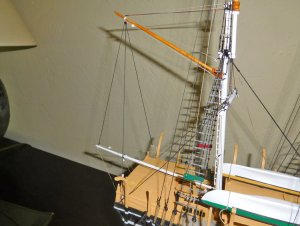
Charles W. Morgan by David Lester - Model Shipways - 1/64 scale [COMPLETED BUILD]

You are building a very fine model - really - happy to see your progress!
One question:
On one photo we can see a little bit more of the copper-plating of the hull - this is looking very good.
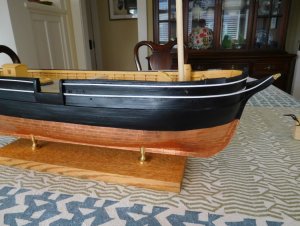
Maybe you show us once a photo of the hull with copper plating? May I ask how you made the copper plates? Are they part of the kit?
 
Hello Uwe,
Thank you for you kind comments. The coppering on the hull is nothing special. It's just one way of doing it. The copper plates are cut from self-adhesive copper foil which comes in a roll. The strip is 6.35mm (1.4") wide and if I remember correctly I believe I cut the plates 5/8" long. This is a Model Shipways kit and it includes one roll of the copper foil. If more is needed it's readily available from hobby or craft suppliers. It's more typically used by people making stained glass ornaments. They wrap the edges of the glass with the foil, then solder the pieces together imitating the lead cane that would be between the pieces in real stained glass work.
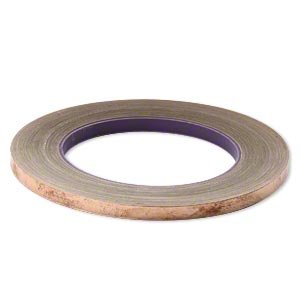
adhesive-copper-foil-venture-tape-masterfoil-plus-635mm-wide-and-1mm-t---p5449bsb.jpg

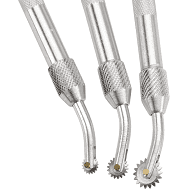
It's possible to suggest rivet heads by imprinting the foil using a pounce wheel (below)
pounce.png
I never know whether to include this step or not. I'm not convinced that at this scale the rivet heads should show up, so I always have an internal debate. The pounce wheel impresses the foil deeply and I'm pretty sure that it would be overkill to imprint the entire plate. So, the compromise is to outline the plate, running the wheel only along the edges. Since the plates overlap about 1/32" I only outline two edges on each plate. While this isn't exactly an accurate representation, it does add some texture to the finished product, makes the individual plates stand out a bit and the overall effect is not too bad.

The other question that is often discussed is whether plates should be shiny or patinated. I don't worry about this very much one way or the other. I just put the plates on, leave them shiny and left them naturally dull slightly over time. I notice that many of us (myself included) don't tend to artificially "age" our models, showing much wear and tear the way railroad modellers often do, so I don't see why copper plating needs be shown in an aged state if the rest of the ship looks new. On the other hand, a patinated finish looks pretty nice too, so I don't think it's too big an issue one way or the other.

You put the plates on just as you would if you had used the individual plates like some kits include or can be purchased separately.

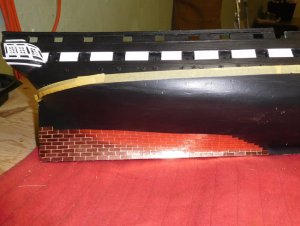
Here are pictures of a couple of my other models during the coppering process and the last picture is my CWM with the copper finished.
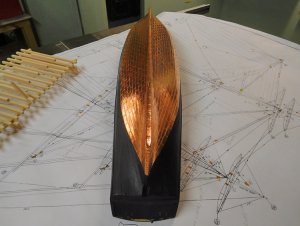
copper.jpg

DSCN1862.JPG

DSCN2253 (Custom).JPG

I trust that answers your question. I am no expert on this subject, but that's just my experience with coppering.

Thanks,
David
 
Good Morning,
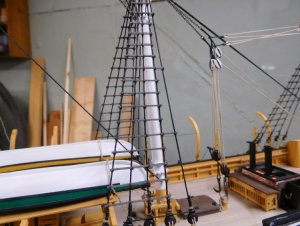
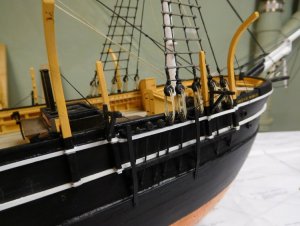
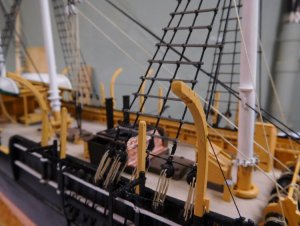
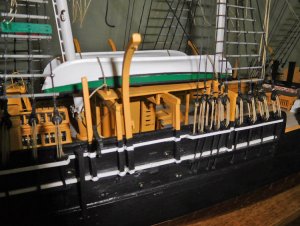
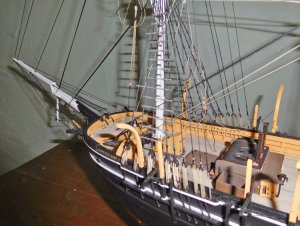
With the lower shrouds and lower stays in place, it seemed like a good idea to stop work on the standing rigging and add the five boat handing stations at this point. I also added the ratboards as well.

The ratboards were fun to do and actually quite a bit easier than regular ratlines. I always have a problem with the outermost two shrouds pulling in as add the ratlines, but that was not a problem in this case.

I've also finished the five boat handing stations. While they were not difficult, it was a much larger job than I anticipated as there are many components to each one.

The hull of this ship has an incredible number of things on it and someone had advised me to take a great deal of care at the outset and when adding any element to the hull to be quite aware of how it would affect the placement of other components. It was a challenge making sure everything would fit in more or less the right place. I'm happy to report that everything fits properly and I didn't have to make any "do overs."

Now on to the rigging in earnest.
David

DSCN2507 (Custom).JPG

DSCN2508 (Custom).JPG

DSCN2509 (Custom).JPG

DSCN2510 (Custom).JPG
 
Hello All,
It seems I have been working and working with very little to show for it!

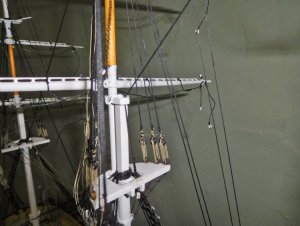
It's time to mount the top masts and then add their shrouds and stays, but a quirk of the Morgan is the lower and upper topsail yards on the fore and main masts are attached with metal brackets. That necessitates their being mounted to the masts before the masts can be mounted on the ship, which means a whole lot of rigging to add to the yards before anything can happen. There's a fair bit of chain rigging on this ship and it's had to deal with because you can't just snug it up by sliding the seizing; you pretty much have to get the length right from the beginning.

You can see the metal brackets for the two yards in this photo:

DSCN2512 (Custom).JPG

While there are many benefits to adding as much rigging to the yards before mounting them, it creates a great deal of chaos, especially with the long lines. I have a bad habit of inadvertently getting glue on them somewhere along their length which I never notice until much later when it won't pass through a block and I have to get up, leave the room and walk around the block before I settle down again. But, I'm getting ahead of myself; that's all lying in wait for me.Redface

DSCN2511 (Custom).JPG

One tricky bit on this model is this piece of rigging:

4105417_orig.jpg

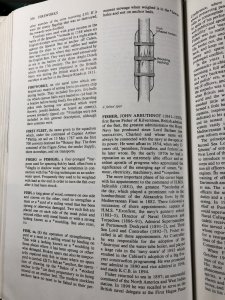
It's a double iron block hanging below the two lower masts through which two chains pass.

DSCN2513 (Custom).JPG

The piece included in the kit is almost laughable. It's a small piece of sold white metal with no holes in it. It needs to be drilled through on each side in order to accept the chains. I did not anticipate being able to use it successfully and have spent a lot of time considering how best to replicate this part from scratch. I decided to try drilling it nevertheless and couldn't believe it, but I managed to get it to work - two through holes in each of the two pieces! (Paint touch up is needed on the yard as a result of dirty fingers from handling the chain.)

So now, on to the topmast shrouds and stays.

Thanks again for looking in.

David
 
Hello All,
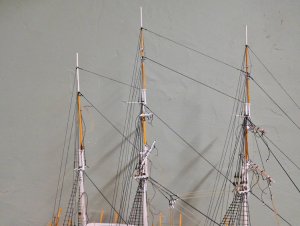
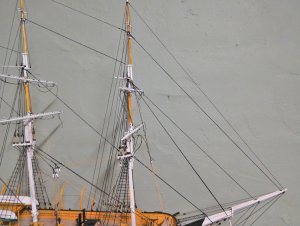
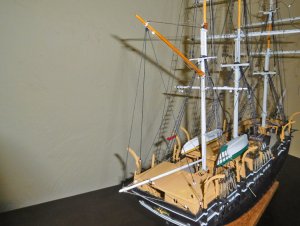
A little more progress to report - I've finished the standing rigging! It's always a nightmare process for me as I can never seem to get the tension right among the three masts. As soon as I tension one line and it brings the mast into a more or less straight position, another line goes slack. And, I'm always too quick to get the seizings glued and trimmed, which of course makes later adjustments all but impossible. I never seem to learn from one model to the next; it's always like I'm doing it for the first time and like deja vu all over again I went down that rabbit hole this time too!

But then I got control of myself and started over. I'm not sure what others like to do, but I've pretty much decided that the best way for me to do it is to get the lowest stay for each mast in place first before the lower shrouds go on, then move directly to the highest stay starting with the mizzen and moving forward. So my order was: 1. mizzen topgallant stay, then mizzen topgallant backstay, 2. main royal stay, then main royal backstay and 3. fore royal stay then fore royal backstay. And I even left the seizings all unglued and untrimmed until all were in place so I could adjust each as needed until the masts were all reasonably straight. Then it was just a matter of filling in the others. At this point it was easy to apply just enough tension to each line without it having an adverse effect on the others.

Sorry if that all seems too elementary to even mention, but I'm feeling very happy about finding a system that works for me and with any luck I won't have to relearn it on my next model. I enjoyed Groundhog Day, but that doesn't mean I like living it!

DSCN2519.JPG

DSCN2520.JPG

DSCN2521.JPG

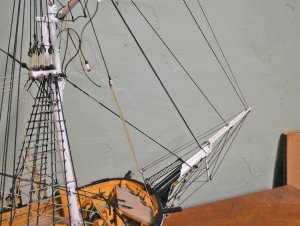
I've also attached the fish tackle. This is a piece of rigging that I'm not familiar with. I assumed it was related to whaling, but according to the MS instructions it was used to help hoist the anchor. Is that correct? Is it a feature of ships of this era (second half of the 19th century?) All the other models I've built are of much earlier ships.

DSCN2522.JPG

also added the running lights

DSCN2523.JPG

back stays secured

DSCN2524.JPG

mizzen topmast stay

Up next is the upper ratlines.

Many thanks for comments, likes etc.
 
Hi Wes,
Thanks for looking in. Your upcoming CWM project sounds great. I'm afraid I'm not in the same league as many of you out there; scratch building, frame construction and extensive kit bashing etc. So far I'm quite content building kits with only minor upgrades to some of the parts.

As kits go, I think the CWM is one of the best. It's very well designed, providing plenty of challenge but not so hard that it's impossible to work with. And it's a fun change from a warship.

Looking forward to seeing your CWM in the near future.
David
I do have a thread here somewhere ...
It has been more than 40 years since I built ships of any kind. Actually the bug never left just priorities have shifted. Now to turn it further I will be delayed yet another two years possibly as I will undergo three major surgeries that will keep me tied up ... But I can plan, research, and build up one fine tool arsenal. :)

I'm glad you like the model you have chosen. A point about what others are doing ... its your hobby, not theirs, work it they you want to and be satisfied with yourself.
Happy modeling.
 
Not a lot of progress to report; I've been spending lots of time working outside on the house and yard. However I have accomplished a little bit on the CWM.

I'm working from aft to fore and have now finished the mizzen mast rigging. A problem I didn't foresee is that most of the lines are seized to eyebolts, rather than seized directly around the spars, which is not a problem when there's only one line. However, some of these eyebolts have more than one line seized to them and at the aft end of the gaff there are four separate lines seized to one eyebolt. I used too small an eyebolt initially and wasn't able to cram all four seizings onto it and still have it look half decent, so I had to redo that bit using a bigger eyebolt.

I always find it hard to belay lines to the pins and the ones surrounding the mizzen mast on this model are particularly hard to access, so here's a strange question. Has anyone ever considered doing much of the rigging backwards? By that I mean attaching and securing long lines to the belaying pins very early on, before almost any deck details have been added. Then run the lines in the opposite direction and seize them later to the masts and yards. I've never seen or read anything that suggests that as an alternative, and it probably isn't a viable alternative, but could it really be more difficult than belaying in a tidy manner to the almost inaccessible pins? It's just a thought that occurred to me this morning as I came close to "losing it"!

Thanks again for checking in.
David

DSCN2537.JPG

DSCN2538.JPG
 
I am not sure, if this way would really work everywhere.....
the standing - and the running rigging lines are ending with both ends at the deck level at your belaying points.
If you start the rigging in "your way", you need to calculate sometimes correctly how long the line has to be. So I think a good work-preparation and planning of the working schedule will be necessary.
And you have to be very careful when working on your model (masts and yards, deck fittings etc.), with all the rigging lines already prepared and fixed at the belaying points...... so maybe the handling could be more problematic in this way......
It would be interesting to see, if this is working........
I do not like rigging work so much.......partly because of the problems you described......
 
Thank you for the "encouragement" guys, but I'm not sure I'm quite ready to try this idea just yet! I was being somewhat facetious, although I have actually been trying to imagine how it might work. Probably would present more problems than it would solve, otherwise people would be doing it. I don't think it would be difficult seizing a line to a yard, but when the line is a halliard and seizes to a block that is already seized to something else, it could be hard to do.
David
 
Back
Top