Chinese Sampan 1:20 Scale Pear Wood Unicorn Models

Dear All

The good news is that it is the start of the Chinese New Year Celebrations aka Spring Festival (not that there is much chance of Spring - it's far too cold for that!) and hopefully I will have some time to work - uninterrupted - on the boat. Nevertheless, I still managed to squeeze some work in last night after work, and this morning before work.

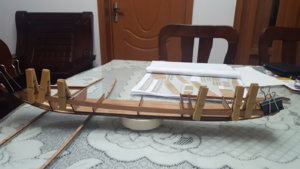
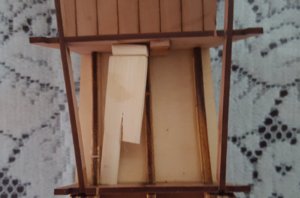
No matter how much careful persuasion and fiddling with the torsion bars I tried, I just couldn't eliminate the slight warp that developed in the hull. The extremely flimsy stringers are definitely at fault here as the bulkheads are very sturdy and solid. Unicorn could well use some more substantial stringers in future, as it would improve the overall rigidity to no end. So ... I had to try something else and opted for a different approach. A chopstick was lobbed off at a slightly oversized length and wedged between the two bulkheads at the bow. Voila! Warp gone! I then simply boxed the chopstick to make any unwanted movement impossible. I know it is rather a crude way of eliminating the problem but sometimes a "big hammer" approach is all that works. (see photograph below).
20200121_080157.jpg

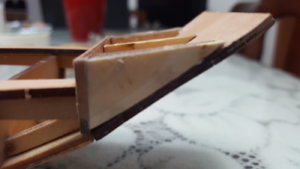
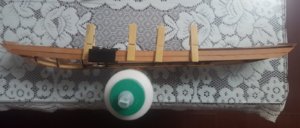
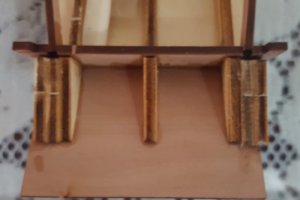
Next, a few pieces of laminated wood were attached to the bow and stern bulkheads to minimize the deadwood area. They purposely extend too far over the sides to allow shaping to follow the curvature of the hull. This should make the planking of the sides easier and also provide more grip for the side planks. (see below).
20200121_080252.jpg

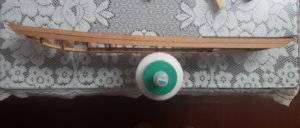
With the hull now straight and true, it was time for my first ever attempt at planking. The first plank was laid down and all I can do now is to wait for tonight for the glue to dry before I can continue the process.
20200121_082430.jpg
 
Until now I saw in our hobby the use of chop-sticks (bamboo) only for making treenails - but seems, that it is every time good, to have some of them in the stock.
Many Thanks for sharing with us also these details - interesting to see and read
 
Dear Friends

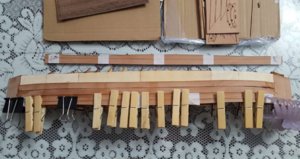
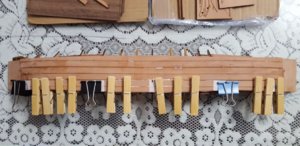
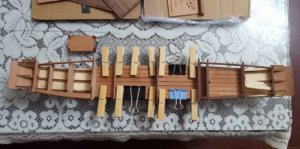
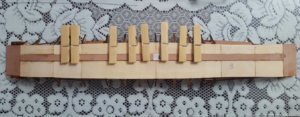
Finally - a full day that I could spend on the Sampan. Well, not really. As mentioned in the previous post, it is extremely cold and wet at the moment in Nantong, so the glue takes for ever to dry. I leave glued pieces for at least 6 hours before I feel confident enough to remove the clamps. In any case, it was on with the planking. It was frustrating because after each plank was laid down there was the inevitable waiting period for the glue to dry. Also, I don't have enough clamps, so while the planking was in progress, I couldn't glue anything else.

WeChat Image_20200122051737.jpg

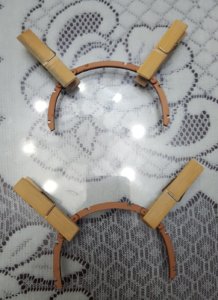
As can be seen from the above photograph, even the Admiral's hairclip came into play as a clamp. Luckily it is with her permission, but that means I fist have to consult when she wants to wash her hair! Lol!

WeChat Image_20200122092107.jpg

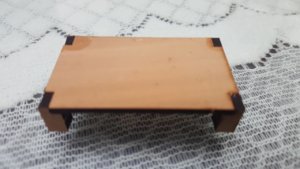
While waiting for the glue to dry, I quickly assembled the "dining table" which will finds it way into the canopy later on. With Chinese New Year around the car and the New Year's eve family supper a major focal point of celebrations, at least the boat builders can enjoy a good supper while working!

WeChat Image_20200122142700.jpg

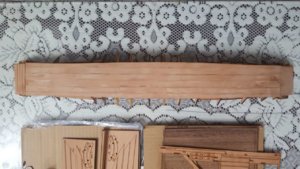
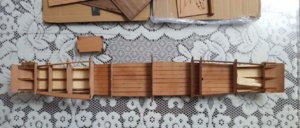
The planking just after the clamps were removed and before any finishing.

WeChat Image_20200122160013 - Copy.jpg

This is where I will have to call it a night. Whilst I am reasonably happy with it, I will spend some time finishing it properly and hopefully it will look MUCH better in final guise.

Thank you all for your interest and for watching.
Heinrich
 
Dear All

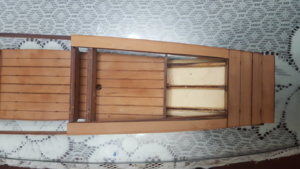
Today was a slightly interrupted day having to go to the bank this morning and doing last-minute shopping for Ney Year tomorrow, but still managed to get the floor planking done.

WeChat Image_20200123160953.jpg

WeChat Image_20200123160938.jpg

I'm very happy with that how turned out.

Thanks for watching and for your interest.
Heinrich
 
Maarten and Jim: Thank you very much for the kind words and wishes.
 
Dear All

Work continued today - mostly with small odds and ends. First I glued the top planking braces at the stern into position. Apart from acting as a partial top cover, they also serve as a extra meat for the top planking to butt up against - something I believe will be sorely needed.

20200124_140625.jpg

Waiting for the glue to dry allowed me the opportunity of assembling the first two frames of the canopy (picture below)

20200124_140729.jpg

In anticipation of laying down the side planking, the boxwood inserts at the bow and stern had to be shaped so as to minimize the deadwood area behind the bulkheads at the two ends of the boat. This took ages as the boxwood bravely refuted any attempt at plastic surgery. With that finally out of the way, it was now time for my most dreaded exercise - my first attempt at planking a hull.

20200124_140803.jpg

20200124_205820.jpg,
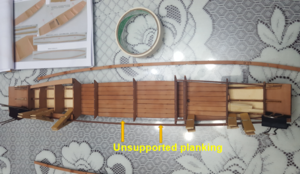
With everything aligned and properly set-up, I read and re-read the instruction manual - actually, looked and re-looked at the photographs, (the instructions are all in Chinese) and laid down the top plank of the side planking. This was a mission for someone as inexperienced as myself, but went reasonably well. My big concern however, is that even chamfering the edges of bulkheads to create a bigger face for the planking to adhere to, there is still precious little material to attach it to. But of even bigger concern to me is the unsupported portion of the top plank (it will be the same case with the second plank from the top) as it "floats" unsupported and unattached to anything for a good portion of the length of the hull. (See photograph below)

unsupported.png

How proper alignment of the next plank is to be accomplished, I have no idea. Oh well, all I can do now is wait for the glue to dry and hope that the morning brings a new perspective.

Thank you aall for watching and for your interest.
 
I like your build very much! it is really good size to show a lot of details! keep up a great work, Heinrich.
 
Dear Friends

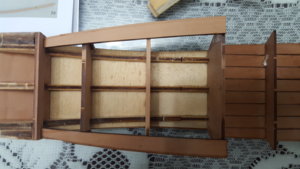
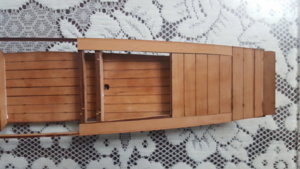
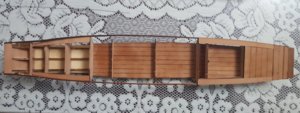
Today was devoted entirely to planking which meant that progress was S - L - O - W. Still scratching my head about how to go about doing the side planking, I decided to tackle the "deck" portion first. Now it was the turn of the planking braces at the bow to be glued into position followed by the planking of the two foremost compartments at the bow.

Build 32.jpg

Build 33.jpg

With the front two compartments covered the "fish tank" will be left uncovered to provide some contrast and depth to what is essentially a "flat" boat. This is where we are now.

Build 34.jpg

Not being able to escape the dreaded side planking any longer I turned my attention to try and figure out a way of two separate planks following the same curvature with no bulkhead as guide. Section by section, I glued the edges of the two planks together with CA. When I more or less had what looked like one plank in the middle (in the unsupported area) I very gently started securing the whole thing to the bulkheads at the stern and bow. When all of that was done, I cut a brace which I glued to the inside of the planking to provide extra support to the middle-joint of the two planks. After that everything was clamped and left to dry.

Build 35.jpg

I'm reasonably happy with how that turned out, but the acid test is going to be to see the planks bends. At the bottom of the plank it is still not secured to the bulkheads, s tomorrow I will have to bend it into position to glue the bottom edge to the bulkheads.

Build 36.jpg

Thank you all for your interest and for watching.

Heinrich
 
Dear All

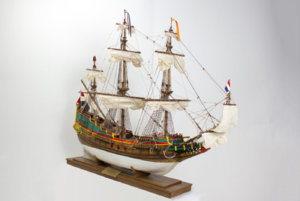
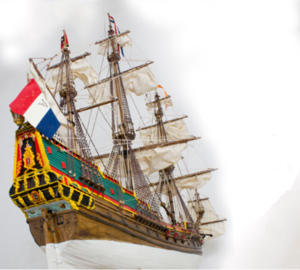
First, I have to apologise for hijacking my own thread, as work on the Sampan has stood still since the weekend. Ever since I discovered Kolderstok Models on SOS, I have wanted to build a Dutch ship because of my Dutch/South African origins. With the help of Maarten, I first made contact and then joined the Dutch Modelbouwforum. I was simply blown away by some of the builds of Kolderstok models on the forum and soon made contact with Hans van Nieuwkoop of Kolderstok. With the wonderful input of a number of forum members, one thing led to another and today I purchased the Kolderstok Batavia. (Photographs below courtesy of Kolderstok). As there is no build log for the Batavia, I thought I would mention it here.

Batavia 1.jpg

Kolderstok - Copy.png

Thank you all for your interest and for watching.
Heinrich
 
Dear All

First, I have to apologise for hijacking my own thread, as work on the Sampan has stood still since the weekend. Ever since I discovered Kolderstok Models on SOS, I have wanted to build a Dutch ship because of my Dutch/South African origins. With the help of Maarten, I first made contact and then joined the Dutch Modelbouwforum. I was simply blown away by some of the builds of Kolderstok models on the forum and soon made contact with Hans van Nieuwkoop of Kolderstok. With the wonderful input of a number of forum members, one thing led to another and today I purchased the Kolderstok Batavia. (Photographs below courtesy of Kolderstok). As there is no build log for the Batavia, I thought I would mention it here.

View attachment 130671

View attachment 130672

Thank you all for your interest and for watching.
Heinrich
I am happy to hear, that you just ordered one kit from Hans. So hopefully we will get also an insight of his kits with a building log of the Batavia
 
Hi Uwe

The Batavia is an altogether different kettle of fish. I am now studying the build logs on the Dutch forum and it took me a whole day just to work through two pages of the log. Before I start construction on this, I will first make sure I have a VERY good idea of what is r

Any recommendations with regards to a good building jig? The hull is approximately 800mm in length.

Thanking you in advance.
Heinrich
 
Dear Maarten

Thank you very much for the interest. I can certainly do a review. Thank you for the advice on the build slip. It looks very good indeed, but on the website it is listed as temporarily unavailable.
Best Regards
Heinrich
 
Dear Maarten

Thank you very much for the interest. I can certainly do a review. Thank you for the advice on the build slip. It looks very good indeed, but on the website it is listed as temporarily unavailable.
Best Regards
Heinrich
Hi Heinrich,

Maybe it has to do with the link. The adress is www.hobbyzone.pl
 
Back
Top