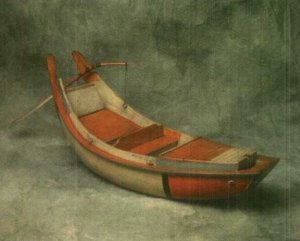
Chinese Sampan 1:20 Scale Pear Wood Unicorn Models

Heinrich

Staff member
Bluenose Moderator
Joined
Jan 9, 2020
Messages
10,342
Points
938

Dear All

Trepidation is not the word, but the kind requests of Uwek, Nigel, Jimsky, Don and Zoccane have prompted me to start a build log on my Chinese Sampan.

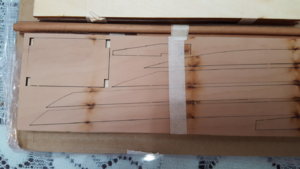
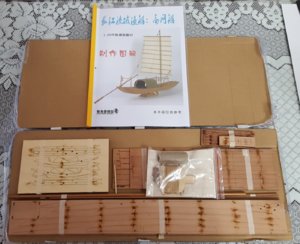
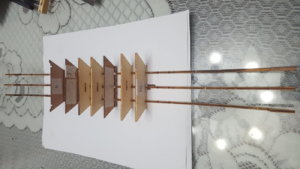
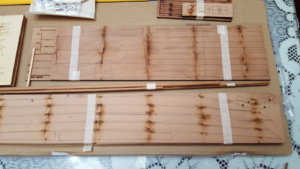
The kit arrived this morning and my first impressions are positive. The wood (a combination of Pear, Cherry, American Walnut and Laminates) looks to be of good quality and the laser cuttings very accurate. As a test I have removed one or two of the bulkheads and the parts that make up the "keel stringers" (for want of a better word - there is no keel on the flat-bottomed Sampan). The bulkheads came away easily from their sheets with the minimum of chaff, but the laminated keel stringers are very fragile and required great care.

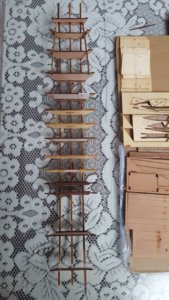
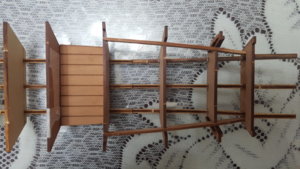
The parts are clearly marked and identifying everything seems to be realtively straightforward. The 9-page instruction manual is only in Chinese, but luckily my students can translate the text for me into English, if need be. In addition, there is also a comprehensive set of step-by-step photographs which should help a lot. I am waiting for my Titebond to arrive so there is not much I can do other than to get a "feel" for the kit and try to familiarise myself with the build sequence. I have included a few pics to show what the kit looks like.
Unboxing 4.jpgUnboxing 5.jpgUnboxing 2.jpg
Thank you so much for your interest in the Sampan - it is sincerely appreciated.
 
Dear All

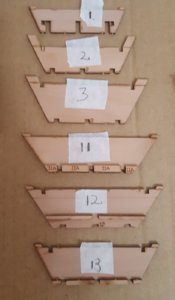
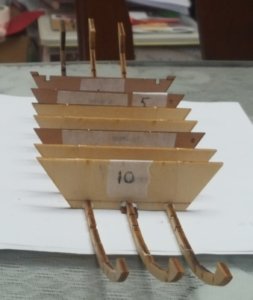
Thank you so much for all your good wishes and interest in the Sampan. Well, the glue arrived late last night and I immediately got my feet wet! First off, I clearly labelled the bulkheads as a kind of cross-reference for myself. I apologise beforehand for the ungainly masking tape, but since this is my first build I want to make sure that all T's are crossed and I's are dotted.

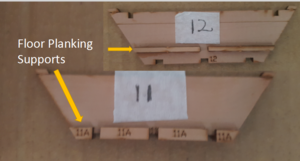
You will notice that on a number of bulkheads there are "supports" glued to the bottom. These come in different configurations and are mounted at different heights to serve as support for the floor planking later. You will also notice that four of the bulkheads are from laminated wood and look completely out of place. Their top sections will only remain in the model until the planking is completed. Once that is done, the top sections will be removed while the bottom sections will remain - serving as floor supports and adding to the structural rigidity of the whole assembly. Interestingly, the Unicorn model resembles exactly the way that the original Sampans were constructed - three bulkheads (forming four compartments), two half-bulkheads and four frames.20200114_145615.jpgSupports.png
 
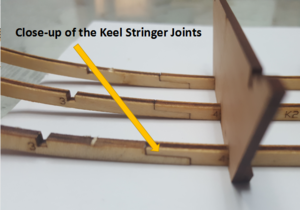
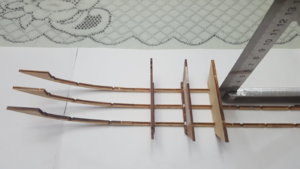
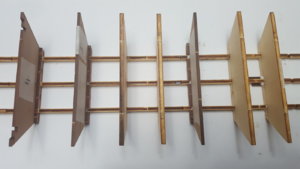
Next up was the gluing of the keel stringers. I was very careful with this as I don't have a jig to effect any form of alignment. With the three keel stringers that would have been a formidable task in any case. However, hats off to Unicorn - the alignment seemed to be spot on. Next up it was simply a case of dry fitting the bulkheads and making sure that everything was square. Again, this proved no issue as each time that the bulkhead "clicked" into position it was almost perfectly square. In fact, in only one case, I did have to do the slightest adjustment.

Joints.png20200114_132422.jpg

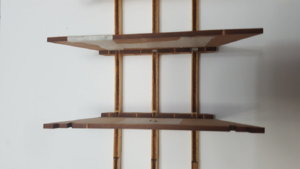
The next picture shows the supports in place for the floor planking which will follow later.20200114_152204.jpg

And this is where I am at the moment. Now it's time for a Nescafe Gold and for the glue to dry properly! I am very happy so far - especially with the alignment of everything. It all seems to be straight and true. Phew!20200114_145811.jpg20200114_150449.jpg20200114_150656.jpg
 
Last edited by a moderator:
Dear All

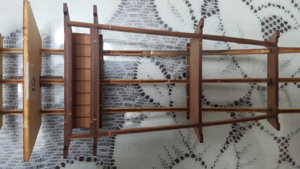
It may not look like much progress, but I am very glad that the front and rear torsion/tension bars are in position. These bars create the tension that the gives the Sampan its distinct curvature at the back and front. The problem is that if you don't get the tension exactly equal on all 4 sides, the whole hull assembly will pull skew with all the nightmares associated with that. This process required some careful massaging of the bars to coax them into position under just the right amount of pressure. It may look simple, but believe me the effect that these bars have on the hull is marked.


20200116_234600.jpg

Above: The Rear Tension Bars

20200116_234637.jpg

Above: The Bow Tension Bars

The first of the bottom planking was laid down to check the alignment of the hull and also to aid in some structural rigidity before the first keel planking (bottom photograph) goes on.20200117_001443.jpg20200117_083527.jpg

That is where I will have to call it a day. Thank you all for watching and for your interest.

Heinrich
 
Dear All

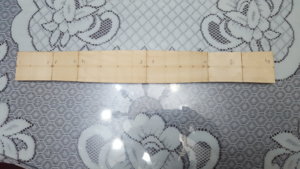
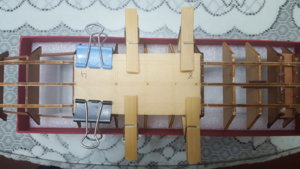
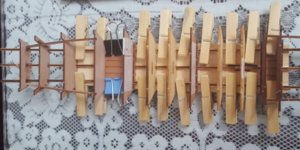
In the last post I started with the keel "planking" and continued with that. Strictly speaking, it is not actually planking, but sheeting; as the keel is covered by 6 separate sheets of thin boxwood/laminated wood. The sheeting is very pliable which made the whole process an easy one. Again, I was surprised by the accuracy of the laser cutting as the sheets lined up perfectly with their corresponding guidelines and bulkheads. Titebond was used to glue these to the bottom frame of the hull; then they were clamped and left to dry. Once perfectly dry, the bottom will be sanded in preparation of the real planking. Ultimately, the bottom will also be covered in Pear wood planking.

WeChat Image_20200118121519.jpg
The bamboo washing pins used as clamps provided a nice, authentic Chinese character to the whole process!20200119_073052.jpg20200119_072936.jpg
In real life, the colour of the Pear wood is actually a lot lighter than what it shows up on the photographs.

After all the clamps had been removed, I did notice a very slight warping at the stern. This will require some more fettling with the chines at the stern, but I want to get this absolutely right before I start with the side planking. All in all though, I am very happy with how things have turned out so far.

Thank you all for your interest and for watching!
Heinrich
 
Thank you very much Nigel - I am happy with how things have progressed so far. The challenge though is going to lie with the side planking - those bulkheads are far apart!!! But we will cross that bridge when we get there.
 
Dear all

Thank you very much for all your kind words. To those of you following the build, here is a bit of information on the Sampan as used in China and Vietnam.

The word "sampan" literally means "three planks". The name refers to the hull design, which consists of a flat bottom (made from one plank) joined to the two sides (the other two planks). The Sampan is a flat-bottomed, wooden Chinese boat that is generally used for transportation in coastal areas or rivers and often as traditional fishing boats in the central reaches of the Yangtze river. Solidly constructed from hard-wearing and water-resistant Fuzhou Pine or Ningbo Softwood, they feature a wide variety of designs, ranging from open to partly decked with a closely-woven shelter or cabin aft. In their sheltered configuration, they are often used as permanent habitation on inland waters.

Propelled and steered by a yuloh (a single, long sculling-oar), the sampan is also rigged for sailing with a single mast and sail for long-distance travelling. The yuloh can be used either at the bow or stern of the boat, aiding in flexibility. The fishing gear consists of a net with a maximum load capacity of 5 tons and a live fish tank.

Sampans are still widely used by rural residents of Southeast Asia, particularly in Malaysia, Indonesia, Bangladesh, Myanmar, Sri Lanka and Vietnam.

Antwerp_Sampan.jpg

Above: from Shaky Ships: The “hongtou”, a small sampan used in the harbour of Shanghai (National Maritime Museum, Antwerp. AS 35, 48, 10).

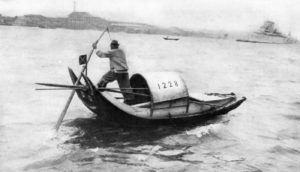
Virtual Shanghai.png

A Sampan being operated in Shanghai harbour. Note the number on the shelter. Sampans are required to register with the harbour Police of the Chinese Maritime Customs. This is done annually, usually in April. On the hood, on each side of the registered number of the sampan, a coloured dot will be noticed. The colour is changed each year and shows at a glance when the boat was last registered. (Photograph supplied by: Virtual Shanghai)

QTBC 1.png

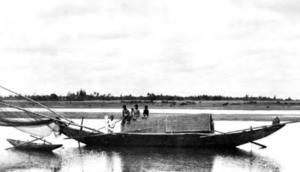
This is the high-net fishing boat of which my model is an accurate depiction. It is larger than the harbour Sampans and can also be rigged for a sail. See photo below. (Photographs courtesy of the Blue Book)

QTBC 2.png
 
Back
Top