Colchester Smack

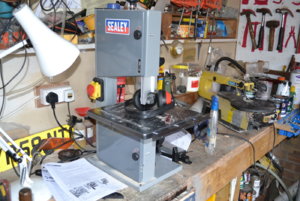
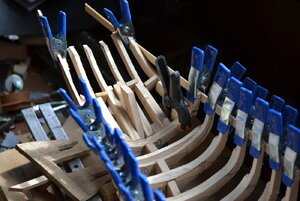
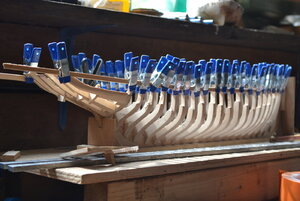
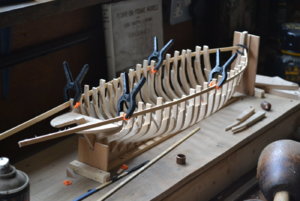
Although I have visited the Forum practically every day and marvelled at the workmanship I have been focused on my 1930 car project for the past 3 months. However that is in a good place where I need to think about next steps so I am back on the smack for a while. Major task is fitting the remaining frames and working out how the stern is framed up. I have made a temporary former for the deck level to help. My new toy is a Sealey band saw - I wish I had bought one years ago as it is a great tool and very easy to use (with ear defenders and gloves I hasten to add). Great for boats but also for small wooden parts for the car interior many of which are missing.DSC_0001.JPGDSC_0002.JPGDSC_0006.JPG
 
This is the tentative start of a build log for a Colchester smack, which is a type of fishing craft that worked out of the Colne and Blackwater rivers in Essex in the 19th and 20th century. Many of these craft still survive as yachts and I live only a couple of hours away from where they can be seen. I will be using the plans in the Chatham Directory of Inshore Craft which were drawn by the naval architect Maxwell Blake. I have to get these enlarged as the originals are in a private collection and I don't know who owns it.

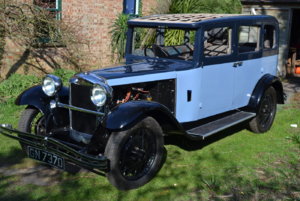
My model will be built at 1:24 or 1/2":1' in Imperial. This has the advantage that 1mm is about 1" in scale terms which makes sourcing the timber rather easier. There is lot of drawing to do which I will continue in parallel with working on my car project which is 1930 Singer Light Six which hasn't been on the road since around 1970. The model will form a nice contrast to the rather large and oily car!

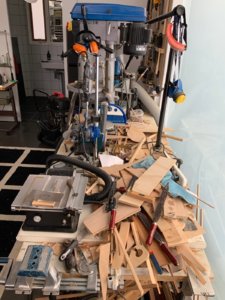
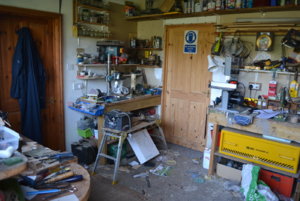
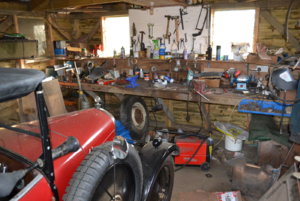
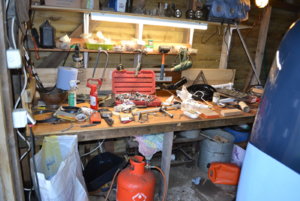
I will probably go for sycamore or lime although I have to find a decent source. I have made a start in the meantime by getting most of the car stuff out of my main workshop and trying to establish a boatyard in its place. I have acquired some machine tools since I made Leon as a student with hand tools on the kitchen table so I hope these will help me make a boat that is worthy to sit alongside the quite outstanding models I watch develop on this forum. View attachment 90532View attachment 90533View attachment 90534View attachment 90535
Hi, it looks like a really great project I shall follow it with interest, I also enjoy seeing others work space, it makes me feel a lot better to know some are nearly as messy as me.
Regards
IMG_0516.jpgTony W
 
Ha ha! That was the tidy version Tony. I have three work stations in three different sheds, one for boats, one for metalwork and other grubby pursuits and one for clean car stuff. They are all always in a mess.

DSC_0002.JPG
DSC_0003.JPG pictures...:eek:DSC_0001.JPG
 
I am often frustrated by my own mess especially when I put something down and then can't find it five minutes later....! I have finished the last two frames at the bow so all frames except the stern timbers are cut out and the middle ones have been bevelled. I plan to bevel the frames on the deadwood fore and aft and then try and achieve reasonably scale scantlings for them all where possible. I'll trim the tops of the frames once they are all bevelled and glued into place. As this isn't a particular craft I have a bit of licence in it all, and so long as it looks OK it will be OK with me.

DSC_0002.JPGDSC_0003.JPG
 
Good morning, Colin.
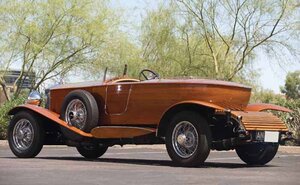
Impressive bandsaw and car! I always marvel at the amazing work that people can do on antique cars, but boats are my passion. Your boat is looking great .
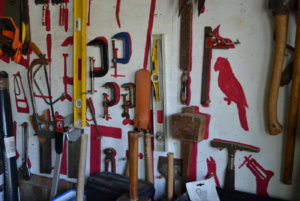
I notice that your tool board has painted outlines of each tool's location. I saw that on an electronics tool board aboard a Japanese ship that tied up alongside the US Navy ship that I served on, in the 1960s. The painted outlines quickly & clearly show where each tool belongs and which tools are out working somewhere (or lost).
Happy modeling.
Steven :) Thumbsup
 
My wife painted the shapes on the board to try and keep me in order Steven. It sort of worked but I have no idea what happened to the parrot!ROTF
I took the plunge yesterday and glued most frames to the keel. Rather than making up a jig I glued a thin piece of wood across the top of four frames, marked the centre line and then installed those against a string line stretched from the bow to the stern post. After they had glued solidly I ran a batten round them and after checking that it made a fair curve I used that to hold the other frames in position as they were also glued in place. I have always liked the term 'eye sweet' (was that from Dynamite Payson?) and she looks right to my eyes. There are a few more frames to work on before they are ready to be glued up but I think that once all frames are in I can use them as a base to develop the stern timbers. My approach and skill level are both rough and ready but I am enjoying myself which is what counts in these strange times. DSC_0001.JPGDSC_0005.JPGDSC_0006.JPG
 
Hallo Colin, alias @Colin B ,
we wish you all the BEST and a HAPPY BIRTHDAY
Birthday-Cake
How is the work on your Smack going? Hope you made some progress, so we would all like to see an update of your log
 
Many thanks Uwek. Although my model is not progressing at the moment (too many other things to do) I visit the forum every day and really enjoy the excellent work being created.
 
Happy Birthday Colin, I hope that you are able to spend some of it in your wonderful workshops,regards Tony
 
Wounderfull work to keep cars alive - thanks for sharing, Colin!

The boat start to find its way into the workshop...


Perchance on the next project you want to mix both?

bd24b96b52ea19c7ca23710d06aafa0f.jpg

98188a0f3a91f8e079f8a2b12e11199c.jpg

In Germany we call the back seat "mother in law's place"* ;)

schwiegermuttersessel-7943cf78-16f4-441f-8e22-058b1dc49277.jpg
* and this is her armchair
 
Last edited:
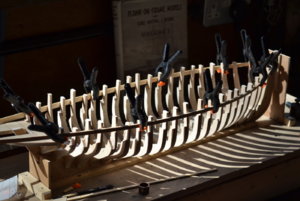
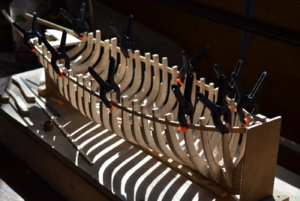
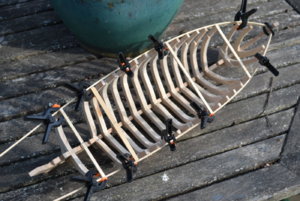
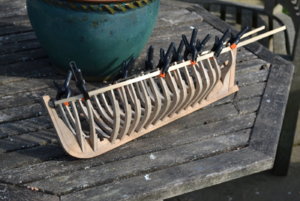
I have been waiting for some material for my car project, so I had a go at framing out the stern of the smack. As is my usual approach I have just winged it and I'll be sanding it all to shape on the hull. It eyes-in quite well and a batten runs fairly well over it although there is a lot of sanding to do, and some of the spacers stand really proud of the main shape at the moment. I sold a pair of pre-war sidelights on eBay so I have bought the Proxxon mini belt sander with the proceeds which will speed up the bulk removal (provided I practice first!).

DSC_0002.JPGDSC_0003.JPG
 
What a pretty row of little clamps, it must be strange, the jump in scale, from cars to boats. Let us know how the proxon mini belt sander goes it looks like a handy tool but I don’t think that there is any dust control. Best, Tony
 
What a pretty row of little clamps, it must be strange, the jump in scale, from cars to boats. Let us know how the proxon mini belt sander goes it looks like a handy tool but I don’t think that there is any dust control. Best, Tony
Hello Tony - it is a very useful tool especially for getting inside concave shapes so I would recommend it. My only criticism is that the location of the on/off switch makes it impossible to switch it on one-handed which is a bit of a nuisance if you are holding the work piece in the other hand.
The clamps constitute my version of a building jig, holding the frames together while I sand in the bevels (I'm afraid I don't come up to the very high standards of other builders on this excellent site but I am enjoying the process). :)
 
Hi Colin, Thank you for the report on the Proxon mini belt sander it can now be added to my ever growing wish list of tools, I am on the cusp of ordering a bandsaw as I know how useful they are for all sorts of tasks, I recently looked into and purchased some Swiss made blades for my scroll saw and am amazed at the improvement in cutting when one selects the right blade for the job, I agree with you about the extraordinary skill and I think patience that some of our builders have and am in awe of their work, however in spite of my best intentions I tend to also make it up as I go along.
I continue enjoy looking at your photos whether its cars, boats or workshops and am still wondering about the missing parrot. Best. Tony
 
I wouldn't be without my bandsaw Tony, and in fact I have put the scroll saw away as I find the bandsaw far easier to control. Although its a small one it also cuts quite thick hardwood for my car project, is better for ripping lengths to width than my rather gutless circular saw and leaves a very clean cut. I have bought a finer toothed blade for it to use when I begin to cut out the planking.
The Proxxon sander has a dust control connection by the way but I'm not sure how practical it would be to use it as the essence of the tool is its flexibility in the hand and I doubt if having a vacuum cleaner attached to it would help much.
 
Back
Top