Colonial Schooner Sultana

it must be the same mind set as guys who build and restore old cars. Not many people stil running windows 98. when i started in the lumber business i had a 1948 Chevy flat bed truck and it wasn't in 1948 more like 1976. No need to change the old goat ran just fine and very simple to work on.
 
I run the system over 15 years now. Just have to reinstal it just for 4 times. And 2 times of that was because I installed W10 in an update. 1 time because the motherboard was broken and 1 time a virus that only show me a black screen.
 
after a rough start with parts that did not fit and the computers going down everything is back up and running. I got a new set of bulkheads and the fit is perfect so lets get going on the build

step 1

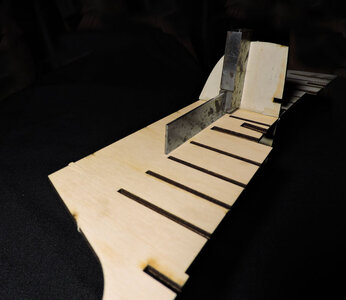
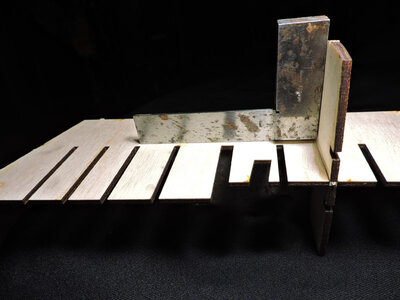
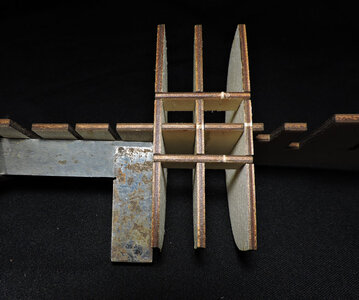
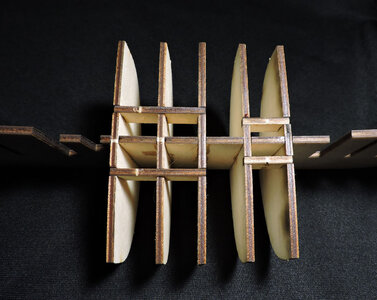
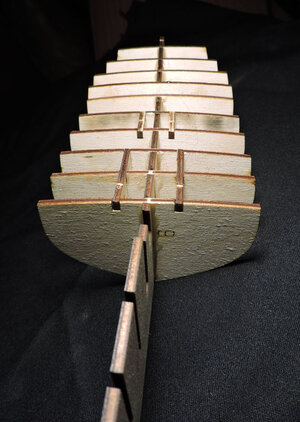
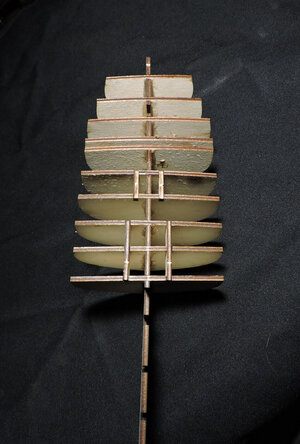
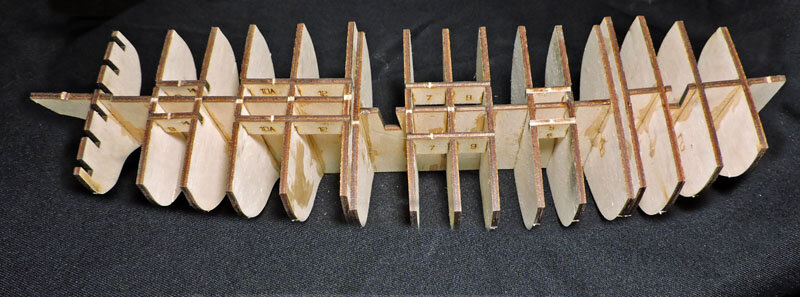
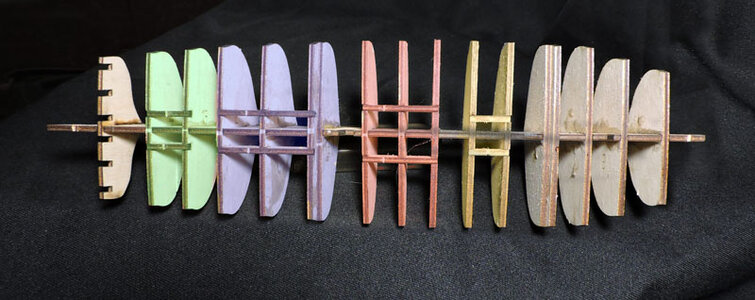
assembling the bulkheads to the center profile piece is all about getting them square. Like i showed in the first part it does not matter what you use to square up the bulkheads. What i use is actually a square. To start I did not just pick bulkhead number 8 at random there is a method to the build.

hull1.jpghull2.jpg

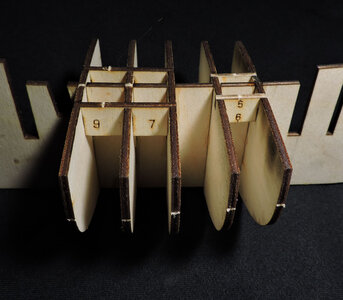
First bulkhead number 8 is in the center of the hull so i will work out in both directions. Doing this will avoid any squaring up error to continue from bulkhead to bulkhead and second is to build a center section which is square.

hull4.jpg

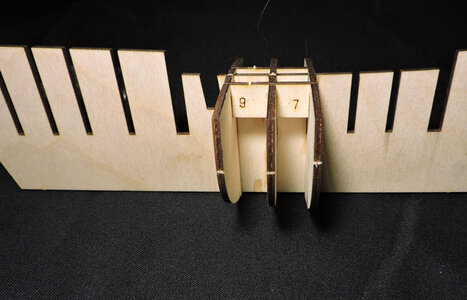
just to make sure i checked bulkheads 7 and 9 for square.

hull3.jpg

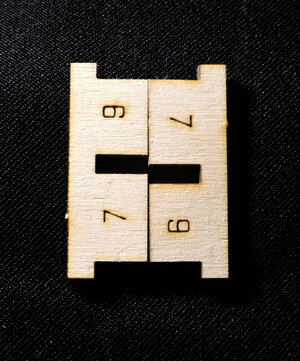
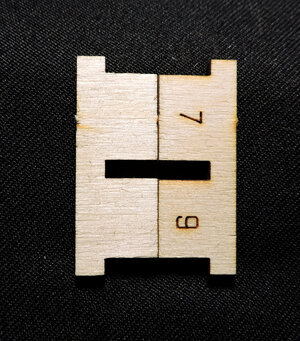
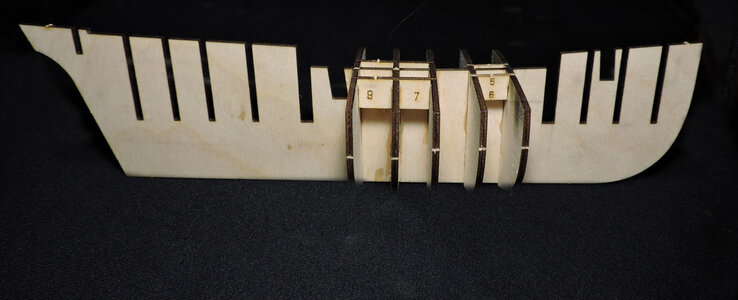
these parts act as carlings and will support the hatch coamings, they also lock in bulkheads 7 and 9 square to bulkhead 8.

bulkheads 7 and 9 are not at an equal distance from bulkhead 8, i found if you do get them turned around they will no fit properly. Besides they are marked as to which way they go.

hull6.jpghull5.jpg

when gluing the bulkheads to the profile piece i am using a 5 minute Epoxy, this gives enough time to set the bulkheads in place and square them up. Once set i go back and run a bead of Epoxy down the seam.

hull7.jpg

i now have a strong and square mid section.
 
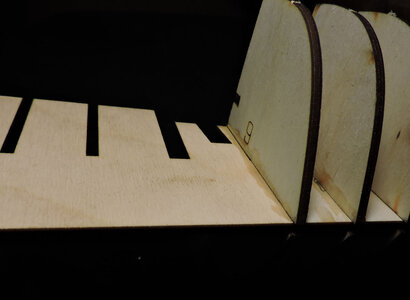
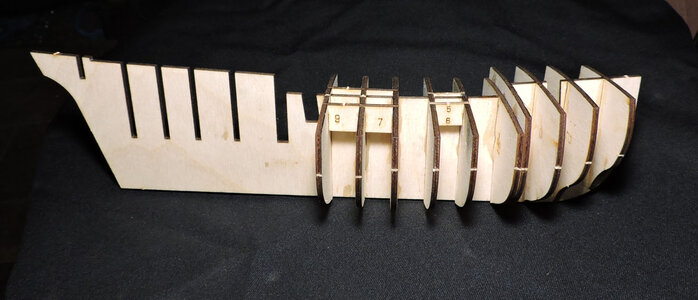
moving on the next set to place in are bulkheads 5 and 6 there is no need to use a square to line them up. With the carlings in place the bulkheas line themselves up.hull9.jpghull10.jpg

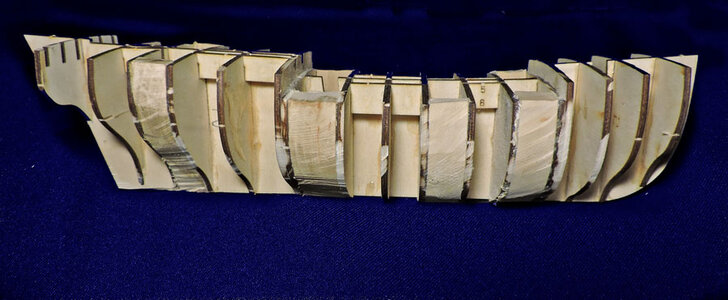
what we now have are two square solid units in the midship.

hull11.jpg

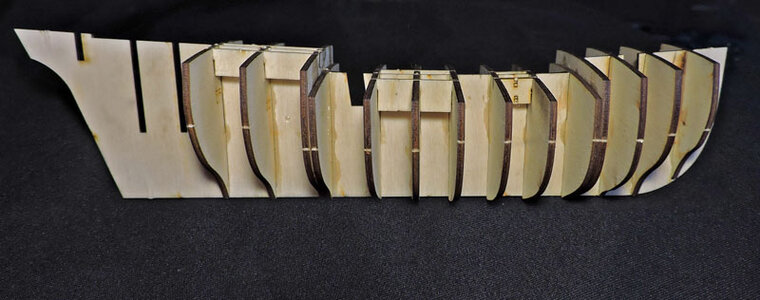
to build the bow section each bulkhead is put in place like bulkhead 8 using what ever square thing your using.

hull12.jpghull13.jpghull14.jpg
 
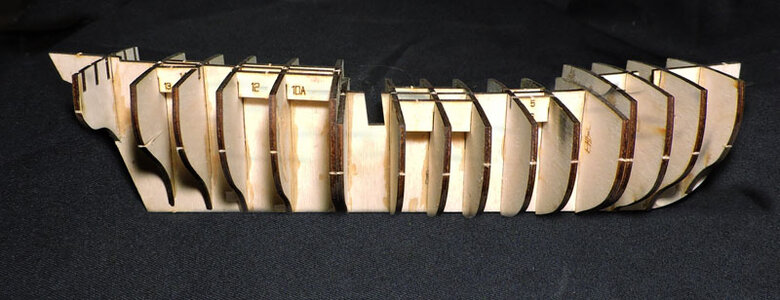
Buiding the stern section starting with the double blukhead number 10. First insert bulkheads 11 and 12 in their slots and add the carlings. Do not glue these in place they are there to square up bulkhead number 10. Using 5 minute Epoxy applied to slot 10 in the profile and bulkheads and between the 2 buklheads, slide the double blukhead on the the profile and line up the notches in the blukhead to the ends of the carlings. Doing this will square up bulkhead 10.

hull15.jpg

bulkheads 13 and 14 are the same as blukheads 5 and 6 the carlings will square up the bulkheads to the profile piece.

hull16.jpg

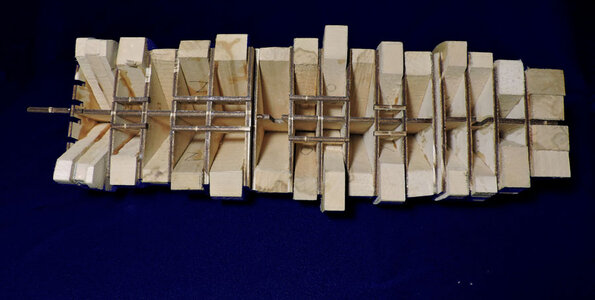
This completes step 1 with a complete bulkhead hull, but far from a finished hull.

hull17.jpg

the idea behind the sequence of assembly of the bulkheads ends with a hull that has a series of solid square sections. The only way the hull will bend, warp or distort is between the solid bulkhead sections and that will be attended to in step 2 of the hull.


hull18.jpg
 
moving on to step 2 of building the hull.

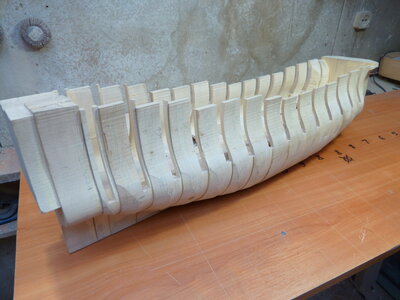
At this stage there are a few way you can proceed one is to start planking the hull with a single layer of planks, the issue with this is because the bulkheads are spaced far apart a single layer of planking tends to sit flat between the bulkheads because there is nothing supporting the shape of the hull. Many kits provide a double layer of thinner planking. This works well the first layer gives you the general shape of the hull and by using some sort of wood filler in the low areas the hull is refined to its final shape. A possible disadvantage to the double planking is the planks are half the thickness and the thinner the plank the more straingth is lost and the planks tend to break. A common way of getting the shape of the hull is to fill in between the bulkheads.

Model builders sometimes do not realize a ships hull has frames spaced close together and in some cases almost a solid wall of timbering for the planking to sit against.

With the Sultana model i am going with filling in between the bulkheads. As far as what to use as a filler you can use a dense foam board called sign board this cuts and works very easy. Make sure the glue your using won't melt the foam board and sticks the planks to the foam board. Another issue is the foam board sands very easy and the plywood bulkheads are much harder resulting in a ridge that stick up above the softer foam board.
Another suggestion is making a trip to your local Arts and Craft store or a home improvement store or wood dealer or go on line and get yourself some softer wood like Basswood, Soft Pine, Cedar or Balsa wood.

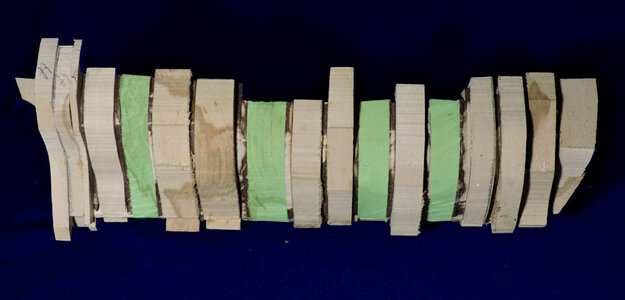
i am using Basswood i had around the shop and the first thing i did was fill in between the 4 solid square sections.
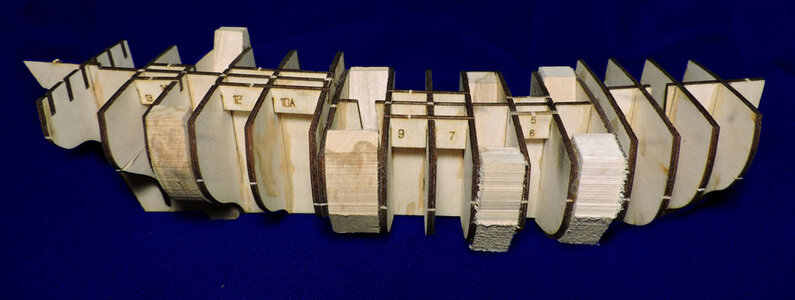
hull19.jpg

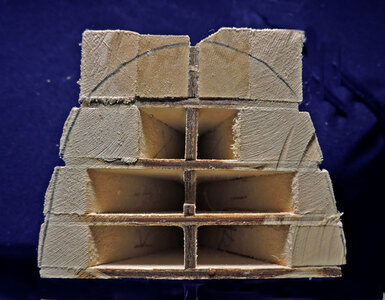
i did not use a piece to fill in the entire area between the bulkheads i cut the Basswood into a crescent shape that filled in the outer area of the bulkheads leaving the center section of the hull hollow.
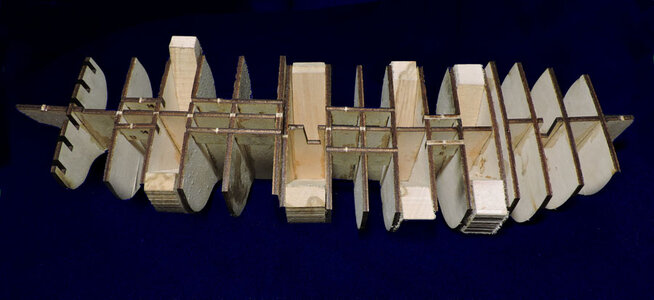
hull20.jpg

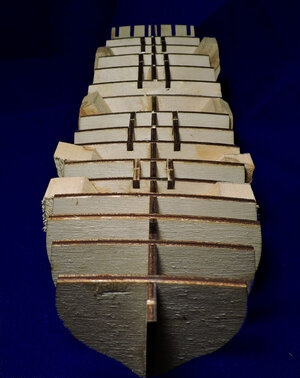
another point is to make the filler pieces high enough above the deck line. This is important because a waterway will be placed along the hull and the ends of the deck planking will have a solid area to sit on.
hull21.jpg

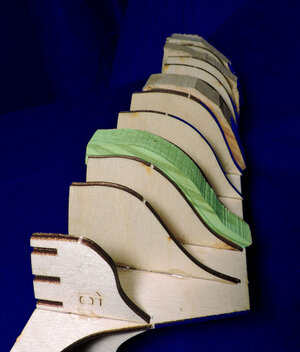
when cutting out the filler block between two bulkheads trace the bulkhead in front when working at the stern and trace the bulkhead behind when filling in the forward section. Looking at this filler piece from the stern it is way beyond the bulkhead
hull22.jpg

looking at the same filler piece from the bow it is close to the shape of the bulkhead
hull23.jpg

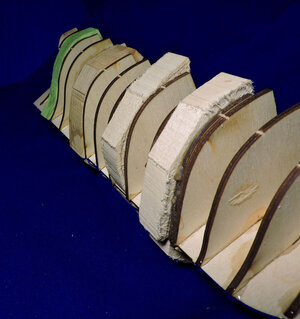
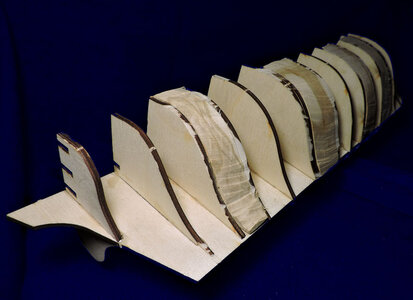
the next step i shaped the 4 filler pieces close to the bulkheads
hull24.jpghull25.jpg

there is no need to use a single block of wood these are just filler and can be made up of smaller scrap pieces or even thinner sheets of wood laminated together.
 
Last edited:
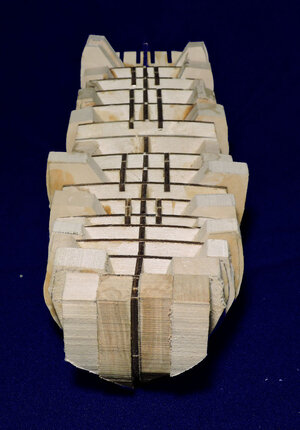
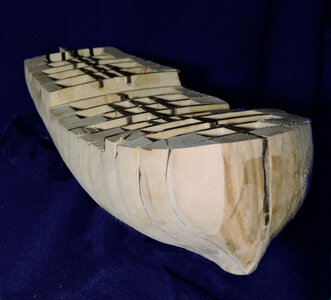
next is filling in the rest of the hull with filler pieces. This step of the build looks ugly and makes you wonder if any good will come of it.

hull26.jpg

i wasn't all that careful cutting out filler pieces and some are obviously very rought cut.

hull27.jpghull28.jpg

Again make sure the filler pieces are above the deck, and again i was a little on the rough side here and there was no need for all the extra wood.
A buider can be a little more careful and cut the filler pieces much closer to their final shape.

hull29.jpg

Looing down on the hull you can see the center is hollow there is no structural reason for this it was just a personal thing. But you can add the filler pieces do they fill in the deck area giving you a solid sub deck to plank over.

hull30.jpg
 
Building the Sultana model depends on you the builder, are you a first time builder with limited tool? or are you more of an advanced builder with a shop full of power tools? Take the filler blocks as an example if you have to shape the hull with nothing more than a block and sanding paper you would want to be more careful when cutting and fitting the filler pieces in the hull thus saving a lot of sanding time. A basic useful tool is a Dremel tool with this tool and home made sanding disks from bottle tops you can save a lot of time and work sanding the hull.
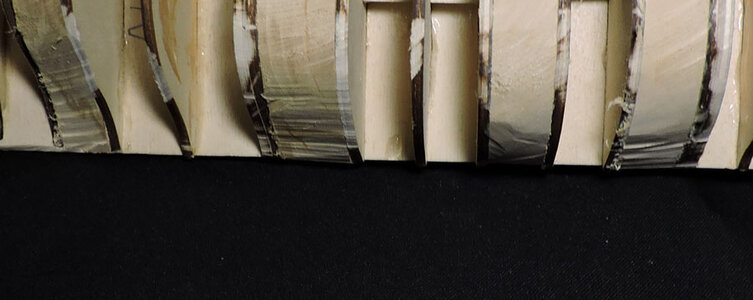
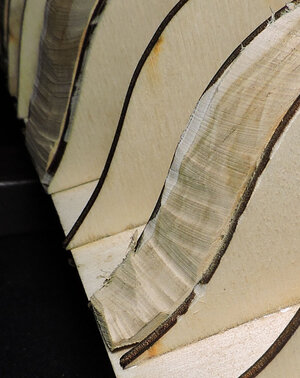
As for me and in this build log i was a little sloppy putting in the filler pieces because i knew i would go at the hull with an angle grinder, not a toy hobby size but a full size big boy tool. The angle grinder made short work of grinding down the hull. It took less than 15 minutes because the grinder took big deep bites as you can see in the closeup pictures. I woud not use such a power tool if i used foam board or Balsa wood as a filler because the gringer would be hard to control and chew gouges in the hull. Basswood was no match for the grinder and i had to be careful not to grind to far.
What i did was use the grinder to remove the large part of the extra wood then use a disk on a Dremel and finally had sand the hull to the finished shape. It is always a good idea to hand sand the final shape with just a folded up pad of sandpaper because you can feel low or high spots.

hull34.jpghull35.jpg
 
This is exactly how I like to build. I also like the idea of the carlings between the bulkheads, automatically squaring things up. This looks very promising, Dave.
 
starting the final hull shape was to grind/sand down the filler pieces flush with the deck and follow along the outer top edge of the plywood bulkheads.

hull33.jpg

for the shape of the bow i used the bow section of the waterway as a template

hull31.jpg

traced it on both sides and ground the blocks to the line

hull32.jpg
 
Last edited:
This is exactly how I like to build. I also like the idea of the carlings between the bulkheads, automatically squaring things up. This looks very promising, Dave.

thank you Heinrich i could have used the carlings on the first 4 bulkheads at the bow i just did not, so i might go back and add them to the design.
 
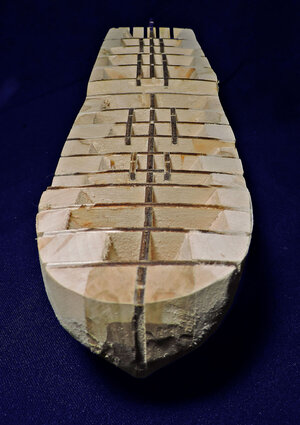
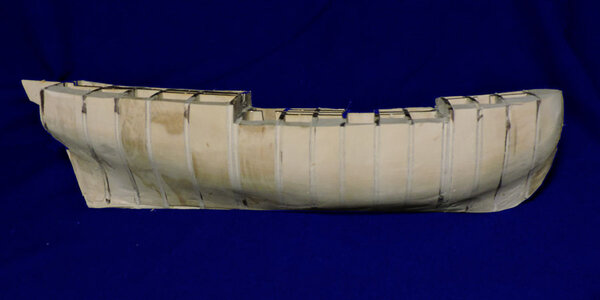
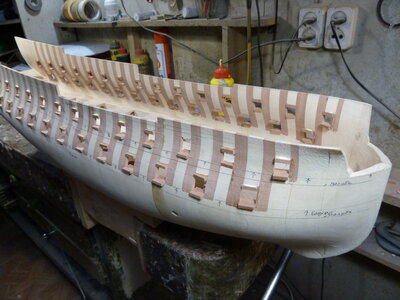
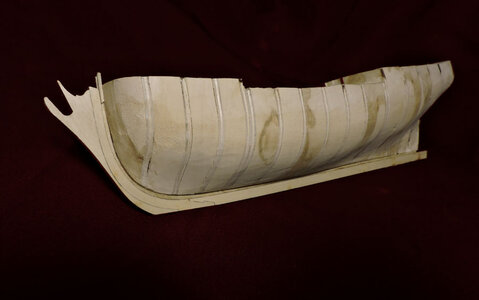
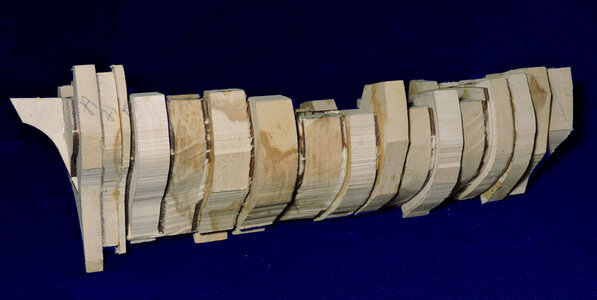
finally after a bit of grinding and sanding that ugly bulky hull took shape. the trick here is using the char on the edges of the bulkheads to guild you as you shape the hull. When they turn white you know you are closing in on the finish shape.

hull36.jpg

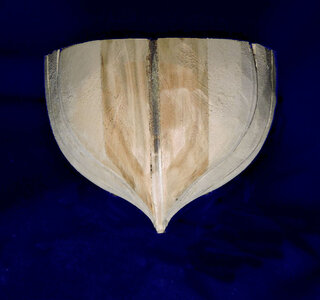
the bow will shape itself well not actually shape itself you have to first get the curve at the deck level like i did with the waterway, and the shape of the first bulkhead, between these two reference shapes the bow will begin to take on its final shape. Just take your time making sure both side of the hull matchup. This is where the mechanics of a build give way to the artistic you have to feel the shape of the bow as you procees.

hull37.jpg

you will know when you got it right because it feels right. This is another reason for using filler pieces because between the spaced out bulkheads there is a lot going on that you do not see. There are suttle curves both conves and concave and they all blend into one another. A good planking job will depend on a proper shaped hull.

hull39.jpg

a final note before moving on to the keel. Notice i did not do anything with the stern at this stage. The reason is the pieces making up the stern and upper stern timbers are a bit delicate and the way the hull is handled durning the building and shaping stages those will no doubt about it break.

hull38.jpg
 
Let me play, the Devil's Advocate for a moment. I know precisely why those wood filler pieces are between the bulkhead, but giving the wood between each bulkhead almost if not wholly defeated the whole purpose of the POB hull. Why not use a solid hull, instead? It doesn't require all the laser-cutting bulkheads and should save in material as well.
 
finally after a bit of grinding and sanding that ugly bulky hull took shape. the trick here is using the char on the edges of the bulkheads to guild you as you shape the hull. When they turn white you know you are closing in on the finish shape.

View attachment 350976

the bow will shape itself well not actually shape itself you have to first get the curve at the deck level like i did with the waterway, and the shape of the first bulkhead, between these two reference shapes the bow will begin to take on its final shape. Just take your time making sure both side of the hull matchup. This is where the mechanics of a build give way to the artistic you have to feel the shape of the bow as you procees.

View attachment 350977

you will know when you got it right because it feels right. This is another reason for using filler pieces because between the spaced out bulkheads there is a lot going on that you do not see. There are suttle curves both conves and concave and they all blend into one another. A good planking job will depend on a proper shaped hull.

View attachment 350979

a final note before moving on to the keel. Notice i did not do anything with the stern at this stage. The reason is the pieces making up the stern and upper stern timbers are a bit delicate and the way the hull is handled durning the building and shaping stages those will no doubt about it break.

View attachment 350978

Is this going to be single planked or double planked?
 
Last edited:
Let me play, the Devil's Advocate for a moment. I know precisely why those wood filler pieces are between the bulkhead, but giving the wood between each bulkhead almost if not wholly defeated the whole purpose of the POB hull. Why not use a solid hull, instead? It doesn't require all the laser-cutting bulkheads and should save in material as well.
No, I don't agree Jim. The bulkheads still define the hull shape clearly - and more importantly, symmetrically. If you were to paint the edges of the bulkheads black and then sand to where you start scuffing the black paint, you would have an exact and symmetrical hull. Even with the Russian master builders of old, when they build a solid hull, it is layered or staggered to ensure accuracy.

微信图片_20220714115222.jpg
Dave and I employed exactly the strategy.

Also depending on what wood you work with, the "solid hull" provides you with a much greater gluing and pinning surface. On the Willem Barentsz which I planked in oak, this was vital.
 
This is where the mechanics of a build give way to the artistic you have to feel the shape of the bow as you procees.
You are the first person ever to say this. I always say that one of my strengths of a builder is that I can "read" a hull. I know exactly what you mean by "feel"! Thumbsup
 
Dave and I employed exactly the strategy.
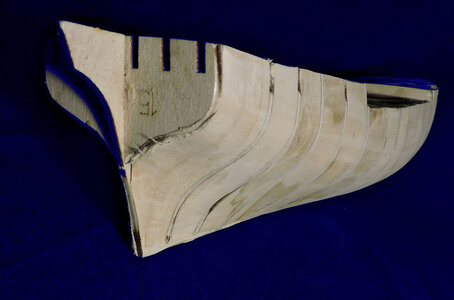
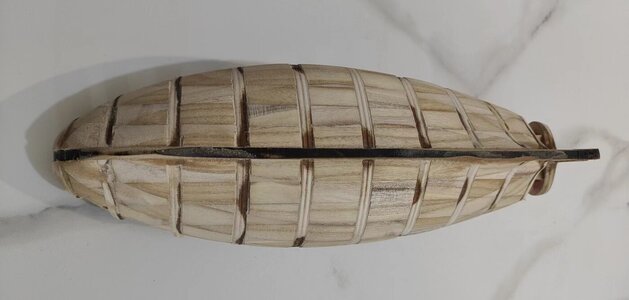
The Devil's advocate is not against Daves's and your strategy. Solid hull can define the same shaper quality as well as symmetry as a bulkhead structured frame hull. The idea behind the bulkhead frames is to simplify the hull structure assembly. Personally, I have no problems with either way of construction (I like both). I would definitely use the wood fillers in the 'bow' and 'stern' sections, maybe some in the middle but filling the entire hull with wood is overkill, IMHO, especially when double-side planking will be employed. I am sure you have seen or heard about solid hulls made by Dr. Mike or Dmitry Shevelev.

Photos courtesy of Dmitry Shevelev
1673667187340.jpeg 1673667227719.jpeg 1673667296313.jpeg

... but you are right, it is just a matter of personal preference and taste! :cool:
 
Let me play, the Devil's Advocate for a moment. I know precisely why those wood filler pieces are between the bulkhead, but giving the wood between each bulkhead almost if not wholly defeated the whole purpose of the POB hull. Why not use a solid hull, instead? It doesn't require all the laser-cutting bulkheads and should save in material as well.

that is a good observation and your correct because the hull did go from plank on bulkhead to plank on a solid surface hull.
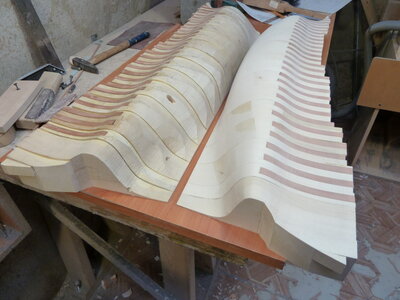
When i started out with the Sultana design i used 1/4 inch thick bulkheads twice the thickness and spaced them closer together. If i stayed with that design concept i do not think filling pieces would be necessary. It is common for commerical made kits to give the builder the general hull shape and it is up to the builder to figure out how to refine the hull to it final shape. This is why you see kit hulls with wide spacing between bulkheads. Double planking a hull is doing the same thing as filler pieces in the end both systems end up with a solid surface for the final planking.
looking at the pros and cons of using a solid hull to start with vs POB hull with filler pieces.

from a production point of view a solid hull requires CNC milling starting with a block of wood and cutting it to shape, the cost of the CNC milling and clear blocks of wood cost more that a sheet of 1/8 inch plywood and minutes of laser cutting as apposed to the time it would take to CNC carve a hull.

i have not done a cost breakdown to provide twice the amount of bulkheads or twice the amount of planking material. Seems wide spaced bulkheads and double the planking material was the cost effective way to go and it does work.

The Sultana in this build will be using a single layer of planking thus the need for a solid surface.

With a POB hull you can not see or feel the final shape every square inch of a hull is changing shape and every shape change blends into the area around it. Not knowing the shape the planking has to take adds to the problems of getting a correct planked hull.
one way or another you need a solid surface, be it double planked, close space framing, a carved solid hull or filler pieces. The hull planking does not give the shape of the hull the shape of the hull shapes the planking.
 
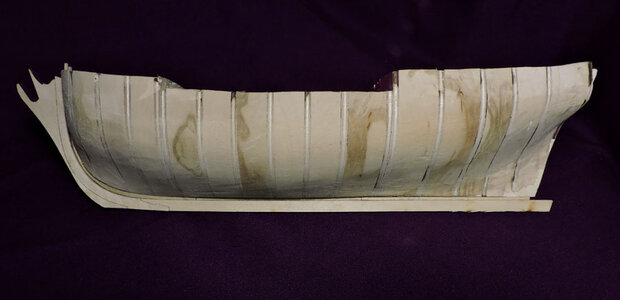
When the hull has been shaped it is time to add the stem and keel.
Before working on the keel a few words about the wood being used. Plank on frame model builders and scratch builders will select woods like Maple, Beech, Cherry, Pearwood, Boxwood and in general hardwoods. Softwood like Basswood, Cedar, Pine and softwoods are usually avoided. For one reason softwoods break easy and difficult to use clamps. As an example the picture shows what happens when you clamp a softwood like Basswood, it leaves a dent in the wood that does not come out. On the positive side softwoods are easy to cut by hand, sand and bend. Hardwood will take a nice finish softwoods do not. Softwood do not machine well and do not leave a sharp edge hardwood do. Harwoods are difficult to work with hand tools softwoods work well with hand tools.

hull45.jpg

there are work arounds when using softwood like rather than clamp the wood taping it works just as well.

hull41.jpg

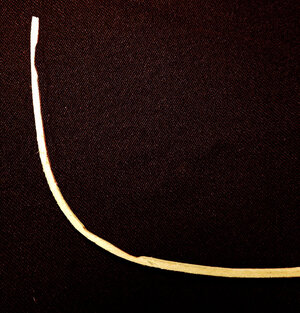
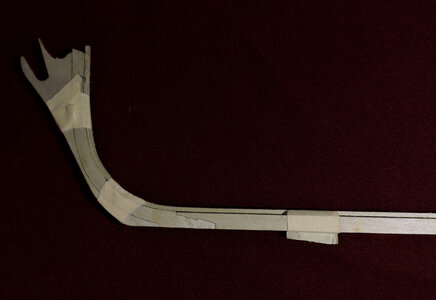
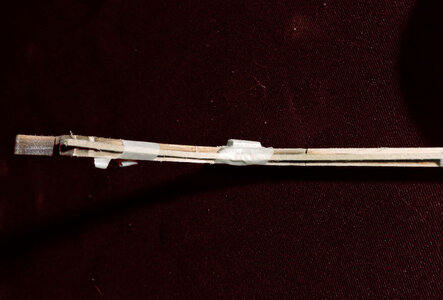
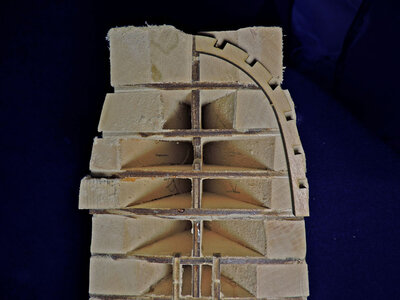
What is going on here is building up the stem and keel leaving off the stern post that will be added later in the build. A channel is cut into the stem and keel of a ship for the gardboard plank to fit into and the ends of the planks at the stem. Rather than trying to cut the rabbit into the keel a 1/16 square strip of wood is used and it runs down the center of the stem and keel creating a channel or rabbit for the planking.

hull40.jpg

the little sticks at the top of the stem are temporarily glued to the profile piece to center the stem. They will be removed later.
hull44.jpg

hull42.jpg
 
Last edited:
Back
Top