


- Joined
- Sep 23, 2021
- Messages
- 375
- Points
- 238

Thanks Peter.Just impressive, Dom. Nice work.
Regards, Peter
I really enjoyed seeing the photo's of the Balder underway!
Dom

 |
The beloved Ships in Scale Magazine is back and charting a new course for 2026! Discover new skills, new techniques, and new inspirations in every issue. NOTE THAT OUR NEXT ISSUE WILL BE July/August 2026 |
|
 |
As a way to introduce our brass coins to the community, we will raffle off a free coin during the month of August. Follow link ABOVE for instructions for entering. |
|
Thanks Peter.Just impressive, Dom. Nice work.
Regards, Peter

You also thanks, Dom. Who knows... maybe they'll do that with the Cutty Sark sometime too....Thanks Peter.
I really enjoyed seeing the photo's of the Balder underway!
Dom


I am in the process of building the same kit - with a few modifications. What I have found to be handy was to get the Campbell drawings scanned and rescaled to match the billings drawings (1.62% from memory). I have put up progress posts on this siteI will not be starting my next build for a while but I thought I would give it a “heads up” now that I have the kit in the shipyard.
Part 1 - Start of a Long Voyage
Choice of Kit - an Odd (or Familiar) Story?
The windjammers/clippers from the mid to late 19th century have always fascinated me for their sleek hull lines and sheer amount of sail. The Cutty Sark is a classic model to build of this type and there are a number of kits to choose from. I looked at some reviews and builds of Cutty Sark kits on the SOS forums and other web sites. Robertd’s recent build of the Sergal/Mantua kit < R'Ds CS > came out very nicely. I was intending to buy that kit later this year but I spotted an estate clearance auction listing for an “old” model boat kit of the Cutty Sark. It turned out to be Billing Boats BB564 complete with the separate fittings kit that had been purchased as a “project” but never started. I left a silly low commission bid and to my surprise won the auction. When I received it I found that it was still in its original shipping box and wrapping paper and had only been opened for inspection. The kit itself is in near mint condition, just some slight damage to the box where the sealing tape had been. The fittings box ( that you had to purchase separately back then) was unopened.
View attachment 323980
Judging from the postage labels the kit was bought in the mid 80’s and has spent the past 37+ years languishing at the back of a cupboard (it makes me wonder just how many model kits have been bought with good intentions but are now just collecting dust?).
I think that it is time for this Cutty Sark to see the light of day and spread her sails (probably not the Stuns’ls!).
Gathering My Thoughts on a Build Plan
Although it is not my first choice of kit it will be a good challenge (but I may also regret this one). It will also be the biggest model I have attempted. The completed model is 1.1m (43”) long and the desk I use for my hobby work is 1.4m wide so I am going to struggle (I also have no idea where I will put it when it’s done!). I am also sure that the rigging will test my patience (and my eyesight!) to the limit but that stage is a long way off into the future for now. I don’t have a lot of space to display my models so it is my intention to take my time over this build, add extra detail and make more parts from scratch. I think I will also need plenty of advice on building this one!
The kit is definitely “vintage” (no laser cut parts). I know that Billing kits from this time were not of the best quality but I will be using this as a base kit for the model build so I’m quite OK with the out-of-the-box quality issues from the day. All of the frames are jig cut and some of the ply parts are die-cut. Other detailing parts are just printed onto ply sheets and need to be cut out (I will probably just use them as templates and make new parts from solid wood). The decorative mouldings and service boats are plastic as are the rigging blocks and deadeyes. The rear transom decoration is a decal. The instructions are the usual basic ones from BB with four plan drawings of layout, sails, pins and rigging.
View attachment 323977View attachment 323978View attachment 323979View attachment 323981
Because I paid very little for the kit I will upgrade it as I go through the build by replacing all of the plastic parts with wood/brass and making new parts where I think the model will benefit.
I have already purchased a set of photo-etched decor parts and a full set of walnut CNC rigging blocks from HisModel. The rigging blocks came in two sets, one for the standing rigging (224 pieces) and one for the running rigging (535 pieces). The blocks are of the correct type and size for this model (759 blocks to rig is however very intimidating!).
I will replace the plastic service boats with wooden ones of the correct type and scale. If anyone knows where I can find some suitable 1:75 kit replacements (or some scale plans so that I could make them myself) that would be great, please let me know through the forum.
I will also replace the rigging thread with some decent rope when I reach that point (I think I will purchase rather than try to make my own).
The BB kit has no hull plates included and the lower hull is suggested to be painted (I think even the latest version of this kit does not offer plates as an option). I would like to sheath the hull because the real ship was sheathed and I will consider options for that upgrade when I reach that point.
To help with the build and rigging I have bought a set of G.F. Campbell’s plans (General Layout, Rigging and Sail Plan) from the Royal Museums Greenwich. I also found Olha’s book review “Cutty Sark, The Ship and the Model/Longridge. C Nepean'' on her YouTube Channel < CS ref book > and I was able to locate a good used copy of the book in the UK. I do not intend to go the “whole hog” on the model by super-detailing it, my intention is to improve it to a level that I am happy with (whatever that is?).
View attachment 323983View attachment 323982View attachment 323984View attachment 323985
I will take a long holiday soon and I have some home improvement projects to do when I return, so it will be a while before I can get started on the framing (probably late autumn). Now that the pandemic is over (I hope!) I have many other things to do, so I will have less time to spend on the ship hobby. I will mainly work on this model during the winter weather months and I will intersperse the work between projects. I am expecting that I will be working on this one for quite some time to come (?years?!) but I am in no hurry.
I will give an update once I have kicked-off the framing.
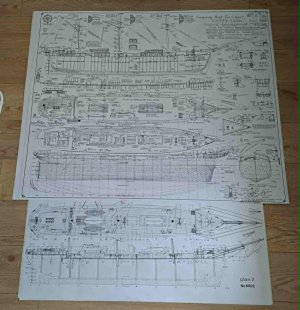

I am in the process of building the same kit - with a few modifications. What I have found to be handy was to get the Campbell drawings scanned and rescaled to match the billings drawings (1.62% from memory). I have put up progress posts on this site
II am in the process of building the same kit - with a few modifications. What I have found to be handy was to get the Campbell drawings scanned and rescaled to match the billings drawings (1.62% from memory). I have put up progress posts on this site
View attachment 608772
After I bought Campbell's plans I found out that the RMG will supply properly scaled prints to order. I'm at the stage that I am just going to soldier on with the standard prints and rely mostly on Longridge's descriptions of the rigging.I am in the process of building the same kit - with a few modifications. What I have found to be handy was to get the Campbell drawings scanned and rescaled to match the billings drawings (1.62% from memory). I have put up progress posts on this site
View attachment 608772
Sadly, she will never see the sea again, they cut big holes in the hull and hoisted her up on steel beams and walled her in. There was a group that proposed to build a true replica Cutty Sark 2 a few years ago, but that came to nothing - too much £££/€€€, a pity.You also thanks, Dom. Who knows... maybe they'll do that with the Cutty Sark sometime too....
Regards, Peter
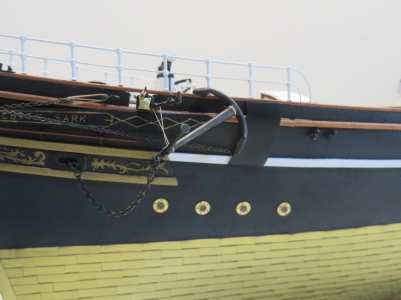
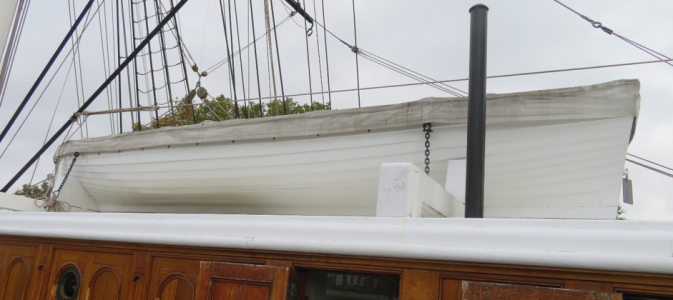
 s and Boats.s: The Cutty Sark carried several types of anchors as required under Lloyd’s Rules: 3x Bowers (30 cwt. each), 1x Stream (12 cwt.) and 4x Kedges (2x 6 cwt. and 2x 3 cwt.). On the museum ship, the anchors are just chained on the outside and they have removed the anchor chains. At sea they would have been hoisted inboard and stored on the forecastle deck to prevent damage. For display purposes, I also placed the anchors under the Catheads (which is what most people do). There were a couple of anchors in the kit which I could have used, but they were the usual generic plastic ones and were not the correct scale size (and pretty rubbish), so I bought some metal replacements from Corel which were of a better quality and size and were nicely finished, so I didn’t even need to paint them.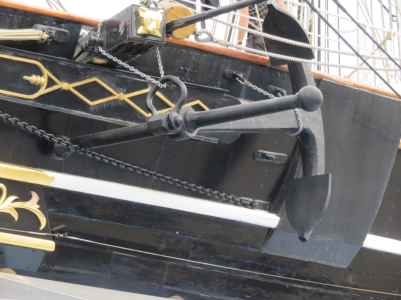
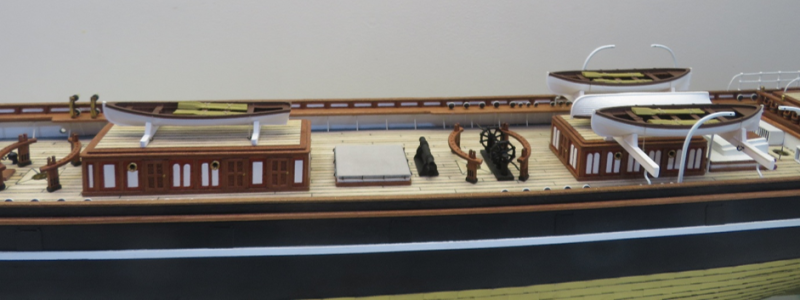

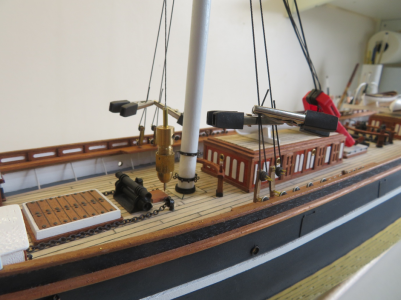
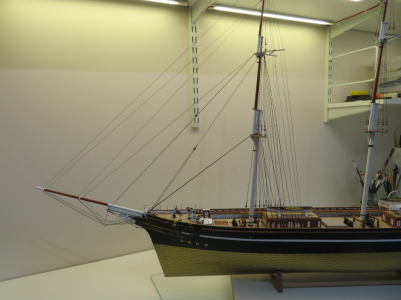
My great respect for this part of the rigging, Dom.
Part 46 Rigging Part 3. Fore Mast Standing Rigging.
It's stupid hot in the UK at the moment!
Rather than post in bits and pieces, I decided to finish all the standing rigging on the Fore and just post as one section (I will do the same for the Main and Mizzen), so this is rather a lengthy part.
Suffice to say, trying to decipher the rigging plans has been driving me bonkers! None of the plans agree, and the drawings that I have are rubbish!
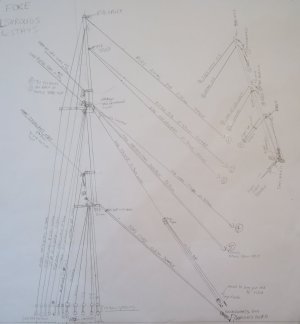
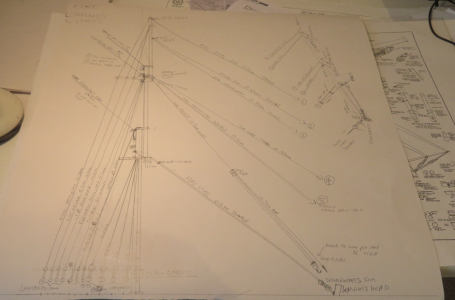
To make sense of things, I have resorted to DOM-CAD to sketch out the standing rigging for each mast - a piece of white wallpaper, a ruler, a pencil and a good old-fashioned rubber start to make things a lot clearer! The running rigging will be much harder as there are many, many errors that I have already spotted where the runs, sizes of ropes and types of blocks are not consistent (I will have to delve deep into my references).
View attachment 614759
DOM-CAD to the rescue!
Order of Rigging the Fore Mast: Because it is extremely easy to pull the mast over with the Upper Fore and Back Stays, I started with the lower shrouds to stop any side-to-side pull, followed by the Back Stays working fore to aft and then bottom to top followed by the Fore Stays, again bottom to top. I gave the ropes just some very light tension as I rigged and did not lock anything. With all the stays in place I gradually fully tensioned everything, starting with the shrouds. To keep the mast from pulling over I tensioned the Cap Stays and then the Fore Top Stay first. I then repeated for each pair of Fore/Back Stays working up to the Royal. Needless-to-say, the plumb bob was rigorously checked at every stage. With everything tensioned I locked everything into place
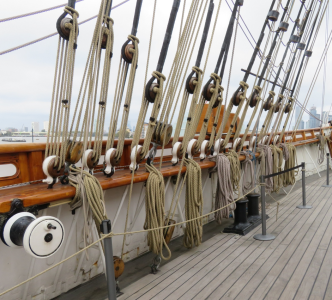
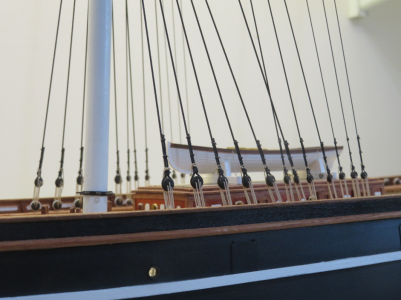
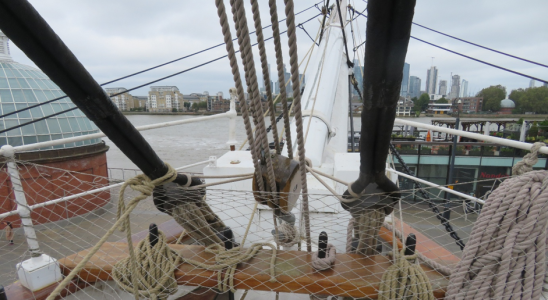
Lower Shrouds: There are five pairs of shrouds on all the masts. The first shroud forward runs down the centre line of the mast, and the remaining shrouds are equally spaced aft. On the Cutty Sark all the lower deadeyes are placed on the inside of the bulwarks along the main rail which makes access very tight (invoking a few salty words!). I made up several sets of jigs to hold the deadeyes level so that I could set the shrouds & stays as two pairs per side at a time to avoid pulling the mast out of true. Campbell’s plans state that the gap between the lower and upper deadeyes on the shrouds and stays should be roughly 2ft (8mm at scale) and all the other deadeyes are laced at 3ft (12mm). Because there are two sizes of deadeyes (2.5 and 3.5 mm), I made up the jigs so that all the spacing of the deadeyes would be the same when pulled taught (but as you can see in the image it’s not an easy task to achieve). You can also see in the picture that the lanyards for the deadeyes are thicker for the heavier shrouds than on the upper. For the shrouds I went with 0.6mm rope and 0.35mm for the lanyards, ideally, they should be ~0.45mm, but I could not get the rope through the holes in the deadeyes and it’s too late to start drilling them out now! (note: in the picture you can see that each of the shrouds have fairleads attached which are for the leech, bunt and clew lines for the corresponding sails, starting at the lower course and working backwards up to the royals, this repeats for each mast and will help later when sorting out the running rigging).
View attachment 614760
Deadeyes for the Lower Fore Shrouds and Back Stays – Note the Triple and Double Blocks for the Lower and Upper Topsail Yard Halyards.
Before stepping the mast, I cut all the shrouds to the approx. length and seized them around the mast top. I decided to use a little bit of glue in the mast socket to prevent it turning rather than to rely on the rigging to hold the masts square. Fortunately, the effort I made placing the mast sockets at the start of the hull work has paid dividends at this stage. After I fitted the mast with a few drops of glue and then hung my plumb-bob to check, I found that it was perfectly plumb to the deck and the rake was spot on (not even a nudge needed) – well pleased - at least something went right!
I set the lower shrouds as two port and starboard pairs at a time starting forward and working aft, and with such tall masts, I was checking with my plumb bob (with utmost paranoia!) after pulling each pair taught before seizing the lines.
View attachment 614761
Setting the first pairs of shrouds before seizing
Rinse and repeat for the rest of the shrouds and then I laced them all to the same tension.
Back Stays: There are seven pairs to fit. The Back Stays are all attached to the mast using eye splices. I used 0.5mm for the Top Mast Back Stays (three pairs of), and 0.3mm for the Top Gallant Stays (two pairs of) and also for the Royal Back Stays (single pair). There is also a pair of Cap Stays which uses the same diameter rope (0.6mm) as the main shrouds. The Cap Stays are very awkward to place because the dead eyes are between the first and second Top Mast Back Stays. The smaller deadeyes used 0.25mm rope for the lanyards.
Fore Stays: There are six Fore Stays to deal with. The Fore Top Stay and the Fore Top Mast Stay are seized around the mast, all the other stays are attached to the mast with an eye splice. The thinnest wire is the Fore Royal, then the Flying Jib and Fore Top Gallant (which are the same size single wires) followed by the slightly heavier single Jib Stay wire. There was very little difference in scale size between the Fore Royal, Flying Jib and Fore Top Gallant so I opted to use 0.35mm rope for those and 0.45mm for the Jib Stay. The Fore Topmast and Fore Stays are double wires (the Fore being the heaviest), and I went with 0.5mm and 0.6mm ropes.
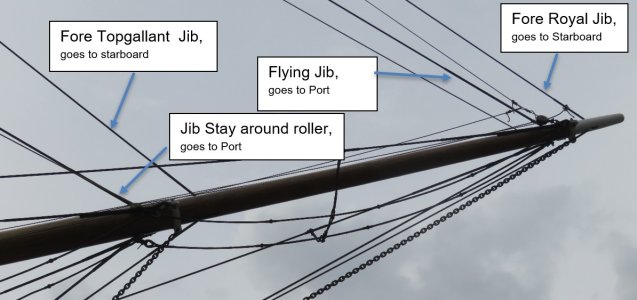
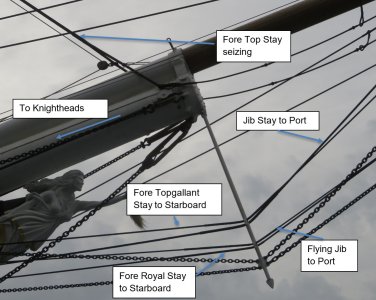
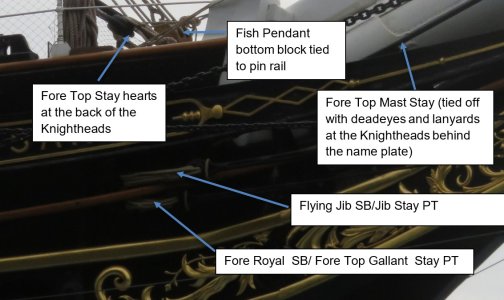
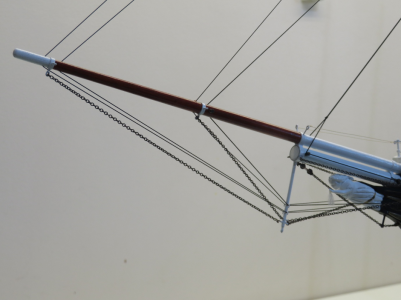
Arrangement of the Fore Stays: The Fore Royal, Flying Jib and Fore Top Gallant stays pass through sheaves in the Jibboom and are held in place by cleats on the Martingale and are then set up with two pairs of deadeyes and lanyards per side which are attached to the hull just under the name board. The Jib Stay passes over a roller on the jibboom rather than through a sheave. The upper stays are tied off so that they alternate starboard-port, starting with the Fore Royal.
The Fore Top Mast Stay is doubled so that it loops around the Top Mast head and is seized just in front of the Top Mast, in the middle and also just above the end of the bowsprit, the wires then split so that each pass-through rollers on the sides of the bowsprit and the ends are secured using deadeyes and lanyards attached to the front of the Knightheads on each side with an eye bolt.
The Fore Top Stay is seized just in front of the Top and then both wires run down to the back of the Knightheads and are seized around stout hearts and secured with lanyards (Note: Longridge says that the Fore Stays are also seized just above the Forecastle deck, but pictures show that is not the case). The bottom hearts are stropped to the Knightheads with iron bands.
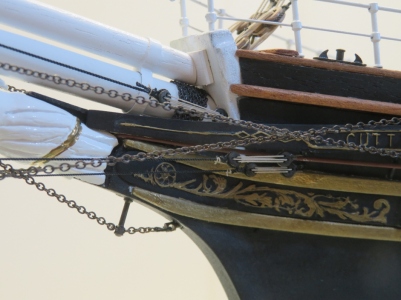
I did make the mistake of not fitting the eyebolts under the name plate to attach the deadeyes to the hull earlier, which was “rather annoying” to say the least! It took a lot of bad language to strop the deadeyes in such a tight space without damaging anything. I used some brass wire bent around the deadeyes and glued them into holes under the name plate. In the end they looked fine, but it was an absolute pain fitting them and then lacing the lanyards.
View attachment 614803
Arrangement of the Stays on the Jibboom
View attachment 614804
Arrangement of the Stays on the Bowsprit and Martingale
View attachment 614805
Arrangement of the Stays at the Bow
View attachment 614802
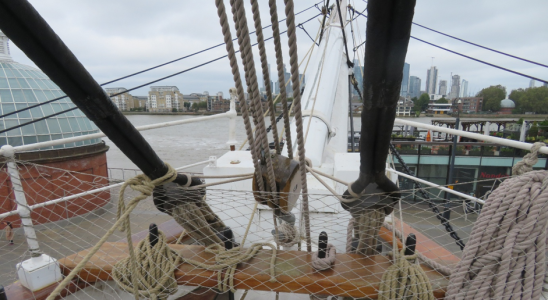
Arrangement of the Fore Top Stays and Fish Pendant
Fish Tackle/Pendant: Technically running rigging, but the pendant was used bring the anchors on board. The pendant is looped around the Top Mast with an eye splice and shackled to a large triple/double block purchase with a hook at the end which was used to lift the anchor. When not in use, the Fishhook is tied to the pin rail at the Knightheads. The pendant uses a strong wire with heavy rope for the purchase to handle the weight of the anchors and chains, so I went with 0.5mm rope for the pendant and 0.45mm for the purchase.
View attachment 614807
All my ducks in a row
View attachment 614808
Bow sprit and jibboom
View attachment 614809
Tying off the Fore Shrouds at the Bow (that was hell!)
View attachment 614810
Fore Mast Standing Rigging complete
Next up: Main Mast standing rigging, and I will reinstate the jibboom guys (but I need the weather to cool off a bit before I do anything else!)
Note: I thought that I had made a reasonable estimate of the amount of rope I would need for all the rigging, but the Fore Mast used up a lot more rope than I thought (they are tall masts!), so I ordered some more from Ropes-of-Scale, and hopefully I will have enough so that I don’t run out when rigging the other masts (which would be annoying!). Any extra will end up being used on my next build anyway.
View attachment 614806
 And with the DOM-CAD is nothing wrong. I suppose you use the same version as my PeVo-CAD. A very nice balance of ropes thicknesses. You are not the only one who underestimates the amount of rope you need. But the investment through R-o-S is paying off now. And: 'a hobby is allowed to cost money'.
It's the first time I have rigged with RoS thread and it is very nice to use. I thought I had made a good "guess" at the rope and added 20% for wastage, but just the back stays used 8 metres, and with so many deadeyes, I forget how much rope is needed to tie each one and that added up to nearly 6 metres just for those!My great respect for this part of the rigging, Dom.
Regards, Peter

You can send some of that hot weather my way DomIt's the first time I have rigged with RoS thread and it is very nice to use. I thought I had made a good "guess" at the rope and added 20% for wastage, but just the back stays used 8 metres, and with so many deadeyes, I forget how much rope is needed to tie each one and that added up to nearly 6 metres just for those!
Fortunately, RoS are very good, ordered some on Sunday, arrived yesterday!
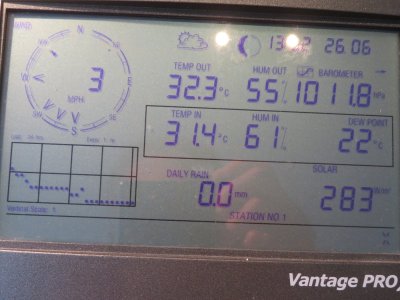
No more rigging for a while, I don't have the luxury of aircon, and this was the temperature in my hobby room this afternoon!
View attachment 614915
 . Fabulous and accurate rigging- very nice indeed. Cheers Grant
Hi Kevin,Excellent rigging Dom, I'm sure you'd be doing many of us a big favour by posting your Dom-CAD sketches here. I still haven't worked up quite enough enthusiasm to try rigging mine but I will for sure be going back through this log when I do.
I was running into that issue already when I parked it and have, more than once, considered restarting from scratch at a slightly larger scale, especially as the only part I’d used from the Revell kit was the hull. You’re doing a great job on yours so don’t lose heart!Hi Kevin,
when I've drawn out the plans for the other masts I'll take some sharper pictures and post them together if you think they will be useful. It's fiddly enough rigging at 1:75, let alone dropping down to 1:96! I think you will have to miss out some of the rigging, I don't know how you could even try to thread some of the eyes in the space available at a smaller scale. I had to walk away several times trying to tie off the jib and fore stays at the bow...... it was that bad!
Dom
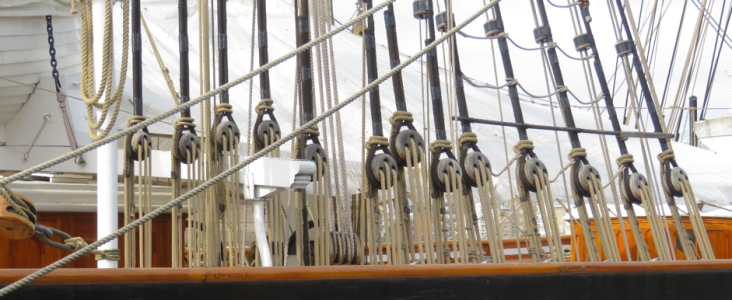
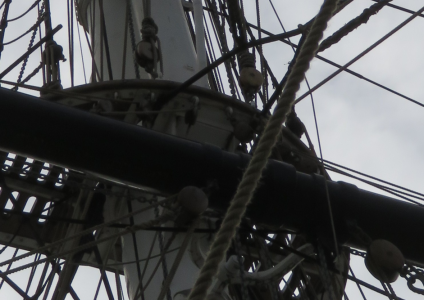
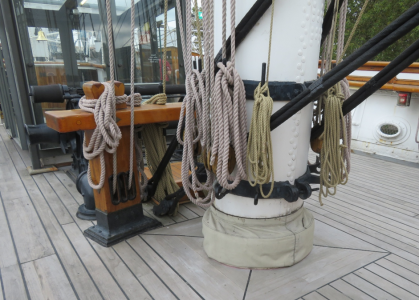
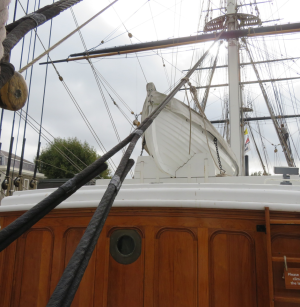
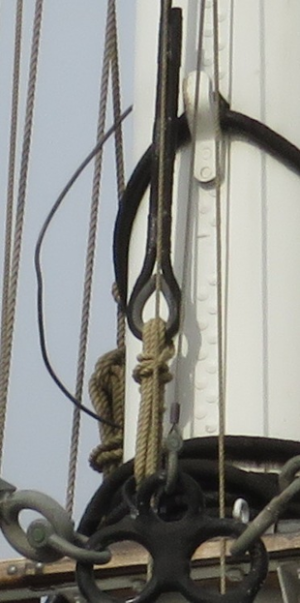
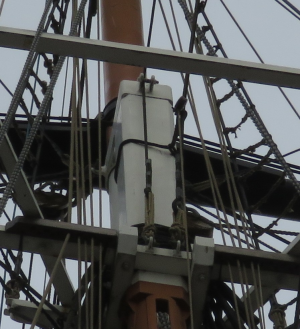
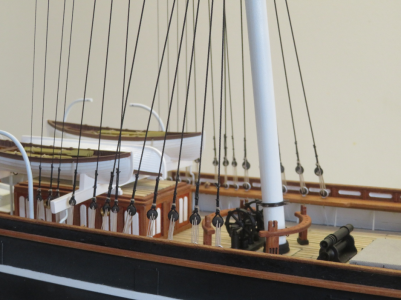
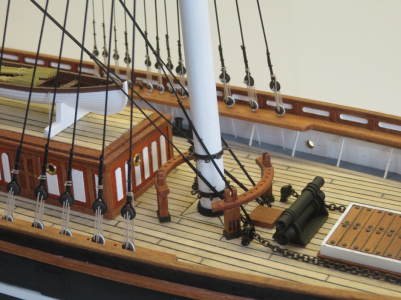
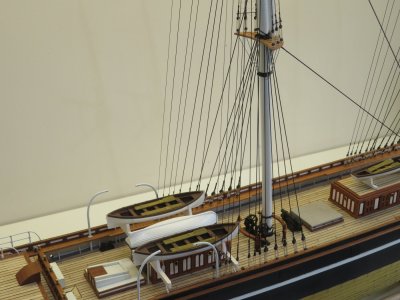
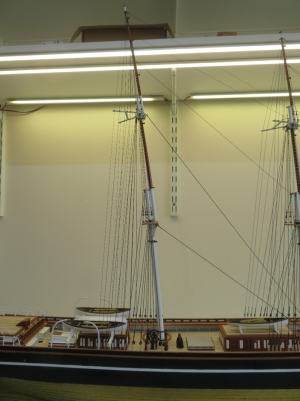
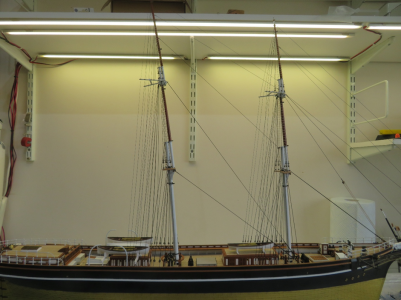
Well done, Dom. It’s looking great!Part 47 Rigging Part 4. Main Mast Standing Rigging.
The heat wave across the UK and Europe has been relentless and was too hot to work in my hobby room over the past couple of weeks. Fortunately, there has been a little bit of respite and temperatures have now started to return to something closer to normal for this time of year, so I have managed to resume work on the standing rigging.
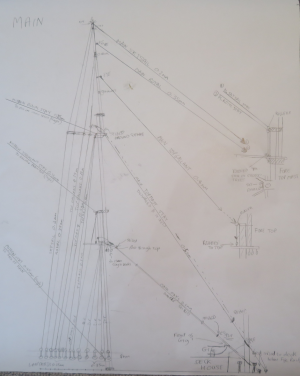
First was to draw up a 1:1 rigging plan using DOM-CAD (I have also taken a better picture of the one I drew up for the Fore Mast and have replaced the one in Part 46 so that it is more useful as a reference for other builders).
View attachment 620987
Main Standing Rigging
Order of Rigging: The standing rigging on the Main Mast follows the same general plan as the Fore Mast and is pretty much a “rinse and repeat”, starting with the lower shrouds, followed by the back stays and then the fore stays. The biggest problem is the very tight access of the deadeyes in between the boat skids and capstans and positioning the halliard blocks for the Main Course and Lower Top Sail.
View attachment 620988
Arrangement of the Main Shrouds, Backstays and Halliards
The Lower Shrouds: the shrouds are set up in an identical fashion to the Fore Mast with 0.6 mm rope for the shrouds and 0.35mm for the lanyards .
Main and Cap “Pain-in-the-Back” Stays: There are seven pairs of Back Stays and a pair of Cap-Stays to deal with (suffice to say, they were very difficult to fit!). The Cap and Back Stays follow the same plan as on the Fore Mast with an additional pair of Stays for the Skysail. The rope sizing is identical except for the Skysail Backstay which uses a very thin wire, and for that I used 0.2mm rope (note: the labelling of the back stays on Campbell’s plans are dubious). The very tight access to the lower deadeyes made it impossible to use my jigs, so I had to use a different method. Taking the small boats off again may have given me a little bit more access, but it was marginal, and I would have then faced the problem of reinstalling them with the Stays in place - the lesser of two weevils? I tried using some thin copper wire to hold the deadeyes at the correct spacing, but that entailed so much faffing and bad language, that it was not a good solution. The best method was to apply some reverse logic and seize the ropes to the upper deadeyes first, lace them to the lower ones and then adjust the spacing with the lanyards keeping some light tension on the rope. This method was more fiddly and took longer compared to using the jigs, but job done in the end.
Main Stays: There are five Main Stays to fit. The Main Top Stay and Main Topmast Stays are double wires and are the same diameter as on the Fore Mast (0.6 and 0.5mm). The Main Top Stay is looped around the Main Top, passes through the gratings, and the wires are then seized together.
View attachment 620989
Arrangement of the Main Top Stay – note that the wires pass through the Top Gratings
The Main Topmast Stay is looped around the Topmast and long eye seized. The Main and Main Topmast Stays are set up on lugs on the deck just in front of the Fore Fife Rail (so you need to carefully check the position so that the stays clear the underside of the Fife). For both stays, the wires separate and pass either side of the Fore Mast.
Note:- some plans and models have the Main Stay as a split wire coming from the Top, that is wrong, the wires were seized together. The reason why became obvious as I rigged!
View attachment 620990
Arrangement of the Main Top and Topmast Stays at the Fore Mast.
Well, that’s annoying! Because the Main Stay comes down just above the front of the forward deckhouse, it hits the bow of the Gig (that is why some plans show the wires were not seized together!). All of the plans show that the Gig was positioned along the centre line of the deckhouse, and the bow was level with the front, or just behind (Campbell, Longridge, Billing, others). Longridge’s solution was to move the Gig further back, so I also did the same, and I thought I had it right, but I found that the stay still hit the bow ( I was 2mm out!). I was pondering the issue, and it was only when I looked more closely at my photographs that I spotted why there was a problem - the Gig should be offset so that the stay clears! I was rather peeved when I saw that I had the picture of how it should be done and I had missed it! It was too late to try to move the Gig because everything was firmly fixed into position, and I would almost certainly have caused a lot of damage trying. The only solution was to move the seizing up so that the stay split just above the bow of the Gig. Good enough, but very annoying - so much for following plans! At least anyone building a Cutty Sark model will know what to do if they read this!
View attachment 620991
Arrangement of the Main Stay and the Gig – note the offset of the Gig to Starboard!
For the Main Topgallant stay I used 0.45mm rope, the stay attaches to the Fore Mast at the Fore Top, runs through a roller pulley and is set up on the back of the Trestle Top. For the Main Royal stay I used 0.35mm rope and for the Skysail stay, 0.2mm. The Main Royal and the Skysail stay come down to the back of the Fore Topmast, pass through some rollers and are set up on eyes at the back of the crosstrees.
View attachment 620992
Arrangement of the Main Topgallant Stay at the Fore Top
View attachment 620993
Arrangement of the Main Royal (SB) and Skysail (PT) Stays at the back of the Crosstrees.
Order of tensioning: Because the Main is so tall, it is it is very easy to pull the top over, especially when tensioning the upper fore and back stays. Once I had all the shrouds and stays at the correct length, I went through systematically to bring all the ropes into tension, starting at the lower shrouds and then tensioning each pair of back stays and then the opposing stays moving up to the Skysail.
Order:-
Main Lower Shrouds; Cap Stays; the first pair of Topmast Back Stays; Main Top Stay; the other two pairs of Topmast Back Stays and the two pairs of Topgallant Back Stays; Main Topmast Stay; Royal Back Stay; Main Topgallant Stay; Royal Back Stay; Main Royal Stay; Skysail Back Stay and finally the Main Skysail Stay.
Needless-to-say, the mast was checked at each stage.
View attachment 620994
View attachment 620995
View attachment 620996
View attachment 620997
Next up: Mizzen Mast standing rigging.
Hi Kevin,Excellent work, write-up and drawings, Dom. I had a look at mine and, as luck would have it, the only boat already fixed in place is the gig. Dead centred of course, but easy enough for me to move at this point. I hadn't really appreciated how many stays there are. A question for you - would having the yards already mounted have been a major obstacle? I ask because at present my design has them as integral to the masts i.e. you can't build the masts without fixing the yards in place. May be that I need to revisit that.
I’m using Ropes of Scale for everything now, and have a large bag of fluffy other string destined for odd jobsI don't know what sort of thread you will use for your model but I came across this stuff https://www.uschivdr.com/shopping-categories/shop-rigging-and-various
which would be much easier to use for smaller scale models because you don't need to tension it like ropes.
. I might buy a reel of the elasticated stuff out of curiosity, as the tensioning has me slightly worried. My resin printed crosstrees are quite delicate and I’m not sure how well they’ll hold up. (It both amazes and reassures me that I can remember so much detail after parking the ship two years ago now!)