• LUCZORAMA SHIPWRECK SCAVENGER HUNT GIVEAWAY. 4 Weeks of Fun • 1 Legendary Prize ((OcCre’s Fram Ship)) • Global Crew Welcome!
    **VIEW THREAD HERE**

D805 Piet Hein, ex HMS Serapis, WW2 S class destroyer

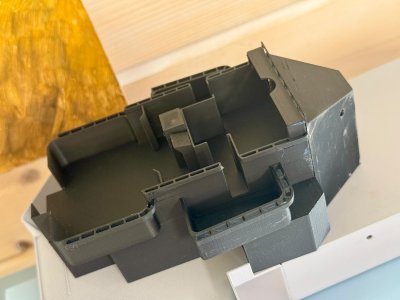
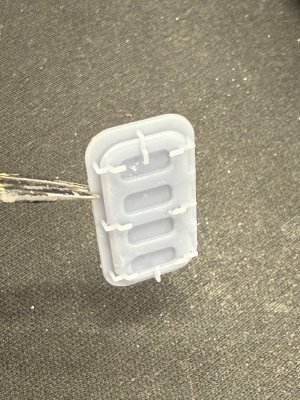
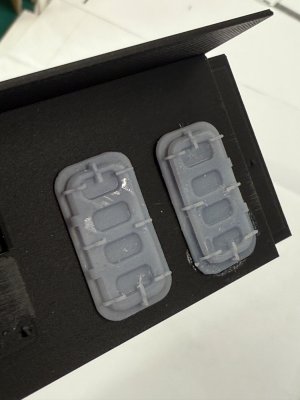
Went back to the drawing board and did all kinds of small detailing to get it 'just right'. Doors were actually worn: I did the handles on the doors and of course they should be on the 'sill'. And I found a good drawing on line and shaped the handles to look more like the real thing. And they came out tip top. I also worked on the separate deckhouses and the bridge. Thinned walls to 0.7mm (were 1.2mm) to get closer to scaled thickness. Under 0.7 things become too wonky. Little details like a door handle ca be done at 0.4 or even less, but walls etc. really need some body to survive the printing. But 0.7 translates to 49mm in real life, so that's not too far off for a steel plate.

Next job is the complete bridge, so where the damage was. I'll be back with some images, but already found all in between test prints having some fault or other. I will probably have to break her up in smaller parts.

Doors in resin, deckhouse in filament. Superglue to the rescue. And the little glimmer on the door is a left over from the printer bath. Will disappear.
IMG_6484.jpeg

IMG_6485.jpeg
 
Considering the scale you are working at those doors turned out great Marco. Look forward to seeing the rest.

JJ..
 
Thanks, JJ.

In the meantime my endeavours regarding the bridge worked out fine. I split it in four (rather awkward) parts to ensure printing would not warp any of the faces. A little superglue and a little filler and the thing is better than I've ever managed in resin. Walls of 0.7mm printed just fine. No details lost. Sharp edges. I'm calling this a successful day.

Next days will be about flash guards on the two deckhouses, glueing doors in their places, etc. And some handrails along the longer walls. That'll be fun ...

Oh well.

IMG_6492.jpeg
 
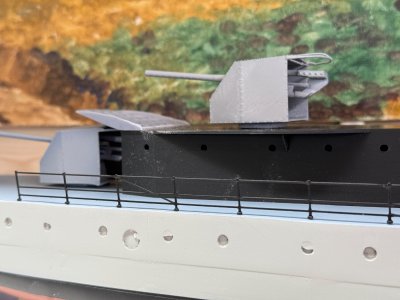
And suddenly things are picking up: deckhouses all printed, doors glued in place, etc. And after some trial and error created some rather fancy railings. It will be a chore to paint them, as the stanchions must be light grey to whit-ish, while the horizontals must be dark almost rusty. It's not like doing this with brass stanchions and wire, but I'd need about a 150 euros worth of them.

Deckhouses will get hand railings along the sides. I think brass rod. Next job will be filling and sanding of deckhouses et al, primer coating and final coating. And in between there will be hours designing the Hazemeijer twin, torpedo tubes, etc.

But she starts to look better and better. Now I'll get everything down again, before something else drops and breaks.

IMG_6499.jpeg

IMG_6496.jpeg

IMG_6493.jpeg
 
And suddenly things are picking up: deckhouses all printed, doors glued in place, etc. And after some trial and error created some rather fancy railings. It will be a chore to paint them, as the stanchions must be light grey to whit-ish, while the horizontals must be dark almost rusty. It's not like doing this with brass stanchions and wire, but I'd need about a 150 euros worth of them.

Deckhouses will get hand railings along the sides. I think brass rod. Next job will be filling and sanding of deckhouses et al, primer coating and final coating. And in between there will be hours designing the Hazemeijer twin, torpedo tubes, etc.

But she starts to look better and better. Now I'll get everything down again, before something else drops and breaks.

View attachment 528648

View attachment 528649

View attachment 528650
That's looking very nice, Marco. With nice details ....... such as rivets. :)
Regards, Peter
 
Looks very good Marco and well worth the effort of replacing the bits you did not like. Wish I had such self-control. As for the cost of stanchions and rails....well don't get me started! Look forward to see your lovely brush work, he he;). How thin did you get the rails btw?

Cheers JJ..
 
@JJ: I managed stanchions at 0.6 and horizontals at 0.4mm. That’s nozzle width, so without swapping to a smaller 0.2mm nozzle it is the limiting factor.
 
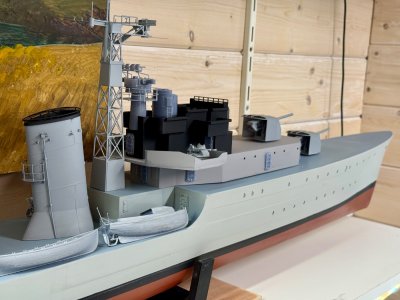
Warm weather and a workshop that is heating up doesn’t really help making progress. But I managed to do some detailing and have put the final paint coat on most of the major parts of the ship.

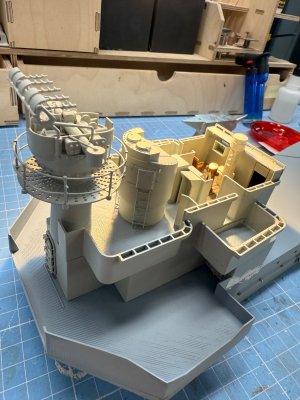
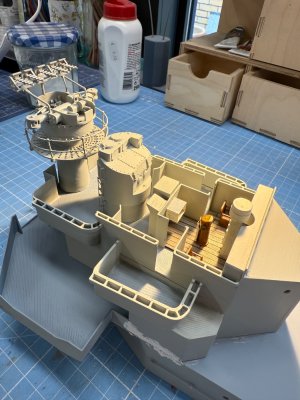
This is the new bridge, after I wrecked the original one. Search lights and all other small bits to follow.

IMG_6524.jpeg

IMG_6523.jpeg
 
Warm weather and a workshop that is heating up doesn’t really help making progress. But I managed to do some detailing and have put the final paint coat on most of the major parts of the ship.

This is the new bridge, after I wrecked the original one. Search lights and all other small bits to follow.

View attachment 531822

View attachment 531823
That’s looking very nice, Marco. Especially the wooden floor gives a nice color contrast.
Regards, Peter
 
Back
Top