• LUCZORAMA SHIPWRECK SCAVENGER HUNT GIVEAWAY. 4 Weeks of Fun • 1 Legendary Prize ((OcCre’s Fram Ship)) • Global Crew Welcome!
    **VIEW THREAD HERE**

D805 Piet Hein, ex HMS Serapis, WW2 S class destroyer

Hi Marco I have tried the PE, and them being flat, and even if you build up lots of coats of paint the still don't look realistic in 1/48, not sure about 1/76 you would have to try them. Your picture above reminds me of something that got loose from Quatermass's pit; love it! Seriously though if you don't try you will never know and that's what I like about this project.

All the best JJ..
JJ

At 72 scale the stanchions are 15mm by 0.4mm. Of course the “bulbs” through which the railing goes, are a tad bigger. But the hole through is again smaller. In print I tried 0.5, but - fiddlyness apart - I don’t see how I could string wire through them.

The PE is going to be another trial. We’ll see.

At 48 scale I used brass stanchions like you do. Those are beautiful and easy to string along the hull line.

Last: I could start D805 over, but now in 1/48 …
 
In the meantime I’ve printed the whalers … I’m finding 1/72 scale is awkward. Just between invisible (1/96) and worth the effort (1/48).

I’ll see what a coating does.

For now I’m not putting any paint on parts or ship, except the decks. First have most parts printed.

IMG_6357.jpeg
 
The whaler looks good Marco, although I know what you mean about scale, but 1/72 is still a lot better than 1/96. A question, I know RN destroyers also carried at least one motor launch as well as whalers, did Piet Hein also continue to carry one or more? and are you planning to print them also? I would look forward to seeing one. You are making great progress.

JJ..
 
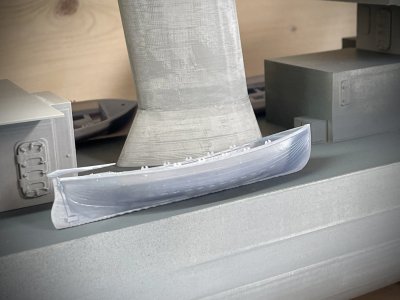
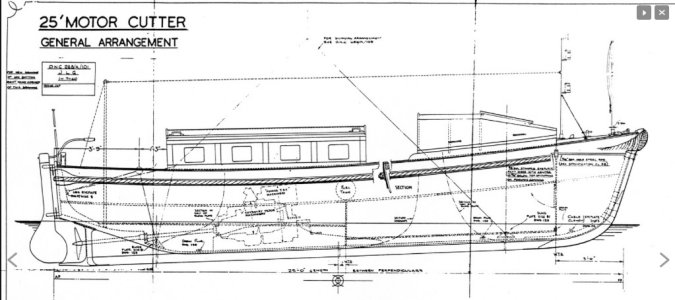
JJ, I am designing a motor cutter as we speak. The whalers are a revamp of some I already had for the earlier 1/96 version. More detail and better understanding of how to print them.

But the 25ft motor cutter needs to be set up from scratch. And I’m getting more irritated with the clunky way Fusion handles such shapes. So opened another learning project … Plasticity.

Plan is to keep creating details in Fusion and wrestle with Plasticity to create the 25ft boat. And I really want to learn, as I have plans for another ship and really don’t want to end up doing that as I have done the last one.

Screenshot 2025-05-19 at 15.05.56.jpeg
 
And even more detail. The problem with that is, that the main structure starts to look shoddy. So I have a new compass bridge running in the printer.

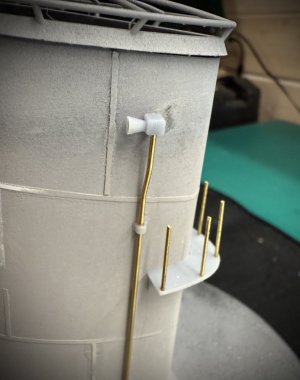
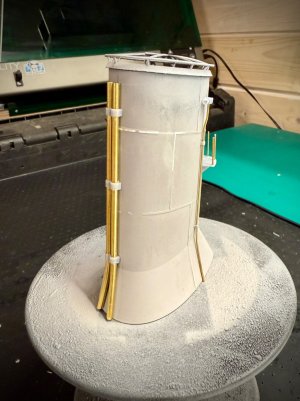
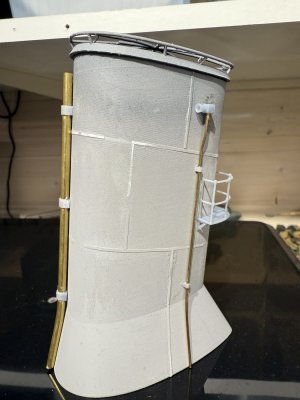
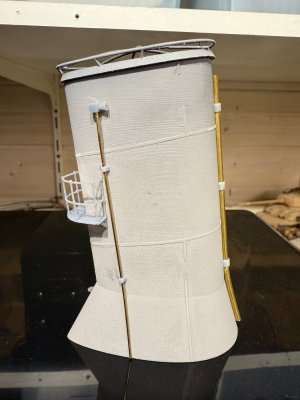
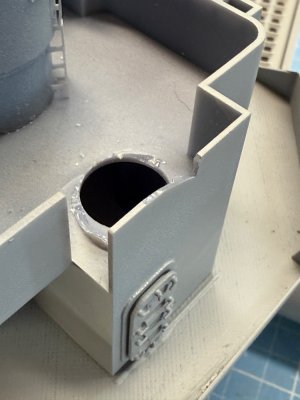
The stack required some old fashioned styrene and brass. Fun work to do. Little brackets that hold up a 0.5 mm “steam tube” for the horn, but needed drilling as the holes were 0.45 or so.

Patience is a virtue, they say. I think it’s testing the edges of that.

IMG_6381.jpeg

IMG_6382.jpeg
 
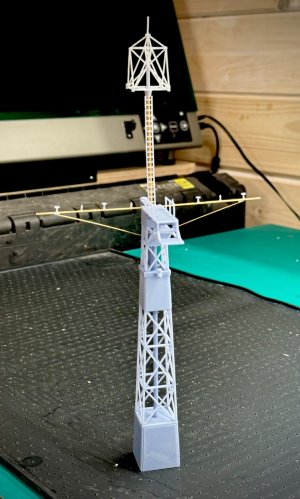
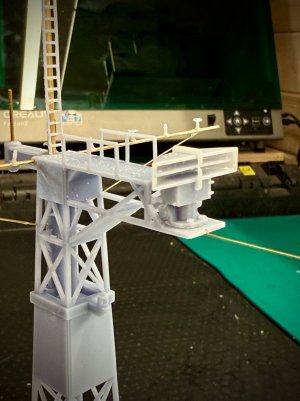
And I worked on the mast. Luckily I have lots of images, amongst others from the museum in Den Helder.


The director control tower with 285 radar is based on a vague drawing and some beautiful commercial 3D examples. But I wanted to create my own. Some detail, like rivets, are overdone to make them visible. And the plate at the bottom has way to big relief.

And I need to clean up some fiddly small parts.

Oh well.

IMG_6384.jpegIMG_6385.jpeg

IMG_6389.jpeg
 
And even more detail. The problem with that is, that the main structure starts to look shoddy. So I have a new compass bridge running in the printer.

The stack required some old fashioned styrene and brass. Fun work to do. Little brackets that hold up a 0.5 mm “steam tube” for the horn, but needed drilling as the holes were 0.45 or so.

Patience is a virtue, they say. I think it’s testing the edges of that.

View attachment 522282

View attachment 522283
And I worked on the mast. Luckily I have lots of images, amongst others from the museum in Den Helder.


The director control tower with 285 radar is based on a vague drawing and some beautiful commercial 3D examples. But I wanted to create my own. Some detail, like rivets, are overdone to make them visible. And the plate at the bottom has way to big relief.

And I need to clean up some fiddly small parts.

Oh well.

View attachment 522285View attachment 522286

View attachment 522284
Nice to see that the details cone from your printer and some scratch, Marco. Although drawing in 3D is ofter also a kind of scratch.
Regards, Peter
 
What I really like about this more or less scratch building, is that you have to understand function and form. I had no clue what actually was on the inside of a smoke stack. Logically, there are rather big pipes going to the in this case two boilers. Each about 3 to 4 foot diameter. You'll have to nose into that stack to see them, but it's fun creating even more detail.

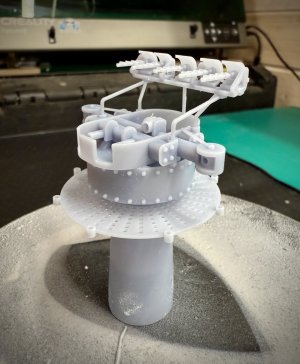
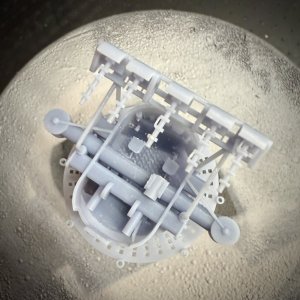
I also decided to try my hand at printing the complete platform, including the railing. That turned out really well. 0.7mm ... but opens a door to printing railings. Hmmm, have to tink a little how to do that, as even with five stanchions it took me a good ten minutes to remove the print supports.

IMG_6393.jpeg

IMG_6395.jpeg
 
I had my eye check today, so they poured some goo in to widen the pupils. Six hours later and I’m getting back to be able to read. All’s good, so that’s good. But not being able to focus reminds you how much one needs eyesight. Especially in a hobby like this.

About D805:
Work is slowing down as I’m into detailing. And with the detail I see parts of the main structure that require some finessing as well. Which probably means I will be chasing my tail … oh well.

Biggest issue is that with usage of resin and filament measurements are off by a little. So I had to do some old fashioned filling and sanding. And after a light coat of primer I see that I need to go in again. Oh well.

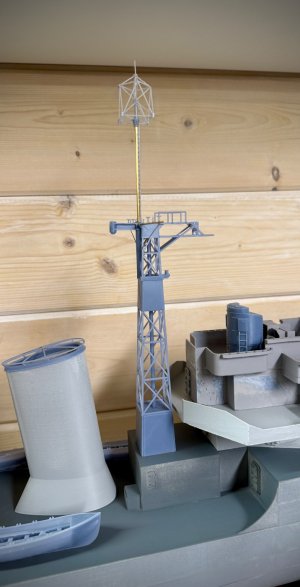
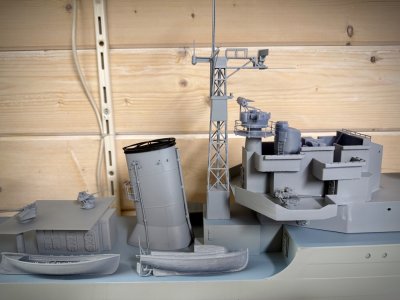
Here’s a nice shot of the detailing I’m busy with. Stack, lattice mast, bridge et al. And I found a motor cutter that resembles the ones they had in 1945-6. Later on they became more fancy.

Most is still not glued in place, but the bridge and directors are fixed. And apart from the black on the stack, everything is in primer.

Not true: I started painting the hull in correct colours. Which was fun finding out, as of course Dutch ships were sent to the East Indies and so had different, lighter schemes.

IMG_6452.jpeg
 
I had my eye check today, so they poured some goo in to widen the pupils. Six hours later and I’m getting back to be able to read. All’s good, so that’s good. But not being able to focus reminds you how much one needs eyesight. Especially in a hobby like this.

About D805:
Work is slowing down as I’m into detailing. And with the detail I see parts of the main structure that require some finessing as well. Which probably means I will be chasing my tail … oh well.

Biggest issue is that with usage of resin and filament measurements are off by a little. So I had to do some old fashioned filling and sanding. And after a light coat of primer I see that I need to go in again. Oh well.

Here’s a nice shot of the detailing I’m busy with. Stack, lattice mast, bridge et al. And I found a motor cutter that resembles the ones they had in 1945-6. Later on they became more fancy.

Most is still not glued in place, but the bridge and directors are fixed. And apart from the black on the stack, everything is in primer.

Not true: I started painting the hull in correct colours. Which was fun finding out, as of course Dutch ships were sent to the East Indies and so had different, lighter schemes.

View attachment 525357
That looks very good, Marco. A layer of paint changes everything. And when it comes to detailing …….. time flies!
Regards, Peter
 
Back
Top