-

Win a Free Custom Engraved Brass Coin!!!
As a way to introduce our brass coins to the community, we will raffle off a free coin during the month of August. Follow link ABOVE for instructions for entering.
-

PRE-ORDER SHIPS IN SCALE TODAY!
The beloved Ships in Scale Magazine is back and charting a new course for 2026!
Discover new skills, new techniques, and new inspirations in every issue.
NOTE THAT OUR FIRST ISSUE WILL BE JAN/FEB 2026
You are using an out of date browser. It may not display this or other websites correctly.
You should upgrade or use an alternative browser.
You should upgrade or use an alternative browser.
Duyfken 1/50 scale - Kolderstock
- Thread starter Pathfinder65
- Start date
- Watchers 23
-
- Tags
- duyfken kolderstok
- Joined
- Jan 9, 2020
- Messages
- 10,566
- Points
- 938

AAAHHHH!!!! Now we are talking!  I can already smell that fresh Kolderstok wood. My friend, this is a special occasion and one where you will have to endure me. I will be there for the whole ride and I will share everything I know. First tip - GLUE!
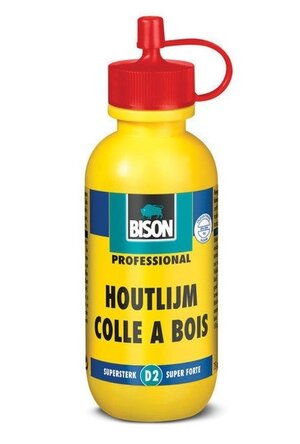
Try your best to get this - just make sure it is D2 . The glue must NOT be waterproof.
 I can already smell that fresh Kolderstok wood. My friend, this is a special occasion and one where you will have to endure me. I will be there for the whole ride and I will share everything I know. First tip - GLUE!
Try your best to get this - just make sure it is D2 . The glue must NOT be waterproof.
AAAHHHH!!!! Now we are talking!I can already smell that fresh Kolderstok wood. My friend, this is a special occasion and one where you will have to endure me. I will be there for the whole ride and I will share everything I know. First tip - GLUE!
View attachment 201291
Try your best to get this - just make sure it is D2 . The glue must NOT be waterproof.
Hi Heinrich,
I’ll try to find the glue, if you recommend it then it must be a good product
Jan
Jan
This will be a fun one to watch, have fun Jan
- Joined
- Jan 9, 2020
- Messages
- 10,566
- Points
- 938

Jan, I don't use that glue, because I can't get it in China. However, by far the majority of Dutch modelers on modelbouwforum.nl use it and swear by it. The reason I recommend the NOT Waterproof one, is simply in the case of an "oops" moment when the glue can be loosened with water.
Hi Heinrich,
First question.
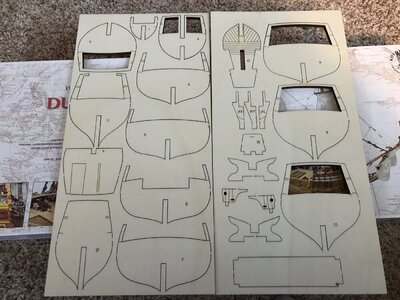
Removing the bulkheads. Is there any special method for cutting through the tabs left behind by the laser? At 6mm thick they are much more robust than ones from my other builds and I don’t want to force anything.
Second question.
Char removal. Remove the char from the false keel and the insert portion of the bulkheads before gluing?Remove the char from the exterior of the bulkheads or wait and do that at fairing?
Jan
- Joined
- Jan 9, 2020
- Messages
- 10,566
- Points
- 938


 Robust is the word - welcome to "Blood and Thunder Building"! Stanley knife/box cutter will do the trick after repeated cuts. Take your time - and cut from both sides. As far as sanding goes - only sand smooth the little nibs where parts were attached to the wooden sheeting. Do not touch the char - it will be of great help during the fairing of the bulkheads to show you the developing hull line.

Robust is the word - welcome to "Blood and Thunder Building"! Stanley knife/box cutter will do the trick after repeated cuts. Take your time - and cut from both sides. As far as sanding goes - only sand smooth the little nibs where parts were attached to the wooden sheeting. Do not touch the char - it will be of great help during the fairing of the bulkheads to show you the developing hull line.

 Excellent, that is good to know. I’ll have to rummage through my scrap pile and find material for a suitable build cradle.
 Just checked Amazon. They have Bison D3 wood glue, but I couldn’t find the D2 version. I’ll do a wider search later.
Jan
I NEED TO FIND A GLUE THAT I CAN REMOVE RESIDUE, I USED WATCO ON MY LEUDO, BUT VERY BLOTCHY BECAUSE OF GLUE I WAS AFRAID TO SAND TO MUCH FOR FEAR OF GOING THROUGH PLANKS I TRIED VERY HARD TO WIPE OFF GLUE AFTER USING SOLDERING IRON REALLY WIPED IT DOWN, WILL THIS HELP. GOD BLESS STAY SAFE ALL DON
- Joined
- Jan 9, 2020
- Messages
- 10,566
- Points
- 938

Hi Don. The reason I mentioned this glue is because it is very "compatible" with the wood used in the Kolderstok kit. I have no idea whether it will result in a "cleaner" build. The glue that I use is cheap Chinese PVA which works brilliantly on everything! If I could have exported that glue, I would have!
The first casualty:
One of the "horns" on bulkhead #5 broke when I cut it out. I didn't notice that the laser cut was not clean through.
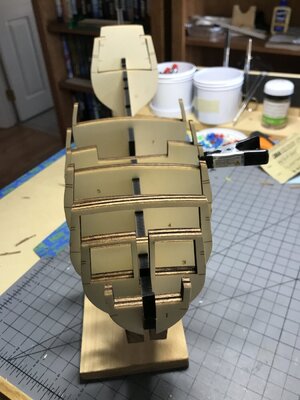
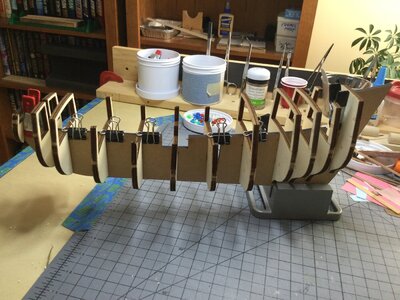
A quick fix with a bit of glue and a temporary clamp. I'm just slipping the bulkheads into the keel. Nothing permanent yet. Just couldn't resist working on the little ship.
Jan
One of the "horns" on bulkhead #5 broke when I cut it out. I didn't notice that the laser cut was not clean through.

A quick fix with a bit of glue and a temporary clamp. I'm just slipping the bulkheads into the keel. Nothing permanent yet. Just couldn't resist working on the little ship.
Jan
Wow, I’m honored to become a member of such a distinguished fraternity.
Jan
Jan
- Joined
- Jan 9, 2020
- Messages
- 10,566
- Points
- 938

Hi Jan
This is what I meant by 90-degree L-shaped aluminum clamps mounted perpendicular and two-two opposite each other with just enough of a gap for the keel to slide into.
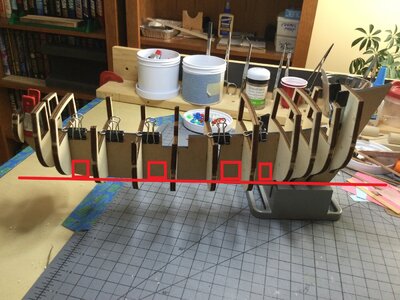
It costs nothing and with 3 or 4 of those in place, the keel won't budge. (Please excuse the very roughly-drawn illustration).
This is what I meant by 90-degree L-shaped aluminum clamps mounted perpendicular and two-two opposite each other with just enough of a gap for the keel to slide into.

It costs nothing and with 3 or 4 of those in place, the keel won't budge. (Please excuse the very roughly-drawn illustration).
Hello Heinrich,
Jan
That method is certainly worth a try.Hi Jan
This is what I meant by 90-degree L-shaped aluminum clamps mounted perpendicular and two-two opposite each other with just enough of a gap for the keel to slide into.
View attachment 201531
It costs nothing and with 3 or 4 of those in place, the keel won't budge. (Please excuse the very roughly-drawn illustration).
Jan
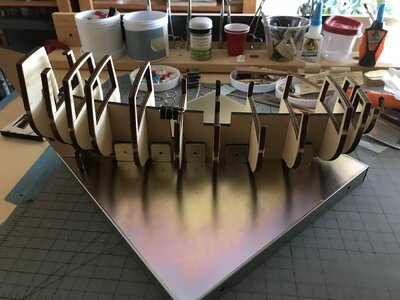
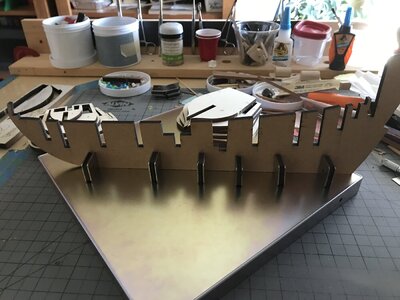
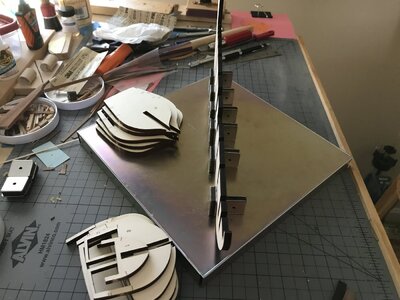
This gives me a good idea for what I need as a jig to hold the keel. Thanks Heinrich, your "post" was a great help. This setup is fairly stable but working with magnets is a "NO, NO" for me. So I'll definitely have to limit my work with this setup. But the the little ship or should I say the "Little Dove" is a magnet also. I'm really looking forward to this build.
Jan
OK MY 2 CENTS WHAT WORKS FOR ME IN THIS SITUATION AND BY NO MEANS AT MY SKILL LEVEL SAYING THIS IS THE WAY BUT FOR ME IT WORKS I TAK A PIECE OF SCRAP WOOD THE LENTGTH OF THE MODEL AND TACK GLUE IT, IT IS VERY EASY TO TAKE APART WHEN FINISHED WIT ABSOLUTLY NO DAMAGE AT ALL THE I HAVE ENOUGH ROOM TO PLACE ALL BULKHEADS TO HOW THEY BELONG YOU CAN THEN PUT IT ON A BUILDING BOARD OR A VICE, I DO NOT LIKE THE VICE, THIS WORKS FOR ME QUITE WELL. GOD BLESS STAY SAFE ALL DON


