-

Win a Free Custom Engraved Brass Coin!!!
As a way to introduce our brass coins to the community, we will raffle off a free coin during the month of August. Follow link ABOVE for instructions for entering.
-

PRE-ORDER SHIPS IN SCALE TODAY!
The beloved Ships in Scale Magazine is back and charting a new course for 2026!
Discover new skills, new techniques, and new inspirations in every issue.
NOTE THAT OUR FIRST ISSUE WILL BE JAN/FEB 2026
You are using an out of date browser. It may not display this or other websites correctly.
You should upgrade or use an alternative browser.
You should upgrade or use an alternative browser.
Duyfken 1/50 scale - Kolderstock
- Thread starter Pathfinder65
- Start date
- Watchers 23
-
- Tags
- duyfken kolderstok
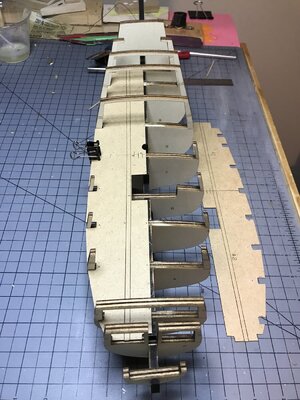
I don’t know if it’s right or wrong, but I’m installing the deck one side at a time. The camera angle is bad but you can see the planking guidelines as well as the guide lines to align the deck.
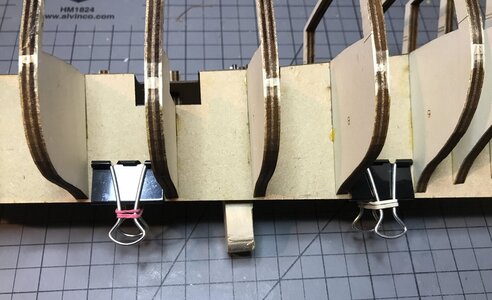
Sometimes necessity provides an answer to another problem. Two rubber bands and two page clips and viola you have a temporary keel jig.
Jan
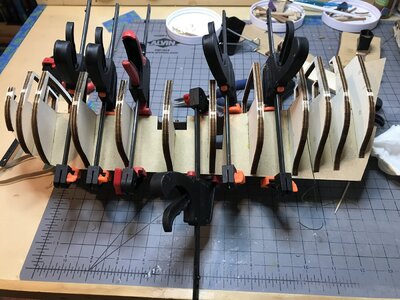
Big clamps, little clamps:
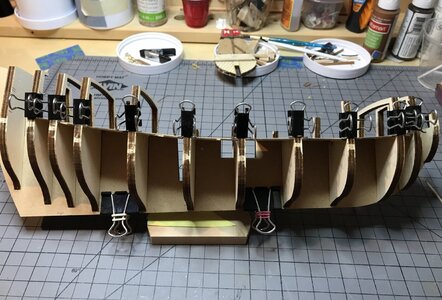
The little clamps came in handy to hold the edges of the deck while glueing them to frames . The next step is to insert the the other deck halves and repeat the glue and clamp routine. Then the the hull will be set aside for a day or so to let the glue set.
I also have to do a “re-do” on frame #1, I hadn’t noticed that it wasn’t square on the keel.
Jan
The little clamps came in handy to hold the edges of the deck while glueing them to frames . The next step is to insert the the other deck halves and repeat the glue and clamp routine. Then the the hull will be set aside for a day or so to let the glue set.
I also have to do a “re-do” on frame #1, I hadn’t noticed that it wasn’t square on the keel.

Jan
- Joined
- Jan 9, 2020
- Messages
- 10,566
- Points
- 938

Hello Jan - Loosen Frame #1 right now if at all possible - before the glue really sets. Just soak the glue lines with water (hoping that you didn't use waterproof PVA ( hence the Bison D2 recommendation - remember  )
)
Hi Heinrich.Hello Jan - Loosen Frame #1 right now if at all possible - before the glue really sets. Just soak the glue lines with water (hoping that you didn't use waterproof PVA ( hence the Bison D2 recommendation - remember)
Frame #1 is glued in with Titebond II. It’s only attached to the keel so I don’t anticipate any problems making that fix.
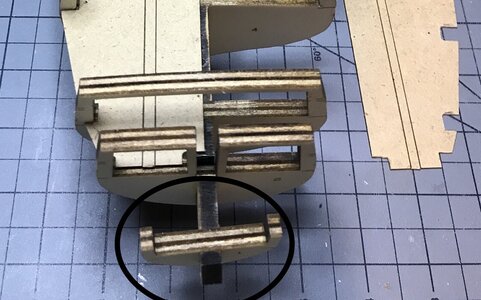
When frame #1 is square to the keel I’ll add the bow filler pieces and fair the frames. But once again were at 28F and in middle of snow squalls So no outside sanding. The rest of the week is forecast sunny with temperatures in the low 40’s.
Jan
Jan
Hi Jan,
It's time to update your signature - the Duyfken is decidedly In progress!
It's time to update your signature - the Duyfken is decidedly In progress!
Hi Jan,
It's time to update your signature - the Duyfken is decidedly In progress!
 Thanks Paul, I'll fix that shortly.
Jan
Is it just me or does this look warped? Optical illusion?Necessity the mother of inventions???
A temporary solution for dry fitting until I can get to the hardware store to get some "stuff" for a permanent setup.
Jan
View attachment 201537View attachment 201538
I think there is a bit more distortion with the photo angle. I’ve been using my iPad to take the pictures and the front to back type pictures aren‘t the best.Is it just me or does this look warped? Optical illusion?
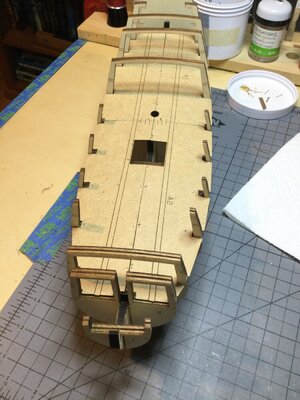
The parallel lines on the deck also look odd. Frame #1 is a bit off, but that’s an easy fix.
Jan
You’re right the parallel lines look curved.I think there is a bit more distortion with the photo angle. I’ve been using my iPad to take the pictures and the front to back type pictures aren‘t the best.
View attachment 203623
The parallel lines on the deck also look odd. Frame #1 is a bit off, but that’s an easy fix.
Jan
The "Do Over":
In the post above I've shown Frame #1 is a little askew. This morning I removed it and will reset it later.
But I'd like to share two items.
1) Placing and glueing the deck, I think that would be a lot easier if Frames 1 and 12 were added to the keel after the deck is laid. That way the ends of the deck could be positioned better and then clamped while being glued in.
2) The merits of PVA water soluble glue. I was going to brush hot water on both sides of Frame #1 to loosen it. That process has worked in the past. I noticed this morning that when I cleaned the glue from my metal hobby plate that the Rubbing Alcohol I was using did a great job. So I switched gears temporarily and brushed several heavy coats of Rubbing Alcohol (91% Isopropyl Alcohol) on the joints holding Frame #1 to the keel.
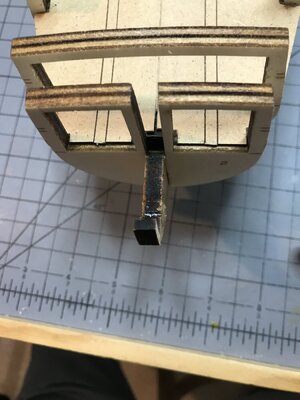
It didn't take very long and the frame came right off. I've no idea of the pros and cons for this method, but for me it provided the result was looking for.
Jan
In the post above I've shown Frame #1 is a little askew. This morning I removed it and will reset it later.
But I'd like to share two items.
1) Placing and glueing the deck, I think that would be a lot easier if Frames 1 and 12 were added to the keel after the deck is laid. That way the ends of the deck could be positioned better and then clamped while being glued in.
2) The merits of PVA water soluble glue. I was going to brush hot water on both sides of Frame #1 to loosen it. That process has worked in the past. I noticed this morning that when I cleaned the glue from my metal hobby plate that the Rubbing Alcohol I was using did a great job. So I switched gears temporarily and brushed several heavy coats of Rubbing Alcohol (91% Isopropyl Alcohol) on the joints holding Frame #1 to the keel.

It didn't take very long and the frame came right off. I've no idea of the pros and cons for this method, but for me it provided the result was looking for.
Jan
Last edited:
I think you did a great job and I don’t believe the alcohol will prevent future glue form adhering.The "Do Over":
In the post above I've shown Frame #1 is a little askew. This morning I removed it and will reset it later.
But I'd like to share two items.
1) Placing and glueing the deck, I think that would be a lot easier if Frames 1 and 12 were added to the keel after the deck is laid. That way the ends of the deck could be positioned better and then clamped while being glued in.
2) The merits of PVA water soluble glue. I was going to brush hot water on both sides of Frame #1 to loosen it. That process has worked in the past. I noticed this morning that when I cleaned the glue from my metal hobby plate that the Rubbing Alcohol I was using did a great job. So I switched gears temporarily and brushed several heavy coats of Rubbing Alcohol (91% Isopropyl Alcohol) on the joints holding Frame #1 to the keel.
View attachment 203761
It didn't take very long and the frame came right off. I've no idea of the pros and cons for this method, but for me it provided the resultI was looking for.
Jan
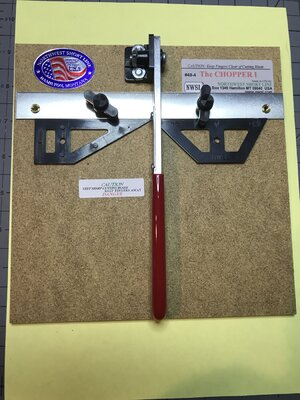
Nice tool! Works great I think.
I found that it worked very well, the angle cuts were easily accomplished versus trying to do them with a ruler and a sharp blade.Nice tool! Works great I think.
Jan
Hi Jan,
I'd love to learn how that cutting tool holds up over time. I looked at it once.
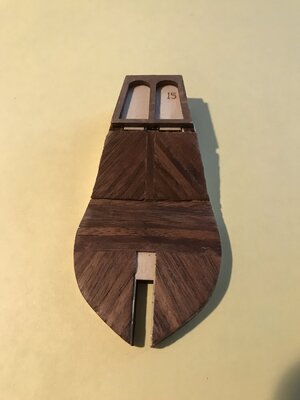
On my 1:65 Vasa the gun ports were 10x10 with a liner then added to the porthole. Not sure if that is helpful but...
I'd love to learn how that cutting tool holds up over time. I looked at it once.
On my 1:65 Vasa the gun ports were 10x10 with a liner then added to the porthole. Not sure if that is helpful but...
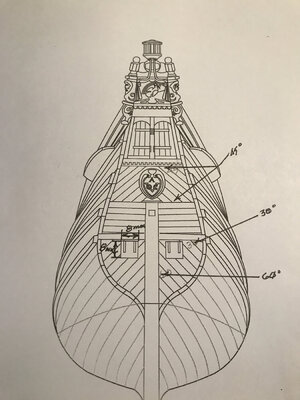
Ehh - I had to measure them myself too, as this is something which is not complete clear in the instructions
They are a little bit smaller than the ones in the bulwarks, 8 x 8 mm or evt. 9 x 9 mm
Hi Hans,Ehh - I had to measure them myself too, as this is something which is not complete clear in the instructions
They are a little bit smaller than the ones in the bulwarks, 8 x 8 mm or evt. 9 x 9 mm
Excellent, I think I'll go with the 8 X 8 mm. I think smaller would look better.
BTW, I'm having a great time with the kit.
Jan

