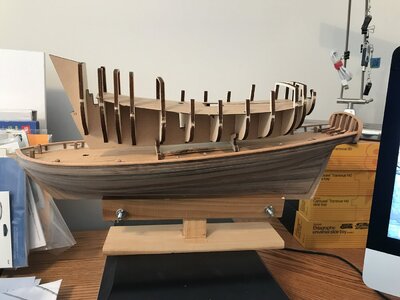
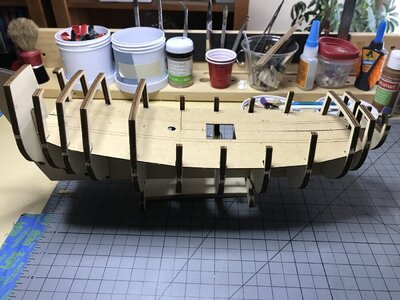
Duyfken 1/50 scale - Kolderstock

OK MY 2 CENTS WHAT WORKS FOR ME IN THIS SITUATION AND BY NO MEANS AT MY SKILL LEVEL SAYING THIS IS THE WAY BUT FOR ME IT WORKS I TAK A PIECE OF SCRAP WOOD THE LENTGTH OF THE MODEL AND TACK GLUE IT, IT IS VERY EASY TO TAKE APART WHEN FINISHED WIT ABSOLUTLY NO DAMAGE AT ALL THE I HAVE ENOUGH ROOM TO PLACE ALL BULKHEADS TO HOW THEY BELONG YOU CAN THEN PUT IT ON A BUILDING BOARD OR A VICE, I DO NOT LIKE THE VICE, THIS WORKS FOR ME QUITE WELL. GOD BLESS STAY SAFE ALL DON
Thanks Don,

Another good method to consider. I'm looking for a stable platform so I can start mounting and gluing the frames. Past experience has shown that the false keel needs to be turned every which way while doing this. Once the keel, stem and stern pieces are added there will be a "lip" so I can use my regular clamp/holder.

Jan
 
I USE A PIECE OF OAK OR SIMILAR FROM LOWES OR HOME DEPOT, AND SO ANGLE PIECES LIKE THEY SELL SCREW IT INTO THE BOARD AND USE CLAMPS LIKE ALIGATOR CLAMPS TO CLAMP THE KEEL WILL NOT MOVE UNTIL YOU RELEASE THE CLAMPS, SOME USE SMALL SCREWS TO SCREW INTO THE FALSE KEEL TO ME THAT IS A NO, NO THE CLAMPS WORK FINE JUST ME. GOD BLESS STAY SAFE ALL DON
 
Nice start Jan, and Heinrich has already given a lot of usefull information.
A bit late to say, but the most easy way to get the frames out of the 6 mm plywood is putting a thin knife on the tab and then hammer it until you're through. When you do this on both sides it works fairly easy.
Of course you should use a small hammer.
 
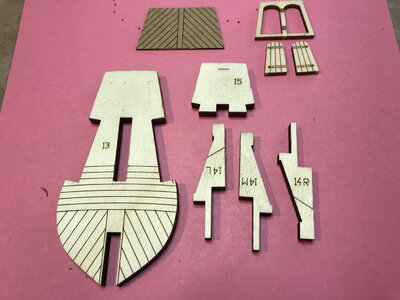
The stern frame:

This little piece of the build is turning into fun.

The parts.

A5AE79CF-9051-4745-B264-D2926719595B.jpeg

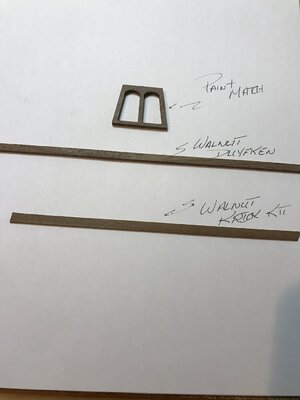
The color match for the door frames. One drop of white paint and a very tiny drop of brown mixed well.

7F86389F-42A0-4801-80E7-B99AAD4A36E0.jpeg

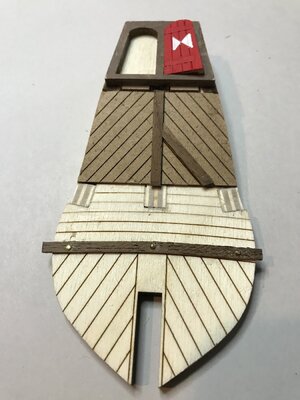
The assembly as far as I can go today.

46EC2707-5820-4823-B4C7-3484F0D49E33.jpeg

I‘ve ordered a NWSL Chopper I, I don’t have a tool in my current inventory to cut precise angles this small. The planking is 1mm X 3mm and 1mm X 4mm Walnut.

Happy New Year everyone.

Jan
 
Last edited:
Hi Jan

This part of the Duyfken always looks like fun. I presume you will still make the door hinges black or use metal strips made black?
 
Hi Jan

This part of the Duyfken always looks like fun. I presume you will still make the door hinges black or use metal strips made black?
Hi Heinrich,

Indeed, the door hinges will be black, I temporally covered those spots with tiny strips of masking tape. I didn’t want to paint over the hinge indications. Door number two is on the “do over” list. The masking tape stencil I made to outline the white symbol didn’t press down well and the white bled through.

Jan
 
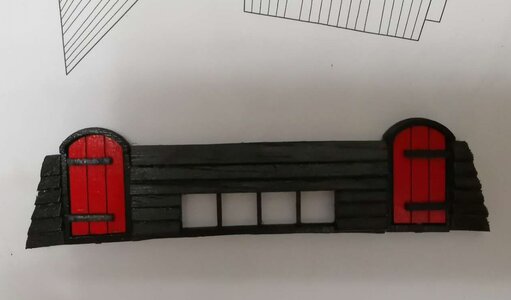
Jan - a suggestion if I may - I don't like painting the doors as that fills in too much of the grooves. Get some red spray paint and apply (very lightly) a few layers until covered. That way the grooves remain razor sharp.

WeChat Image_20200707114917.jpg
 
Jan - a suggestion if I may - I don't like painting the doors as that fills in too much of the grooves. Get some red spray paint and apply (very lightly) a few layers until covered. That way the grooves remain razor sharp.

View attachment 202795
That’s a neat idea. I tried thinning the paint to get the same effect, but.... the outcome wasn’t what I visualized. I’ll experiment with your method, did you use rattle can or an airbrush?

Jan
 
Rattle can - sweet and simple. Just spray from at least 20cm to cover thinly and apply as many coats as necessary to cover the wood.
 
Rattle can - sweet and simple. Just spray from at least 20cm to cover thinly and apply as many coats as necessary to cover the wood.
I will give that a try, I used rattle cans painting the tug and lobster boat. The last couple of coats on those was clear Satin.

Jan
 
It looks very good! However, Duyfken is a small ship and I think a bigger scale model of her would look better - and even the smaller details could be worked our better. My scratch Duyfken is to a 1:40 scale. This was also a convenient choice because the original plans from the Duyfken foundation were to the scale of 1:20 so the drawings had to be decreased to 50%.
János
 
?What scale is that?

We had a family round table last night. COVID type using FaceTime and the backdrop for me was my little boatyard.

DDA236B5-F0AD-43BC-AEB1-BD0580C38F4A.jpeg

We had a great discussion about building scales, different model kits and of this Forum and it’s great member participation . I think I might have kindled a little spark and there will be another first time builder in the family.

Jan
 
Last edited:
Build step #1:

1) Place the frames in the correct sequence and glue them to the frame. DONE!
2) Sand the frames to the right shape "fairing?"so the hull planks fit. That was todays agenda, but it's snowing and only 30F outside ( to much residue dust if I do that in my little workshop. :(
3) Glue lower deck in place. That will be todays alternate agenda.

5C16A370-2578-4C9D-90E3-83BED57E5D58.jpeg

The lower deck dry fitted and almost wiggled into the right position.

Jan
 
Jan is there any balsa insert at the bow that needs to be sanded into shape. If there is, do that BEFORE you start fairing the hull.
 
Jan is there any balsa insert at the bow that needs to be sanded into shape. If there is, do that BEFORE you start fairing the hull.
Hi Heinrich,

Indeed, those pieces are all set to be glued in once I finish the deck. I’ve fiddled with the deck most of the morning, still not quite satisfied with the fit. I’ve got the Port side “adjusted “ and ready for final gluing but the “S’board side“ is persnickety, it requires a little more adjustment.

Jan
 
Back
Top