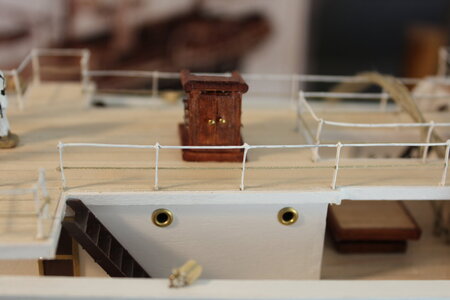
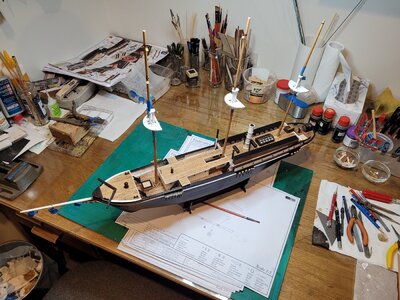
Thank you for all that on scuppers....when you look closely at one of the diagrams two holes in the floor are shown in the aft corners of the middle deck...obviously drain overboard as you say. I have not seen that before so thanks to all for pointing it out before I started hacking slots in the bulwarks.... ooops
-

Win a Free Custom Engraved Brass Coin!!!
As a way to introduce our brass coins to the community, we will raffle off a free coin during the month of August. Follow link ABOVE for instructions for entering.
-

PRE-ORDER SHIPS IN SCALE TODAY!
The beloved Ships in Scale Magazine is back and charting a new course for 2026!
Discover new skills, new techniques, and new inspirations in every issue.
NOTE THAT OUR FIRST ISSUE WILL BE JAN/FEB 2026
You are using an out of date browser. It may not display this or other websites correctly.
You should upgrade or use an alternative browser.
You should upgrade or use an alternative browser.
Endurance from Occre by Mallacoota
- Thread starter mallacoota
- Start date
- Watchers 22
-
- Tags
- mallacoota occre
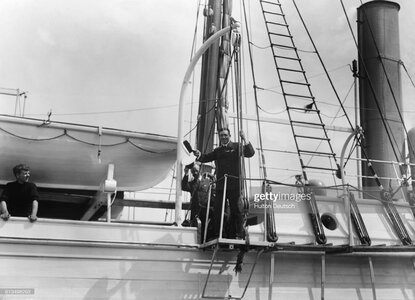
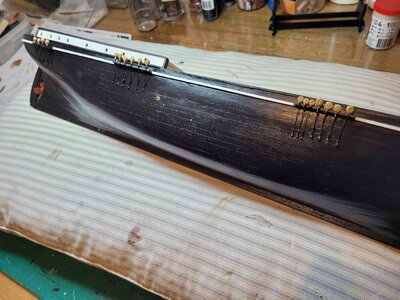
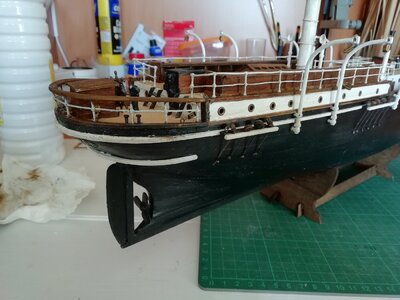
Put in the drains and outboard discharges thanks to the advice of others here. Pretty disappointed that the kit asks you to mount lower deadeyes on the gunwales rather than on outboard channels. Looking at the many Frank Hurley films of Endurance all six shroud baes were outboard channels or chainboards set into the white band, So I am going to do a kit bash and do that. The real ship seemed to use rods rather than flat as chainplates below the chainboards, with an eye in the lower end bolted through the hull but I cant be certain of that detail. So it might be a while befofre I get that all done...
- Joined
- Mar 12, 2023
- Messages
- 49
- Points
- 78

Ca Va Francois ..?...Yes it is really cheap to specify brown thread on all lower deadeyes to a nail ..no chainplates. And on the foremast the lower deadeyes are all set in the gunwale..with a pointless brown thread going over the gunwale to a nail where a chainplate would be. I have checked all the photos I can find and all show proper channels ( as your excellent photo shows) for all three masts. I have made two home made channels from 2 x 5 for the foremast standing rigging.
So while I am no metalworker I have made some copper "chains" and might solder a short plate on the bottom if I can find some brass strip. Otherwise I will just attach the bottom of the copper bar to the hull....a short plate would be better and then the copper would be just taking the part of a solid rod. Not great work, but I am happier than I was going to be with brown thread..?
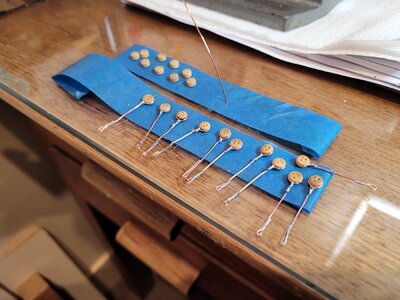
Need to be straightened out a bit before fitting but you get the idea
So while I am no metalworker I have made some copper "chains" and might solder a short plate on the bottom if I can find some brass strip. Otherwise I will just attach the bottom of the copper bar to the hull....a short plate would be better and then the copper would be just taking the part of a solid rod. Not great work, but I am happier than I was going to be with brown thread..?

Need to be straightened out a bit before fitting but you get the idea
Last edited:
- Joined
- Mar 12, 2023
- Messages
- 49
- Points
- 78

Very nice !
The mid cabin is in. I have no idea how to make the 10mm stanchions secure... the arrowhead shape has me totally confused.
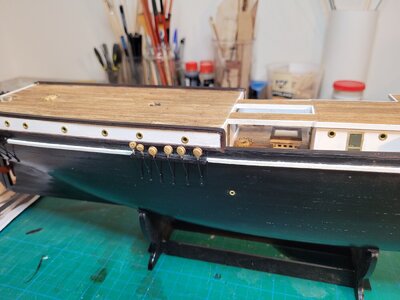
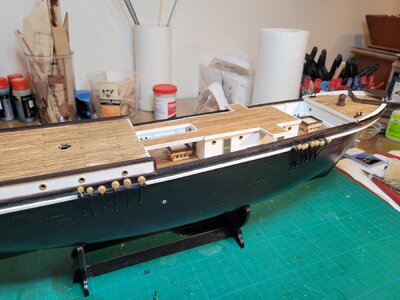
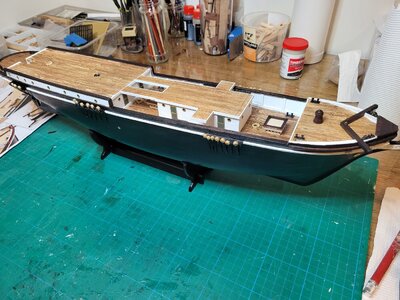
Quite an attractive hull but as they discovered to their grief you cant break through sea ice... they needed a 21st century icebreaker which has a rounded flat bow and rides up on the sea ice and then breaks it downwards with the weight. Just read the story of the trip by Alfred Lansing...it is a must read for anyone interested in Endurance. The bow on this hull was 4ft thick..incredible ( but ineffective)


Quite an attractive hull but as they discovered to their grief you cant break through sea ice... they needed a 21st century icebreaker which has a rounded flat bow and rides up on the sea ice and then breaks it downwards with the weight. Just read the story of the trip by Alfred Lansing...it is a must read for anyone interested in Endurance. The bow on this hull was 4ft thick..incredible ( but ineffective)
- Joined
- Mar 12, 2023
- Messages
- 49
- Points
- 78

I bought other stanchions because the ones supplied by Occre looked so flimsy. I used the supplied single posts around the bow but during working on the ship I must have dislodged every one at least once and had to refix it.The mid cabin is in. I have no idea how to make the 10mm stanchions secure... the arrowhead shape has me totally confused.
View attachment 373553View attachment 373554View attachment 373555
Quite an attractive hull but as they discovered to their grief you cant break through sea ice... they needed a 21st century icebreaker which has a rounded flat bow and rides up on the sea ice and then breaks it downwards with the weight. Just read the story of the trip by Alfred Lansing...it is a must read for anyone interested in Endurance. The bow on this hull was 4ft thick..incredible ( but ineffective)
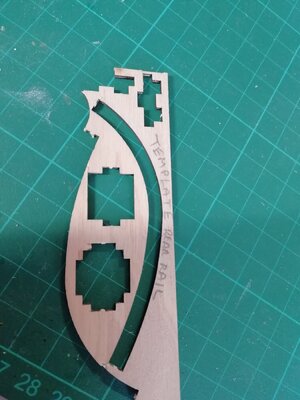
I also completely changed the stern rail because photos of the Endurance show it as made from substancial sized wood, not metal rail like the rest.
Everybody should read Alfred Lancing's book. When one sees today of warnings to prevent people being "traumatised" by, for instance, pictures of a minor accident then see what Shackleton and his men had to endure and how they coped during and after the expedition then you know the world has gone soft.
i agree totally. It is just an amazing book and almost unbelievable. You are exactly right about the stern rail... It is curved solid wood as you have made...can be clearly seen in photos of the expidition and of the wtreck on the bottom. This is a historically important ship and deserves a better quality kit from someone good like Amati. This has been made down to a price.
You have reminded me about the stern rail...I dont know how I will do it but I will think of something..look closely at yours.
You have reminded me about the stern rail...I dont know how I will do it but I will think of something..look closely at yours.
- Joined
- Mar 12, 2023
- Messages
- 49
- Points
- 78

v
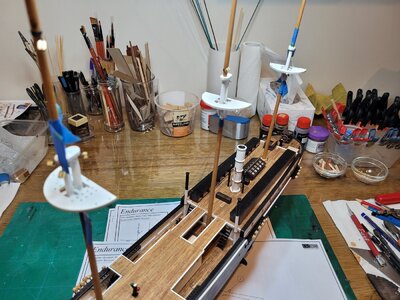
Very nice, very good choose of the colour. Are your sure of the position of the 2 ladders in front ?Yep good..have done a trial one and it works Ok doesnt it. I have decided to go ahead with the masts before I do the posts and rails as I am clumsy enough to break them reaching in for a rigging point...I guess it works both ways doesnt it.
View attachment 374806View attachment 374807
- Joined
- Mar 12, 2023
- Messages
- 49
- Points
- 78

Alternative, I used brass wire diameter 1mm painted in brown with original stanchion from OcCreFor the stern rail I used 2 pieces of 2mm x 2mm supplied with the kit, soke and curved them using the cut out of the deck rail. Glued them together so to hold their shape. View attachment 374841
Hope this helps...
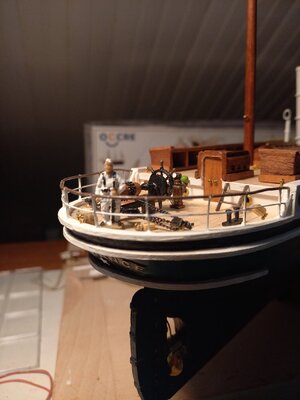
I really have to do that stern rail as you have done... the stanchion and rope solution is not good enough. I had a hard time bending the white rails below so I thiunk I will find some mahogany scrap and cut the curve out of it...maybe in two pieces.
Good morning. Great work on the stern railing- very realistic. Cheers GrantStanchions and steel wire railings.
Stern rail in wood.View attachment 374832
The kit supplies ample 2mm x 2mm light wood. Two lengths of that, bent and glued together can be stained to match the deck rail. I rounded off the edges with fine sand paper before staining.I really have to do that stern rail as you have done... the stanchion and rope solution is not good enough. I had a hard time bending the white rails below so I thiunk I will find some mahogany scrap and cut the curve out of it...maybe in two pieces.
The white secondary rail was difficult for me also using wire. In the end I used thread stiffened with glue then painted it white.
- Joined
- Mar 12, 2023
- Messages
- 49
- Points
- 78

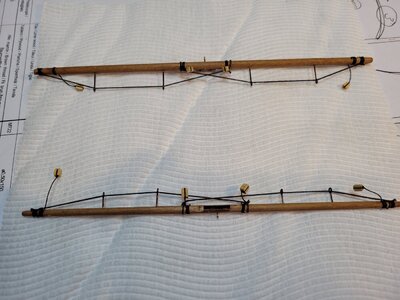
hello may be for the next spars you can reduce a little bit more the diameter (conical shape)Spent the morning making spars for the foremast..only the small top one to go.
View attachment 374906
Have a nice day


