First Question! Why doesn't this boat have any oars? It is towed by another boat?
-

Win a Free Custom Engraved Brass Coin!!!
As a way to introduce our brass coins to the community, we will raffle off a free coin during the month of August. Follow link ABOVE for instructions for entering.
-

PRE-ORDER SHIPS IN SCALE TODAY!
The beloved Ships in Scale Magazine is back and charting a new course for 2026!
Discover new skills, new techniques, and new inspirations in every issue.
NOTE THAT OUR FIRST ISSUE WILL BE JAN/FEB 2026
You are using an out of date browser. It may not display this or other websites correctly.
You should upgrade or use an alternative browser.
You should upgrade or use an alternative browser.
Esping in 1:64 scale [COMPLETED BUILD]
- Thread starter dockattner
- Start date
- Watchers 41
Why do you say it doesn't have oars?First Question! Why doesn't this boat have any oars? It is towed by another boat?
Nevermind... I read your first paragraph wrong.Why do you say it doesn't have oars?
All the very best to you on this project -I decided to build my esping based on a solid hull template. I will then plank that solid hull template and later remove the hull in order to add frames and other details afterwards (hull first rather than frame first).
A chunk of basswood in hand I have now used rubber cement to paste my plans to the block of wood:
View attachment 340726
I then used the drawings to create shape templates that correspond to various locations along the hull of the ship (it is here I hope I have understood the drawings and how to best use the loft lines). These templates will guide the shaping of the solid hull form...
View attachment 340727
Wish me luck!
In dental school you have to carve each of these teeth out of chalk in order to learn proper anatomy... I had two classmates drop out because they couldn't do it!Wow Paul your first scratch build, that will be fun.
About reading drawings I don t worry.
Guess you can read this drawing
View attachment 340845
so the plan of a boot won t be a problem.
Oh no he can carve also. I think I will quit this hobby.In dental school you have to carve each of these teeth out of chalk in order to learn proper anatomy... I had two classmates drop out because they couldn't do it!
PS I hope you will pick up carving at your next build, convinced it will give you a lot of joy and satisfaction ........ and admiration offcourse
A productive day today on my esping. I began by roughly cutting out the perimeter of the hull from a block of basswood:
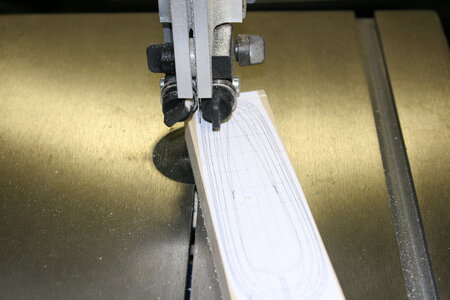
Not the first time I used a bandsaw, but it is the first time I used THIS bandsaw. WAY BETTER than my old bandsaw .
.
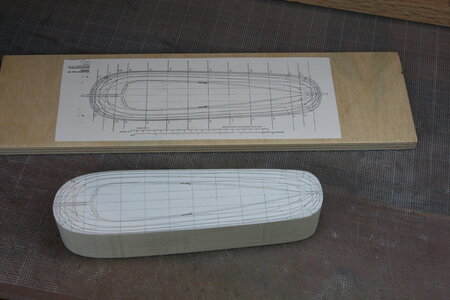
I then modified my template leaving in place only the part representing the flat bottom of the hull (this particular boat is flat on the bottom allowing it to operate in shallow harbors and such):
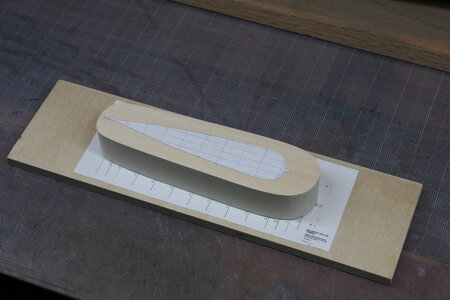
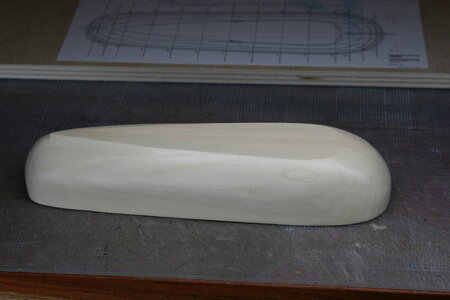
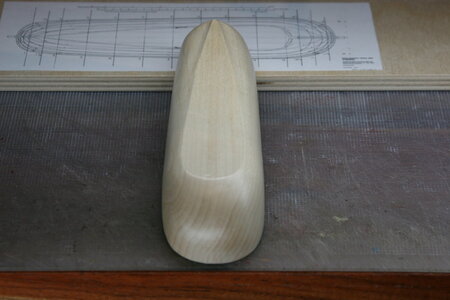
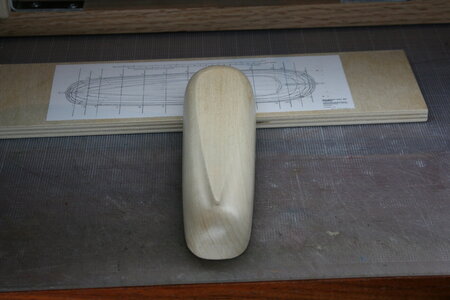
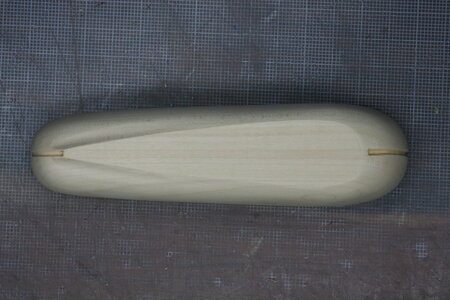
And then for the next four (five?) hours I sanded a block of wood into the shape of a tiny boat:
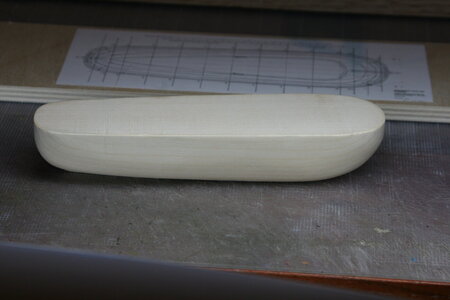
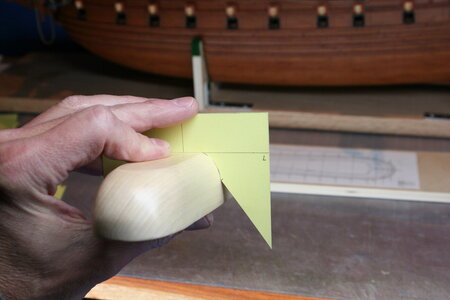
Here is one of the guides I made held in place (full disclosure: they didn't all turn out this good - but, overall, I'm very close).
Next, there are partial keels at the fore and aft ends of the boat. In order to get them in the right place relative to the hull planking it was necessary to create a recess for them to sit in. That way they will protrude on the inside of the hull a bit...
Finally, I glued up four wide 'boards' to make the bottom of the boat, and then carefully faired that bottom to the sides of the hull. The hull planking will overlap the base.
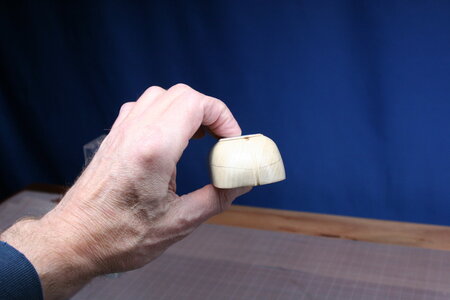
I also tested a few planks and discovered that the entire hull planking will need to be spiled - or at least that's what it appears to require at this point. The bow and stern of this little boat are just as bluff as the bow of the mother ship.
Hmm, maybe this wasn't such a great idea after all...

Not the first time I used a bandsaw, but it is the first time I used THIS bandsaw. WAY BETTER than my old bandsaw

I then modified my template leaving in place only the part representing the flat bottom of the hull (this particular boat is flat on the bottom allowing it to operate in shallow harbors and such):

And then for the next four (five?) hours I sanded a block of wood into the shape of a tiny boat:


Here is one of the guides I made held in place (full disclosure: they didn't all turn out this good - but, overall, I'm very close).

Next, there are partial keels at the fore and aft ends of the boat. In order to get them in the right place relative to the hull planking it was necessary to create a recess for them to sit in. That way they will protrude on the inside of the hull a bit...

Finally, I glued up four wide 'boards' to make the bottom of the boat, and then carefully faired that bottom to the sides of the hull. The hull planking will overlap the base.

I also tested a few planks and discovered that the entire hull planking will need to be spiled - or at least that's what it appears to require at this point. The bow and stern of this little boat are just as bluff as the bow of the mother ship.
Hmm, maybe this wasn't such a great idea after all...
Looking good Paul. Now the real fun begins
- Joined
- Oct 15, 2017
- Messages
- 1,191
- Points
- 443

Paul, I really like your unique approach. Innovation plants the seeds for others that otherwise might not exist. Did you treat the hull (sanding sealer).?? I've worked with basswood a lot and your one photo shows a very "satin' looking finish that I've not ever seen in my work with basswood. Also, do you plan to carve a void in the solid hull? I ask only because I am fascinated with this unfamiliar approach.
While I've built models, I've never shared my project's build steps, until recently. This has obviously revealed an opportunity for me to learn more about photography and image management/sharing, which you are obviously very proficient at. I notice your dark blue back drop.
I am going to try and develop my own skills to present and share images. If nothing else, to prevent SoS members viewing my work to have migraine headaches.
Great looking work. Looking forward to your next post
I can't wait to see him spile that hull. He's gonna hurt himself. . . 
Oh well.. guess I better help him...
HEY PAUL! Here's a method to help you make patterns for spiled planks on that deeply curved hull. Use the TAPE PULL METHOD, Cover the hull with tape, DRAW the plank lined on the tape, Number the planks and PHOTOGRAPH THEM ON THE HULL, carefully pull the tape off, and cut along the lines. Lay the tape flat on thin wood, and cut the wood at the edges of the tape pattern. Use your photos and plank numbers to show you where they go. It saves lots of guesswork.
Last edited:
Great to see another project from you Paul 
My personal preference is frame over form then plank but either way works.The one thing I would say though is spilling is the only way to go, you do not want to build in any stresses with small boats like this otherwise you run the risk of the hull twisting out of shape when removed from the form.
Kind Regards
Nigel
Excellent tip thank you.I can't wait to see him spile that hull. He's gonna hurt himself. . .
Oh well.. guess I better help him...
HEY PAUL! Here's a method to help you make patterns for spiled planks on that deeply curved hull. Use the TAPE PULL METHOD, Cover the hull with tape, DRAW the plank lined on the tape, Number the planks and PHOTOGRAPH THEM ON THE HULL, carefully pull the tape off, and cut along the lines. Lay the tape flat on thin wood, and cut the wood at the edges of the tape pattern. Use your photos and plank numbers to show you where they go. It saves lots of guesswork.
I must remember it for next time.
Very interesting work - and very good informative description and photos - Many thanks for sharing with us
Hi Ken,Paul, I really like your unique approach. Innovation plants the seeds for others that otherwise might not exist. Did you treat the hull (sanding sealer).?? I've worked with basswood a lot and your one photo shows a very "satin' looking finish that I've not ever seen in my work with basswood. Also, do you plan to carve a void in the solid hull? I ask only because I am fascinated with this unfamiliar approach.
While I've built models, I've never shared my project's build steps, until recently. This has obviously revealed an opportunity for me to learn more about photography and image management/sharing, which you are obviously very proficient at. I notice your dark blue back drop.
I am going to try and develop my own skills to present and share images. If nothing else, to prevent SoS members viewing my work to have migraine headaches.
Great looking work. Looking forward to your next post
RE: the satin appearance... I am layering up the hull form with wax (hand-rubbed hard wax like you would use on an heirloom piece of furniture) so that the planks will not adhere to it when I get to that stage.
RE: carving a void in the hull... Let me explain more carefully. The hull form you see here will be discarded. The plan (and at this point it is only a plan) is to fully plank the hull on this form and then remove the hull form giving me the shell of a boat that will then have the internals added to it (including the frames). As Nigel has demurred over this approach see my response to him that follows.
Indeed that was the original plan. That's why there is a flat board in an early photo. I was going to add the frames to the hull form (sticking their overly long ends into holes in that flat board at each of the frame stations) and then plank over the frames precisely as you mentioned. But the fact that there is not a continuous keel caused me to rethink the viability of that approach (a full keel would provide stabilization of the frames along the midline). I am confident I could come up with a workaround and if my current effort crashes and burns I'll try again using the approach you have suggested (necessarily making the hull form smaller to account for the thickness of the frames).Great to see another project from you Paul
My personal preference is frame over form then plank but either way works.The one thing I would say though is spilling is the only way to go, you do not want to build in any stresses with small boats like this otherwise you run the risk of the hull twisting out of shape when removed from the form.
Kind Regards
Nigel
Yes, I share your concerns about the stability of the little boat when it comes off the hull form.
Clever. I'll give that a try!I can't wait to see him spile that hull. He's gonna hurt himself. . .
Oh well.. guess I better help him...
HEY PAUL! Here's a method to help you make patterns for spiled planks on that deeply curved hull. Use the TAPE PULL METHOD, Cover the hull with tape, DRAW the plank lined on the tape, Number the planks and PHOTOGRAPH THEM ON THE HULL, carefully pull the tape off, and cut along the lines. Lay the tape flat on thin wood, and cut the wood at the edges of the tape pattern. Use your photos and plank numbers to show you where they go. It saves lots of guesswork.
One niggling problem I am still trying to sort out in my head is that the first few planks up from the flat bottom are planked smooth and then the hull planking converts to a clinker style. If I use veneer stock (0.6 mm) I should be able to just overlap the planks - but if I use dimensional stock (1mm thick by 3 or 4) I'll either need to sand in a bevel or cut a rebate on the back of the upper plank (if I don't do something the clinkering will be too thick for the scale). The fact that I need the hull to be pretty stable has me concerned...
- Joined
- Jan 9, 2020
- Messages
- 10,566
- Points
- 938

I like your approach a lot, Paul. I won't go into details as to why though - suffice to say that you just carry on the way you are doing it now. It will be fine, and you will be pleasantly surprised by the rigidity of the frame when the hull mould is removed.
Hey Paul Following with great interest.


