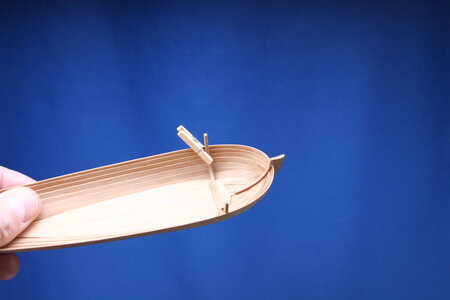
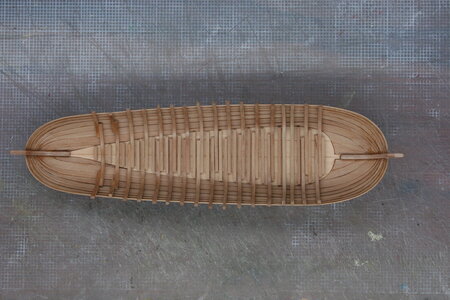
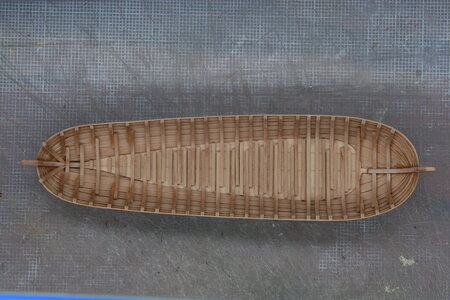
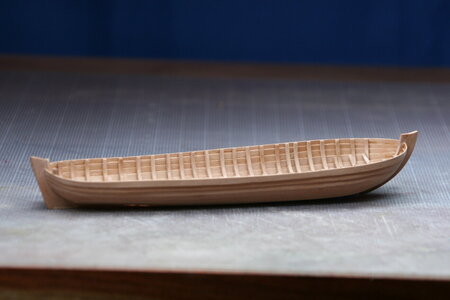
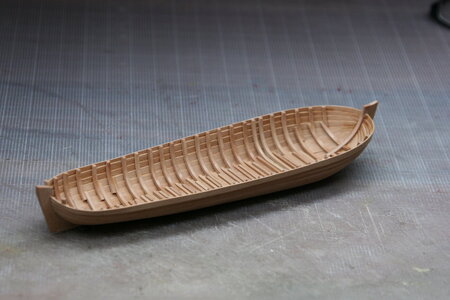
Esping in 1:64 scale [COMPLETED BUILD]

1669401931118.png
Congratulations on your first 100% scratch build, Paul!
The hull looks great. Tiny boat hulls are actually tougher than they appear. If you go Godzilla and step on them, they won't hold up, but if they fall off the table, they won't break into small pieces. Fantastic work! I can't wait to see how you detail it out. The hull should hold it's shape well as you add stiffeners, if you pre-shape the stiffeners such that they have little or no spring while being attached, the hull should retain its shape.
 
Thank you, friends, for your encouraging words and likes. I had an enjoyable day installing some of the frames on the esping. Before you review my progress photos a few comments might be helpful.

First, I am not building AN esping - I am building VASA's esping. To that end, I am using the plans provided by Dr. Hocker. As you will see, the framing is somewhat irregular compared to what we normally see (and do) on boats and other smaller support vessels. As has been pointed out by @Maarten our habit of making everything perfect/symmetrical etc. really was not historically accurate - at least relative to the 17th century.

To that end, you will see frames on the esping that don't follow some of the conventions we accept as normal. They are not identical in style - they are not uniform - but they ARE really, really fun to do!

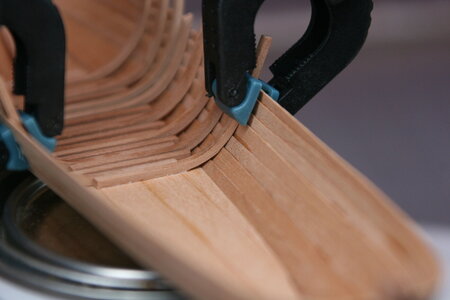
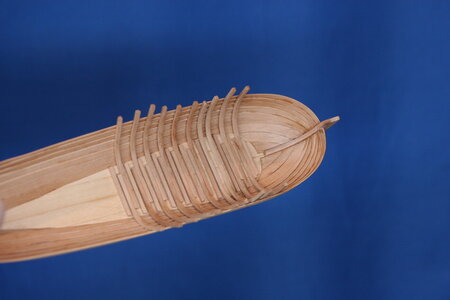
The frames are 1.5x1.5 mm pearwood soaked and bent on a plank bender. They are installed about 1mm 'narrow' on each side in order to bring the walls of the hull in just a bit (to get the width of the esping closer to the plan dimensions).

IMG_8901.JPG

IMG_8902.JPG

IMG_8910.JPG

IMG_8914.JPG

The width of the esping has now been corrected. I'll be framing the bow and the stern next though that might be delayed. I have some other responsibilities this weekend and coming week.

You are kind to stop by.
 
I know how difficult this is.
True words Stephan - as difficult as anything I've done in this hobby. The size makes everything so demanding - even small mistakes play out as big ones. I hope you know that it was your sloop (and the two built by @Giampy65 at a larger scale) that inspired me to add this boat.

But such fun to spend a day and see actual progress being made! That's not always the case on the big ships!
 
Very nicely done with the ribs so far. I suspect there were a few broken and miss fit ones along the way.
The early success rate was shy of 50% but then I realized my stock of square 1.5mm was going to run short so that made me more patient. After a while I became quite proficient at eyeballing the bend and getting it right on the plank bender... It's quite satisfying to see the frame fit the first time!

For the record, my original plan was to cut the frames from flat sheets but then I counted the number and complexity of the frames...that's when I transitioned to hull first construction. Glad I did.

The frames should be notched to match the clinkering but that's not going to happen ROTF.
 
Wow Paul! Beautiful and amazing. As usual I'm playing catchup here. There's nothing quite like watching a master in the making (you) building a masterpiece and getting to see how you do it. Fantastic and thanks for sharing.
Yup. Some kind of master...just got my fingers separated after bonding them together with CA ROTF.
 
Well, I unexpectantly ran into a few free hours for modeling today so I was able to wrap up the framing - or nearly so.

IMG_8918.JPG

IMG_8928.JPG

IMG_8919.JPG

I still need to add in a bit of framing at the bow (something that would function like a breasthook), but it needs to be placed above a seat and I haven't established the vertical position for that seat yet.

For the record, I went back and looked more closely at some pictures I have of the real esping and realize I did several of the forward frames incorrectly (misinterpreted the line drawings). The good news is those frames will be covered by the same seat I just mentioned so no one will know (well, except for you guys).

This little boat is really fun to work on!
 
The early success rate was shy of 50% but then I realized my stock of square 1.5mm was going to run short so that made me more patient. After a while I became quite proficient at eyeballing the bend and getting it right on the plank bender... It's quite satisfying to see the frame fit the first time!

For the record, my original plan was to cut the frames from flat sheets but then I counted the number and complexity of the frames...that's when I transitioned to hull first construction. Glad I did.

The frames should be notched to match the clinkering but that's not going to happen ROTF.
Even this is a relatively small scale, and clinker-plank fit to the frames is really hard to discern that it's even there. The important things are that your scale, trim and finish of all parts is exceptional. You know if you ever get tired of staring/smelling the open maws of patients, you could definitely make a living (albeit, probably much more modestly) as a professional modeler.
 
In dental school you have to carve each of these teeth out of chalk in order to learn proper anatomy... I had two classmates drop out because they couldn't do it!
Well, this explains EVERYTHING. Why didn't you mention this before as we all marveled at your immediately success with the arts and mysteries of model ship making?
 
A productive day today on my esping. I began by roughly cutting out the perimeter of the hull from a block of basswood:

View attachment 340974

Not the first time I used a bandsaw, but it is the first time I used THIS bandsaw. WAY BETTER than my old bandsaw :).

View attachment 340975

I then modified my template leaving in place only the part representing the flat bottom of the hull (this particular boat is flat on the bottom allowing it to operate in shallow harbors and such):

View attachment 340976

And then for the next four (five?) hours I sanded a block of wood into the shape of a tiny boat:

View attachment 340977

View attachment 340978

View attachment 340979

View attachment 340982

Here is one of the guides I made held in place (full disclosure: they didn't all turn out this good - but, overall, I'm very close).

View attachment 340983

Next, there are partial keels at the fore and aft ends of the boat. In order to get them in the right place relative to the hull planking it was necessary to create a recess for them to sit in. That way they will protrude on the inside of the hull a bit...

View attachment 340984

Finally, I glued up four wide 'boards' to make the bottom of the boat, and then carefully faired that bottom to the sides of the hull. The hull planking will overlap the base.

View attachment 340985

I also tested a few planks and discovered that the entire hull planking will need to be spiled - or at least that's what it appears to require at this point. The bow and stern of this little boat are just as bluff as the bow of the mother ship.

Hmm, maybe this wasn't such a great idea after all...
It's too bad General Washington didn't have you to craft his wooden dentures! Can you hear the bourbon yet?
 
Back
Top