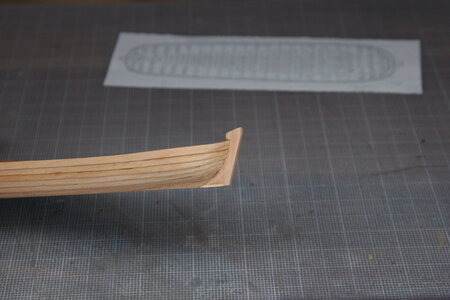
Esping in 1:64 scale [COMPLETED BUILD]

A bit of significant progress today on the little boat...

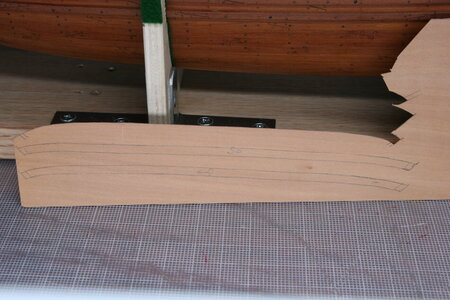
With the flat bottom made it was time to create the fore and aft partial keels. I simply made a template from cardstock and then cut the keels from 2mm pear sheets using a scroll saw. Here they are fitted to the slots I previously created in the hull template:
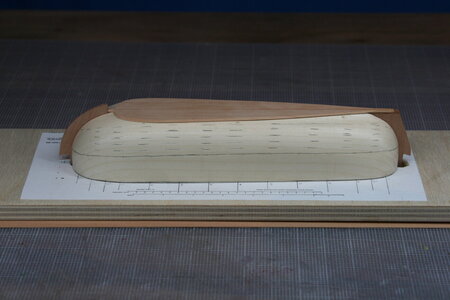
IMG_8829.JPG

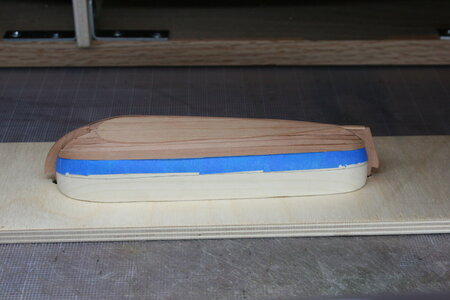
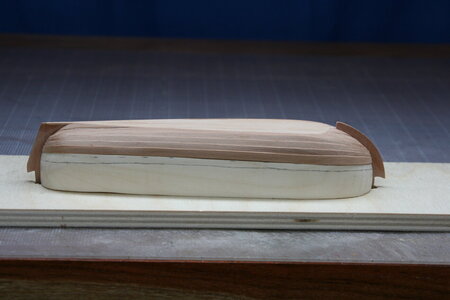
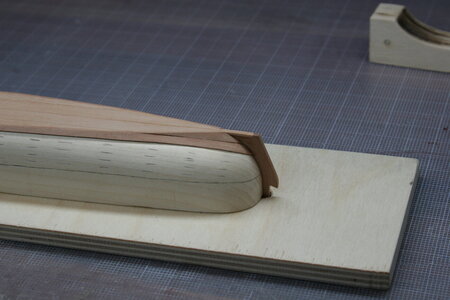
And then came the hard part - planking the hull to merge seamlessly with the flat bottom (how many of you knew I should not be attempting my first scratch build on a ship with a flat bottom??? :(). Well, after several aborted attempts I managed to fabricate something worth keeping:
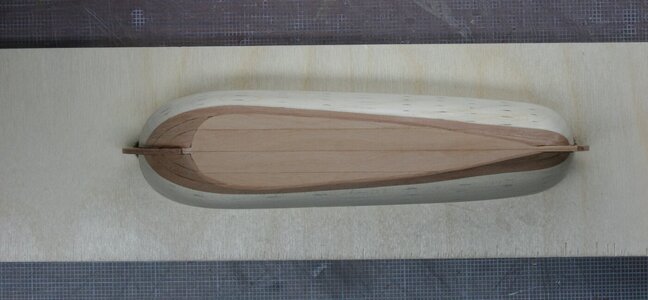
IMG_8830.JPG

IMG_8833.JPG

IMG_8834.JPG

IMG_8835.JPG

Not my best work but acceptable. Note that from this point forward the hull will be planked using an overlapping (clinker-style) pattern - at least if I can manage that.

I am using veneer sheets (0.6 mm) for the hull planking (necessarily spiled because of the very round ends) making this little boat quite delicate. I did a trial using 1 mm stock but the clinkering was out of scale if left full thickness. I tried to cut a rabbet on the back side (lower edge) of the upper plank in order to reduce the clinkering - but I couldn't create a clean rabbet.

If the hull would only be seen from the outside, I think it would have worked - but the inside of the hull will be fully visible. Remember, every piece is spiled so I am not working with straight stock... I'm sure it's possible to cut a rabbet on curved pieces using a mill but my skills aren't there yet.

Anyway, I'm hoping the 0.6 mm veneer will look good inside and out...

Thanks for stopping by!
 
Last edited:
A bit of significant progress today on the little boat...

With the flat bottom made it was time to create the fore and aft partial keels. I simply made a template from cardstock and then cut the keels from 2mm pear sheets using a scroll saw. Here they are fitted to the slots I previously created in the hull template:

View attachment 341497

And then came the hard part - planking the hull to merge seamlessly with the flat bottom (how many of you knew I should not be attempting my first scratch build on a ship with a flat bottom??? :(). Well, after several aborted attempts I managed to fabricate something worth keeping:

View attachment 341498

View attachment 341499

View attachment 341500

View attachment 341501

Not my best work but acceptable. Note that from this point forward the hull will be planked using an overlapping (clinker-style) pattern - at least if I can manage that.

I am using veneer sheets (0.6 mm) for the hull planking (necessarily spiled because of the very round ends) making this little boat quite delicate. I did a trial using 1 mm stock but the clinkering was out of scale if left full thickness. I tried to cut a rabbet on the back side (lower edge) of the upper plank in order to reduce the clinkering - but I couldn't create a clean rabbet.

If the hull would only be seen from the outside, I think it would have worked - but the inside of the hull will be fully visible. Remember, ever piece is spiled so I am not working with straight stock... I'm sure it's possible to cut a rabbet on curved pieces using a mill but my skills aren't there yet.

Anyway, I'm hoping the 0.6 mm veneer will look good inside and out...

Thanks for stopping by!
Hi Paul,

Looking great!
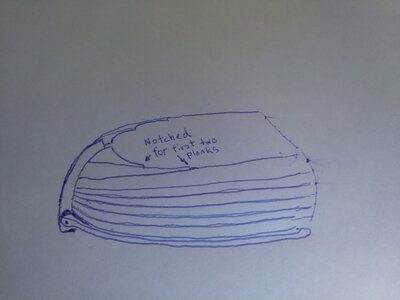
I'm not sure if you are interested in that level of detail/have those drawings, but the bottom was notched for plank ends like this:IMG_20221120_115929.jpg
 
A productive day today on my esping. I began by roughly cutting out the perimeter of the hull from a block of basswood:

View attachment 340974

Not the first time I used a bandsaw, but it is the first time I used THIS bandsaw. WAY BETTER than my old bandsaw :).

View attachment 340975

I then modified my template leaving in place only the part representing the flat bottom of the hull (this particular boat is flat on the bottom allowing it to operate in shallow harbors and such):

View attachment 340976

And then for the next four (five?) hours I sanded a block of wood into the shape of a tiny boat:

View attachment 340977

View attachment 340978

View attachment 340979

View attachment 340982

Here is one of the guides I made held in place (full disclosure: they didn't all turn out this good - but, overall, I'm very close).

View attachment 340983

Next, there are partial keels at the fore and aft ends of the boat. In order to get them in the right place relative to the hull planking it was necessary to create a recess for them to sit in. That way they will protrude on the inside of the hull a bit...

View attachment 340984

Finally, I glued up four wide 'boards' to make the bottom of the boat, and then carefully faired that bottom to the sides of the hull. The hull planking will overlap the base.

View attachment 340985

I also tested a few planks and discovered that the entire hull planking will need to be spiled - or at least that's what it appears to require at this point. The bow and stern of this little boat are just as bluff as the bow of the mother ship.

Hmm, maybe this wasn't such a great idea after all...
Dear Paul
good luck with your new project, it's looks promising! :) Thumbsup
I'll keep Following with great interest.
 
A bit of significant progress today on the little boat...

With the flat bottom made it was time to create the fore and aft partial keels. I simply made a template from cardstock and then cut the keels from 2mm pear sheets using a scroll saw. Here they are fitted to the slots I previously created in the hull template:

View attachment 341497

And then came the hard part - planking the hull to merge seamlessly with the flat bottom (how many of you knew I should not be attempting my first scratch build on a ship with a flat bottom??? :(). Well, after several aborted attempts I managed to fabricate something worth keeping:
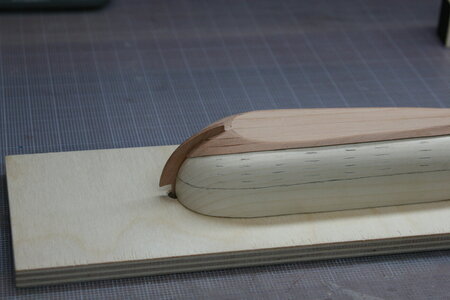
View attachment 341498

View attachment 341499

View attachment 341500

View attachment 341501

Not my best work but acceptable. Note that from this point forward the hull will be planked using an overlapping (clinker-style) pattern - at least if I can manage that.

I am using veneer sheets (0.6 mm) for the hull planking (necessarily spiled because of the very round ends) making this little boat quite delicate. I did a trial using 1 mm stock but the clinkering was out of scale if left full thickness. I tried to cut a rabbet on the back side (lower edge) of the upper plank in order to reduce the clinkering - but I couldn't create a clean rabbet.

If the hull would only be seen from the outside, I think it would have worked - but the inside of the hull will be fully visible. Remember, every piece is spiled so I am not working with straight stock... I'm sure it's possible to cut a rabbet on curved pieces using a mill but my skills aren't there yet.

Anyway, I'm hoping the 0.6 mm veneer will look good inside and out...

Thanks for stopping by!
For a first time scratch build, this is looking very promising, Paul. :) What I see are just neatly fitting planks.
Looking forward to those overlapping ones.
Regards, Peter
 
Glad to see you are getting started on the model. Let me know if you run into questions about details.

On the proportions, an esping was supposed to be either as long as the ship was wide or 1/4 of the length of the ship. Vasa's esping is almost exactly a quarter of the overall hull length, as well as close to the width.

We will be producing published versions of the plans, with more detail for modellers, but those are probably a couple of years in the future. If anyone else here is contemplating an esping model before then, let me know.

Fred
 
Hej Fred!

I have one question that might be useful for modelling the bottom;

You mentioned some time ago that the bottom is flat, but there is a skeg nailed at the stern. 12 cm deep at the stern, tapering off to nothing about 4 m forward. Then at the stem, a fairing block to fair the stem to the bottom.

Question: How long is that fairing block please?
(I started some drawings a while back, but have a question mark on this one)

Cheers,
Peter
 
Last edited:
A bit of significant progress today on the little boat...

With the flat bottom made it was time to create the fore and aft partial keels. I simply made a template from cardstock and then cut the keels from 2mm pear sheets using a scroll saw. Here they are fitted to the slots I previously created in the hull template:

View attachment 341497

And then came the hard part - planking the hull to merge seamlessly with the flat bottom (how many of you knew I should not be attempting my first scratch build on a ship with a flat bottom??? :(). Well, after several aborted attempts I managed to fabricate something worth keeping:
View attachment 341498

View attachment 341499

View attachment 341500

View attachment 341501

Not my best work but acceptable. Note that from this point forward the hull will be planked using an overlapping (clinker-style) pattern - at least if I can manage that.

I am using veneer sheets (0.6 mm) for the hull planking (necessarily spiled because of the very round ends) making this little boat quite delicate. I did a trial using 1 mm stock but the clinkering was out of scale if left full thickness. I tried to cut a rabbet on the back side (lower edge) of the upper plank in order to reduce the clinkering - but I couldn't create a clean rabbet.

If the hull would only be seen from the outside, I think it would have worked - but the inside of the hull will be fully visible. Remember, every piece is spiled so I am not working with straight stock... I'm sure it's possible to cut a rabbet on curved pieces using a mill but my skills aren't there yet.

Anyway, I'm hoping the 0.6 mm veneer will look good inside and out...

Thanks for stopping by!
Hi dockattner,
Looking good so far, can not wait to see your next update.
 
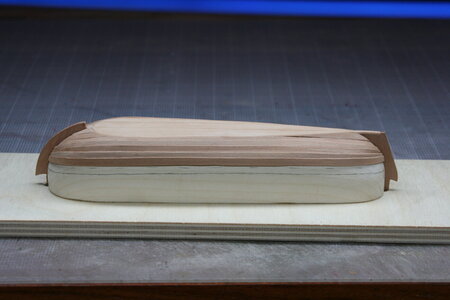
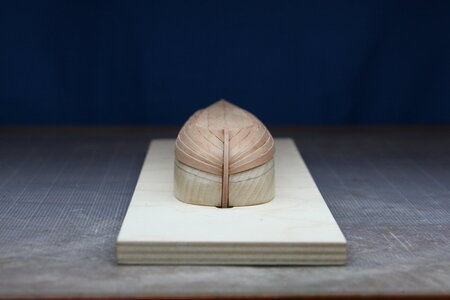
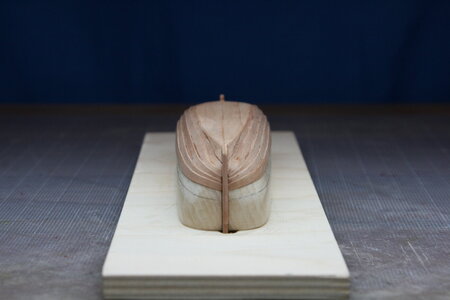
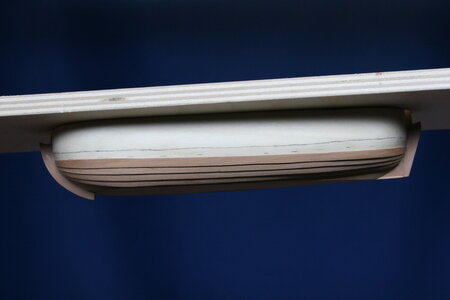
Next up it was time to attempt 'clinker' planking of the hull using the 0.6 mm veneer.

As was mentioned previously, the bluff bow and stern required spiling of each of the planks. I followed Kurt's suggestion and taped over the entire hull - drew in the hull planks - cut out the first of the patterns from the tape - and then used that to develop the form of the first plank. Because the clinkered hull is stacked from below this first hull plank was the lowest (closest to the keel).

That all worked swimmingly. But when it came to fit the second plank the tape pattern previously created was no longer suitable. I attribute that to my own inability to preserve the desired shape of the first plank. There is lots and lots of fussing getting the plank to sit just right and that meant lots and lots of reshaping/sanding/filing. By the time I was done with all that the pattern for the next plank didn't fit (at least not at the tolerances imposed by the tiny size of this boat).

Anyway, it's no big deal to just make tape (or paper - or cardstock) patterns for each plank:

IMG_8836.JPG


IMG_8838.JPG

Here is where I am as of today:

IMG_8855.JPG

IMG_8856.JPG

IMG_8857.JPG

IMG_8858.JPG

Hmm. Looks like I need to adjust the width of the last starboard plank at the bow...

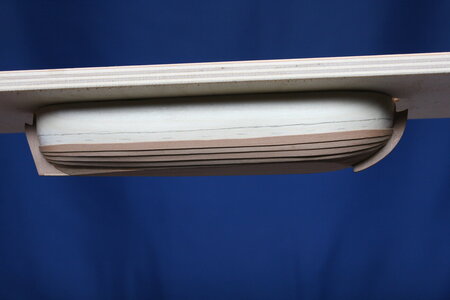
Two more planks to go and then I'll see if this approach worked or not (that is, will I be able to get it off the hull form and will it hold together?). Here is the esping "right side up":

IMG_8859.JPG

IMG_8860.JPG

Thanks for visiting. And Happy Thanksgiving to our US members!
 
Next up it was time to attempt 'clinker' planking of the hull using the 0.6 mm veneer.

As was mentioned previously, the bluff bow and stern required spiling of each of the planks. I followed Kurt's suggestion and taped over the entire hull - drew in the hull planks - cut out the first of the patterns from the tape - and then used that to develop the form of the first plank. Because the clinkered hull is stacked from below this first hull plank was the lowest (closest to the keel).

That all worked swimmingly. But when it came to fit the second plank the tape pattern previously created was no longer suitable. I attribute that to my own inability to preserve the desired shape of the first plank. There is lots and lots of fussing getting the plank to sit just right and that meant lots and lots of reshaping/sanding/filing. By the time I was done with all that the pattern for the next plank didn't fit (at least not at the tolerances imposed by the tiny size of this boat).

Anyway, it's no big deal to just make tape (or paper - or cardstock) patterns for each plank:

View attachment 342215


View attachment 342217

Here is where I am as of today:

View attachment 342220

View attachment 342221

View attachment 342222

View attachment 342223

Hmm. Looks like I need to adjust the width of the last starboard plank at the bow...

Two more planks to go and then I'll see if this approach worked or not (that is, will I be able to get it off the hull form and will it hold together?). Here is the esping "right side up":

View attachment 342224

View attachment 342225

Thanks for visiting. And Happy Thanksgiving to our US members!
Hi Dockattner,
Great job, a little bit of tinkering and it will be excellent.
Keep up the good work.
 
SUCCESS!

Today I tenderly, gingerly, cautiously, removed the little boat from its form. I had waxed the form itself but there were still places where the glue was stuck, and I had to snap/pry it off. In the process I broke a part of the planking from the forward keel, but it was easily repaired. This thing is crazy lightweight and SO fragile at this point!

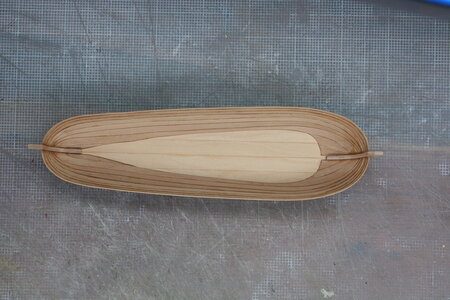
Looking into the hull from above:

IMG_8889.JPG

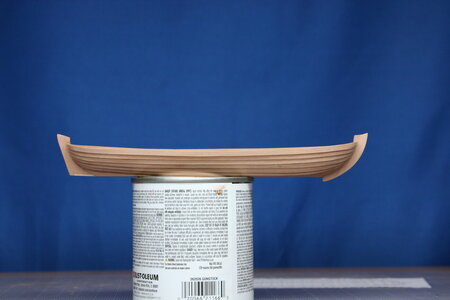
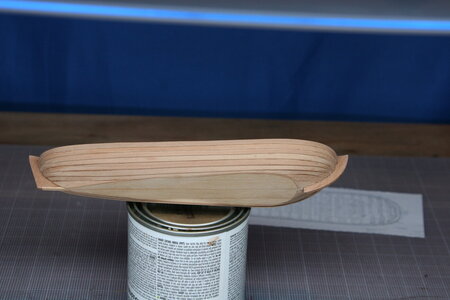
And from the side:

IMG_8891.JPG

IMG_8892.JPG

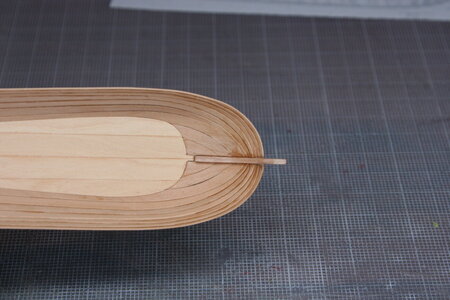
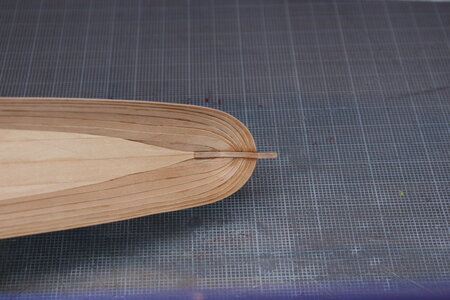
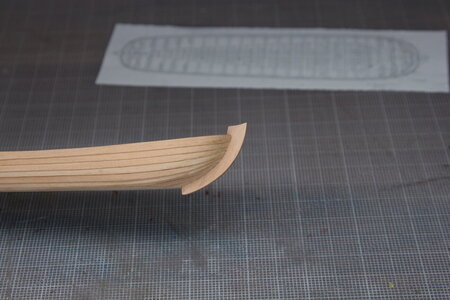
A closer look into the bow and stern:

IMG_8893.JPG

IMG_8894.JPG

Don't be concerned with the overflow of CA. I reinforced those joints, and the discoloration will disappear once the hull is treated with linseed oil.

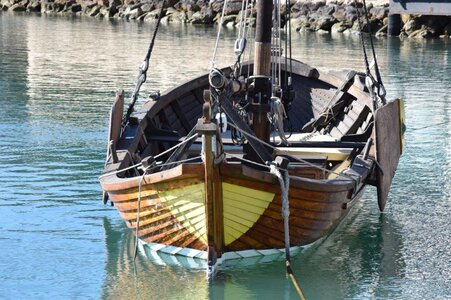
One of the 'difficult to model' features of an esping is the fact that the clinkering of the planks fades out as the boards approach the bow and stern. You can see what I am talking about in this picture of Batavia's longboat:

DSC_0496.JPG

In an early practice run I attempted to build the hull that way, but it was too much for me. The combo-platter of: size of the little boat, fragility of materials, hull-first planking technique, spiling every single piece, and inexperience, conspired against me. Anyway, I kept the clinkering all the way to the fore and aft partial keels as a concession.

In a separate communication, my friend Frank (@Frank48) gently pointed out my mistake based on pictures I had posted earlier. I explained to him then - and I'm showing you now - my compromise solution:

At the bow and then the stern:

IMG_8895.JPG

IMG_8897.JPG

Yup. You guessed it. I just filed and sanded in the flat profile... So much for my entry into the world ship modeling championships ROTF.

Next up: adding frames without breaking the thing apart (full disclosure: the hull has sprung out and the beam is now about 2.5 mm too wide (at scale) - I'm going to need to address that with the framing, or by adding some temporary battens to pull the sides in a bit).

Thanks for visiting my tiny shipyard.
 
Last edited:
As you said, I am just repeating - SUCCESS!!! ...and I love
SUCCESS!

Today I tenderly, gingerly, cautiously, removed the little boat from its form. I had waxed the form itself but there were still places where the glue was stuck, and I had to snap/pry it off. In the process I broke a part of the planking from the forward keel, but it was easily repaired. This thing is crazy lightweight and SO fragile at this point!

Looking into the hull from above:

View attachment 342470

And from the side:

View attachment 342471

View attachment 342472

A closer look into the bow and stern:

View attachment 342473

View attachment 342474

Don't be concerned with the overflow of CA. I reinforced those joints, and the discoloration will disappear once the hull is treated with linseed oil.

One of the 'difficult to model' features of an esping is the fact that the clinkering of the planks fades out as the boards approach the bow and stern. You can see what I am talking about in this picture of Batavia's longboat:

View attachment 342477

In an early practice run I attempted to build the hull that way, but it was too much for me. The combo-platter of: size of the little boat, fragility of materials, hull-first planking technique, spiling every single piece, and inexperience, conspired against me. Anyway, I kept the clinking all the way to the fore and aft partial keels as a concession.

In a separate communication, my friend Frank (@Frank48) gently pointed out my mistake based on pictures I had posted earlier. I explained to him then - and I'm showing you now - my compromise solution:

At the bow and then the stern:

View attachment 342475

View attachment 342476

Yup. You guessed it. I just filed and sanded in the flat profile... So much for my entry into the world ship modeling championships ROTF.

Next up: adding frames without breaking the thing apart (full disclosure: the hull has sprung out and the beam is now about 2.5 mm too wide (at scale) - I'm going to need to address that with the framing, or by adding some temporary battens to pull the sides in a bit).

Thanks for visiting my tiny shipyard.
Hi Dockattner,
You have done a great job so far, well done sir.
Maybe you could make a box that is the width plus the plank thickness of the proper dimensions required and put the little boat in so that it holds the correct shape while you continue to put in the stiffeners/ribs.
Just an idea.
 
Back
Top