• Win a Free Custom Engraved Brass Coin!!!
    As a way to introduce our brass coins to the community, we will raffle off a free coin during the month of August. Follow link ABOVE for instructions for entering.

Fair American 1:48 by Model Expo

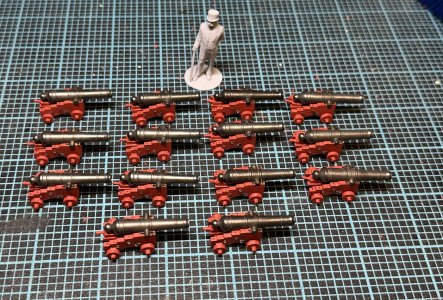
Thank you, again, to @GrantTyler for highlighting what I probably should have noticed myself. I came up with a jig to hold the assembled carriages and was able to drop them about 1.5mm.
View attachment 550011
Still sitting pretty high to the bulwarks, but perhaps just low enough to get away with leaving the bulwarks at the current height per the plans.

Thoughts, anyone?
Namabiiru!

I love what you're doing my friend! Although I am very late to the dance, I suggest leaving the bulwark height alone. Raising it will risk throwing off the lines/proportions. Looks to me like you don't absolutely need to do it because you're guns Will be low enough particularly after you get the cap rail on

Blessings
Chuck
Thank you for that sage input, Chuck. You’ve knocked me off the fence! :)
 
I am in dread of messing up the gun ports, so as part of my on-going effort to put off that task as long as possible, I contemplated the ship’s bell.
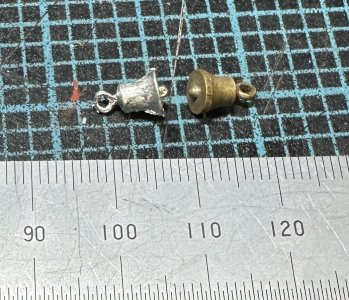
IMG_6194.jpeg
On the left is the brittania bell included in the current kit. On the right, the brass bell from the 30 year old kit. Both are acceptable, but who wouldn’t replace white metal parts, given half a chance?

But I figured I could do better still.
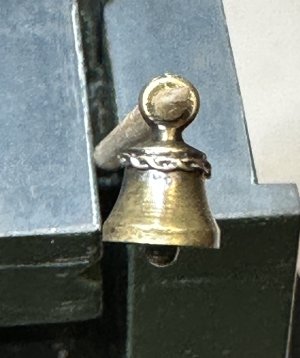
IMG_6200.jpeg
I decided to solder a brass filigree around the top, which I think really makes it pop (sorry for the poor photo—best my phone can manage).

The filigree was actually leftovers from making chains for a model tank. Two strands of brass wire twisted together then flattened in a pair of flat-faced pliers. A tiny amount of solder paste was applied to the bell before the filigree was wrapped around it.
 
Last edited:
Back
Top