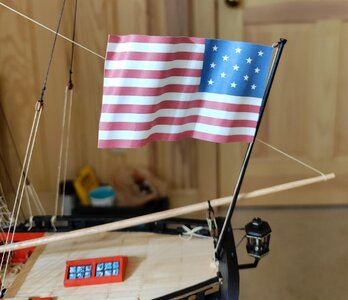
Fair American 1:48 Model Shipways Retrospective Log and Personal Modeling History

Joined
May 25, 2020
Messages
367
Points
228

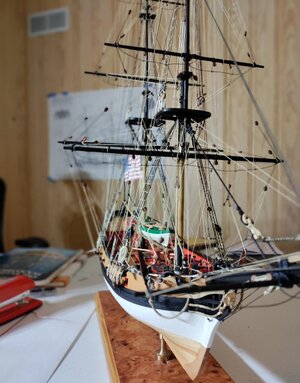
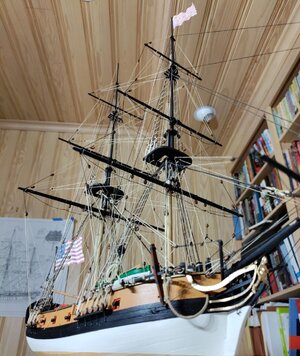
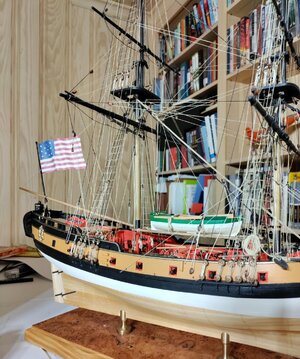
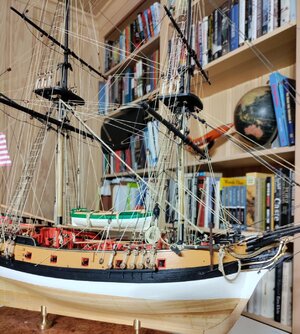
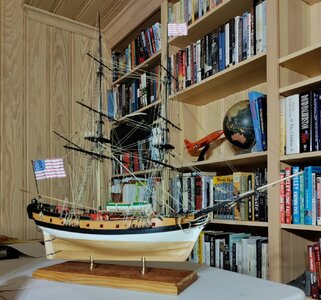
Good morning! This will be a retrospective build log. The model is pretty much finished. My thought is to record my mistakes and discoveries for comment by experienced modelers and perhaps for the benefit of other novices like me. I'm going to start the log at then end and work my way backwards. I'm doing this mainly because most of the pictures I took are of the finished model.

Before I post the pictures, a little history is in order. This is my second build of Fair American. My first build started in 1999 and ended in 2003. I have no pictures and the model was consumed in the conflagration of the Great Recession. I was fond of the model and had a great sense of accomplishment when I finished. My first build was the Model Shipways Sultana, solid hull. I did a crap job (much less than workman like), impatient and without the right tools. When I finished Fair American the first time, I looked at it from a birds eye view and had a hard time accepting that I really had built the model when I saw the wonderful, symmetrical spider web of the braces from above.

My next build was the Constructo USS Enterprise. The Enterprise scale is very close to 1:48 which, probably because of my first Fair American, is my preferred scale. My mother gave me the kit for Christmas in 2006. It was the last gift she gave me. It stayed in the box until summer 2020. Somehow it survived, a little worse for wear, through four house moves. When I finished it, again I had a feeling of accomplishment. I also learned a lot from the modelers here about hull planking, for instance, and upgrading, particularly replacing kit supplied blocks with the superior products one can now get from Syren Ship Model Company and Model Shipways to name a couple.

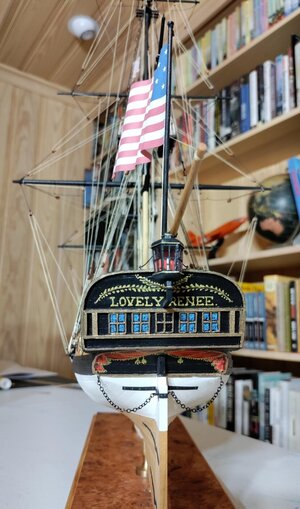
So, I ordered Fair American 2 which I rechristened Lovely Renee after my wife because she is the lovely Renee and because I tipped the scales in my favor for house room for my models;).
 
Last edited:
Although it smack of hubris, this is my best build ever:D. It makes my Sultana, Fair American 1 and Enterprise look like second hand bathtub toys. On the other hand. It is filled with errors and "I wish I had . . .".

"Things I tried because of you!" I think my future logs will all have this section. There are some great Fair American builds out there. Because of those modelers I added the rudder chains, the sky light, and the boat and I upgraded the stern lantern from the chunk of metal supplied with the kit to the Syren Ship Model Company 1:48 scale lantern. Also, because I'm not set up to do metal work, I'm indebted to the modelers who suggested black construction paper as a suitable scale substitute for certain iron work like gudgeons and pintles. Finally, although I'm certain it's controversial, thanks to the modelers who posted about making ships flags!
 
Beautiful work, very classy model!
Thank you! That's very kind! I don't know if you feel this way, but I fall in love with the one I just finished. Then like a fickle wind, taking whatever skill and foresight I learned in the process, I fall out of love with the one before it.
 
I get that. I think we continually improve our skills as we go from model to model and gain the ability to add improvements and just do a better job. Think that is why the latest completion retains our affection.
 
I'll write about my errors, "I wish I had . . ." and my skills progress in a general way for now. Later I'll go into more detail with relevant pictures.

My errors: My main error is impatience. Thus, for example, the ships boat with no oar locks or any way to keep the oars from sliding all over the place. There's just no way a boat's crew could have made any progress on the sea. The uniformity of the length of the chains and their placement in line with the shrouds. I could go on and I will in the chapter detailing my errors;)

"I wish I had . . ." You can probably fill in the first blank: I wish I had been more patient! Maybe, you were a kid like me. You started building model airplanes, tanks, ships, cars when you were 8 or 9 years old. I almost always had "extra" parts when I got finished. I realize that one of my joys of this avocation is that it reawakens my best childhood memories. I also realize that, if I'm going to produce a really good model, I need to tamp down my inner 8 year old.

I also wish I had stuck to the rigging plan in the kit for the Burton tackle at the topmast cross trees. I think, for what it's worth, that every additional detail pays off huge dividends in the finished product. I also wish I had taken more time thinking about the impact of moving the cabin bulkhead aft to accommodate the last pair of guns on the location of pinrails. The overarching, "I wish I had . . ." goes with my impatience. I wish I had spent more time thinking about the whole model and sourcing materials before I ever remove any parts from the box.

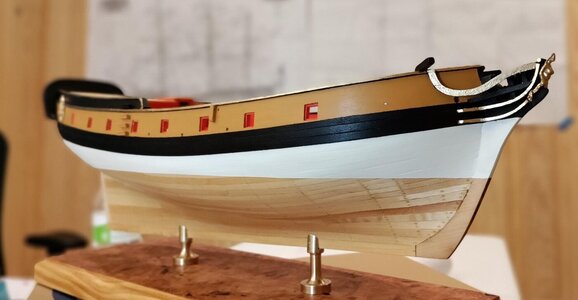
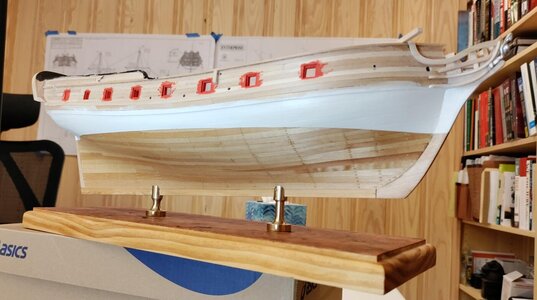
Progress! Happy to report I made some progress from my Enterprise build. I think one can say that planking the hull is a, if not the, cornerstone of a good model. On this point I really wish I had pictures of my first Fair American. I didn't have the patience at the time to do things the right way. I didn't have a manual or electric plank bender either. Nor did I have the modern internet - bless the planking tutorials on YouTube! I had Frank Mastini's Ship Modeling Simplified (and I'm glad I still have it!) and a Number 10 hobby knife and Titebond wood glue. My planking job was a mess and I tried to correct the mess with putty and sanding. Any rate, I painted and repainted the hull and you could still see what was and was not wood. With Lovely Renee I feel I made significant progress in my planking. So much so that I had the temerity to leave the lower hull unpainted and even attempted to show some tree-nailing!

More details next time shipmates!
 
Broke off again to take more pictures.

I mentioned earlier that one of my major bits of progress was in hull planking. That's what I think. My technique has gotten better. On the other hand, I have yet to do a second planking. As a novice, my thinking has been, so far, why on earth would I traumatize myself with a second planking! The first was bad enough!

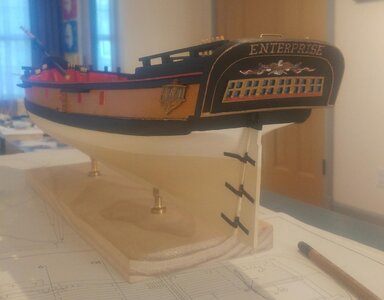
Here's one of the few picture I have of Enterprise. I hope you can see that despite the full paint job on the hull, no wood to be seen, the hull looks good and smooth. No filler! It took lots of sanding and a Mantua manual plank bender and a planking tutorial on YouTube.

Now for the Errors and "I wish I had . . . " It's not a great picture. I think you can see that the windows are on top of the transom planking. From what I've seen on the forum and subsequent research, the windows should be much more flush with the planking. If you looked at the Lovely Renee pictures, you've already seen that I repeated that error. Also, take a look at the rudder. It's about a mile away from the stern post. I used the supplied metal parts and this was the result. I wish I had studied the subject a bit more. After I attached the rubber to the hull I found a thread that talked about using black construction paper to simulate iron work. If I had know that, I probably would not have used the kit supplied parts and would have produced a much less clunky result. Also, based on my reading and the excellent work of modelers on the forum, the braces (straps on the rudder and hull) increase in length as they near the keel.

Enterprise Stern.jpg
 
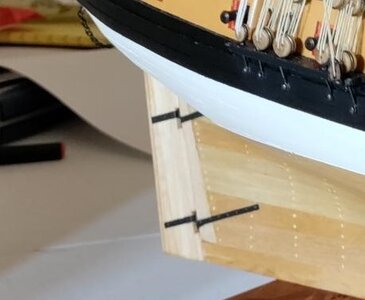
So, with Lovely Renee, I used the black construction paper method and came out with a result that satisfied me better. Again, sorry for the image quality. I think the result is much less clunky and easier to manage. I also discovered (it's probably more accurate to say that I stole it from a more experienced modeler) that I could represent the bold heads by dipping a took pick in a dab of wood glue (Titebond II - gonna try Elmers next time) and lightly touching the toothpick to the spot where I wanted the bolt head.

Now, I did make a mistake that nearly killed me when I attached the rudder: I used CA and did not properly align the straps on the hull. The lowest strap was not parallel with the two upper straps. A little nail polish remover and gentle scraping later, I had the bad straps (port and starboard) off the hull without damaging my totally awesome planking job (I hope you laughed at that!) I then made new braces and fixed the problem.

LR Rudder Detail.jpg
 
Last edited:
Apologies, I got a bit off track. Hull planking. With Lovely Renee I began with a major error. Although I have no pictures, I confess that my bulkheads were not square to the false keel when I finished gluing them in. I had to do a lot of shimming and sanding to give myself a somewhat decent skeleton to plank. By this time, I watched the hull planking video again AND I got an electric plank bender. The latter was a game changer for me. I don't have pictures of the planking in progress here's the result.

LR Hull painted.jpg

LR Hull Stbd.jpg
 
"I wish I had . . ."

I wish I had done the tree-nailing before I was near my final sanding. I also wish I had tree-nailed as if it were a plank on frame model.

"What happened was . . ." I anchored myself to the idea that I would paint the hull. I had always painted the hull and the picture on the box shows the hull painted. Once I had the hull pretty smooth, however, I though well, maybe I'll show wood below the waterline. And if I do, I'll simulate the tree-nails. More research on the forum for methods of tree-nailing and here she is. I think I used a .5 mm bit in a pin vise. The result would have been better if my planks had still been pretty thick when I tree-nailed. So what I ended up with was a hull that gives and idea, a suggestion of tree-nailing. I use Watco Tung Oil for the finish.
 
Progress

I mentioned earlier that I've recognized that every additional detail yields great results. I'm not speaking from experience. I'm talking about the models you've built and the overwhelming impression the detail makes. Here are the details I added to Lovely Renee.

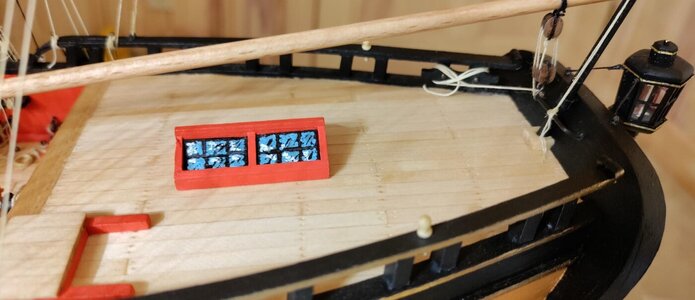
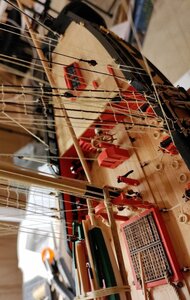
Skylight: A number of modelers have built Fair American. Many have decided to move the aft bulkhead further aft to give sufficient space to the aftermost guns. If you build according to the plans there's really not enough room for anyone to work those guns. In the same logs they also considered the very big (scale-wise) and empty quarter deck. The suggestion was a skylight! And, considering that I am the Capt. of Lovely Renee skylight sounded like a great idea. Moreover, for the Patrick O'Brien fans out there, Jack Auburey's first command was a brig Sophie, he married Sophie and his brig had a skylight!

Lovely Renee Skylight Detail.jpg
 
"I wish I had . . ."
I wish I had thought to check Syren Ship Model Company. How did I ever get along without Chuck Passaro? He's got a neat skylight kit in 1:48 scale for the revenue cutter Cheerful. I also wish I had been more patient and tried more than once to produce a scratch built prototype. I'm not angry with myself about the result. Rather than photorealism I opted for the impression of glass reflecting the sky and clouds.

Lovely Renee Aft Overhead.jpg
 
Last edited:
More details

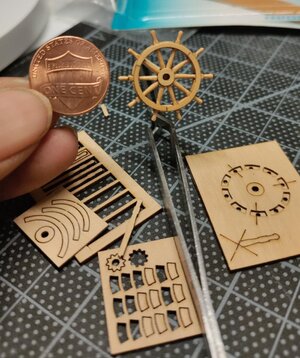
If you have this kit and are building it, or you've already built it, you probably looked at the Britannia metal castings with an arched eyebrow. Most of you who posted build logs replaced all of the kit parts with scratch built parts. Thank you! I followed your lead. How about the ship's wheel and stern lantern? I didn't take pictures of what I did not use. Here's what I used:

Syren Ship's Wheel Kit.jpg
 
You can also see in this picture my effort to replicate the pumps.

"I wish I had . . ." gone to SSMC ("Syren Ship Model Co.). Again, a nice set of pumps for the 1:48 scale revenue cutter Cheerful.
 
Other details.

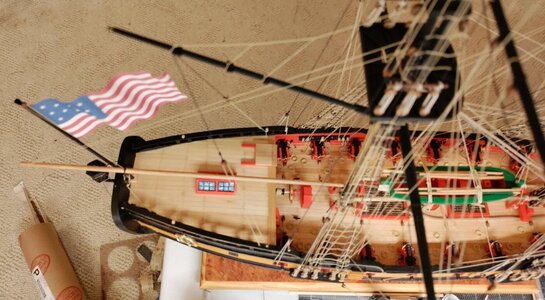
Motion. Yes, these are static models. But, some of you have done great things to give the impression of motion by rigging sails to your models. I am conflicted about this for myself. Mastini writes about going with or without sails and concludes why hide all of the work you did on the rigging. I agree. I agree in part because the rigging is so cool! The other part is that I don't have the skill (yet ;)) to do justice to a model under sail or even with furled sails. But I quite liked the idea of suggesting motion with the ensign and the jack.

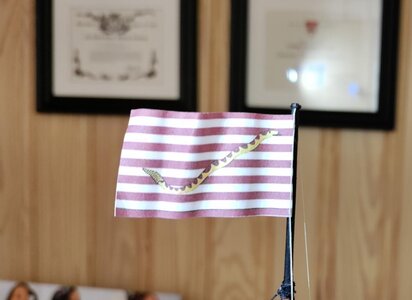
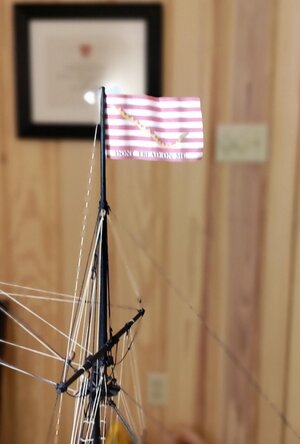
Fair American does not come with flags. So, I ordered some fabric flags which are very nice (I'll take some pictures of them and will be happy to mail them to the first person who asks). Then, as I approached the end of the build and started the process of "making" the flags I found that they did not "hold the wind" the way I wanted. Back to the forum and I learned about using paper to make flags that really "hold the wind"

Gadsden Jack Port.jpg

Gadsden Jack Starbord.jpg

Lovely Renee Ensign Port.jpg

Lovely Renee Ensign.jpg
 
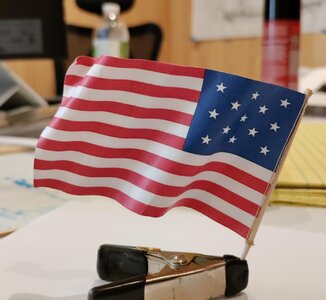
The picture at the bottom is my prototype of a 13 star ensign. In my imagination Lovely Renee is a commerce raider belonging to the Continental Navy. I have her attached to the squadron that cruised on British trade in the Caribbean. Thus the Gadsden Jack in the first two pictures.

Here's the method I used: I used Google to find crisp images of the flags I wanted. I copied the images and saved them. Unfortunately, my tech is not cutting edge. So, the images were pdf and not jpeg. Nevertheless, I could manipulate the size and create a reverse image. Once I was satisfied with the size, I printed both sides of the flag and used spray adhesive and tried to carefully mate them. Some of you are probably really good with the tech (photoshop?) and can produce something printable with registration marks to take the stress out of mating the flag halves.

Note that on the Gadsden Jack the motto "Don't Tread on Me" is only on one side. I do not know if this is historically accurate (I doubt it is). I did this by choosing which side of the ship will be most visible once she's "under glass" and in her rightful place in our living room. For me that's the starboard side and I printed that side with the motto. I took a copy of that print and blocked out the words. Made a scan. Reversed the image and came up with the port side of the flag with no words. I did this because I preferred no motto on the port side to having the motto backwards.
 
Back
Top