Very good work
-

Win a Free Custom Engraved Brass Coin!!!
As a way to introduce our brass coins to the community, we will raffle off a free coin during the month of August. Follow link ABOVE for instructions for entering.
-

PRE-ORDER SHIPS IN SCALE TODAY!
The beloved Ships in Scale Magazine is back and charting a new course for 2026!
Discover new skills, new techniques, and new inspirations in every issue.
NOTE THAT OUR FIRST ISSUE WILL BE JAN/FEB 2026
You are using an out of date browser. It may not display this or other websites correctly.
You should upgrade or use an alternative browser.
You should upgrade or use an alternative browser.
Fair American 1:48 Model Shipways Retrospective Log and Personal Modeling History
- Joined
- May 25, 2020
- Messages
- 1,131
- Points
- 443

More details.
If you're building Fair American, you probably notice the problem with the cabin door. I didn't with my first FA. Those whose logs I relied on noticed that the door is way too short for a any one to use it who's taller than about 4 ft. The suggestion was a transom that could slide and increasing the height of the door. I made my attempt and incorporated it into my effort to move the cabin bulkhead aft. If you're planning to move that bulkhead, do a lot of thinking about how that change might impact other things (more on my mistakes there in a later post).
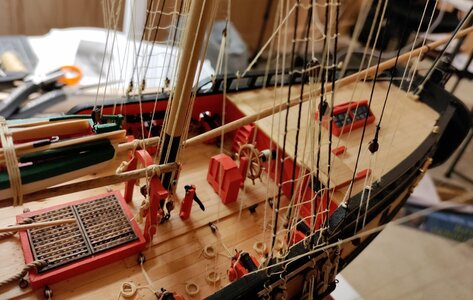
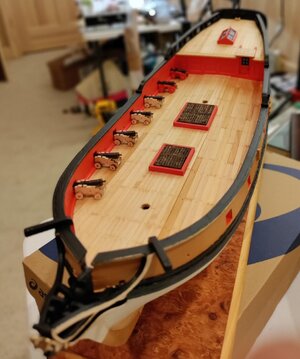
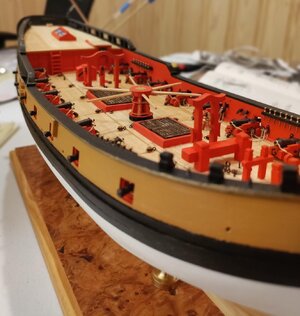
If you're building Fair American, you probably notice the problem with the cabin door. I didn't with my first FA. Those whose logs I relied on noticed that the door is way too short for a any one to use it who's taller than about 4 ft. The suggestion was a transom that could slide and increasing the height of the door. I made my attempt and incorporated it into my effort to move the cabin bulkhead aft. If you're planning to move that bulkhead, do a lot of thinking about how that change might impact other things (more on my mistakes there in a later post).


- Joined
- May 25, 2020
- Messages
- 1,131
- Points
- 443

Thank you Tobias! Very kind!Very good work
- Joined
- May 25, 2020
- Messages
- 1,131
- Points
- 443

- Joined
- May 25, 2020
- Messages
- 1,131
- Points
- 443

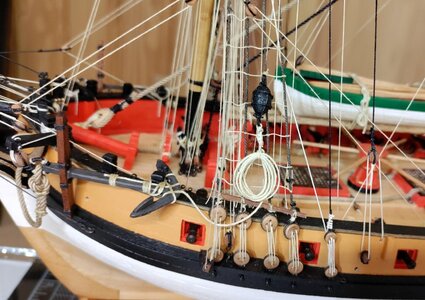
 buoy: This is a neat little detail that I omitted in my first FA and my Enterprise builds. I'm sure I first saw it on one of your FA build logs. I then went looking through the forum and found some wonderful examples. I also used Wolfram zu Mondfield's Historic Ship Models as a reference. In an avocation where precision counts, I'm almost embarrassed to say that I eyeballed the size of the buoy. It's shape, however, is shown in the book and on line and described as something like a rugby football. The descriptions showed me the proper placement of the ropes around the buoy and the the work of others on the proper dimensions of the buoy ropes in relation to the anchor cable was excellent. If memory serves the proportion is 1/3 the size of the next biggest rope. The biggest rope was the anchor cable. The buoy rope is 1/3 that size. The rope lashing the buoy rope to the anchor is 1/3 smaller than the buoy rope.
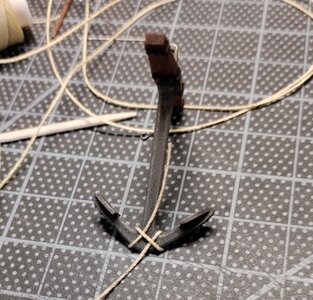
Error: The second picture is the anchor. I used my dremel to polish the cast Britannia and remove the casting line. I then blackened it as best I could in JAX pewter black. I did not thin the flukes!
Last edited:
- Joined
- May 25, 2020
- Messages
- 1,131
- Points
- 443

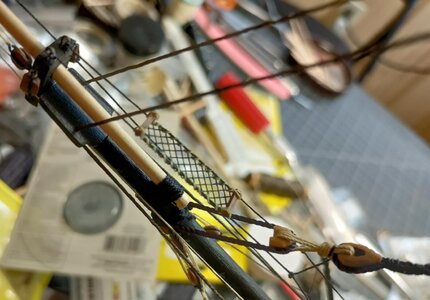
Bowsprit horse netting.
You might be asking why I bothered with this detail and not foot ropes for the bowsprit or the main boom. No excuse, Sir!
I think it was something I left off my first FA and I wanted to give it a try. For you Model Shipway's FA builders, you know there's a complete discussion of how to hand tie this netting. I took a short-cut. On one log I visited, the builder used screen door netting! Genius! So, after spending $10 on a 36"x 98" roll of netting I had a piece about 3/8" by about 15/16" that I laced to the horses.
You'll have also noticed that my effort rigging the foremast stay leaves something to be desired. I used a closed heart I bought and made the open heart. Other than glue, there's no way the open heart stays put. It's not even lashed to the collar!
"I wish I had . . ." If you're thinking: He wishes he had visited SSMC for open and closed hearts. You're right! I also wish I had studied this piece of rigging a bit more. Even using my clunky open heart, I could have extended it and lashed it to the collar.
Last edited:
- Joined
- May 25, 2020
- Messages
- 1,131
- Points
- 443

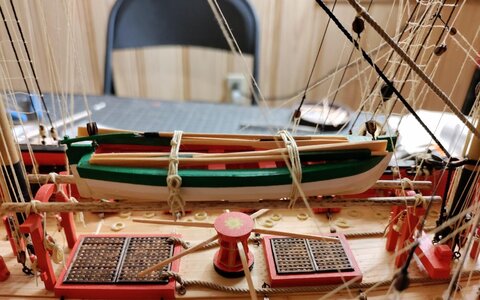
For those of you waiting for me to talk about the ship's boat, I'm going to have to disappoint you for the evening. This is a very important an cool detail. I want to take some better pictures of the boat on the model and the experiment that led to the boat on the model. I will say that this detail is based on the suggestions of FA builders logs and I am thankful to those modelers! I will also say, if you're skills aren't up to creating your own form and building a scratch boat like you are a 1:48 scale shipwright (thinking of Nigel Brook and Uwe here  ) shop around for kits. My skills aren't that well developed yet. So it was a kit for me . . .
Tune in tomorrow for the stunning conclusion! "Same Bat-time! Same Bat-channel!"
Tune in tomorrow for the stunning conclusion! "Same Bat-time! Same Bat-channel!"
- Joined
- May 25, 2020
- Messages
- 1,131
- Points
- 443

Ok. I just looked at what you're doing. Your kung fu is the best, Tobias!Very good work
Hello. I really do think you’ve made a wonderful ship here. Very clean construction with a keen attention to the details. In many places you‘ve preserved proper scale - not always an easy thing to do. Bravo.
Oh. And the beard is legit in your avatar.
- Joined
- May 25, 2020
- Messages
- 1,131
- Points
- 443

Thank you Paul! I just happened to come back to my work room for my blue-tooth speaker and saw your comments. Your comments are very kind. One of my posts for tomorrow is a comment on that very thing. I think the guns I went with are a bit small and the capstan I scratch built is a bit big. I'll also check out your builds in the morning! Looking forward to your Kingfisher!
Ah, yes! The beard! Long story behind that. Short story is that the real Lovely Renee said she liked it. So, I had it for over a year. Then I got tired of it and shaved it off. Now she says she never wants to see it again! I'm waiting 'til the whole thing is white which will probably happen tonight or over the weekend
 . In any event when it is all white, I've already told Lovely Renee that I'm growing it back! She wouldn't even let me keep the awesome Wolverine muttonchops I grew during the first COVID summer. Oh well, happy wife, happy life!
Ah, yes! The beard! Long story behind that. Short story is that the real Lovely Renee said she liked it. So, I had it for over a year. Then I got tired of it and shaved it off. Now she says she never wants to see it again!
- Joined
- May 25, 2020
- Messages
- 1,131
- Points
- 443

Good day to you, shipmates!
I read back through the log and noticed that I didn't write about the stern lantern yet. Again, I am indebted to you for pointing me in the direction of swapping out the cast Brittania lantern that can with the kit for the SSMC lantern kit. I can't say enough good things about Chuck Passaro's mini kits! The stern lantern kit comes with enough material to make two! The instructions are easy to follow and the result is so much better than the cast metal lantern.
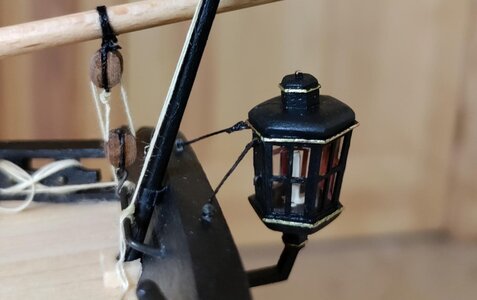
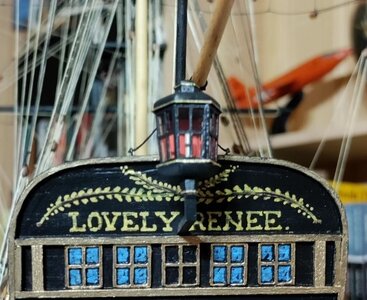
I read back through the log and noticed that I didn't write about the stern lantern yet. Again, I am indebted to you for pointing me in the direction of swapping out the cast Brittania lantern that can with the kit for the SSMC lantern kit. I can't say enough good things about Chuck Passaro's mini kits! The stern lantern kit comes with enough material to make two! The instructions are easy to follow and the result is so much better than the cast metal lantern.


- Joined
- May 25, 2020
- Messages
- 1,131
- Points
- 443

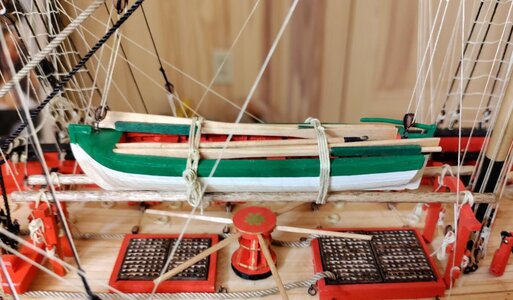
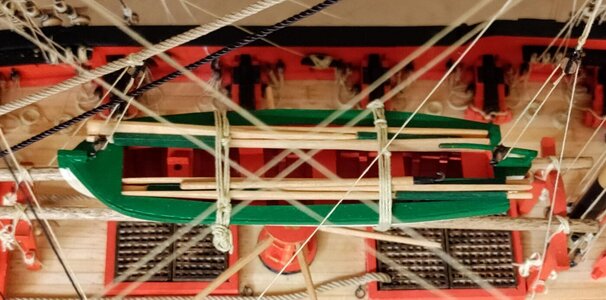
Now for the ship's boat. I confess that impatience got the best of me. Again! Also, again, thank you for pointing out that a ship the size of the FA would have had a ship's boat. Without that prompting, I wouldn't have even made the attempt.
After I decided that I would add a ships boat, I went looking for kits that might work. BTW, I think it would be great if any of you were to post separate build logs of your ship's boats whether from kits or from scratch.
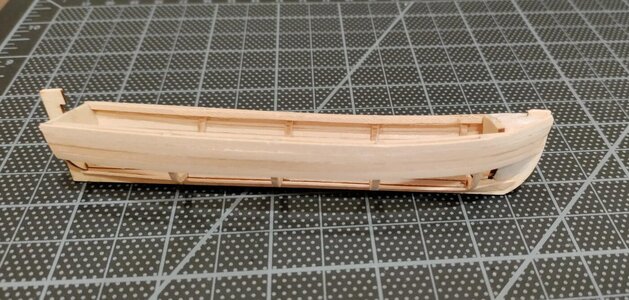
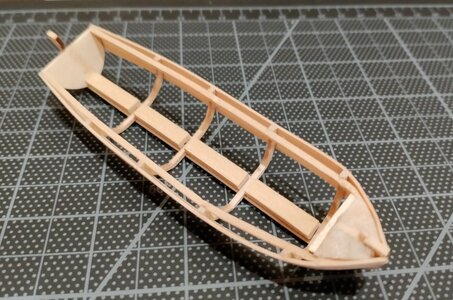
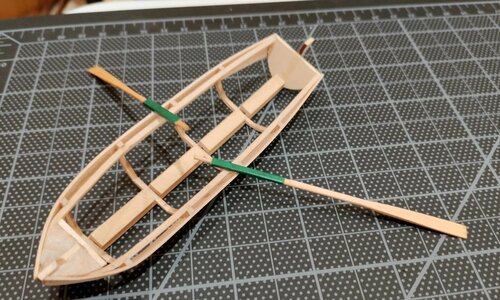
I found that Model Shipways had ship's boat kits in several sizes. The first one I ordered and partially built turned out to be way too big. But the process of trying to build it helped me understand the instructions. The hardest part, for me, of the Model Shipways kit was understanding the instructions. It took me a long time to puzzle out that the boat was to be build upside down on a frame. Then, having build the boat and having managed not to glue the boat to the frame, you could cut the frame attachment points and remove the basic hull structure. Unfortunately, I didn't take pictures of the process. I am going to post photos of the partially built boat.


- Joined
- May 25, 2020
- Messages
- 1,131
- Points
- 443

Obviously, I need to work on my photography skills. Ok, here was the problem, for me, once I figured the instructions out: the four frames are 1/16 x 1/16. They were meant to be bent over the formers, but even with trying to soak and heat bend them they came out kinked. The oars did not come from the kit. I shaped them from 3/16 x 1/16 bass wood basing the dimensions on diagrams in Wolfram zu Mondfeld's Historic Ship Models.
- Joined
- May 25, 2020
- Messages
- 1,131
- Points
- 443

I am happy with the oars and my effort at a boat hook.
"I wish I had . . ." Been more patient. The ships boat is a cool detail! It should have oar locks! I also wish I had paid the "$2.00" and given the boat a third shot. The Model Shipways kit isn't expensive. Also, I wish I had done more research on ship's boat kits. CAF has some kits that look like stunners and seem reasonably priced.
"I wish I had . . ." Been more patient. The ships boat is a cool detail! It should have oar locks! I also wish I had paid the "$2.00" and given the boat a third shot. The Model Shipways kit isn't expensive. Also, I wish I had done more research on ship's boat kits. CAF has some kits that look like stunners and seem reasonably priced.
- Joined
- May 25, 2020
- Messages
- 1,131
- Points
- 443

A few of other details are worth mentioning. Rigging line, blocks, guns.
The FA kit comes with rigging line blocks and guns. The line is very shiny and the blocks are not particularly beautiful. The guns in this kit were cast Britannia metal. On my first FA, I used what came with the kit and was happy for it! This time, I decided to upgrade the rigging line and replace all of the blocks with Model Shipways "Beautiful Blocks" and blocks, also beautiful, from SSMC. I had a very kind compliment about my effort to keep to scale yesterday. I tried. In some respects I failed. But, I think that having a variety of sizes of rigging line and blocks helps with the project of trying to show size relative to purpose. This may be the completely wrong idea, but I planned my rigging with the thought that blocks and line for heavier spars should be bigger and thicker. So, I used 4 - 5 mm blocks on the fore and main yards, 3.5 mm blocks on fore and main topsail yards and 3mm blocks on the topgallants. The thickness of the line changed as well as I went aloft.
The FA kit comes with rigging line blocks and guns. The line is very shiny and the blocks are not particularly beautiful. The guns in this kit were cast Britannia metal. On my first FA, I used what came with the kit and was happy for it! This time, I decided to upgrade the rigging line and replace all of the blocks with Model Shipways "Beautiful Blocks" and blocks, also beautiful, from SSMC. I had a very kind compliment about my effort to keep to scale yesterday. I tried. In some respects I failed. But, I think that having a variety of sizes of rigging line and blocks helps with the project of trying to show size relative to purpose. This may be the completely wrong idea, but I planned my rigging with the thought that blocks and line for heavier spars should be bigger and thicker. So, I used 4 - 5 mm blocks on the fore and main yards, 3.5 mm blocks on fore and main topsail yards and 3mm blocks on the topgallants. The thickness of the line changed as well as I went aloft.
- Joined
- May 25, 2020
- Messages
- 1,131
- Points
- 443

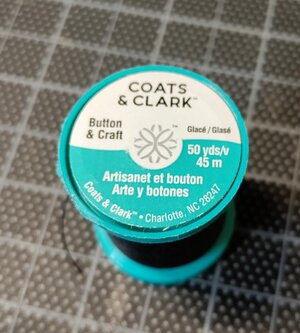
Speaking of rigging: I had a devil of a time stropping my blocks with wire. On my Enterprise build I remember crushing several blocks as I tried to twist the wire to conform to the shape of the blocks. Then, I read on the forum about stropping blocks with thread! That was a game changer. No more ruined blocks and, to my mind, the result is much less clunky. Also the thread is thick enough to use for some of the smaller diameter standing rigging.


- Joined
- May 25, 2020
- Messages
- 1,131
- Points
- 443

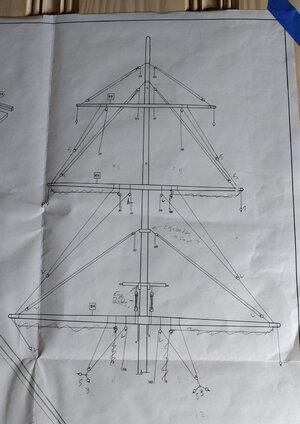
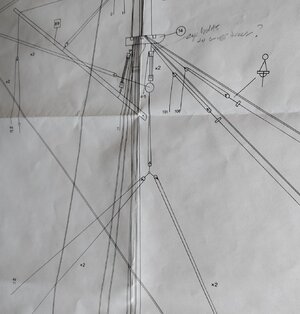
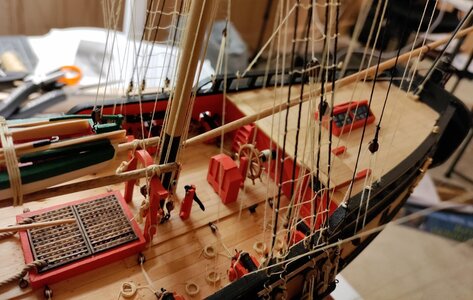
One of my favorite detail upgrades to the FA rigging was the addition of sheets and and clewlines and the fore tack. Why have fore tack boomkins and no fore tack! I used the rigging plan from Enterprise as a guide. These additional lines and their attachments to the yards are shown in the first photo. The second photo shows the fore tack side on.
