- Joined
- Feb 18, 2019
- Messages
- 717
- Points
- 353

 |
As a way to introduce our brass coins to the community, we will raffle off a free coin during the month of August. Follow link ABOVE for instructions for entering. |
 |
 |
The beloved Ships in Scale Magazine is back and charting a new course for 2026! Discover new skills, new techniques, and new inspirations in every issue. NOTE THAT OUR FIRST ISSUE WILL BE JAN/FEB 2026 |
 |


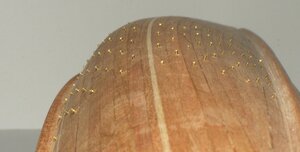
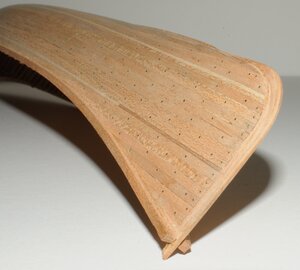

how hard is it to sand the brass nail ends down?
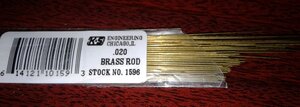
What type brass wire do you use for the nails.
It must take fine tough and good eyes to not damage the planking strips when taking the brass rods down flush. Dedicated patience there. PT-2Planking Fastenings simulation ...
A shorter canoe = less nails.
The process has began: working one vertical row at a time.
- marking the placement of each individual nail with a pencil dot.
- pre-drilling the holes.
- Inserting the brass rod.
- Cutting the nail (using a nail-clipper)
And repeat for as many ribs there are.
Here the nails have been put in place. The portion implanted in the wood is about 1/16 of an inch or 1.6 mm. The portion sticking out is about 1/32".
Now they need to be filed flush with the planking. Filing goes quite quickly...
View attachment 173811
And here is the result...
View attachment 173812
G.

Brass was acquired years ago from my local hobby shop. At the time I purchased 100's of 12 inch long pieces. I use this stuff exclusively on canoes and small vessels when needed: I probably simulate nailing at a ratio of about 1 for every 15 or 18 canoe and even less for other small water crafts, but I am running low on inventory.Thanks good to know, what is your secret source for the brass, somewhere on the web I hope!

It must take fine tough and good eyes to not damage the planking strips when taking the brass rods down flush. Dedicated patience there. PT-2
Thank you for your advice. Definitely something to pay attention to if after a trial on other material I decide to proceed. PT-2That is why it almost doubles building time.
It largely depends on what kind of lumber is used for the planking.
Hard wood works fine as long as the nails do not go right thru the planking as the nails will just sink in when any pressure is applied on it. You need to have a light touch and a fine file.
If soft wood is used, such as cedar, the nail will move (wiggle) under the pressure of the file or sand paper movement. It will create a larger hole in the planking: believe me I have done this operation before. The only solution for this is to cut the nail longer and flatten one end before installation so that it does not have the sharp edge created by the cutting tool. This is a painful process ... for the average fingers: your finger-prints will just disappear.
Planking on the canoe will likely be around 1/16 of an inch thick when the nails are placed. If the location of the ribs is followed, you can add half the thickness of the ribs (about 1/64") to the length of the nail.
As well, I would recommend not just pushing the nails in. Instead "rotate" them as they are pushed and inserted in the hole... Clockwise / counter clockwise back and forth movement works: the sharp edge created by the cutting tool will make the nail dig in the lumber: kind of like the end of a drill bit.
Well, this is my take on this subject. It is neither the best or the only way to do this: I am sure other modelers may have other solutions.... such as bypassing the pre-drilling step and inserting a short piece of brass in the drill: using the brass as the bit.
Anyways, adding the nails is tedious work and can be risky as once one starts, there is no turning back. So be ready for a long process if you decide to go thru this.
It is best to practice before going into it on the canoe. Practice not only on one single strip but glue a few together to simulate an area of the planking and go at it. The straight flat areas should work well, curved areas are a bit more touchy .... and canoes have curves everywhere.
You may also check this post for details as to the process:
#6 Support: Installation of inner gunwale and simulation of fastenings.
Here we will address: All matters related to the installation of the inner gunwale and simulation of fastenings (optional).shipsofscale.com
G

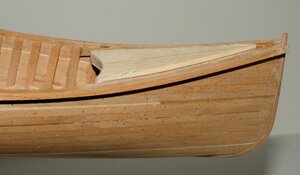
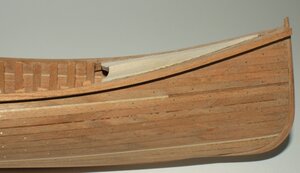
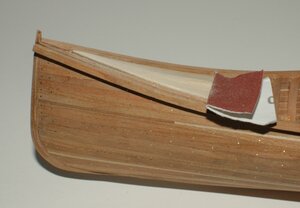

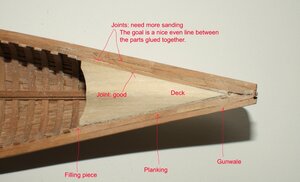
I enjoy the good information on technique used to help us from botching up our first attempt to duplicate the looks you have demonstrated.
I have been looking around the internet for old and old wood canoes. Here is an Old Town circa 1929 I believe and the short bow "deck" filler piece on the restored canvas covered canoe. PT-2Not quite done with the nails yet: still have half of one side to do.
But I am a bit tired of doing that so to change pace I decided to work on the deck for the end that is done.
The decks on this canoe will be shorter and completely closed (no opening due to ribs and inner gunwales) so I am doing something slightly different from what I did on the 19 inch.
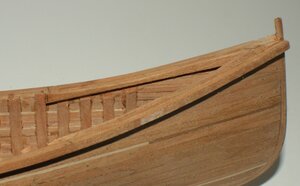
The inner gunwales will only run from deck to deck instead of the entire length of the canoe. After having decided where the deck is to begin at each end of the canoe and in order to seal it, I shortened a few ribs on each side and installed a filling piece running from the spot where the deck begins (the last full length rib) to the tip of the stem.
This filling piece is made out of the same material used for the ribs: same thickness and will follow the curve of the sheer.
View attachment 174143
Then the deck is cut and dry fitted. Once in place, the sheer line is transferred to its edge so that it can be shaped accordingly.
The deck is made from lumber + 1/8 inch thick (birch).
View attachment 174144
The deck will look similar to what I did on the 19 inch canoe. The shape requires a bit of carving and a whole lot of sanding to get that center crest towards the open end trying to follow the curve of the sheer line.
The photo below show the preliminary shape. The deck is kind of flat at the stem and the crest is gradually created towards the open end.
View attachment 174145
At this point the deck is permanently installed so that the final shape can be achieved. All sanding is done by hand, and as you will notice, there is quite a bit to do.
View attachment 174146
About 45 minutes later...
View attachment 174147
But more work need be done in the joint areas: all 4 layers (deck - filling piece - planking and gunwale need to be leveled to achieve that nice / clean joint line.
View attachment 174148
The joints will be cleaned by sanding once the inner gunwales are installed....
But for now, back to nailing so that the deck can be installed at the other end.
So, to be continued....
G
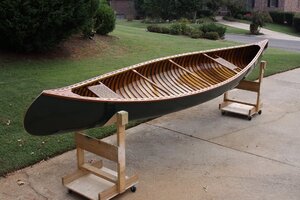
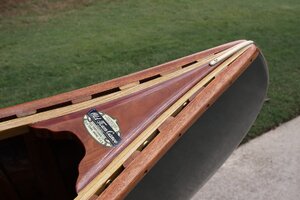
I have been looking around the internet for old and old wood canoes. Here is an Old Town circa 1929 I believe and the short bow "deck" filler piece on the restored canvas covered canoe. PT-2View attachment 174152View attachment 174153
I should have saved the photo of the delapidated canoe before restoration. It looked like there was some kind of thin veneer on the ribs as a substrate to the canvas. Restoration must have been a major challenge and cost to bring it to the present condition. The seats are woven cane. PT-2NICE.!!
That is a classic look.
They made a stripper about 30-35 years ago that was 15-16 ft. long. It was a little wider across the beam and a bit flatter on the bottom. Absolutely beautiful.!!


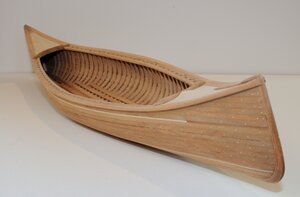
I have been wondering if the scale of these canoes is 1" = 1'? From the appearance of my 19 incher it seems long but if it is a cruising type of canoe and not a tight turning one that would make some sense for a 19 ft. canoe I would like to know so that I can correctly proportion seats and paddles when I get there. Status if major sanding to day smoothing out my more irregularly set strips which did not always have good clamping to hold them in place. This is my learner project and while a bit disappointed I can accept the facts and move onward. PT-2This is what the 17-inch canoe looks like as of today: equipped with the decks.
Have to do a bit of cleanup on the outside including light fine sanding and it will be time for finishing.
View attachment 174375
I know, some may wonder why the decks of my canoe models are much longer than the typical deck on the typical real canoe. Well, it makes for a distinctive look...
Keeping the proportions in mind, the decks on this canoe are shorter than what I normally do these days, but I do need a certain length to keep the appearance and shape in line with the others.
G.


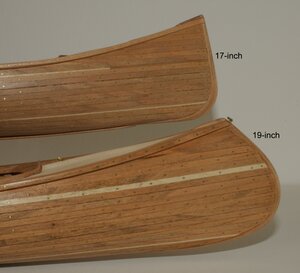
17 looks darker and has a sheen from the light that the 19 does not. I was thinking about an oil finish but will try a small sample to compare with varnish. Do you brush that on? (which is what I would be doing) PT-2First outside coat of varnish applied to both canoes : 19 and 17-inch.
The 19-inch was not varnish at the time, as I wanted to do one of the 17-inch at the same time.
Do you see a difference? Although both are made of the same wood (cherry) and the same finish is being applied.
View attachment 174567
At least 5 more coats to go.
G
