• Ships of Scale has incorportated an extra level of security when you log In. Please follow on-screen prompts to acknowledge that you are not a robot via a "Check Box" or a "Pictorial Check Box Puzzle". This is needed due to higher level of AI Activity Security.
  • SUBSCRIBE TO SHIPS IN SCALE TODAY!

    The beloved Ships in Scale Magazine is back and charting a new course for 2026!
    Discover new skills, new techniques, and new inspirations in every issue.

    NOTE THAT OUR NEXT ISSUE WILL BE July/August 2026
  • Win a Free Custom Engraved Brass Coin!!!
    As a way to introduce our brass coins to the community, we will raffle off a free coin during the month of August. Follow link ABOVE for instructions for entering.

H.M.S. Enterprize 1774 1:48 from Modelship Dockard, by Fangorn (Guy)

Joined
Dec 21, 2022
Messages
120
Points
88

Location
Bealeton, VA
Good day all. I received the model last week. The box got a tad wet in one corner but all is well except for a corner on the box. 19 lb 2.5 oz or 8.7kg.

I know it is quite a large build. I have the 1:96 version as well and it is a much smaller build (.5mm clearances for framing). For me right now bigger is better. I build for my joy and try to do my best. There is a log for the 1:96 too.. but it is on hold.

This will be from start to finish with small comments between, including the building of the Jig.
- I will try to order some prints from RMG https://shipsofscale.com/sosforums/threads/enterprize-1774-1-48-scale-kit-from-md.18451/post-486816 but for the most part I will compare a lot with the AOS book Pandora as this is similar in build.
- Goal to understand the infrastructure
- Goal to fully rig the model (I have heard that MD will be coming out with a rigging upgrade... I HOPE SO)
-Goal concentrate on this model and no others. Although my 70 year old stroke damaged mind would like to.. I have learned not to listen to it. (I have several models I bought and now in my stash that I will never get to.. I listened to my mind. You can only really do ONE thing at a time.)

I will put pictures here for now. https://photos.app.goo.gl/Bbyhdi1D3bQFyQqj7
 
Welcome to the group build !
I'll follow your build. :)
I have slowed down a lot on my build because I'm having trouble with cataracts.
Still working a little bit, but it's very slow.
Trying to get surgery for it.
 
Cataracts. My right one is done. Left yet to do. It’s getting foggier. Lots of floaters too.
I hope I don’t move too slowly for others.

Btw. Char removal. What are you doing?
 
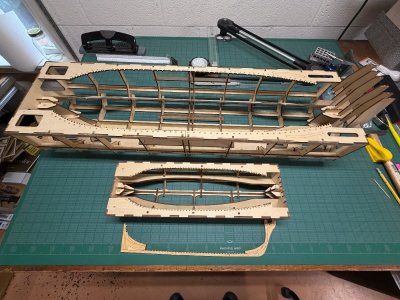
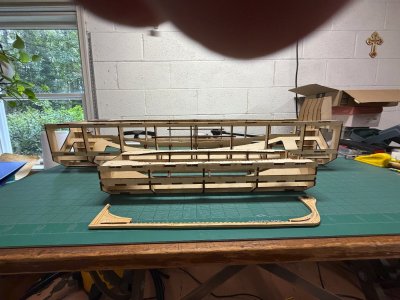
Just finished the Frame Jig. It weighs in at 2 lb 4.5oz or 1.035kg. For fun I placed the 1/96 version of the Frame jig. It weighs in at 9 oz or 0.26kg. You can see the size difference between 1/48 and 1/96. I plan on building both, but will concentrate first on the 1/48
Now to the next step.. what fun!
Hope all are well!
Guy
IMG_0413.JPGIMG_0414.JPG
 
Hello folks,
It appears that the packing is by wood thickness. I am ready to build the keel and associated parts. Are there any drawings which show the outline of items on a sheet and the thickness of the sheet? ( @Dry-Dock Models & Parts )? not having the full drawings it is hard to find a part. Before I go and make a picture of each billet I wanted to check. See the attachment
Guy
 

Attachments

Hi Guy

I messaged @Modelship Dockyard ,I don’t really have an answer to this as I am not the manufacturer.Victor can clear this up.

Zoltan
Thanks Zoltan. I love the kit.. finding parts is one thing.. and if it is removed from the billet/spue.. it is not marked (which is ok, but one needs to pencil in the parts id.. in case it gets mixed up.

Guy
 
@Fangorn - There was no parts list when I started mine, but perhaps they have one now. All of the sheets are labeled with a letter which is normally included in the construction drawing. As an example, a part number would be "C1-14" That means sheet C1 and part number 14 on that sheet. There are some instances where an incorrect part number is given in the drawings. In my build log, I have tried to itemize those as I have built, to help others.
 
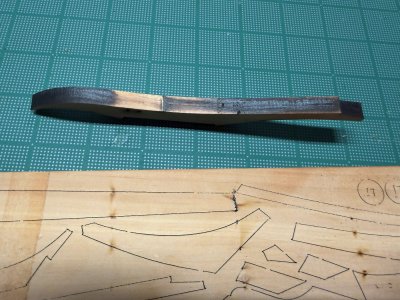
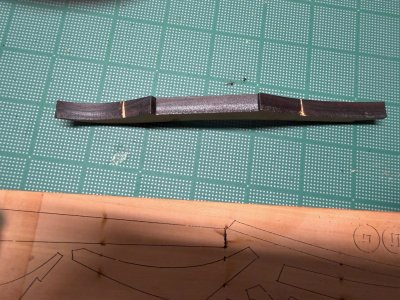
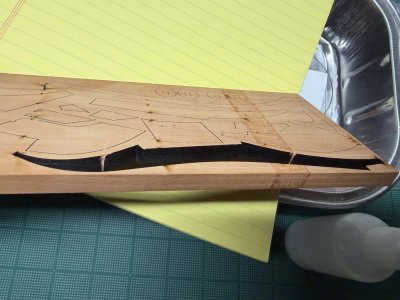
Good afternoon. Whats a little (LOT!) of CHAR. Well, i have learned my lesson. It is ALL my fault. I should have read, read and then read some more about these newer fangled laser cut kits (https://shipsofscale.com/sosforums/threads/ca-glue-oozing-from-fine-tip.19077/post-503986 ) . You buy a fine pear, cherry, even boxwood kit from vendors thinking you will have a bright model with sharp edges (where needed) on the boat/ship model. To learn
1. I had fun building the highly engineered building jig. (but it was just like building an erector set)
2. I started to build the keel and the cutwater and on the thickest pear board got the A-6 out. Beautiful pear. with tons of difficult to remove char where the laser cut.
3. got my scrapers out (no sand paper) because I wanted fine sharp edges.. well... as @Bob Cleek said "cant polish a turd"... well you can but.. a turd is a turd. I screwed up.
4. It would take me hundreds and hundred of hours of scraping and sanding. (round edges and misshapen parts to boot).
5. I wondered why there were really few models...I chocked this up to expensive.. yep.

6. Well.. the Alert 1777 is 85% cnc with tons of saw dust, but NO char. I will try this as I have the model.

Someone said (above) "I guess what I'm really trying to say as gracefully as possible is that the best way to remove laser-cutting char from your models is not to buy it anymore."

I dont know what I was thinking.. if I want a fine model, scratch build it.. I MUST make the effort. Not pay someone to generate a kit for me that is laser cut.

... off my box.. sorry for the bandwidth...

GuyIMG_0421.JPGIMG_0424.JPGIMG_0425.JPG
 
I'm sorry you had trouble with what quite a few have said is one of the best on the market. Yes, char is a pain, but with some aggressive sand paper on a block, it's not that hard to remove.
 
Its the sandpaper and being agressive. One changes the sizes of the actual part and rounds the edges. I will try a few things..
 
use a large "slab as a piece holder (this prevents the sanding block from marking the top of the work bench) and slide the side of the sandpaper block along the piece while holding the piece and the sanding block flat on the "slab".
 
Back
Top