-

Win a Free Custom Engraved Brass Coin!!!
As a way to introduce our brass coins to the community, we will raffle off a free coin during the month of August. Follow link ABOVE for instructions for entering.
-

PRE-ORDER SHIPS IN SCALE TODAY!
The beloved Ships in Scale Magazine is back and charting a new course for 2026!
Discover new skills, new techniques, and new inspirations in every issue.
NOTE THAT OUR FIRST ISSUE WILL BE JAN/FEB 2026
You are using an out of date browser. It may not display this or other websites correctly.
You should upgrade or use an alternative browser.
You should upgrade or use an alternative browser.
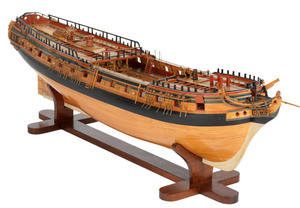
H.M.S Minerva plank on frame 1/48 scale - Prototype Pilot Model
This model is a beta version/ prototype kit and not available for sale until later this year. There could be some adjustments that need to be made during construction, and I will be liaising with DaHai model about this.
The model will be available in a stern section in 2 chapters, and also a full hull version of 5 chapters. The kit I am building is the full hull 5 chapter version. It should be noted that this kit is an Admiralty model with stub masts.
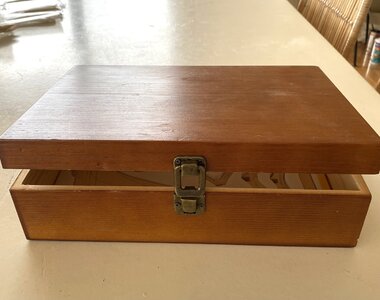
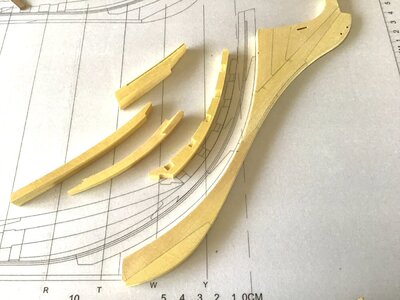
Here are some photos of the kit contents.
.
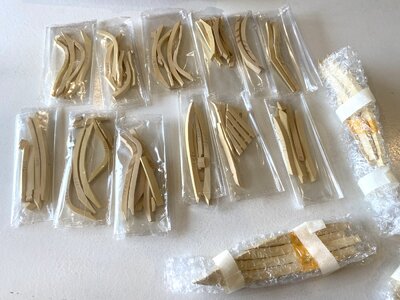
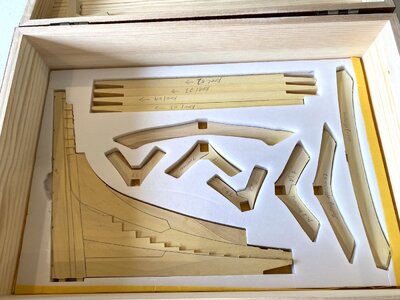
The model will be available in a stern section in 2 chapters, and also a full hull version of 5 chapters. The kit I am building is the full hull 5 chapter version. It should be noted that this kit is an Admiralty model with stub masts.
Here are some photos of the kit contents.
.


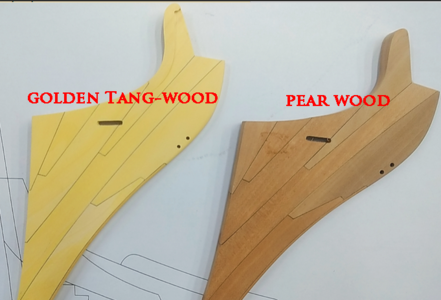
The kits will be offered in 2 versions of timber for the modeller to choose from. The first is a very high quality pear wood, and the second is Golden tang or Chinese Jujube wood. That looks almost identical to English boxwood. The Golden tang wood is a more expensive option and its the wood I have selected for my model.
For those wondering, DaHai model has purchased a licensing agreement from the NMM to produce this kit commercially. I know that is an important point for some people.
.
.
For those wondering, DaHai model has purchased a licensing agreement from the NMM to produce this kit commercially. I know that is an important point for some people.
.
.

Last edited:
- Joined
- Jan 9, 2020
- Messages
- 10,566
- Points
- 938

I am happy for you that you finally received the kit, Brian. In my conversations with Da Hai, he has made it clear that the goalposts are being shifted with this kit. Judging by the packaging, the appearance of the wood and the jigs it certainly looks like something very different. I do believe however, that the acid test of this kit will be when the perceived quality is measured against the purchase price. On the surface all looks very good, but very expensive. Therefore, the question will be how expensive - people like to judge against known parameters and in doing so will ask the age-old question: If it is double the price of Model XXX, is it twice as good?
I will follow with interest. I just hope that you don't make us wait as long as with the Granado.
I will follow with interest. I just hope that you don't make us wait as long as with the Granado.
Very promising parts and jigs - I am looking forward to see much more of this kit
BTW: I ejoyed the work with this kind of wood (boxwood) on my Granado section very much.
But also the example of the stern structure in pear is looking extremely good
BTW2: I underline the last sentence made by Heinrich - hope to see regular the progress on this highly interesting model
BTW: I ejoyed the work with this kind of wood (boxwood) on my Granado section very much.
But also the example of the stern structure in pear is looking extremely good
BTW2: I underline the last sentence made by Heinrich - hope to see regular the progress on this highly interesting model
Je vais suivre aussi cela de prés ! c'est un kit qui parait très intéressant, au vu du nombre de pièces et de leurs finitions ! bonne continuation.
Last edited:
I am happy for you that you finally received the kit, Brian. In my conversations with Da Hai, he has made it clear that the goalposts are being shifted with this kit. Judging by the packaging, the appearance of the wood and the jigs it certainly looks like something very different. I do believe however, that the acid test of this kit will be when the perceived quality is measured against the purchase price. On the surface all looks very good, but very expensive. Therefore, the question will be how expensive - people like to judge against known parameters and in doing so will ask the age-old question: If it is double the price of Model XXX, is it twice as good?
I will follow with interest. I just hope that you don't make us wait as long as with the Granado.
I tought the same thing when I saw for the first time the all metal building slip on Aliexpress at a couples of x100$. All these money just for an accessories.
During the preparation and the devolpment with @DaHaimodel we made some additional research, and based on this I made some time ago a summary in the ship history area, with a collection of existing contemporary drawings, paintings and even contemporary models of the Minerva and the other ships of the same class.
So if you are interested also in the original vessel, please take a look here:
So if you are interested also in the original vessel, please take a look here:
Minerva class frigates - the first 38-gun 18-pounder frigates of british Navy (1778–1782)
Minerva class frigates - the first 38-gun 18-pounder frigates of british Navy (1778–1782)
The Minerva-class sailing frigates were a series of four ships built to a 1778 design by Sir Edward Hunt, which served in the Royal Navy during the latter decades of the eighteenth century. During the early stages of the American Revolutionary War, the Royal Navy - while well supplied with...
shipsofscale.com
38-gun Minerva-class frigates - HMS Minerva (1780) / HMS Arethusa (1781) / HMS Phaeton (1782) / HMS Thetis (1782)
38-gun Minerva-class frigates - HMS Minerva (1780) / HMS Arethusa (1781) / HMS Phaeton (1782) / HMS Thetis (1782)
The Minerva-class sailing frigates were a series of four ships built to a 1778 design by Sir Edward Hunt, which served in the Royal Navy during the latter decades of the eighteenth century. During the early stages of the American Revolutionary War, the Royal Navy - while well supplied with...
shipsofscale.com
I believe that some things needs to be simplified to cut the cost,as this is a prototype build the final version may not be the same including the jig accessoriesI tought the same thing when I saw for the first time the all metal building slip on Aliexpress at a couples of x100$. All these money just for an accessories.
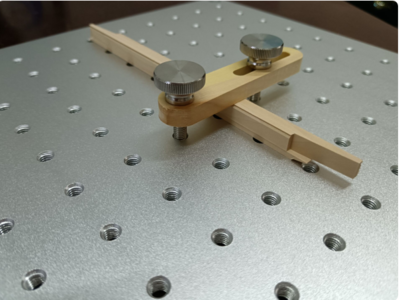
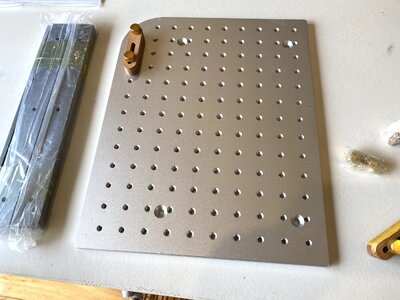
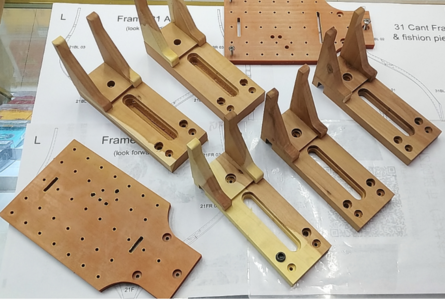
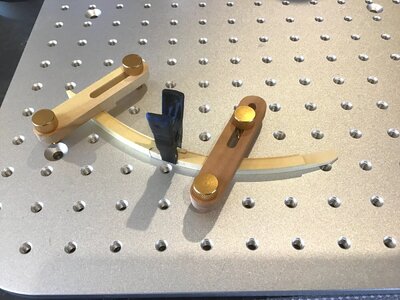
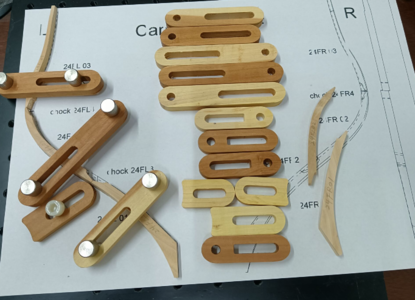
Being a “fixture” guy I love the fixtures and jigs.The kit has an optional extra of reusable building jigs and a threaded cast aluminium building base to lock everything in place. This is a really unique and wonderful idea and could be used on other ship models with minor modification.
.View attachment 315831View attachment 315832View attachment 315834View attachment 315835
Below is the fixture I made when building the Kearsarge. This was a leftover magnetic building board from my RC aircraft days. I'm fortunate that money isn't my #1 consideration
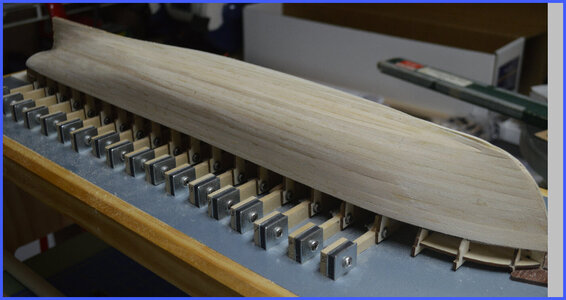
Last edited:
- Joined
- Apr 15, 2020
- Messages
- 448
- Points
- 278

First of all, many thanks to Brian for developing this project with me (making prototypes). I would also like to thank the SOS forum, especially UWE and Zoltan, jimsky. UWE looked for many historical materials and data of this project. Zoltan helped me contact the license officer of NMM. With his help, I purchased the license for the commercial kit . Therefore, this project uses the historical drawings from NMM as the reference basis, including two drawings collected by NMM and one stern photo (also the NMM model). This photo is used as the reference for designing stern decorations .Jimsky has provided many design suggestions. He is likely to test the stern section. He will help me optimize some structures.
As Brian and Zoltan mentioned, this project is still a test kit. Many structures, including components and prices, have not been finalized yet.
We pay attention to the configuration and price, which are concerned by many members. Therefore, relatively cheap POB kit is also being developed synchronously.
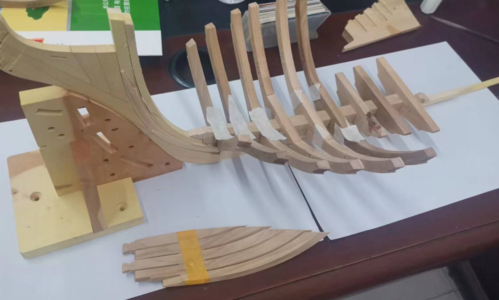

POB design,It originates from the internal structure of the museum but has many innovative designs, which are completely different from the products in the market.
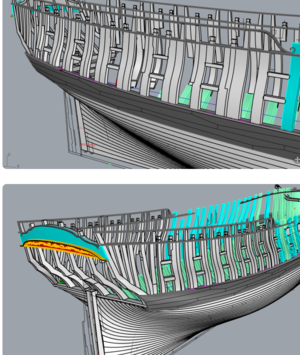
POB may be nearly half as cheap, and POF stern section may be 1/3 of the price of full kit. We even introduced the concept of semi kit. Semi kit may only provide the first chapter and carving set, and then drawings and assembly instructions. This price may continue to be reduced to less than XXX US dollars. As for the price, it may not be cheap, but I have to mention three points. 1. almost the best wood in kit products is used. 2. except for NMM licenses, all software for design and CNC processing has purchased commercial licenses, which is very expensive. I can only say that it is very very expensive, 3 For the knowledge of ship model design for this project, we have paid the cost to the European ship model experts, which is also very expensive. However, we have not deliberately passed on these expensive costs.We try our best to meet the needs of most members.
As for those aluminum alloy parts, I need to clarify that Brian entrusted me to purchase and send them to him, because I recommend him to use these jigs.
This is kit's own assembly platform. It is made of ABS material. It is light in weight but small in size because of the high express cost.
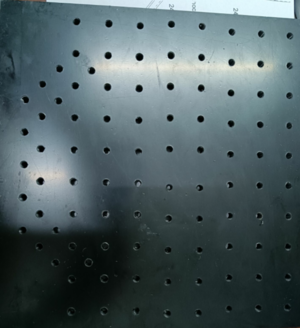
But it is also enough to complete the assembly work.
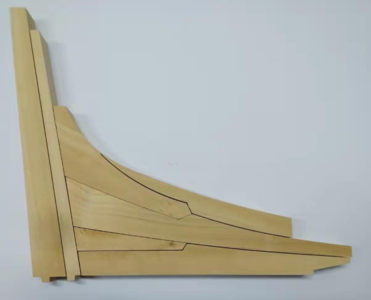
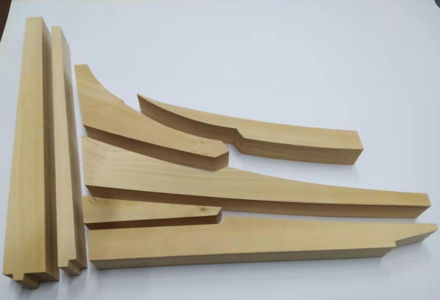
The above two figures clearly show that there is a great difference in the cost between simple machining and fine machining parts. For most members, such parts will take a lot of time, require a lot of special power tools and good skills,but the price will be much lower. For a master, you can choose the former.
In short, this is an original kit. Our greatest wish is to make members with different skills and consumer needs find their own happiness.
Thank you!
DaHai
As Brian and Zoltan mentioned, this project is still a test kit. Many structures, including components and prices, have not been finalized yet.
We pay attention to the configuration and price, which are concerned by many members. Therefore, relatively cheap POB kit is also being developed synchronously.


POB design,It originates from the internal structure of the museum but has many innovative designs, which are completely different from the products in the market.

POB may be nearly half as cheap, and POF stern section may be 1/3 of the price of full kit. We even introduced the concept of semi kit. Semi kit may only provide the first chapter and carving set, and then drawings and assembly instructions. This price may continue to be reduced to less than XXX US dollars. As for the price, it may not be cheap, but I have to mention three points. 1. almost the best wood in kit products is used. 2. except for NMM licenses, all software for design and CNC processing has purchased commercial licenses, which is very expensive. I can only say that it is very very expensive, 3 For the knowledge of ship model design for this project, we have paid the cost to the European ship model experts, which is also very expensive. However, we have not deliberately passed on these expensive costs.We try our best to meet the needs of most members.
As for those aluminum alloy parts, I need to clarify that Brian entrusted me to purchase and send them to him, because I recommend him to use these jigs.
This is kit's own assembly platform. It is made of ABS material. It is light in weight but small in size because of the high express cost.

But it is also enough to complete the assembly work.


The above two figures clearly show that there is a great difference in the cost between simple machining and fine machining parts. For most members, such parts will take a lot of time, require a lot of special power tools and good skills,but the price will be much lower. For a master, you can choose the former.
In short, this is an original kit. Our greatest wish is to make members with different skills and consumer needs find their own happiness.
Thank you!
DaHai
This is great news, Brian. Looking forward to the progress of this pilot model with huge interest.
Ahoy shipmates,
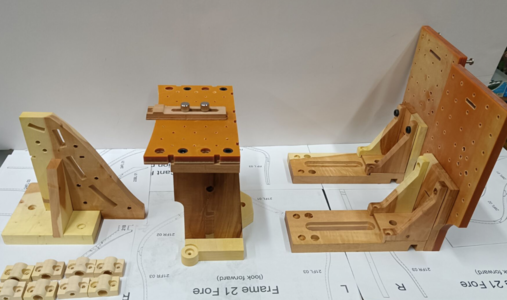
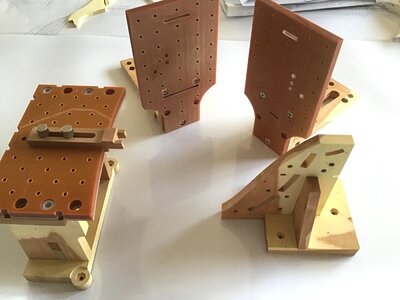
I have begun to assemble some parts. Firstly I assembled the 4 building jigs which hold everything in place. These jigs are made of a Bakelite /plastic material and have pre threaded screw holes allowing for multiple adjustment points. There are also some nicely made timber pieces that slot together with perfect accuracy. I used some white carpenters wood glue to hold everything in place.
.

Last edited:
- Joined
- Oct 17, 2020
- Messages
- 1,691
- Points
- 488

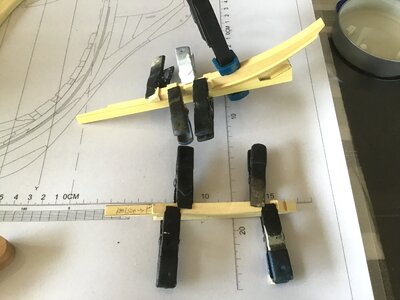
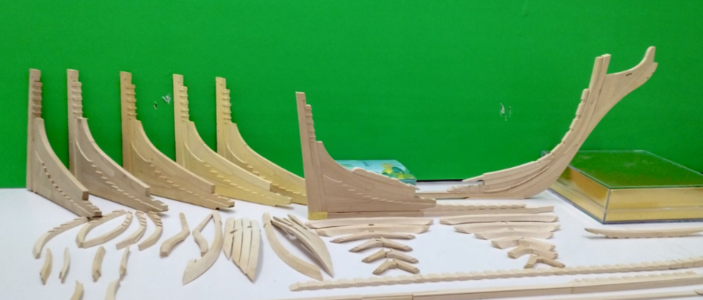
Good morning Brian, if it is permissible, what material is the Kit, I see it very refined, ThanksI have started to glue together the keel and stem structure. All pieces fit perfectly together like a jigsaw puzzle.
This is a real pleasure to assemble, with barely any sanding or filing required.
.View attachment 316428View attachment 316429View attachment 316430
- Joined
- Oct 17, 2020
- Messages
- 1,691
- Points
- 488

Good morning Heinrick, Thank you, see mailFrank, if I may answer on Brian's behalf - it is called Yellow Tang wood - a Chinese species of fine wood.


