-

Win a Free Custom Engraved Brass Coin!!!
As a way to introduce our brass coins to the community, we will raffle off a free coin during the month of August. Follow link ABOVE for instructions for entering.
-

PRE-ORDER SHIPS IN SCALE TODAY!
The beloved Ships in Scale Magazine is back and charting a new course for 2026!
Discover new skills, new techniques, and new inspirations in every issue.
NOTE THAT OUR FIRST ISSUE WILL BE JAN/FEB 2026
You are using an out of date browser. It may not display this or other websites correctly.
You should upgrade or use an alternative browser.
You should upgrade or use an alternative browser.
Halifax Build Log: Lumberyard
- Thread starter donfarr
- Start date
- Watchers 14
-
- Tags
- halifax lumberyard
- Joined
- Dec 1, 2016
- Messages
- 6,383
- Points
- 728

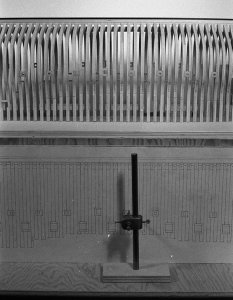
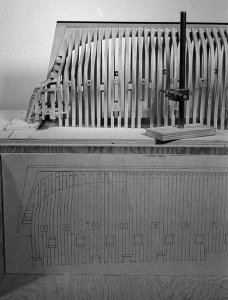
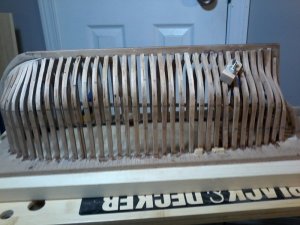
looking through the Hahn archives I found 2 way he used to measure the height of wales, caprails and decks. First way was to measure from the plans and transfer those measurements to the model. Another method he used was to make a pattern from stiff card stock.
Attachments
- Joined
- Dec 1, 2016
- Messages
- 6,383
- Points
- 728

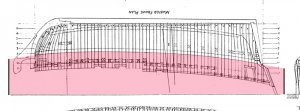
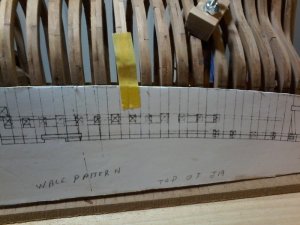
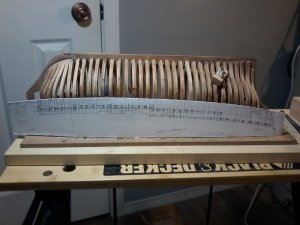
in the case of the Halifax the patterns are created direct from the plans. For the wale use a stiff piece of card stock and cut it at the top of the wale like this. The pattern is set against the model and the wale line is traced. you do the same for the cut off line when cutting the hull from the jig. When setting the deck clamps there are 2 ways you can do it. By using the same methods as above you need to transfer you measurement to the inside of the hull. The colored areas are the card stock patterns.
Attachments
- Joined
- Dec 1, 2016
- Messages
- 6,383
- Points
- 728

another method of setting the height of the deck clamps I used the same idea except I made my card board pattern to fit the inside of the hull. The colored area is the card board pattern cut from the plans. at the bottom I cut the pattern to fit the curve of the keelson and the top of the pattern to match the lower edge of the deck beams. I set the pattern on the keelson and used a straight edge like a 6 inch steel ruler and set it on the top of the pattern and marked the sides of the hull at each beam location.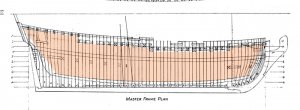

- Joined
- Dec 1, 2016
- Messages
- 6,383
- Points
- 728

just as a suggestion what I do with every model is glue spacer blocks between the frames at the location of the wales. Once the wales on these blocks are covered up. the blocks keep the framing stable and the hull stays stiff.
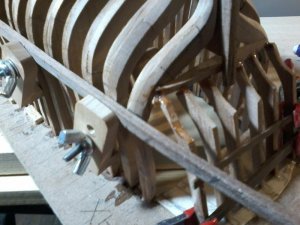
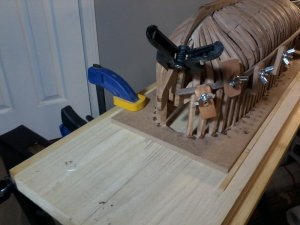
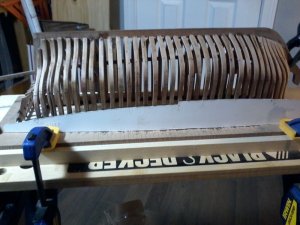
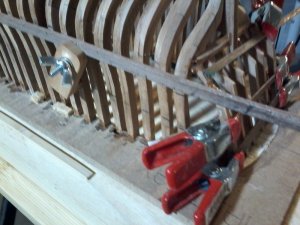
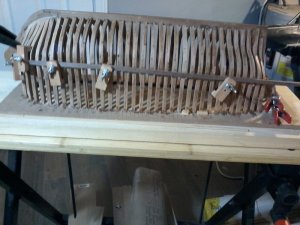
wonderfull Dave will do that method still will show you what I labeled it helps to identify certain elements will remove and re do the wales and the cut offs great way of doing that, did you notice the type of clamps I am using guess where it comes from china of course they are $10.00 for 10 but the shipping is $20.00, but to me well worth the price truly helps with holding things steady in place . THANKS AGAIN Don
Question Dave, on the patterns what I intend to do is cut the wale and cut off patterns out of the plans and rubber cement to 90 pound bond board, the question is is the bottom of the patterens the bottom of the keel, Thanks Don
A
Aussie048
Guest
Don
Looks like you are progressing nicely on the Halifax and asking the right questions.
Cheers
Geoff
Looks like you are progressing nicely on the Halifax and asking the right questions.
Cheers
Geoff
- Joined
- Dec 1, 2016
- Messages
- 6,383
- Points
- 728

"Question Dave, on the patterns what I intend to do is cut the wale and cut off patterns out of the plans and rubber cement to 90 pound bond board, the question is, is the bottom of the patterns the bottom of the keel, Thanks Don"
hum not quite sure what your asking The colored patterns have nothing to do with the keel. The pattern is the colored part shown in the plan. Look off to the right and you can see the jig. The pattern is using the top face of the jig as a reference point. its straight edge sits on the face of the jig and against the hull. I am not following your question about the keel
hum not quite sure what your asking The colored patterns have nothing to do with the keel. The pattern is the colored part shown in the plan. Look off to the right and you can see the jig. The pattern is using the top face of the jig as a reference point. its straight edge sits on the face of the jig and against the hull. I am not following your question about the keel
Dave what I was asking is where do I cut the bottom of pattern as shown on the plans so it sets on the jig, the plans show the model upright so where do I cut it on the plans the bottom that is top of keel or bottom of keel as shown on the plans, hope I am explaining it correctly, in other words from the plans when I cut it out do I cut the pattern to the top of keel or the bottom of keel that sets on the jig, hope I am explaing it corectly. Don
Dave, what I m trying to ask cocerns the bottom of the pattern, in other words from the plans what cut determines the correct height. Don
Dave figured it out, did not at first relize that the master frame plan was turned around, once I got that I understood what was happening, will show the pattern when cut here. THANKS FOR ALL THE HELP Don
- Joined
- Dec 1, 2016
- Messages
- 6,383
- Points
- 728

"yes you got it that's correct"
you can use the same template and once you marked the wales you can cut it down to the bottom of the deck beams, mark those and then cut it to the top of the hull
you can use the same template and once you marked the wales you can cut it down to the bottom of the deck beams, mark those and then cut it to the top of the hull
- Joined
- Dec 1, 2016
- Messages
- 6,383
- Points
- 728

"Question to Dave how does the wale end at the stern framing?"
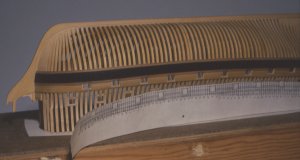
I pulled a few pictures from the Hahn archives. The wale ends by butting against the side molding. I lightened the molding in the first picture so you can see the butt here are some pictures as work in progress, it looks like Harold ran the wales a little beyond the stern frame. Later he added the stern planking which butts against the inside of the wales.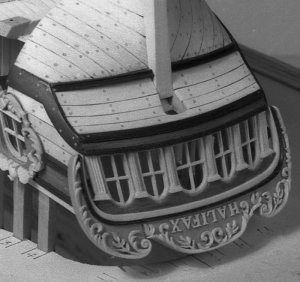
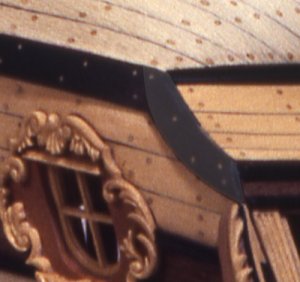
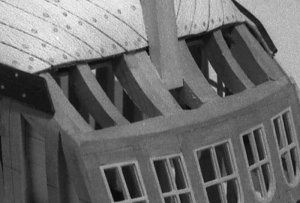
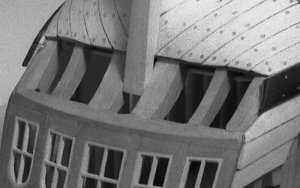
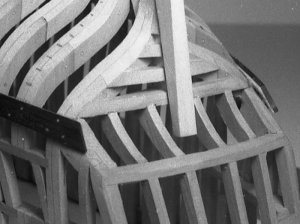
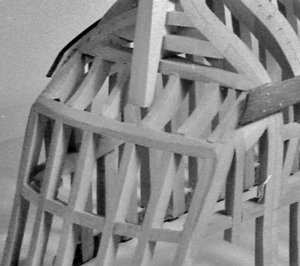
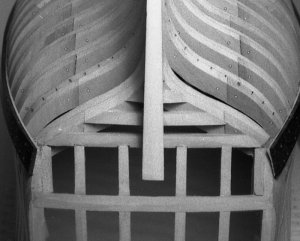
I pulled a few pictures from the Hahn archives. The wale ends by butting against the side molding. I lightened the molding in the first picture so you can see the butt here are some pictures as work in progress, it looks like Harold ran the wales a little beyond the stern frame. Later he added the stern planking which butts against the inside of the wales.


Thanks Dave got it, have one side of the wales installed, boy what a job that was, a piece of the stem broke off able to fix it, it looks OK, I know what the problem was on cant frame No. 10 I had it installed to far back making the bend of the wales almost impossible it should have been foreward a bit, fixed that also will show in pictures. THANKS AGAIN Don

