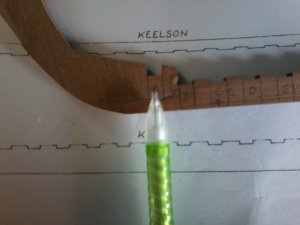
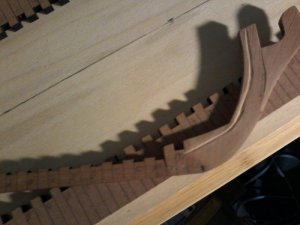
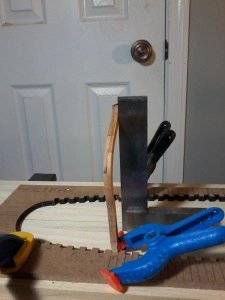
Dave will show you JIG AND KEEL MARKINGS THAT I SHOW FRAME AND SPACE SHOULD BE CHANGED ONE TO LEFT is that correct KEEL MARKINGS SHOULD BE LEFT AS IS...AM I CORRECT.DON
-

Win a Free Custom Engraved Brass Coin!!!
As a way to introduce our brass coins to the community, we will raffle off a free coin during the month of August. Follow link ABOVE for instructions for entering.
-

PRE-ORDER SHIPS IN SCALE TODAY!
The beloved Ships in Scale Magazine is back and charting a new course for 2026!
Discover new skills, new techniques, and new inspirations in every issue.
NOTE THAT OUR FIRST ISSUE WILL BE JAN/FEB 2026
You are using an out of date browser. It may not display this or other websites correctly.
You should upgrade or use an alternative browser.
You should upgrade or use an alternative browser.
Halifax Build Log: Lumberyard
- Thread starter donfarr
- Start date
- Watchers 14
-
- Tags
- halifax lumberyard
Dave, just my mistake, looking at bottom of MASTER FRAMING JIG PLAN looked at bottom of it JUST GOT CONFUSED, WHEN I LOOKED AT THE TOP IT BECAME CLEAR, just me being me i guess.....showing 3 more pictures one of JIG AND 2 of KEEL,... once I understand FRAME A as to how it fits I WILL START PLCING THE FRAMES GLUED TO THE JIG and another piece of wood that the Jig will be glued to
- Joined
- Dec 1, 2016
- Messages
- 6,372
- Points
- 728

the set up will not work the way you are doing it because you are using the inside cut out of the jig rather than the outside jig. The part of the jig your showing in your pictures is just a scrap cut out.
thanks for posting that as I thought I was seeing a new way for a jig as I look at posts and always see the way you posted and was wondering if that little inside thing was some new way of doing things.
- Joined
- Dec 1, 2016
- Messages
- 6,372
- Points
- 728

for one thing the inside scrap piece won't work because the tabs and notches are opposite. Looking at the way Harold Hahn built his models the jig is on the outside of the hull not on the inside.
When he had the hull framed in he built the inside of the ship from the lowest deck up to the top deck. If he used the inside part of the laser cut jig that would block the interior of the hull.
When he had the hull framed in he built the inside of the ship from the lowest deck up to the top deck. If he used the inside part of the laser cut jig that would block the interior of the hull.
Dave, WHAT A DUMMY I AM,(LIKE MY LOVE OF MY LIFE USED TO TELL PEOPLE HE IS JUST SLOW) it is luckey I do not throw any thing away, hope i understand it now, can not believe I did not notice your pictures that the part of JIG THAT I WAS USING WAS TOTALLY WRONG, but the GOOD THING IS THIS IS WHAT A GOOD AND I MEAN GOOD FORUM IS SUPPOSED TO DO. DON PS WILL SEND PICTURES AGAIN TO SEE IF I HAVE IT RIGHT
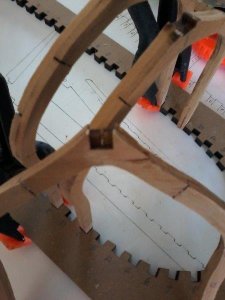
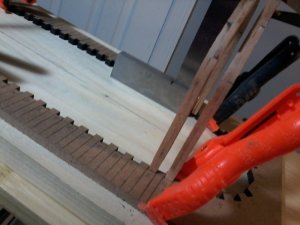
Dave and all, Using the RIGHT JIG I HOPE, foreget the other pictures....THE PROBLEM IS THE FRAMES TO KEEL IT IS NOT SETTING DOWN INTO NOTCHES PROPERLY, GETS WORSE WHE THE A FRAME IS INSTALLED, how do I GET THE FRAMES SET DOWN INTO KEEL, ALSO MAY HAVE TO DEEPEN JIG NOTCHES A TINY BIT SO THE FRAME BECOMES CENTERED ON THE KEEL WHEN INSTALLED. V FRAME SITTING IN JIG NOTCH, new use of correct framing jig. Showing frames to keel, can not get frame notches to sit in keel notches Frames are 2 high, for proper sit. Showing frames to keel not sitting into keel nothces properly worse when FRAME A GETS INSTALLED, NEED TO GET FIX FOR THIS.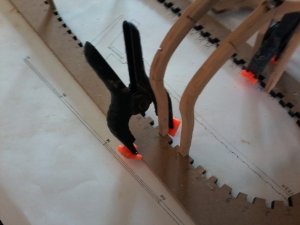
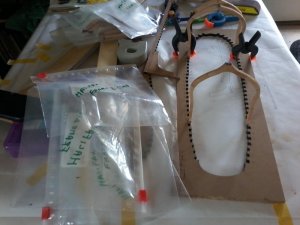
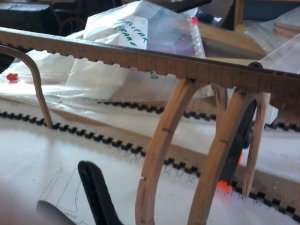


- Joined
- Dec 1, 2016
- Messages
- 6,372
- Points
- 728

"JIG THAT I WAS USING WAS TOTALLY WRONG, but the GOOD THING IS THIS IS WHAT A GOOD AND I MEAN GOOD FORUM IS SUPPOSED TO DO."
I agree a members on a forum should speak up if they see something that does not seem right. All the that a boy, good job, following your build, nice work etc is not helping anything if something is not correct. As for this issue keep in mind any wooden ship kit is not like a snap together plastic kit. There is the "hand of man factor" which is, no matter how exact parts are laser cut or molded slight differences will creep in, even the amount of glue or how tight you clamp parts together add up.
To close the gap at the red arrow go to the end of the extension leg by the blue arrow and sand a little off, this will move the frame over. don't fear messing up the hull by making little tweaks along the way, the frames have been over cut just for this reason, to make adjustments.
Dave, Some other things to caution builders about is to not be afraid to say this does not look right and how do I fix it,also TO ME THIS IS MOST IMPORTANT IF YOU DO NOT GET THE BEGINING OF YOUR BUILD CORECT THE FINISH WILL NOT BE CORECT, spend more time ask more questions before you jump in to a build as each one is different and each one presents a different set of problems,.....WHAT ABOUT THE FRAMES SETTING INTO THE KEEL NOTCHES PROPERLY HOW DO I RAISE THE FRAMES, AND I WILL send one more picture showing my nemisis FRAME No. A
well since I got something right, I have 2 more items to get from you, one is the height of the Cant Frames an Half frames to bottom of rail, to mark on frames, almost impossible for me after frames installed for final height, 2 bevels, bevels and more bevels, these have been a problem to me on going, can not seem to understand all the lines, any way to show me how once and for all, both outside and inside bevels. Don
- Joined
- Dec 1, 2016
- Messages
- 6,372
- Points
- 728

This is what I would do
I would setup the first and last full frames and glue them in place like this. Then I would flip the model over and slip in all the frames between the first and last. I would do whatever you need to do so each frame falls into the keel notches. Don't worry how the extensions sit in the jig notch some frames might sit a little higher or lower but so what the hull will be cut away from the jig. Some frames might be a little thick to slip into the keel notch or the jig notch, no worry here sometimes you need to do some sanding you fit the frame. The entire build is fussy it is all about adjust and fit. Remember paper plans distort, building each frame may not be exact, wood has as a + or - combined together there is a fudge factor to deal with.
I have a big industrial double drum thickness sander I contacted the company about a 10 thousandth difference in the machine. In other words depending where I run material along the drum I can get a heavier cut. Their answer was industrial wood working machines have an industry tolerance of + or - of 15 thousandth. The machines are not that tight unless you get heavy precision machines like milling machines.
I once sent sanded sheets to someone in New Mexico he got back to me and said I was 20 thousandth to thin. I never mill thinner always mill proud (over size) well what happens is it was around 55 degrees here in New Mexico it was 96 the wood shrank. What I am trying to say is wood is an organic material it moves, expands and shrinks, twist it is not plastic, it is not stable.
I once got into an argument about someone bragging their shop was totally climate controlled and the wood was totally milled to exact sizes. My point was yes as long as the material stayed there it will maintain its size and shape. That is why museums take great care in climate control. As soon as you ship that wood to Canada in winter where it is well below freezing or the American south west in summer where it is 101 the material will adjust itself.
This is the very reason framed hulls should be build using a jig of some sort, to keep everything in its place until the structure can be stabilized. Wood is flexible a little nudge here and there to get pieces to fit is totally acceptable.
THANKS DAVE, If i gather corectly you are saying , glue first and last whole frame to the Jig then glue the keel assembly in place, and turn the whole thing over, with the JIG on top and the keel on the bottom is that corect, so I should no I repeat SHOULD NOT GLUE ANOTHER PIECE OF WOOD TO THE JIG ASSEMBLY........I UNDERSTAND FULL ABOUT THE EXACTNESS OF THE WOOD, and expect to make adjustments to the frames, I THINK the A frame at the keel notch should be worked on till the extension is lowered so the keel fits in the notch and the other frames are not so high.....I do need the height locations for the cant frame and half frame Fromm the keel to the bottom of rail but having problems where to start and end the markings, is my thinking correct, THANKS Don
- Joined
- Dec 1, 2016
- Messages
- 6,372
- Points
- 728

I think there was a basic flaw in Hahn's system by not setting the keel. What I did when I built the General Hunter I set the first and last frames in place then I went to the mid ship and set frames in one forward one back until all the frames were in. I did not use the jig to locate the frames up or down, each frame was set into the keel notch. If the extension was short or high in the jig notch I let it float as long as it seated into the keel. The jig was for holding the frames from front to back and the keel was to set the frames up and down.
Dave GREAT IDEA THIS IS THE WAY I AM GOING TO GO WITH THE BUILD, before more pictures, I need to finish the stern half frames, will take about 2 days, then st to go, in the mean time Dave can you show me how to determine final frame cut to underside of cap rail for the cant frames and the half frames, ...also when you get a chance, PLEASE FINALLY HELP ME WITH READING AND INTERPETING THE BEVELS ESPECIALLY THE CANT FRAMES HAVE RUINED TO MANY BUILDS TRYING TO GET IT RIGHT TO MANY LINES IN MY HEAD, GET CONFUSED. Don
Hi All, Just to keep you appraised of the Halifax still working on it, will post somemore pictures by the week end have all but 2 frames made, I am finishing marking the underside of rail on the FRAMES TO ME THAT IS VERY IMPORTANT TO ESTABLISH THE CUT OFF MARK before puttinthe frames into the jig and keel, doing latter to me is a hopeless cause, do need Dave to show me the bottom of the cap rail for the CANT FRAMES AND THE HALF FRAMES, also Dave when you get a chance need to tackle the BEVELS I REALLY HAVE A PROBLEM WITH UNDERSTANDING THEM, ruined some good builds because of that, need to determine them once and for all..... also using the jig and keel assemblly the way Dave shows it but need to fine right support to hold it once I turn it over, any one have any ideas on this. Don
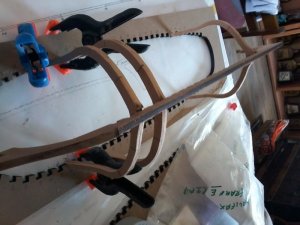
Pictures showing dry fitting of first and last FRAMES, A AND V, I do not think I can work the build the way Dave sugested,will show my solution to see what everyone thinks, also showing rabbit line and cut for rabitt. Showing First and last FRAME A AND V(WHOLE FRAMES). Fitting Frame a in keel notch. Frame V fitting into keel notch.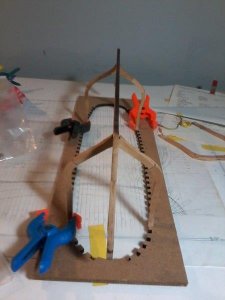
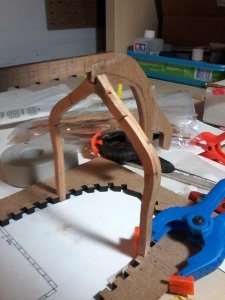
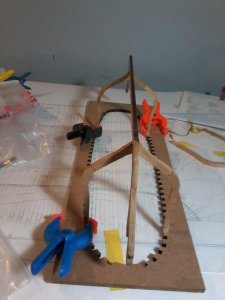
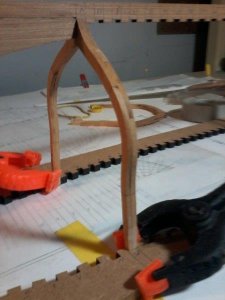


Hi Don,now you have the correct jig,the frames are shaping up nicely.

