• Ships of Scale has incorportated an extra level of security when you log In. Please follow on-screen prompts to acknowledge that you are not a robot via a "Check Box" or a "Pictorial Check Box Puzzle". This is needed due to higher level of AI Activity Security.
  • SUBSCRIBE TO SHIPS IN SCALE TODAY!

    The beloved Ships in Scale Magazine is back and charting a new course for 2026!
    Discover new skills, new techniques, and new inspirations in every issue.

    NOTE THAT OUR NEXT ISSUE WILL BE July/August 2026
  • Win a Free Custom Engraved Brass Coin!!!
    As a way to introduce our brass coins to the community, we will raffle off a free coin during the month of August. Follow link ABOVE for instructions for entering.

HANNAH

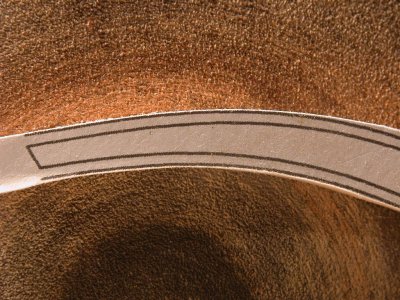
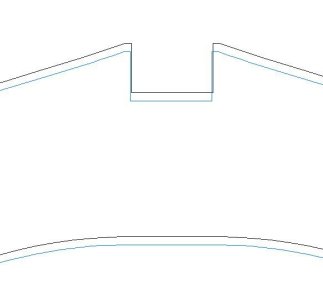
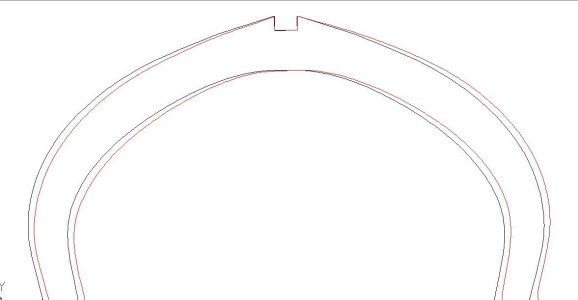
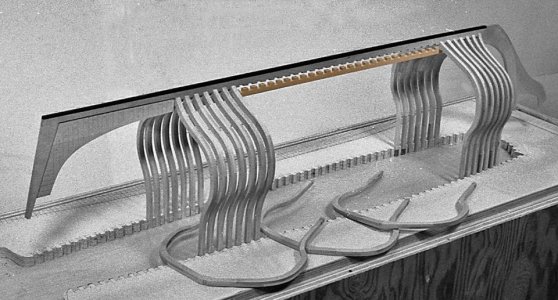
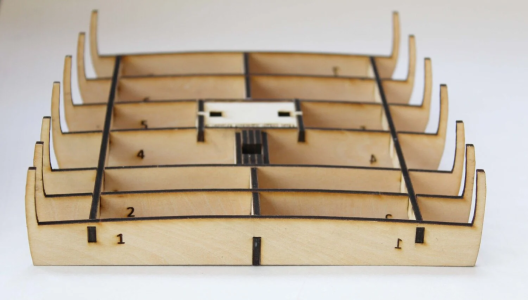
Here are two pictures associated with the Rattlesnake keel / plan / assembly jig. In the semi kit, the keel parts are laser cut as is the assembly jig. So here it is most important that the keel notches matches the jig than the plans. There seems to be creep when placing the laser cutting over the plans:

Keel against Plan.jpg

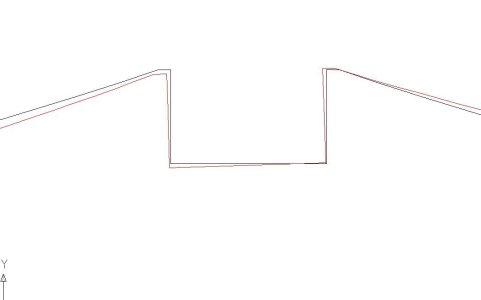
But there is no visible creep when keel is compared with the jig:
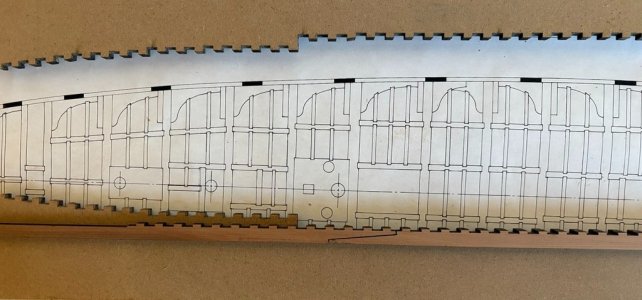
Keel against Building Jig.jpg

I did not check to see if the plans for the keel and the jig are in alignment. However, the difference between plans and laser cutting could be a function of the plans changing shape with moisture content. What's most important is the jig and the keel are consistent. If one was scratch building both the jig and keel, again it would be a matter of consistency as Dave notes above.

Notice that care must be taken in assembling the two sections of the keel at the scarf joint. This must be done to preserve the width of the notch bisected by the joint. If this is not done, that notch will be the incorrect size, but more importantly it will no longer be possible to align all of the notches in the keel with the respective notches on the jig. If you align the fore part of the keel, all the aft slots will be out of alignment and vice versa. If you align at the notch over the scarf joint, the rest of the notches - fore and aft - will not align.

So here I see a tradeoff of having the laser cut part and scratch building the keel. If the keel is scratch built, the scarf joint can be done very nicely to join two pieces of stock a bit longer in total than the finished keel. The notches can then be created with no chance of the joint causing spacing problems. Again the notches would need to be made consistent with spacing of the assembly jig. The keel would then be trimmed to the final dimension.
 
when i comes to the actual building of the hull there are two approaches the Hahn way which is to cut and finish each frame including the bevels then set that finished frame into the hull.

xconfed78.jpgxconfed77.jpgxconfed70.jpg

The second method is to cut the frames with extra wood beyond the frame shape then assemble the hull and sand the hull as one unit.

You still have to be careful to maintain a consistent shape of the frame you cannot be sloppy about cutting out the frames


ps1.jpg

Try and keep the same extra wood along the frame line.

ps3.jpg
 
i would not call it a flaw or error in the Hahn system because it works so i will say the Hahn way and everyone else's way.

First setup is placing the first and last frames in the jig square and level.


2hannah21.jpg

the issue here is you have to remove the keel to install the rest of the frames which removes your reference point where the frame fits the keel notch.

2hannah23.jpg

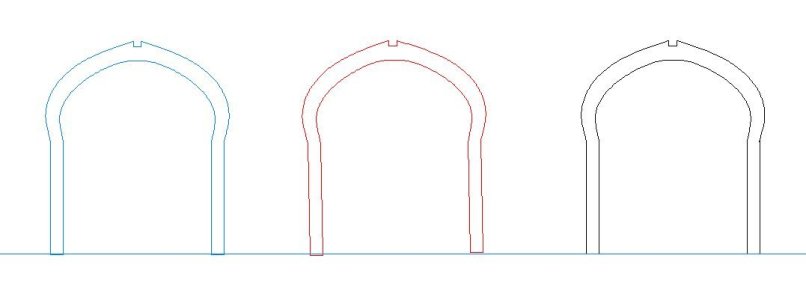
In order to get every frame perfectly in line depends solely on the accuracy in which you cut the frame. Looking at 3 frames sitting in the jig if you are the slightest off on the length of the frame legs the hull will be off.

lineup1.JPG


taking the blue frame, If you are short on the legs the notch will be at a different level

lineup2.JPG

the red frame if one leg is shorter or longer the frame will tilt in the jig

lineup3.JPG

that very small tilt has a big effect on the placement of the frame in the hull. Zooming out you can see what happens.

lineup4.JPG

By cutting the frames over size will allow for micro adjustments when it comes to sanding the hull. but if you finish the frames before you build the hull there is zero tolerance in building.
 
Last edited:
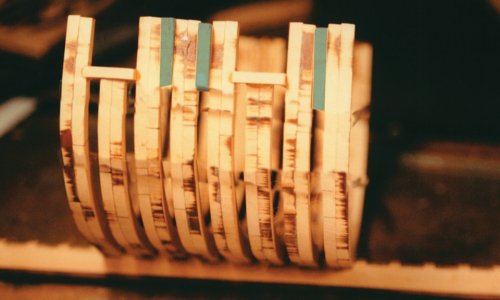
There are a number of work arounds to the original Hahn system such as this one why not after setting up the first frames at each end and one in the center glue the keelson in place. Notches in the keelson match the notches in the keel so now you have a reference point at the keel. Why not cut the frame pieces over size then assemble the frames giving yourself more room to finish the frames and save on the wood from the blank method? All in all the builders kept to themselves and solved problems.

xconfed79.jpg

i met Harold Hahn back in the 1970s and we remained friends till the end. during that time The Lumberyard for model shipwrights sold a lot of timbering set of his models but in all that time very few ever showed up in build logs. Some reasons are the builders were in a separate group either they graduated from kit building or were scratch builders from the start so they had no need to create a build long on a forum that focused on kit building another reason was a lack of detailed instructions Harold expected you to know what you were doing before you started the build. In the early days Harold and the Nautical Research guild were tight, and all his articles appeared in the journal. Then the nit picking and the final falling out and Harold and the NRG went their separate ways. Building of the models continued but the builders remained silent and did not want to be involved with the controversy around the Hahn system or because he put little figures on the models which at the time was considered a sin against the traditional admiralty style. Other reasons were and still are the system is workable but accurate craftsmanship is required and the carvings were a detail few builders could accomplish.

CAD drafting, laser cutting and 3D printing evolved the hobby and the Hahn system has been reworked into the Hahn system 2.0
 
Last edited:
What I find interesting, is that "jig" systems are showing up in a lot of kits these days, and they were never part of the traditional POB kits over the years
Of course their usefulness with a handful of frames would be minimal. `
Still, how often do we hear about the struggle with squaring up the bulkheads/frames of traditional kits?

It seems to me that Hahn was the pioneer with this type of system.

Your work is a great example of usefulness of this type of build.
 
It seems to me that Hahn was the pioneer with this type of system.

that is true it was Harold Hahn who introduced building hulls in a jig and the kit industry ran with the idea and came up with variations
Of course their usefulness with a handful of frames would be minimal. `
Still, how often do we hear about the struggle with squaring up the bulkheads/frames of traditional kits?


the Hahn system was for POF, the kits using POB is an entirely different type of build
 
It doesn't mean they can't benefit from a jig that aids squaring. Which in the end, is what the Hahn system does.

If you take a look at the build log for NRG Rigging project, you will see my jig that squares up the seven frames/ bulkheads.

View attachment 645240

i get what you are saying here the Hahn jig system is not part of the hull structure, you're building a hull IN a jig. What you are showing is the bulkhead structure and the piece to line up the bulkheads is part of the structure. Which serves the purpose of locking in the bulkheads square to the center profile. I have seen this 30 years ago and it works for a POB hull.
 
Last edited:
The fist to address in the upside-down jig system 2.0 is the lack of detailed step by step instructions. The system is actually generic and applies to all the Hahn ship and has been adapted in different configurations in kits and scratch builds. To fix the instruction issue is what the school staff is doing here not to show just how but also the why. This way you learn and that lesson you take with you and apply it to any project you build. Do not expect a fancy full color printed booklet walking you step by step on how to assemble the parts. The information is here and in the form of lectures and teaching using different subjects to demonstrate the how and why.
 
When Hahn introduced his upside-down jig system it was meant to introduce plank on frame building for the first time builder not a first time builder entering the hobby but an experienced builder for the first time building POF hull. The problem to build a plank on frame model using the Hahn method required knowledge of ship building and the builder having the skills to work within close tolerance. Not only having skills but a builder needed the tools to rip down framing stock from rough lumber on a table saw then either plane it or thickness sand it, these tools were not the small hobby tools, you need from 125 to 225 linear feet of one-inch-wide framing stock a bit more than a small hobby tool can handle. Then you need a scroll saw or tabletop band saw for cutting out frames and a disk sander to finish the frame shape. Either a spindle sander or a drum sander on a drill press or a Rotary tool like a Dremel to sand the inside of the frames. Finally a collection of hand tools.
Harold Hahn made it look easy but it is far from that
 
Last edited:
discussing the concept of first time plank on frame builders with Harold Hahn back in the day you need to separate the mill work and the need for big woodworking tools from the actual experience of building a POF model. From this discussion the idea of a timbering set has hatched skip all the wood cutting and jump forward into the actual build. This indeed expanded the builders wanting to give POF building a try but the skill of building within close tolerance is still needed. Building in a jig was not fool proof not even close a lot of things can go wrong.
 
One of the debates is the use of the extended frames being a waste of wood.

extra wood.jpg

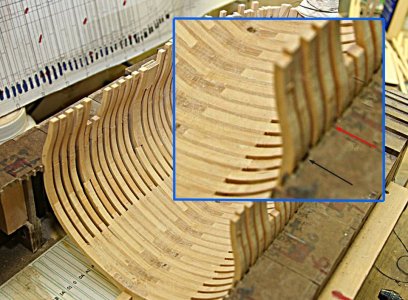
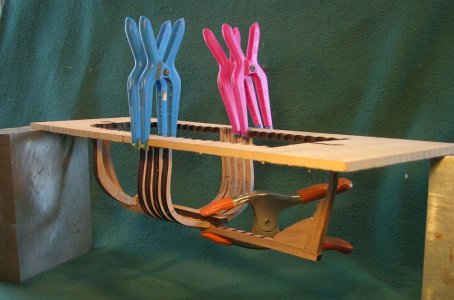
A method to eliminate the extra wood is to redesign the jig idea and build the hull down in a jig. The idea works and it cuts down on the use of wood but fixing one issue creates another. In the insert the problem is the difference pointing to by the black and red arrows the black arrow frame is not sitting tight in the jig and the red arrow frame is. To build a hull this way requires the builder to build each frame exactly correct so it fits the jig. Without any points of reference, the frames are built freeform over a paper pattern.

in a jig.jpg

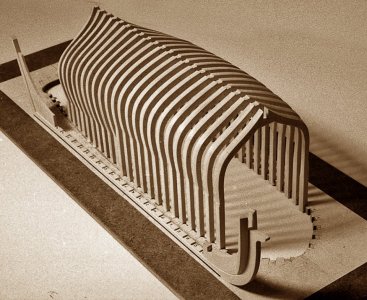
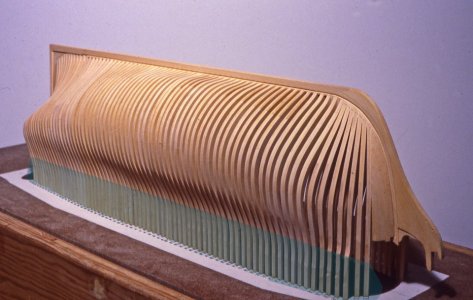
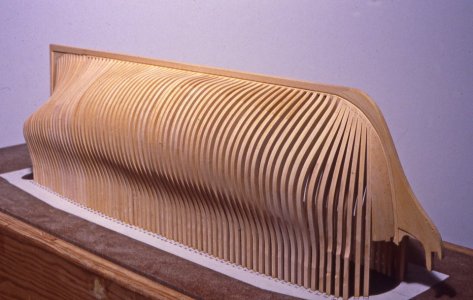
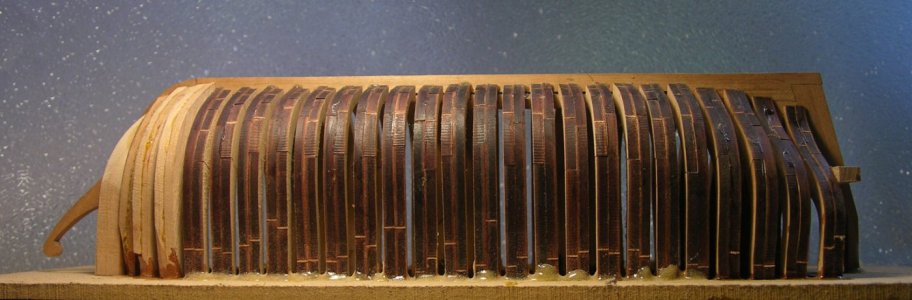
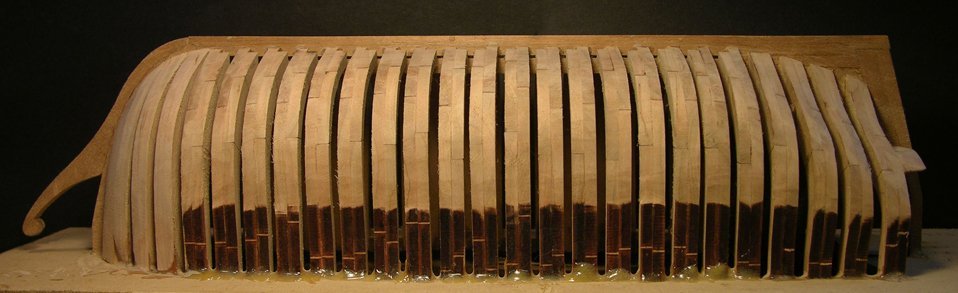
Getting back to this hull it is perfect, a ship builders dream of sweet curves and shapes all flowing in harmony. The catch here is Harold assembled frame blanks, cut and shaped each frame with the correct beveling to the exact finish and lined them up in the jig. That level of workmanship is tediously precise and was way beyond the average builder. Building a hull that sits in a jig requires the same level of workmanship there is no room for errors.


1roebuck06c.jpg

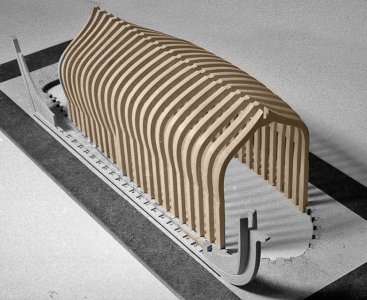
jigging a hull 2.0
so what if you can eliminate the tediously precise shaping of each frame individually and shape the hull as one unit? that is not possible if the hull is built IN a jig because the jig would be in the way of sanding the hull so it is back to the original method with the frame extensions. The concept here is adding extra wood to the frames to allow for sanding and the extra wood give you that little extra to sand out any miss steps in construction.

blocked out.jpg

now you can sand down the hull as one piece and including the bevels.

final hull.jpg
 
Last edited:
Now for the fix of one problem and create another there is no way a hull like this will survive sanding those delicate frames are held in place with a dab of glue at the junction of the frame and jig. to make matters worse is adding frames at the bow and stern then needing to sand in the bevels, that is some aggressive sanding.

2hannah23.jpg

so you can add fillers between the upper part of the hull

B1.jpg

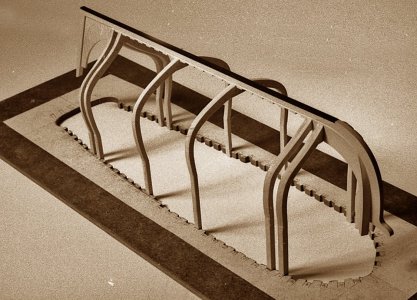
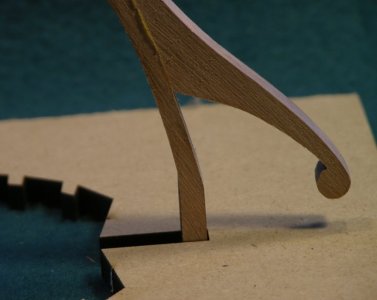
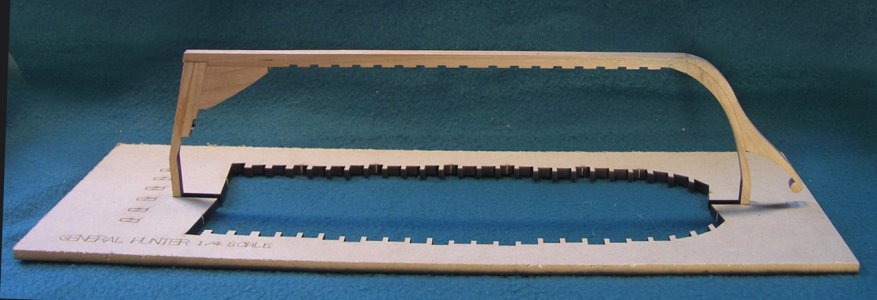
Another idea is to glue the keel in place by adding extensions to the stem and stern post

N9633.jpgkeel jig.jpg


But now the only way to add the frames is through the top

N9834.jpg
 
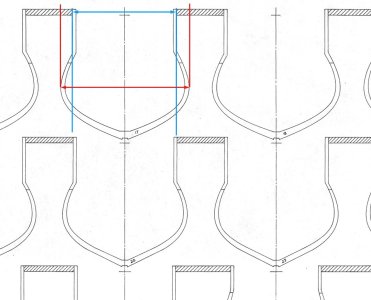
the question of will it work adding frame from the top down so they sit in the keel notch? the hulls i built this way it did work out but if it would work on a hull with a tumble home where the hull is wider than the jig opening can you wiggle a frame into the jig?

rattlesnake 3.jpg
 
This is where the line in the sand is drawn between "i just want to have fun and enjoy building a model" and a hard core scratch builder who has to figure everything out and chase after solutions to problems after problems. Some people actually enjoy the challenges others do not. I like the chase but do admit sometimes it gets just a bit frustrating when a solution just evades you.
 
Back
Top