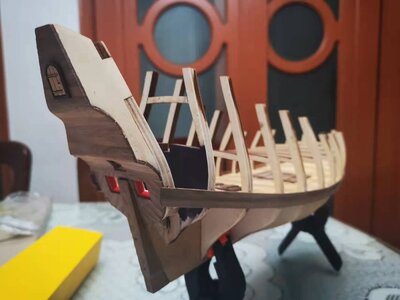
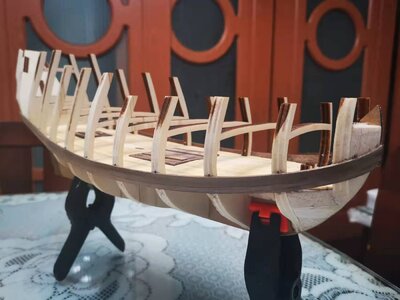
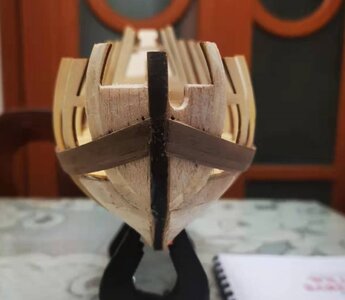
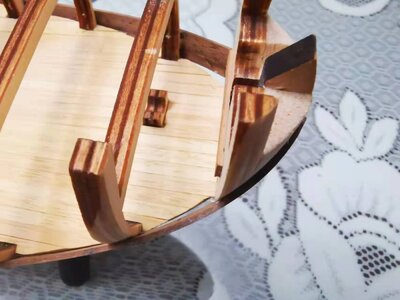
HIGH HOPES, WILD MEN AND THE DEVIL’S JAW - Willem Barentsz Kolderstok 1:50

Wow, what a wonderful presentation and informative set of posts. Makes a “novice” like me start wondering if there is enough of a skill set in his build tool box to even start a build like this. Keep the information coming, I’m reading, re-reading and reading again your build log trying to absorb all the nuisances and hopefully follow in your footsteps.

Jan
Jan,
I too wonder if my skill set will allow me to construct this model. Hopefully, we won’t have a server crash as I will be using this thread as reference when/if I begin construction

Ron
 
Wow, what a wonderful presentation and informative set of posts. Makes a “novice” like me start wondering if there is enough of a skill set in his build tool box to even start a build like this. Keep the information coming, I’m reading, re-reading and reading again your build log trying to absorb all the nuisances and hopefully follow in your footsteps.

Jan

My friend - thank you! The good news is that this kit will build into an incredibly beautiful model. I have no doubt that it is well within your capabilities! :)

With my build log I am trying to capture those little nuances that can help all future WB builders. In that regard, studying Piet's log, is an invaluable source of information. There are also options - for instance, there are different ways of laying the planks so that each individual builder can choose whichever way he is most comfortable with. These I will show you and whatever I learn along the way, I will pass on.
 
Jan,
I too wonder if my skill set will allow me to construct this model. Hopefully, we won’t have a server crash as I will be using this thread as reference when/if I begin construction

Ron
Ron please read my reply to Jan - anyone with common sense and basic skills can build this model. The instructions and drawings are excellent and the quality of this kit is superb! The beauty of it all is that we have Piet's build log and we have Hans a PM away. For more than that one cannot ask.
 
Jan,
I too wonder if my skill set will allow me to construct this model. Hopefully, we won’t have a server crash as I will be using this thread as reference when/if I begin construction

Ron
I don't know about a server crash but I've downloaded a lot of the build steps that Heinrich has shown. We should try convince him to author a PDF of Pros and Cons that we could refer to. There are only 15 days left until I can open the box under the tree and wonder what I've gotten myself into. I'm sue there we will be a lot queries directed at Heinrichand Hans.

Jan
 
So let me show you today's update and share a few thoughts.

I have covered in detail how I faired the hull to the best of my abilities. I thought I had done a good job BUT Lesson Learnt Today: Do not expect that a "general" fairing of the hull will be sufficient. With the first 4mm x 1.5mm plank laid yesterday, all was good, but additional fairing was required for the next plank which is a 6mm x 1.5mm plank. For this "specialized" fairing forget about using sandpaper because you may inadvertently also sand the planks already laid down. A small, flat diamond file is just the number for this.

Hull.png

Lesson 2 Learnt: Whereas the first plank had an inward sloping angle, the second plank is much more "upright" Take note of this and do not be perturbed by it.

So with the second plank in position, this is what she looks like tonight:

Planking 1.jpg
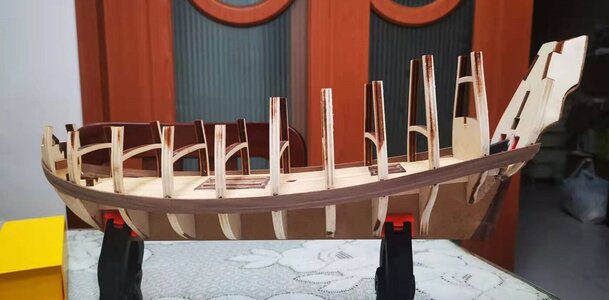
Starboard Side: On this side I had to do additional fairing on all the bulkheads (including the stern) except on bulkheads # 1 and 2.

Planking 2.jpg
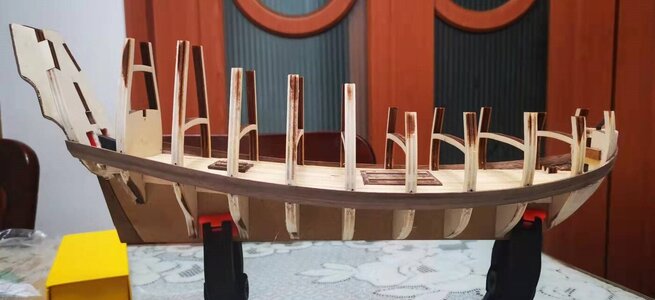
Port Side additional fairing had to be carried out on Bulkhead #10 and on the stern (Assembly #11).

Planking 3.jpg
Port Side: Rear three-quarter view

Planking 4.jpg
Starboard Side: Three-quarter rear view

Planking 5.jpg
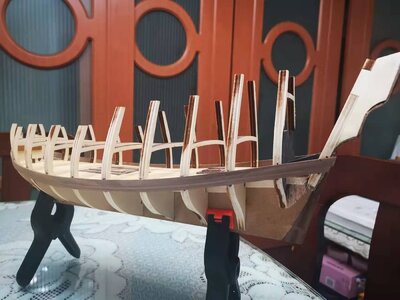
Starboard Side: Front three-quarter view

Planking 6.jpg
Bow view

In both cases the two planks butt beautifully against each other and there are no gaps whatsoever. At the same time, I am striving to achieve a look where all planks are individually distinguishable so that the essence of a planked wooden ship is not lost. (I have an abhorrence to veneer used as a planking material).

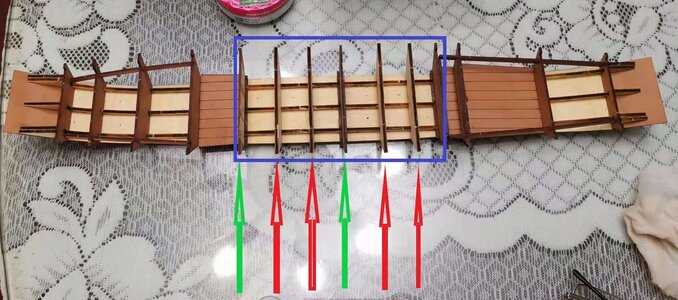
Last night I showed you how the planks lined up with the bulkheads on the port side, so tonight it's the starboard's side turn:

Planking 7.jpg
At the Bow: Check

Planking 8.jpg
Bow to midships: Check

Planking 9.jpg
Midships to Stern: Check

Planking 10.jpg
Stern: Check

And an overview - just because I love the wood colors of the kit. :D

Planking 11.jpg

Seriously though the reason for including this picture is to show you just how bulbous the hull is.

Tomorrow, the next plank is another 4mm x 1.5mm one which is equally important to the first plank that we laid as both of them, plus a third, will eventually form the basis of the wales.

That concludes today's updates. Enjoy and please ask any questions you may have.
 
I don't know about a server crash but I've downloaded a lot of the build steps that Heinrich has shown. We should try convince him to author a PDF of Pros and Cons that we could refer to. There are only 15 days left until I can open the box under the tree and wonder what I've gotten myself into. I'm sue there we will be a lot queries directed at Heinrichand Hans.

Jan

Jan, I can always look into doing a PDF File - I will have to call the Admiral's help in for that. And there's no need to author anything my friend - what I post here is there for all and sundry to use. Remember, a lot of the things that I say are very basic and may sound like old hat to the experienced builders. However, in this case, I also use my build log as a record of my own thinking and reasoning process. I think it was @moreplovac who said something to similar effect during his excellent build of the Brigantine Phoenix and I am sure that @ Peter Voogt Peter does the same during his unbelievable build of Bluenose.
 
So let me show you today's update and share a few thoughts.

I have covered in detail how I faired the hull to the best of my abilities. I thought I had done a good job BUT Lesson Learnt Today: Do not expect that a "general" fairing of the hull will be sufficient. With the first 4mm x 1.5mm plank laid yesterday, all was good, but additional fairing was required for the next plank which is a 6mm x 1.5mm plank. For this "specialized" fairing forget about using sandpaper because you may inadvertently also sand the planks already laid down. A small, flat diamond file is just the number for this.

View attachment 274739

Lesson 2 Learnt: Whereas the first plank had an inward sloping angle, the second plank is much more "upright" Take note of this and do not be perturbed by it.

So with the second plank in position, this is what she looks like tonight:

View attachment 274755
Starboard Side: On this side I had to do additional fairing on all the bulkheads (including the stern) except on bulkheads # 1 and 2.

View attachment 274756
Port Side additional fairing had to be carried out on Bulkhead #10 and on the stern (Assembly #11).

View attachment 274757
Port Side: Rear three-quarter view

View attachment 274761
Starboard Side: Three-quarter rear view

View attachment 274758
Starboard Side: Front three-quarter view

View attachment 274762
Bow view

In both cases the two planks butt beautifully against each other and there are no gaps whatsoever. At the same time, I am striving to achieve a look where all planks are individually distinguishable so that the essence of a planked wooden ship is not lost. (I have an abhorrence to veneer used as a planking material).

Last night I showed you how the planks lined up with the bulkheads on the port side, so tonight it's the starboard's side turn:

View attachment 274767
At the Bow: Check

View attachment 274768
Bow to midships: Check

View attachment 274769
Midships to Stern: Check

View attachment 274770
Stern: Check

And an overview - just because I love the wood colors of the kit. :D

View attachment 274771

Seriously though the reason for including this picture is to show you just how bulbous the hull is.

Tomorrow, the next plank is another 4mm x 1.5mm one which is equally important to the first plank that we laid as both of them, plus a third, will eventually form the basis of the wales.

That concludes today's updates. Enjoy and please ask any questions you may have.
So....you do a general, over-all fairing of the bulkheads, then, as you plank, you 'touch up' the fairing as you go? Do you bevel the plank edges too?
 
Wow, not looking for a few days and the first parts are on the hull. :)
A beautiful progress, Heinrich.
And nice to see you checked the linings via a picture and computer linings. In this way you have a different look and see the parallels better.
Gr. Peter
Thank you for the very kind words Peter. This is what is so great about SOS _ I have learnt a lot from you ands your whole thinking and planning process. I am trying to incorporate that essence in a very limited way into my build as well.
 
So....you do a general, over-all fairing of the bulkheads, then, as you plank, you 'touch up' the fairing as you go? Do you bevel the plank edges too?
Correct Phil. I touch up individually according to the requirements of each specific plank at each specific bulkhead. I do bevel planks, but not as a rule. That is an excellent question though.

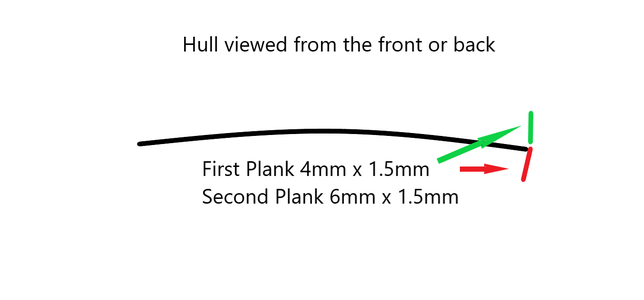
Bear in mind that on my builds I work with relatively thick planks. So let's take the following scenario as an example.

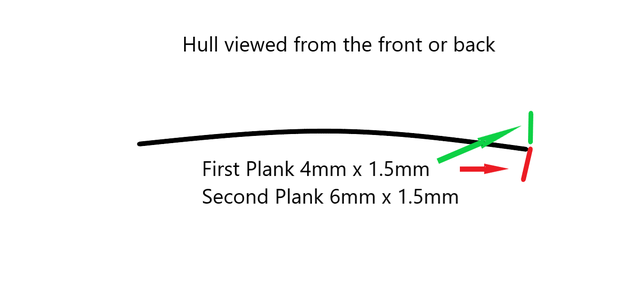
Hull.png

Here I have described that the First Plank (marked in red) has an inward sloping curve as the top of the plank lies just below the deck. Strictly speaking, I could have beveled the second plank to ensure a seamless fit - but with that I have two problems:

1. Exactly how much do you bevel on a plank that follows such a sharp vertical and horizontal curve and which also have to take into account the variables of my man-made fairing?
2. If I do achieve a seamless fit, that is contrary to what I want as I want each individual plank to be clearly defined.

So, what I do is this. With the two planks now butting against each other with no beveling, there is inevitably a very small overlap of the one plank over the other. This is where I just run some 360 grit sandpaper mounted on a non-flexible sanding stick over the joint. It instantly removes any potential or possible gaps while the individual planks are still discernible from one another.

I hope I have explained this properly. :)
 
So let me show you today's update and share a few thoughts.

I have covered in detail how I faired the hull to the best of my abilities. I thought I had done a good job BUT Lesson Learnt Today: Do not expect that a "general" fairing of the hull will be sufficient. With the first 4mm x 1.5mm plank laid yesterday, all was good, but additional fairing was required for the next plank which is a 6mm x 1.5mm plank. For this "specialized" fairing forget about using sandpaper because you may inadvertently also sand the planks already laid down. A small, flat diamond file is just the number for this.

View attachment 274739

Lesson 2 Learnt: Whereas the first plank had an inward sloping angle, the second plank is much more "upright" Take note of this and do not be perturbed by it.

So with the second plank in position, this is what she looks like tonight:

View attachment 274755
Starboard Side: On this side I had to do additional fairing on all the bulkheads (including the stern) except on bulkheads # 1 and 2.

View attachment 274756
Port Side additional fairing had to be carried out on Bulkhead #10 and on the stern (Assembly #11).

View attachment 274757
Port Side: Rear three-quarter view

View attachment 274761
Starboard Side: Three-quarter rear view

View attachment 274758
Starboard Side: Front three-quarter view

View attachment 274762
Bow view

In both cases the two planks butt beautifully against each other and there are no gaps whatsoever. At the same time, I am striving to achieve a look where all planks are individually distinguishable so that the essence of a planked wooden ship is not lost. (I have an abhorrence to veneer used as a planking material).

Last night I showed you how the planks lined up with the bulkheads on the port side, so tonight it's the starboard's side turn:

View attachment 274767
At the Bow: Check

View attachment 274768
Bow to midships: Check

View attachment 274769
Midships to Stern: Check

View attachment 274770
Stern: Check

And an overview - just because I love the wood colors of the kit. :D

View attachment 274771

Seriously though the reason for including this picture is to show you just how bulbous the hull is.

Tomorrow, the next plank is another 4mm x 1.5mm one which is equally important to the first plank that we laid as both of them, plus a third, will eventually form the basis of the wales.

That concludes today's updates. Enjoy and please ask any questions you may have.
Good job Heinrich! It doesn't help that it is a small ship either. On a larger scale ship, the curve would be more gradual, except at the bow and stern.
 
Correct Phil. I touch up individually according to the requirements of each specific plank at each specific bulkhead. I do bevel planks, but not as a rule. That is an excellent question though.

Bear in mind that on my builds I work with relatively thick planks. So let's take the following scenario as an example.

View attachment 274773

Here I have described that the First Plank (marked in red) has an inward sloping curve as the top of the plank lies just below the deck. Strictly speaking, I could have beveled the second plank to ensure a seamless fit - but with that I have two problems:

1. Exactly how much do you bevel on a plank that follows such a sharp vertical and horizontal curve and which also have to take into account the variables of my man-made fairing?
2. If I do achieve a seamless fit, that is contrary to what I want as I want each individual plank to be clearly defined.

So, what I do is this. With the two planks now butting against each other with no beveling, there is inevitably a very small overlap of the one plank over the other. This is where I just run some 360 grit sandpaper mounted on a non-flexible sanding stick over the joint. It instantly removes any potential or possible gaps while the individual planks are still discernible from one another.

I hope I have explained this properly. :)
Great explanation. I am approaching planking my model and need to pay attention to plank fitting as it is a single planked. I need a great fit but cannot forget the curves and probably and some tapering. Like you mentioned, I'm looking for a seamless fit. Should I consider filler blocks between bulkheads?
 
Last edited:
@rtibbs Ron that rendering looks amazing !!!Thumbs-UpThumbs-UpThumbs-UpAnd please do not apologize for calling your ship De Witte Swaen - that is wonderful, because it means that we will have different renditions of the same ship! Variety is the spice of life - bring it on!
I have to confess that I don’t have the carving skills of Dean62 so I’ll use my CNC for these
 
Good job Heinrich! It doesn't help that it is a small ship either. On a larger scale ship, the curve would be more gradual, except at the bow and stern.
Thank you very much Dean. You are so right - those are a lot of curves packed into a small body. :) But ... and I did not think I would say this ... I really enjoy working on the smaller model - even the sampan was considerably longer in length. But this little ship has oodles of character and has already stolen my heart!
 
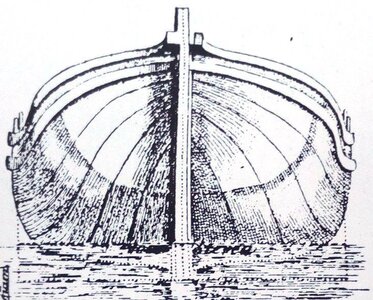
Reading all the discussions above about how to, what is right, and what is wrong please keep one important thing in mind. We are nowadays almost always planking a hull with straight planks, because a straight plank is something which is more easy available. This was however not how it was done in the 17th century.
Have a look at this (old) image:
Dubbele kromming aan de boeg.jpg
What you can clearly see is that every plank has a double curve from side to bow, from concave to convex (looking from above), and then also is bent into the blunt rounding of the bow.
This rather complex form cannot be achieved by a single straight plank which we nowadays have for cladding a hull. And what makes it even more difficult is that a model plank only has a thickness of f.i. 1,5 mm and a width of 6 mm. Even after soaking it for years it is difficult to bent the double curve in it. It is therefore that planks are tapered, and also a reason why a blunt bow is more difficult to plank.
When you look at the first planks Heinrich has mounted it is correct what Ptér said. The end of it should go downwards a bit. But when trying this the plank will start to open itself at the second bulkhead, like the gill of a fish. This we don't want, as we have only 1,5 mm of material to sand away.
Thus we taper the planks to get a smooth and nice bow.
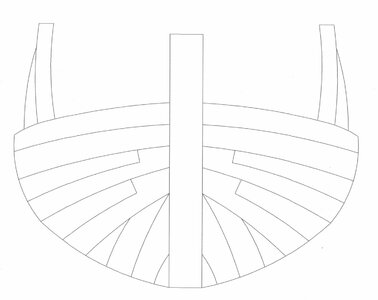
In the end your planking could look something like this:

Vooraanzicht romp_18102018.jpg

During the progress of planking Heinrich will (at least I think) show how - when going upwards - planks are tapered to achieve a good result.
 
Last edited:
Great explanation. I am approaching planking my model and need to pay attention to plank fitting as it is a single planked. I need a great fit but cannot forget the curves and probably and some tapering. Like you mentioned, I'm looking for a seamless fit. Should I consider filler blocks betwen bulkheads?
Phil I am a great fan of filler blocks. On your ship, that would be my ultimate choice. I really like the way that the old school modelers build. Here I am thinking of guys like @El Capi @Alexander74 Sasha and the like. The only reason I did not go the full hog on the Willem Barentsz is because the majority of the planking is actually above the waterline where I can't use filler blocks.

On my sampan build, this was what I had to work with.

Bulkheads to be removed.jpg

So I made use of as many filler blocks as I could.

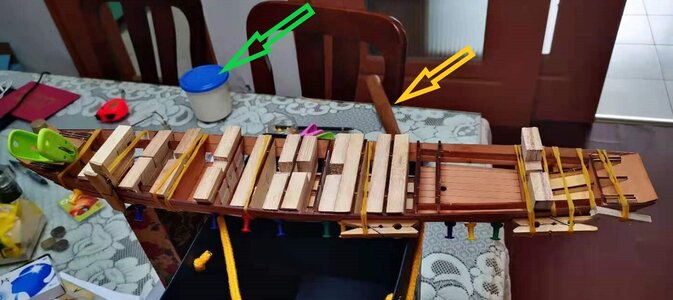
微信图片_20210629235546.jpg

To achieve the finished result.

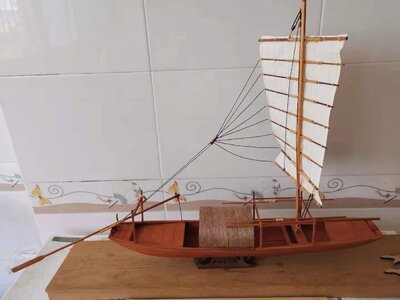
微信图片_20210811200333.jpg
 
Phil I am a great fan of filler blocks. On your ship, that would be my ultimate choice. I really like the way that the old school modelers build. Here I am thinking of guys like @El Capi @Alexander74 Sasha and the like. The only reason I did not go the full hog on the Willem Barentsz is because the majority of the planking is actually above the waterline where I can't use filler blocks.

On my sampan build, this was what I had to work with.

View attachment 274782

So I made use of as many filler blocks as I could.

View attachment 274783

To achieve the finished result.

View attachment 274784
Nice! I have a big block of balsa I can use as fillers as needed. I'll take it a step-at-a-time. I can bandsaw to fit. Thank you for your input! Greatly appreciated.
 
@Kolderstok Thank you very much Hans. This just adds new credence to what we know - those shipwrights were master craftsmen. We can at best only try to achieve a workable compromise.

Most certainly will I show the tapering of the planks Hans as well as the use of inserted pieces (instekers) where necessary. I never know where my planking takes me - maybe I will even have to include a lost strake (verlore gang) somewhere! ROTF
 
Back
Top