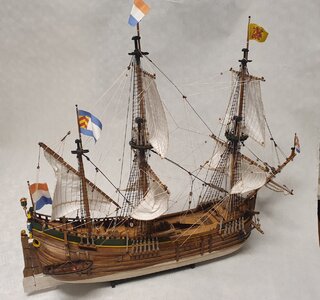
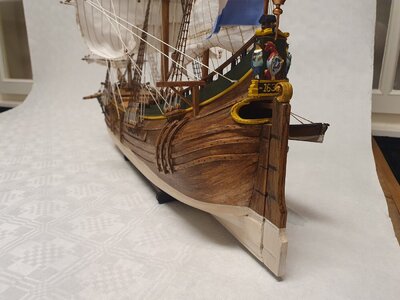
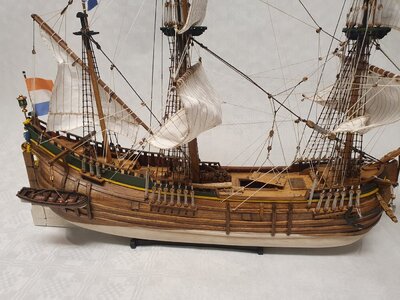
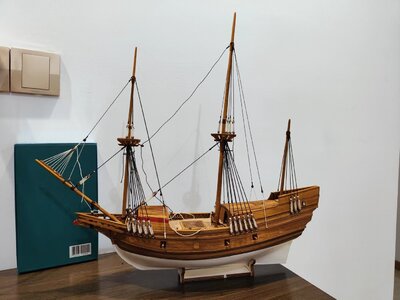
HIGH HOPES, WILD MEN AND THE DEVIL’S JAW - Willem Barentsz Kolderstok 1:50

She is looking great Heinrich ThumbsupThumbsup
Thank you, Peter! One of my rowing colleagues has gone back to Singapore for the school holidays so we went to see her off in Shanghai. That meant I only had half a day in the shipyard while today (Sunday) won't be much better either as I will be without the admiral's help. Ah well, things are what they are.
 
Nice to dee how this ‘old fashion’ rigging is growing, Heinrich.
Regards, Peter
Thank you, Peter. In a strange - and unexpected kind of way - I am actually enjoying the rigging. I think it also provides a nice scale-to-size reference for things like relative mast heights, mast diameters and so forth.
 
Dear Friends

Progress Today: The day's menu consisted of installing the backstays for both the main and foremasts.

View attachment 351222
Main mast backstays. The 0.5mm brown double rope is looped and seized around the top gallant of the main mast and is then tied off with 5-in-one block which is also seized. From there the 4mm white rope is belayed on the deck (underneath the roof of the center canopy - as per my previous posting) and to an eye pin on the outside of the hull in line with the 6 shrouds of the main mast. The loose line running from the topgallant towards the front of the ship, is just draped over the main mast top gallant for measuring purposes and is by no means fixed or tightened.

View attachment 351223
Viewed from squared on, only a single line is visible. The height of the two blocks and the angle of the stays are identical.

View attachment 351227
The foremast backstays are installed in the same way as those of the main mast - the only difference lies in the belaying. On the inside of the hull, it is belayed to the first knight's head of the belaying rack and on the outside, it is seized to the eye pin. The crudely tied rope that runs from the foremast topgallant to the bowsprit is just to keep the top gallant aligned until the crows' feet and permanent forestay go on - hopefully tomorrow.


View attachment 351228
Once again, alignment and symmetry are well-nigh perfect.

View attachment 351232
It's starting to look busy.
Good morning Heinrich. That is very neat rigging ! Cheers Grant
 
Dear Friends

Today, I updated my build log on Modelbouwforum.nl and would like to share with you a few pics of the finished product of @Kolderstok's newest offering - the Fluyt. This model was expertly built by Hans Groenenberg.

20230114_091546.jpg
20230114_091722.jpg
20230114_091620.jpg

For those of you who fancy a REAL challenge - look no further!
 
You haven't had any thoughts yet about a next build my friend??
Lots of thoughts my friend - but there is just nothing that really captures my imagination at this stage. As soon as I think I have found something interesting, I read up on it and then I find something that puts me off. The other thing to consider is cost - paying in the region of 800-1000 USD is beyond my price range.
 
Ah yes, i do understand what you mean. you have to like what you are going to build, and you hve to like it a lot.

And 800-1000USD is not in my leage as well my friend, so that is also very understandeble.
Good luck with your search
 
Ah yes, i do understand what you mean. you have to like what you are going to build, and you hve to like it a lot.

And 800-1000USD is not in my leage as well my friend, so that is also very understandeble.
Good luck with your search
Yes, my friend. The Willem Barentsz has made it very difficult for me to become as involved with ANY other ship, as I have been and still am with her.
 
Dear Friends

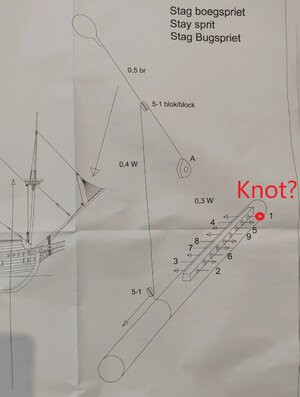
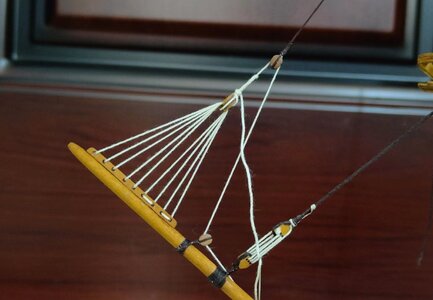
Tonight, it was my turn at rigging the crows' feet on the bowsprit.

微信图片_20230116093336.jpg

This step was accomplished after much consultation with @Kolderstok Hans to ensure that I get it right. As always, he was Mr Patient himself in explaining the process to me step by step.

Note on the instructions that the rope needs to be threaded not only from one side, but from both. You will see that there are five ropes entering from the starboard side and four from the port side. Also note the sequence that needs to be followed. Using this as the definitive parameter I can also safely say that very few of the models of the WB are rigged correctly as far as this goes - many builders either overlook or ignore this detail.

微信图片_20230116224202.jpg
I am also extremely happy with the tension on the ropes.

微信图片_20230116224830.jpg
One rope to go and then the standing rigging (sans the ratlines) is completed.
 
Dear Friends

Tonight, it was my turn at rigging the crows' feet on the bowsprit.

View attachment 351771

This step was accomplished after much consultation with @Kolderstok Hans to ensure that I get it right. As always, he was Mr Patient himself in explaining the process to me step by step.

Note on the instructions that the rope needs to be threaded not only from one side, but from both. You will see that there are five ropes entering from the starboard side and four from the port side. Also note the sequence that needs to be followed. Using this as the definitive parameter I can also safely say that very few of the models of the WB are rigged correctly as far as this goes - many builders either overlook or ignore this detail.

View attachment 351772
I am also extremely happy with the tension on the ropes.

View attachment 351773
One rope to go and then the standing rigging (sans the ratlines) is completed.
the standing rigging looks wonderful, my friend :) Thumbsup I like the colors
 
Back
Top