Hello Everyone
I last posted on Christmas Eve, but my silence must not be mistaken for inactivity.

Unfortunately, the going is S-L-O-W and it has, one more, been a case of one step forward, two steps back. However, I am slowly making progress.
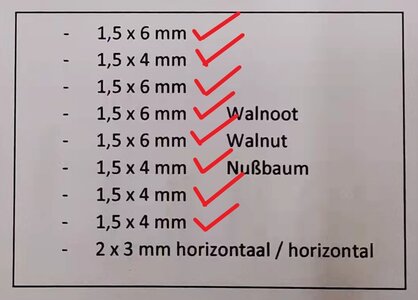
So the status quo was that planking including and above the wales had been completed except for the two 2x3mm planks which are laid horizontally on top of the uppermost plank.
View attachment 278561
The red ticks indicate the completed planking above the wales.
Below the wales, 5 planks had been laid down on either side of which the 5th plank on the starboard consisted of two pieces joined by a butt joint. Seeing that I managed to accomplish the planking on the port side with a single plank, this bothered me and I wasn't happy with it, but decided to leave it for the time being.
Seeing that I have planked relatively far downwards on the hull, it was now time to lay the garboard strakes and start the planking process upwards.
View attachment 278559
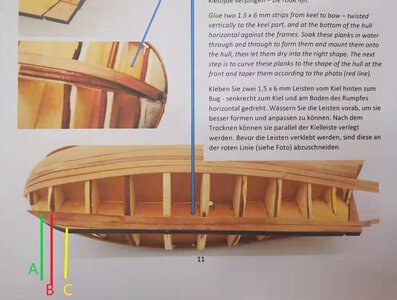
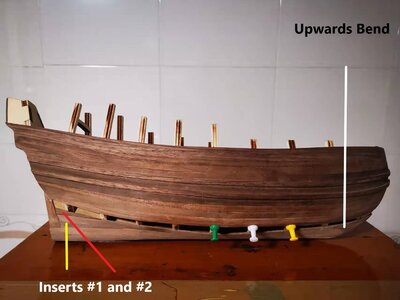
Kolderstok's instructions are pretty clear in this regard. and I followed it to the letter. In the picture above, (A) indicates the adjacent plank to the garboard. (B) indicates the second bulkhead to which the garboard strake is glued in a straight line and (C) indicates the actual garboard strake.
View attachment 278562
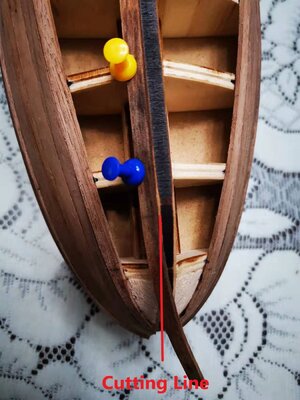
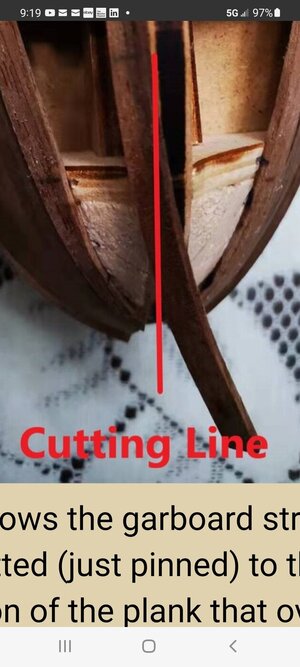
This picture shows the garboard strake pre-bent and dry fitted (just pinned) to the hull. Note the portion of the plank that overlaps the false keel. The red line above indicates the cutting line where the garboard strake needs to be cut so that it follows the upsweep of the hull correctly.
View attachment 278563
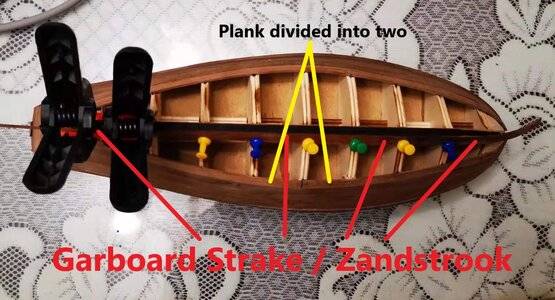
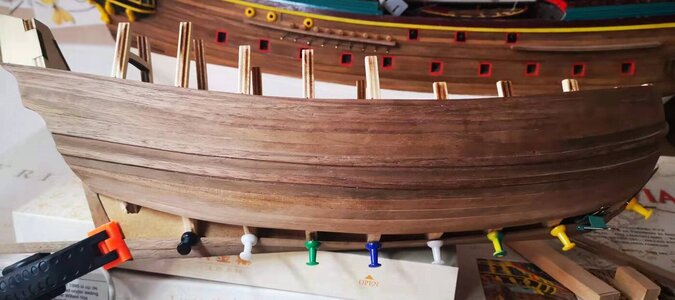
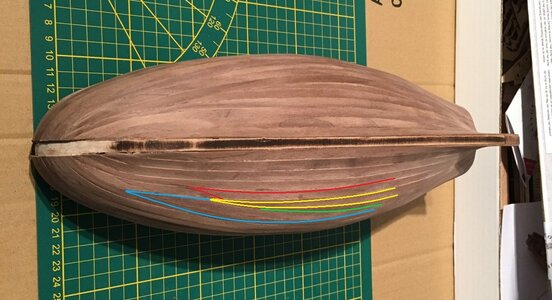
Here is an overview of the dry-fit process of the garboard strake. Also note that the two-part 5th plank on the starboard side whereas the port side only required a single plank. Looking at this picture was the final straw and the offending plank was summarily stripped. Oh boy ... one step forward, one step back.
View attachment 278564
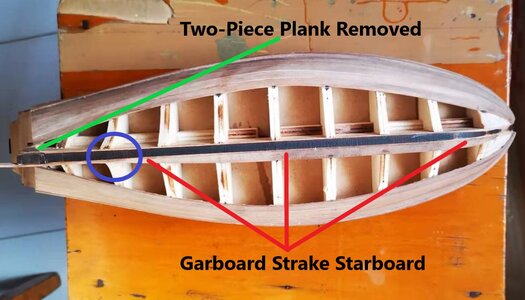
This picture shows that the last plank (consisting of two separate pieces) had been removed from the hull and that the garboard strake on the Port Side had been laid down. The blue circle indicates the spot where the garboard strake has to rotated through 90 degrees so that it lays flat against the side of the keel.
View attachment 278565
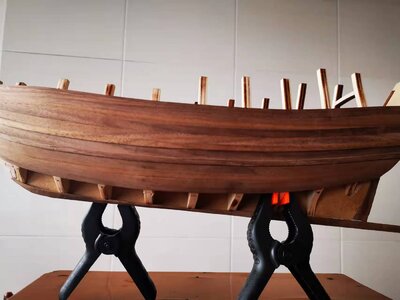
This picture shows the garboard strake on the Port Side. Note that the last plank above the garboard strake consists of one piece - so that prompted me to try again on the starboard side as well.
View attachment 278566
The plank directly above the garboard strake on the Port Side is laid down.
View attachment 278567
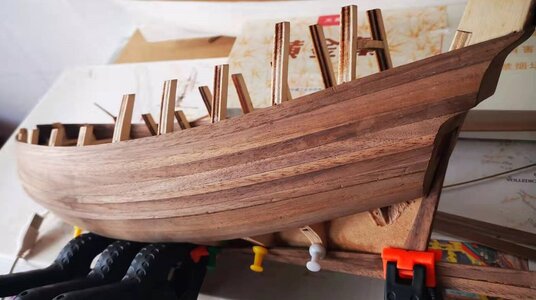
And here is the starboard side. You can clearly see that the last plank down from the wales now consists of a single plank and tha the garboard strake and adjacent plank on the starboard side are both in place.
As I move closer to the closing of the hull, I can tell you right now - that is going to be a nightmare. Every single plank will have to be custom-shaped to ensure the best result. This sis a process that is going to take ages as it will consist of lost strakes, inserts and the like. The other problem is that you cannot just measure how the planking will pan out. Those curves make that impossible and the plank has physically to be pinned into position so that you can see the final line it follows relative to the rest of the planking.
However, with all said and done, I can tell you that the planked and roughly-sanded sections look beautiful so there is plenty of motivation to keep focused and just to carry on.
I trust that you had a wonderful Christmas and time with your families, and that you did not eat too much. For those of you who are taking a break, enjoy the well-deserved rest, take care of yourselves and stay safe. Thank you so much for following along.
It is so true!!


