I love the lines and the curves of the closure of the canopy. Well done, Heinrich.
Regards, Peter
Regards, Peter
Last edited:
 |
As a way to introduce our brass coins to the community, we will raffle off a free coin during the month of August. Follow link ABOVE for instructions for entering. |
 |
 |
The beloved Ships in Scale Magazine is back and charting a new course for 2026! Discover new skills, new techniques, and new inspirations in every issue. NOTE THAT OUR FIRST ISSUE WILL BE JAN/FEB 2026 |
 |

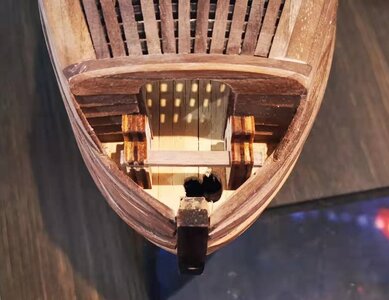
I think your progress on the fwd canopy makes the windlass position topic moot; there's no way, unless you'll be using chirurgical instruments, to get the windlass inside the canopy, let alone adding details afterward. Thus your only option remaining is the spot just forward of the canopy.Now I just need to interrupt my line of thought with regards to windlasses and small boats - I have completed the closure of the rear canopy.
First, let me show you what Piet has done by giving it his own bent.
View attachment 300424
Photograph: Piet Sanders
As beautiful it looks and as wonderfully as it is executed, I did not want to do the same. I wanted a far less elaborate approach and one that follows lines the roof curvature.
And this is what my effort looks like.
View attachment 300428
It still needs to receive its final sanding, but you get the idea. Also, you can see a nice a close-up of the railings.

Peter I wish I could "double-love" your post! I know exactly how meticulous you are with regards to lines, symmetry and effect and when you say that about the canopy, I am a very happy chappy! Like you with Bluenose and the cutting of the hull and adding all the interior detail, I knew how I wanted the canopy to look. Thank you!I love the lines and the curves of the closure of canopy. Well done, Heinrich.
Regards, Peter

Hi Johan. There is no way that I am going to play a Kurt here. I wanted to place the windlass in front of the canopy like Piet has done from the beginning - not because of Piet's build or because the Kolderstok kit says so, but because it makes sense to me. This I will explain when I go into detail about the ship's boats and the information we could get from research.I think your progress on the fwd canopy makes the windlass position topic moot; there's no way, unless you'll be using chirurgical instruments, to get the windlass inside the canopy, let alone adding details afterward. Thus your only option remaining is the spot just forward of the canopy.
It also means you've gotten yourself now ample room for life boats on deck, which makes a lot of sense to me. As already mentioned by @Jack Jäger, rough weather would play havoc on the lifeboats and from what I've learned, the northern seas have plenty of that.
If you really want to get the windlass underneath the canopy it's demolition time, see @DARIVS ARCHITECTVS, https://shipsofscale.com/sosforums/...ini-beyond-believable-boundaries.6365/page-24
Now it's time for me to sit back and watch things unfold...

Thank you so much Johan. As I mentioned to Peter, I wish I could double-love these posts. The canopy is such a focal point of the ship that I had to get it right.PS You build yourself a lovely canopy, brilliant to enjoy the afternoon sun with a cup of tea, or a whiskey...

Hey Heinrich,Hi Johan. There is no way that I am going to play a Kurt here. I wanted to place the windlass in front of the canopy like Piet has done from the beginning - not because of Piet's build or because the Kolderstok kit says so, but because it makes sense to me. This I will explain when I go into detail about the ship's boats and the information we could get from research.
BUT ... I have a confession to make now. I never checked whether or not I could fit the windlass into the space I have. Plus, I mentioned earlier that I was trying to build a "narrow" ship. This potential problem only occurred half an hour or so ago to me. So I quickly cut out the laser pieces of the sidewalls and placed the belaying rack (all dry-fit, of course) to get measurements and to see whether it fits. It fits, but only J-U-S-T !
View attachment 300443
How close can you get? It actually touches in front on the sides! (Please please excuse the sawdust. The shipyard is in full swing today!)

And here I was, thinking you would at least be as daring as Kurt is...There is no way that I am going to play a Kurt here.


It is extremely cramped Johan - you are 100% right in your summary of that. But ... as you will see, it is a case of the lesser of two evils. And, I am pretty sure that was the same situation on the real ship as well - choosing between the devil and the deep blue sea.Hey Heinrich,
Honestly, this location doesn't make any sense to me; it's so crowded by the windlass, the belaying rack and later on the bowsprit that there's no room for the crew to perform any task in this heavily populated area.
I do have to admit though, my thoughts are driven by present day knowledge and practice and not by the standards of the days of the WB/WS.

Trust me, I am just as daring - if I believe that was the right thing to do. But I knew I did not want it underneath the canopy for reasons that you will see as it unfolds. The only thing I did not check, was whether or not it actually fits in that tiny space.And here I was, thinking you would at least be as daring as Kurt is...


Thank you Hans - that is a good idea which gives me another idea! You know I don't like exposed triplex ...To get more space you can reduce the width of the laser cut parts. These are a bit too thick for the scale.


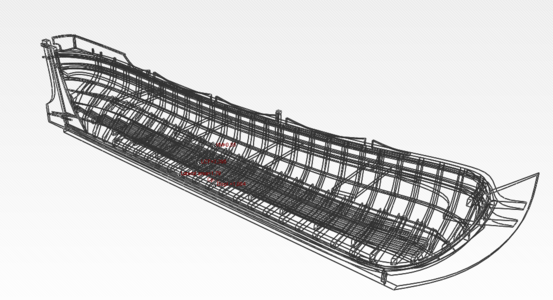

Please, don't tempt me, please don't...In addition, Ab has also made available to me a full plan set of the sloop for a scratch-build. This he was only too happy to make available to all members of SOS, so if you ever want to build a proper chaloup for a Dutch or related ship here you go.

And again, a very interesting historical read.I will start the explanations by first looking at the ship's boats, what they were, what they were used for, what they looked like and some interesting information for you all.
Normally, lifeboats (and I purposely use a generic term at this stage), play a minor role in a trip and rarely do they get the attention they deserve. In Barents's case, these boats are of almost as great importance as the ship itself – if not more. Consider that the lifeboat was instrumental in the men’s return to civilization after a journey over and through the ice of 1200 nautical miles while enduring almost superhuman hardships.
The following information was given to me by @Ab Hoving.
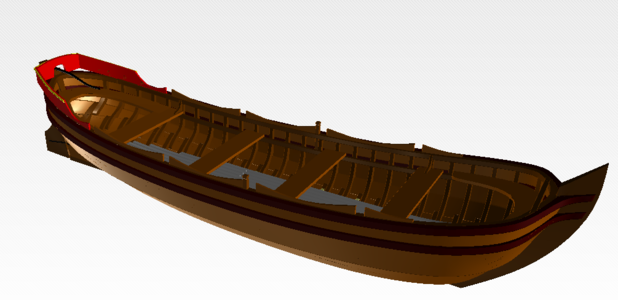
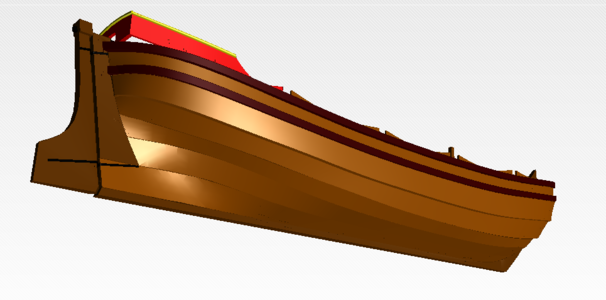
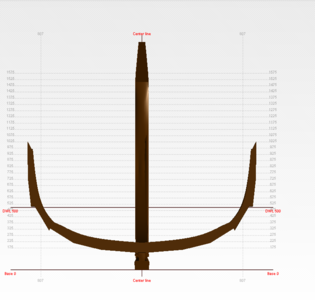
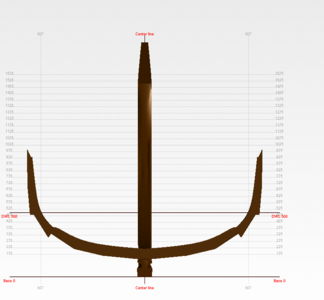
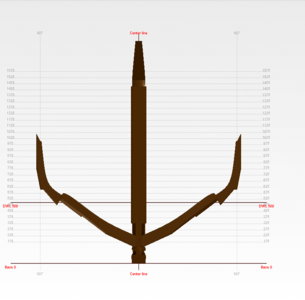
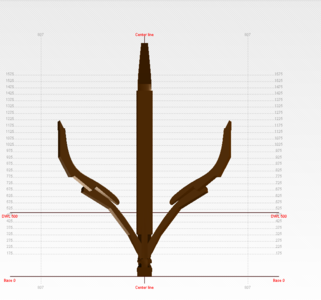
Dutch ships had two auxiliary vessels: a 'chaloup' or sloop for transporting people (round stem and stern, flat counter with side boards, carvel bottom, clinker sides, length 4/5 of the 'boot', mostly stored on deck, see picture 1 and 2) ...
Picture 1:
View attachment 300450
Picture 2:
View attachment 300451
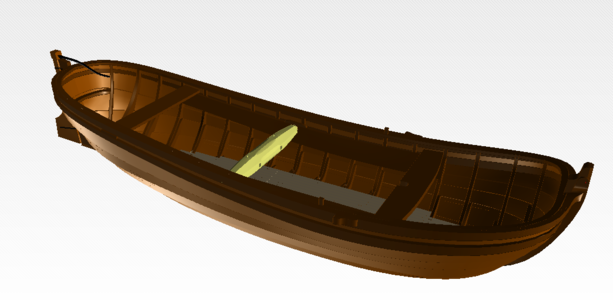
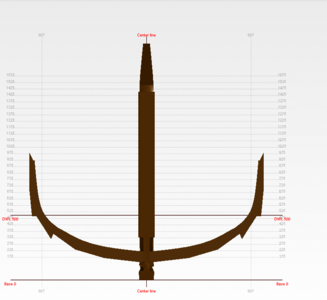
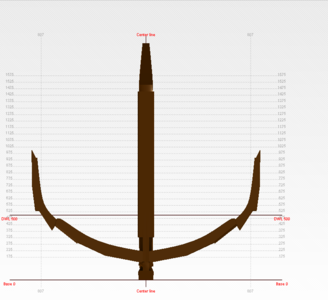
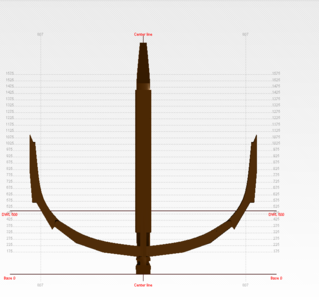
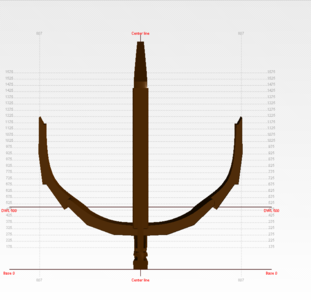
and a 'boot' (made for transport of goods and other heavy duties, round bow and stern, flat bottomed with no keel, clinker sides, length equal to the beam of the ship, or 1/4 of its length, with a windlass for bringing out the anchor and the possibility to sail, mostly towed with a rope coming through one of the 'cardinals hats' near the gun ports in the stern, see picture 3 and 4).
Picture 3:
View attachment 300448
Picture 4:
View attachment 300449
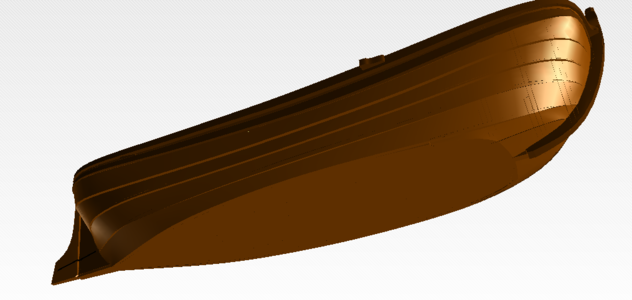
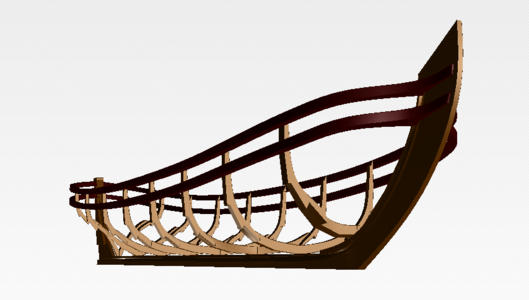
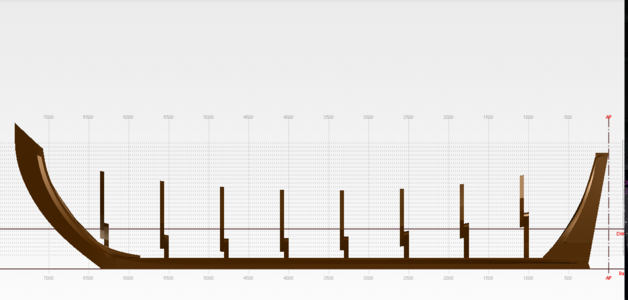
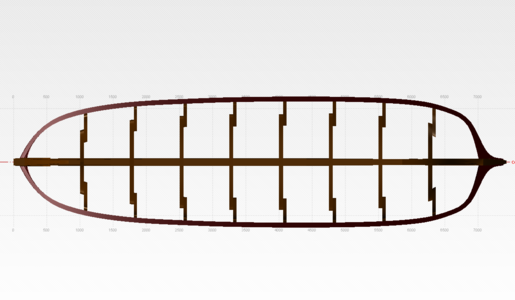
In addition, Ab has also made available to me a full plan set of the sloop for a scratch-build. This he was only too happy to make available to all members of SOS, so if you ever want to build a proper chaloup for a Dutch or related ship here you go.
View attachment 300467
Three-Quarter Front View
View attachment 300468
Side View
View attachment 300469
Top View
View attachment 300470
Bulkhead 00
View attachment 300471
Bulkhead 03
View attachment 300472
Bulkhead 06
View attachment 300473
Bulkhead 09
View attachment 300474
Bulkhead 12
View attachment 300475
Bulkhead 15
View attachment 300476
Bulkhead C
View attachment 300477
Bulkhead F
View attachment 300452
Cross-Section
The following is the information/instructions that Ab sent me and that you can use at will.
Ab Hoving
The length of the chaloup will be 32 feet (9,065m). The vessel I sent you is somewhat smaller at 26 feet but can be enlarged at will.
If you take the sideview and print it with a length of 32 feet at your model scale you can divide the distances between the given frames likewise. The following order is from fore to aft: F, C, 00,03, 06, 09, 12,15. On a full-size chaloup there will be two extra frames between each given frame.
Once you have the shape of the chaloup, you can add the details according to the prints I sent you. The number of benches will be larger. Normally the space between the benches is 4 feet (1.13m) so you can decide for yourself.
So now that we know all about Dutch lifeboats in the 17th Century, does it help us? Yes and no.
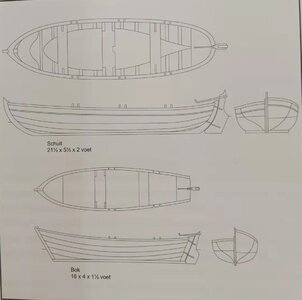
As a result of the Willem Barentsz being from an earlier era, a somewhat different set of rules apply. For instance, we know that in the 16th century no Dutch lifeboats would have had "swords”, because that was an invention that originated in China approximately circa 1600. The journal of crewmember, Gerrit de Veer mentions a “bok” and a “schuit” – not boat or sloop.
View attachment 300478
Illustration from Het Schip van Willem Barentsz - Ab Hoving.
This is where I relied heavily on sources that I received as gifts from @rtibbs Ron and @Frank48 Frank in the form of Hoving's book, Het Schip van Willem Barentsz and Gerrit de Veer's journal.
In his excellent book, Ab states that it remains unclear whether "bok" refers to boat or sloop and the same with "schuit. We know that during the period of overwintering in Het Behouden Huys, the “bok” was lying outside next to the house. After the period of overwintering, the men also attempted to move the “schuit” to the house, but this failed, because of their weak physical condition and the size of the “schuit”. Can we deduct from this that the “schuit” was the larger of the two and how is this important?
Stay tuned for the next update!

Thank you Johan. I am glad you enjoyed it. And if you are tempted, don't worry - Rome wasn't built in a day, so there is still plenty of modeling to come. Who knows when the plans will be useful?And again, a very interesting historical read.
It is amazing and rewarding to return to see the progress and high quality craftmanship that is being produced in SoS. Your work stimulates me to return to my bench and restart my own work. Beautiful and harmonious wood tones of your work lead me back and onwards.Dear Daniel. Thank you for those words - I can only echo what you have said. In my humble opinion, the canopy did come out very well and it is clear in that picture that the side walls clearly follow the inner curvature of the wales. As to her being "stout" - absolutely! She is as solid as a rock!

Dear Rich. To say that you have made my day is an understatement! I am so glad that you are back and that you are well - and when you then say such nice things about my work, it is just the cherry on top! Welcome back my friend!It is amazing and rewarding to return to see the progress and high quality craftmanship that is being produced in SoS. Your work stimulates me to return to my bench and restart my own work. Beautiful and harmonious wood tones of your work lead me back and onwards.
Rich (PT-2)

Hey Rich, long time no see. I hope all is well.It is amazing and rewarding to return to see the progress and high quality craftmanship that is being produced in SoS. Your work stimulates me to return to my bench and restart my own work. Beautiful and harmonious wood tones of your work lead me back and onwards.
Rich (PT-2)
Good morning Heinrich. Another thesis on Dutch ship building, this time lifeboats. Excellent. I’m with Hans on reducing the size and thickness of the belay rack. Re your rear canopy closure, I know Piet is an exceptional modeler, however I do prefer the more rounded closure you achieved. Great work with your WB and thanks for the “thesis”. Cheers GrantI will start the explanations by first looking at the ship's boats, what they were, what they were used for, what they looked like and some interesting information for you all.
Normally, lifeboats (and I purposely use a generic term at this stage), play a minor role in a trip and rarely do they get the attention they deserve. In Barents's case, these boats are of almost as great importance as the ship itself – if not more. Consider that the lifeboat was instrumental in the men’s return to civilization after a journey over and through the ice of 1200 nautical miles while enduring almost superhuman hardships.
The following information was given to me by @Ab Hoving.
Dutch ships had two auxiliary vessels: a 'chaloup' or sloop for transporting people (round stem and stern, flat counter with side boards, carvel bottom, clinker sides, length 4/5 of the 'boot', mostly stored on deck, see picture 1 and 2) ...
Picture 1:
View attachment 300450
Picture 2:
View attachment 300451
and a 'boot' (made for transport of goods and other heavy duties, round bow and stern, flat bottomed with no keel, clinker sides, length equal to the beam of the ship, or 1/4 of its length, with a windlass for bringing out the anchor and the possibility to sail, mostly towed with a rope coming through one of the 'cardinals hats' near the gun ports in the stern, see picture 3 and 4).
Picture 3:
View attachment 300448
Picture 4:
View attachment 300449
In addition, Ab has also made available to me a full plan set of the sloop for a scratch-build. This he was only too happy to make available to all members of SOS, so if you ever want to build a proper chaloup for a Dutch or related ship here you go.
View attachment 300467
Three-Quarter Front View
View attachment 300468
Side View
View attachment 300469
Top View
View attachment 300470
Bulkhead 00
View attachment 300471
Bulkhead 03
View attachment 300472
Bulkhead 06
View attachment 300473
Bulkhead 09
View attachment 300474
Bulkhead 12
View attachment 300475
Bulkhead 15
View attachment 300476
Bulkhead C
View attachment 300477
Bulkhead F
View attachment 300452
Cross-Section
The following is the information/instructions that Ab sent me and that you can use at will.
Ab Hoving
The length of the chaloup will be 32 feet (9,065m). The vessel I sent you is somewhat smaller at 26 feet but can be enlarged at will.
If you take the sideview and print it with a length of 32 feet at your model scale you can divide the distances between the given frames likewise. The following order is from fore to aft: F, C, 00,03, 06, 09, 12,15. On a full-size chaloup there will be two extra frames between each given frame.
Once you have the shape of the chaloup, you can add the details according to the prints I sent you. The number of benches will be larger. Normally the space between the benches is 4 feet (1.13m) so you can decide for yourself.
So now that we know all about Dutch lifeboats in the 17th Century, does it help us? Yes and no.
As a result of the Willem Barentsz being from an earlier era, a somewhat different set of rules apply. For instance, we know that in the 16th century no Dutch lifeboats would have had "swords”, because that was an invention that originated in China approximately circa 1600. The journal of crewmember, Gerrit de Veer mentions a “bok” and a “schuit” – not boat or sloop.
View attachment 300478
Illustration from Het Schip van Willem Barentsz - Ab Hoving.
This is where I relied heavily on sources that I received as gifts from @rtibbs Ron and @Frank48 Frank in the form of Hoving's book, Het Schip van Willem Barentsz and Gerrit de Veer's journal.
In his excellent book, Ab states that it remains unclear whether "bok" refers to boat or sloop and the same with "schuit. We know that during the period of overwintering in Het Behouden Huys, the “bok” was lying outside next to the house. After the period of overwintering, the men also attempted to move the “schuit” to the house, but this failed, because of their weak physical condition and the size of the “schuit”. Can we deduct from this that the “schuit” was the larger of the two and how is this important?
Stay tuned for the next update!
