• LUCZORAMA SHIPWRECK SCAVENGER HUNT GIVEAWAY. 4 Weeks of Fun • 1 Legendary Prize ((OcCre’s Fram Ship)) • Global Crew Welcome!
    **VIEW THREAD HERE**

HIGH HOPES, WILD MEN AND THE DEVIL’S JAW - Willem Barentsz Kolderstok 1:50

What do the expert painters among you guys think?
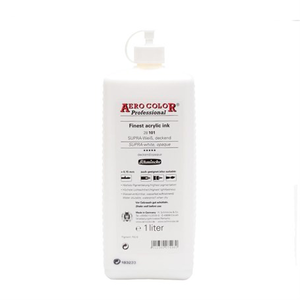
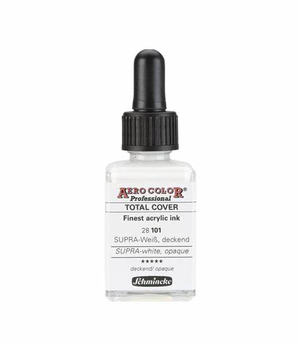
Hi Heinrich. I can not call myself a expert, but the Schmincke Aero Cloror 28101, Supra white opaque, satisfied me very much.
It is not as liquid and transparant as the other inks. It gives a mat to semi mat finish, almost like lime.
1660062825940.png1660062874312.png
I first used it on the railing of my BN, but now also on the outside walls of the cabin and other deck items.
On the railing I used it in a air-brush, but on the cabin I used some mini-rollers.
First I used it as a coat of primer and sanded it. Then 2 coats to get it opaque.
And ...... also for this: shake very well!

But I’m almost for sure that Hans's Harpuis will certainly give such a nice result.
Regards, Peter
 
Last edited:
Hi Heinrich. I can not call myself a expert, but the Schmincke Aero Cloror 28101, Supra white opaque, satisfied me very much.
It is not as liquid and transparant as the other inks. It gives a mat to semi mat finish, almost like lime.
View attachment 322584View attachment 322585
I first used it on the railing of my BN, but now also on the outside walls of the cabin and other deck items.
On the railing I used it in a air-brush, but on the cabin I used some mini-rollers.
First I used it as a coat of primer and sanded it. Then 2 coats to get it opaque.
And ...... lasso thuis: shake very well!

But I’m almost for sure that Hans's Harpuis will certainly give such a nice result.
Regards, Peter
Thank you very much for this Peter. The results that you have obtained on your Bluenose are nothing short of maritime art! The problem is just finding these specialized products in China. Now that I know I have probably not shaken the Harpuis well enough, I am most hopeful that I will be able to achieve great results with it.
 
Heinrich, I can only reiterate what Hans said about shaking the paint vials. I am using his paints also and have found that they tend to be really separated in the vials and require a thorough mixing/shaking before they are applied.
I’m not using a great deal of paint however I’m looking into purchasing a mixed/shaker to do the work for me.:)
Thank you, Ron. I know that you have done quite a bit of painting with the Kolderstok paints and have achieved excellent results! Thumbsup Actually, while on that topic, how is the Statenjacht coming along? I would really like to see what you have done up to. in the Lincoln Shipyard, I will have to revert to manual labor though in shaking those bottles - as if my right arm has not already had enough exercise doing all that sanding! :eek:
 
I purchased his assortment of paints and did notice that when I pick them out of the carton you can see a distinct difference in color looking at the bottom of the vial and yes it takes a lot of hand shaking to get a thorough mix. When I feel (or my wrist feels) I have mixed enough I will put a few drops into my container and it becomes readily apparent if it is mixed.
I will say the paint covers/flows beautifully.

As to the Statenjacht I keep plodding along time permitting. I will try to post where I am. Almost finished planking although the untrained eye will see a couple of gross errors in my work. :( I’ve kinda chalked them up as a learning experience and choose not to do-over. Currently I’m building as time permits and unfortunately not always thinking/planning ahead as I should.
I know I haven’t posted recently as I tend to post stage by stage.
 
Thank you, Ron. I know that you have done quite a bit of painting with the Kolderstok paints and have achieved excellent results! Thumbsup Actually, while on that topic, how is the Statenjacht coming along? I would really like to see what you have done up to. in the Lincoln Shipyard, I will have to revert to manual labor though in shaking those bottles - as if my right arm has not already had enough exercise doing all that sanding! :eek:
If you have a small metal/glass ball/bead you can put it in the bottle and it will mix better when you shake it (like a rattle can for spray paints). I could send you some but you should be able to find something in China faster than I could get it to you...
 
Hi Heinrich,

Loved your detailed discussion about the double planking and the shipworm, just excellent.

The double planking is also a topic I am looking into at the moment for my upcoming fluit build. According Niklas Eriksson the Swedish archeologist who did some research on the wreck the ship had a double planking below the main wales but for a Baltic wood trader this doesn t seem to be logical unless it was done to better cope with the ice in the Baltic.

It is something I hope to solve before I start building.
 
If you have a small metal/glass ball/bead you can put it in the bottle and it will mix better when you shake it (like a rattle can for spray paints). I could send you some but you should be able to find something in China faster than I could get it to you...
Normally that’s a great idea Paul however the paint vials have only a 1/16” orifice unless you remove the insert which will give a larger hole. I don’t recommend doing this though as it gets rather messy. Don’t ask how I know :(
 
@rtibbs
@dockattner

Gents thank you very much for the input on the paint. I will do the shaking thing at first (properly this time around) and hope that it will suffice. Thank you for the little ball-bearing tip - it is great advice which I will certainly keep in mind if the shaking doesn't yield the proper results.
 
I purchased his assortment of paints and did notice that when I pick them out of the carton you can see a distinct difference in color looking at the bottom of the vial and yes it takes a lot of hand shaking to get a thorough mix. When I feel (or my wrist feels) I have mixed enough I will put a few drops into my container and it becomes readily apparent if it is mixed.
I will say the paint covers/flows beautifully.

As to the Statenjacht I keep plodding along time permitting. I will try to post where I am. Almost finished planking although the untrained eye will see a couple of gross errors in my work. :( I’ve kinda chalked them up as a learning experience and choose not to do-over. Currently I’m building as time permits and unfortunately not always thinking/planning ahead as I should.
I know I haven’t posted recently as I tend to post stage by stage.
Ron, re the Statenjacht. I was wondering how the planking went as Piet also mentioned that the Statenjacht is in areas not the easiest ship to plank. I am sure that your planking is far better than what you may think - I have seen the Speeljacht's planking and that was copybook stuff.
 
Hi Heinrich,

Loved your detailed discussion about the double planking and the shipworm, just excellent.

The double planking is also a topic I am looking into at the moment for my upcoming fluit build. According Niklas Eriksson the Swedish archeologist who did some research on the wreck the ship had a double planking below the main wales but for a Baltic wood trader this doesn t seem to be logical unless it was done to better cope with the ice in the Baltic.

It is something I hope to solve before I start building.
Maarten aah yes - the planking of Dutch ships and trying to find some logic behind it :eek: First off, forget about logical. ROTF

According to @Ab Hoving Ab, the Willem Barentsz should logically have had "dubbelling" maybe not for the Northern waters, but as the ship was primarily due to sail to China. It was logical to suppose that there would have been a dubbeling applied to fence off teredo navalis. However, there were no traces of dubbeling. The thin fir planks which were nailed closely to each other, (so that the square heads almost touched each other, in order to form a layer of rust), would have left numerous holes where the nails once were. There was nothing of the kind, the planks were smooth and solid.

For me the double planking on the Fluyt actually makes sense as protection against the ice in the Baltic waters. I am sure that that was probably also the most likely reason for the double planking on the WB.

As a matter of interest - do you know what was the thickness of the planks used for planking the hull and were both layers the same thickness? It would be most interesting to factor in the length of the Fluyt and compare it to the WB.
 
@rtibbs
@dockattner

Gents thank you very much for the input on the paint. I will do the shaking thing at first (properly this time around) and hope that it will suffice. Thank you for the little ball-bearing tip - it is great advice which I will certainly keep in mind if the shaking doesn't yield the proper results.
Of course white is harder to determine if it is mixed properly. Colors give better definition.
 
Maarten aah yes - the planking of Dutch ships and trying to find some logic behind it :eek: First off, forget about logical. ROTF

According to @Ab Hoving Ab, the Willem Barentsz should logically have had "dubbelling" maybe not for the Northern waters, but as the ship was primarily due to sail to China. It was logical to suppose that there would have been a dubbeling applied to fence off teredo navalis. However, there were no traces of dubbeling. The thin fir planks which were nailed closely to each other, (so that the square heads almost touched each other, in order to form a layer of rust), would have left numerous holes where the nails once were. There was nothing of the kind, the planks were smooth and solid.

For me the double planking on the Fluyt actually makes sense as protection against the ice in the Baltic waters. I am sure that that was probably also the most likely reason for the double planking on the WB.

As a matter of interest - do you know what was the thickness of the planks used for planking the hull and were both layers the same thickness? It would be most interesting to factor in the length of the Fluyt and compare it to the WB.
Hi Heinrich,

Unfortunately No, the investigation to the ship was visually with camera and IR scanning so there are no measurements done like this.
 
Hi Heinrich,

Unfortunately No, the investigation to the ship was visually with camera and IR scanning so there are no measurements done like this.
Okiedokie. That is a pity indeed.
 
Hi Friends

While I'm waiting on glue to dry and while we have discussed painting and finishing, I want to tell you about another technique that @Ab Hoving Ab shared with me - that of fuming or leaching the oak with ammonia.

To explain fuming in detail, I found the following great article which you can read in full. https://woodandshop.com/how-to-fume-ammonia-fuming-experiment-cheap-ammonia/

I will just briefly mention a few of the important excerpts.

For those who aren’t familiar with what ammonia fuming is, it is a chemical method that furniture makers use to darken and bring out the nice figure in certain woods, typically prior to adding a finish. The wood is placed in a confined space, and Ammonia, or “Ammonium Hydroxide” is left in a little container for a period of time. The ammonia isn’t applied directly to the wood. The ammonia reacts with the tannins in the wood and darkens the wood. White oak is the wood of choice for ammonia fuming because this wood has a particularly high tannin content.

The author conducted an experiment in which he used affordable (a.k.a. “cheap”) ammonia from local hardware stores containing 10% ammonia.
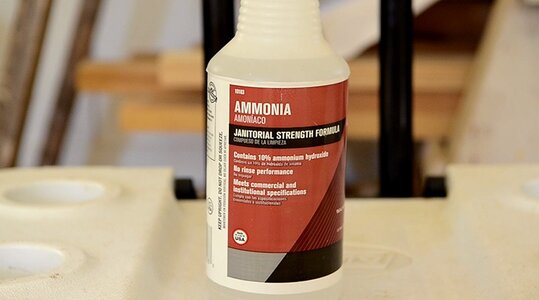
how_to_ammonia_wood_fuming_experiment_ace_hardware.jpg
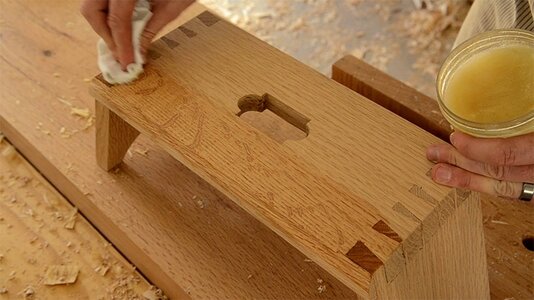
how_to_ammonia_wood_fuming_experiment_wax.jpg

The experiment was conducted on a Moravian footstool which was first given a layer of the author's special mix - a combination of beeswax, boiled linseed oil and turpentine - and left in the sun for a few days.
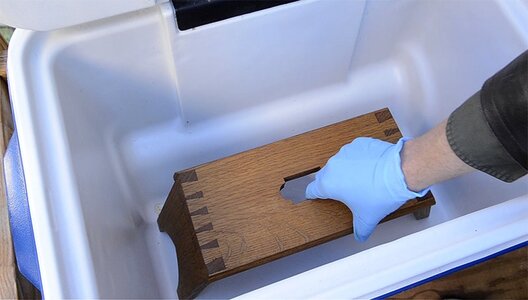
how_to_ammonia_wood_fuming_experiment_safety.jpg

It was then placed inside a cooler box together with a plastic bowl containing 1/2 to 1 cup of ammonia. After three days the footstool was removed from the cooler and after adding another layer of the special mix, this is what it looked like.
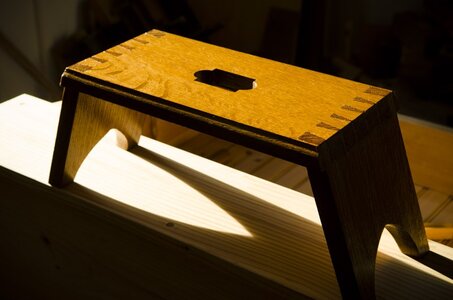
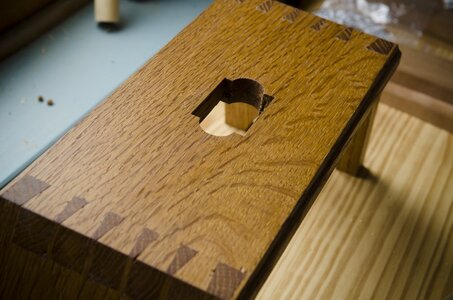
how_to_ammonia_wood_fuming_experiment_DSC1853.jpg

how_to_ammonia_wood_fuming_experiment_DSC1954.jpg

I am sure you will agree that looks brilliant!

IMPORTANT: Should you want to try this, remember the following:

1. Wear gloves and a respirator mask while handling the ammonia - especially when you open the cooler box after 3 days.
2. While fuming is taking place, the cooler box must be placed outdoors.
3. Make sure that you only open the cooler box outdoors.
4. After you have opened the cooler box, move away and let the worst of the fumes first evaporate before handling the wood.
5. As with everything else, always test on scrap wood first.
6. Prior to attemting this, FIRST READ THE WHOLE ARTICLE!

Thank you so much for this, Ab - I had no idea!
 
Adding to this tutorial: when you want to have a very dark natural finish on the oak, dissolve a piece of steel wool (coin size) in half a jar of vinegar and let this solution rest for a few days (the steel wool starts to dissolve in the vinegar). When you apply this mixture onto oak or walnut it almost immediately becomes dark brown to almost black.
I will see if I have some photos of it and post them later.

Hans
Thank you for this Hans - I remember reading about this technique on Modelbouwforum. I have an idea that when all is said and done, the Clou Beits (stain) that you included in the kit, will probably be the trump card! ROTF Having said that, the shellac that I am using, also works very well, even though I am only using it as a sanding sealer at the moment.
 
Back
Top