-

Win a Free Custom Engraved Brass Coin!!!
As a way to introduce our brass coins to the community, we will raffle off a free coin during the month of August. Follow link ABOVE for instructions for entering.
-

PRE-ORDER SHIPS IN SCALE TODAY!
The beloved Ships in Scale Magazine is back and charting a new course for 2026!
Discover new skills, new techniques, and new inspirations in every issue.
NOTE THAT OUR FIRST ISSUE WILL BE JAN/FEB 2026
You are using an out of date browser. It may not display this or other websites correctly.
You should upgrade or use an alternative browser.
You should upgrade or use an alternative browser.
HM Armed Cutter Alert (1777) - Vanguard Models - 1/64 - Completed Build
- Thread starter Smithy
- Start date
- Watchers 34
-
- Tags
- alert vanguard models
- Joined
- Dec 3, 2022
- Messages
- 1,547
- Points
- 488

Blogging was a pleasure Russ.Well done. Thank you for sharing this build with us.
Congrats on a fine build!
- Joined
- Jun 17, 2021
- Messages
- 3,202
- Points
- 588

Thanks for having us tag along. The model is stellar. 


 And the repartee priceless!
Pete


 And the repartee priceless!
 Pete
- Joined
- Dec 3, 2022
- Messages
- 1,547
- Points
- 488

"Delighted!"
That's right peeps, after all my moaning and groaning as I ground my way through the later parts of this build, I confess I'm delighted with the result. Excited even, my hands are still shaking a little. I finished it all off this morning with a base that I think you will appreciate and which I've been planning for months. Alert is no longer an onerous chore on my to-do list but an object that I like to look at. I take pride in it and will show it off to all of my friends, acquaintances, passing strangers... "Hey babe! Wanna come up and see my rigging?" I'll begin with you lot.
It's a swine to photograph, being so big and being mostly empty spaces tied together with string and sticks. I don't claim photography as a hobby though, so I've done my best with the equipment to hand. There's no way I can wait for the weather to brighten up, it could be weeks, so it's mostly artificial light. I've taken a LOT of pictures (I'm reminded of the 36 almost identical photographs I took of my first-born in the delivery suite), so I'll post them with captions in batches. Feel free to jump in with comments of your own - say what you like, ecstatic approval or bitterly hostile condemnation; it doesn't matter. I'm delighted, which is the main thing.
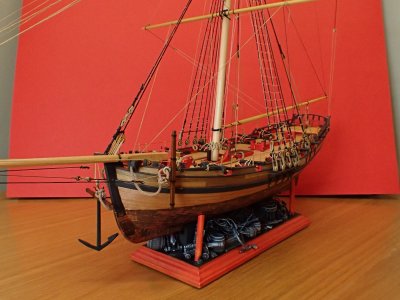
That's the overall picture. It's a small model in a small scale 1/64, which limited the possibilities for adding detail, thank goodness. The small scale allowed me to hide/ignore a lot of sloppy work too. My vision isn't brilliant and unless I peer really hard, I can't see the mistakes at all. Haha!
The build has taken about ten months which isn’t very long in this kind of modelling but it was a long old time for me, used to plastic kits and relatively instant gratification. About 300 days? How many hours? A very wild guess would be 500+ hours I took many days off but when enthusiasm was high and especially at the beginning, I would work three, sessions each of two hours in a day (not including blogging time). I hope that in return for investing that amount of time I have had some fun and learned something other than the diameter of the mast, maybe some things more valuable than mere technical details.
The kit costs about £260 now but I paid £110 two years ago for a charity shop example. I've had my five hundred hours worth of fun and misery for £110; 40 pence per hour? That's a very cheap hobby I think.
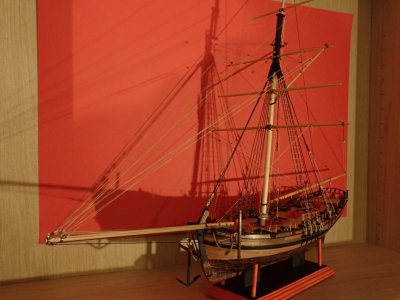
The rigging is the most complex of the three boats I've built. There's at least ten times more of it than my last one and some of it is quite complicated, but I still maintain that the individual pieces don't call for any extraordinary skill. It's the overall effect that dazzles. So if you are thinking about trying a kit with lots of 'knitting' don't be scared, be prepared to be patient.
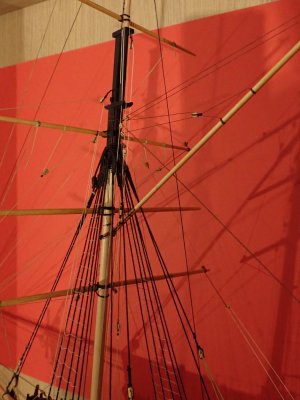
I’m happy to have made this model in my own way. If all of the completed Vanguard Models Alert kits were lined up, I’d know mine from a hundred yards off. It certainly doesn’t look like Chris Watton’s prototype – this one’s mine. It has my decisions in it as well as his.
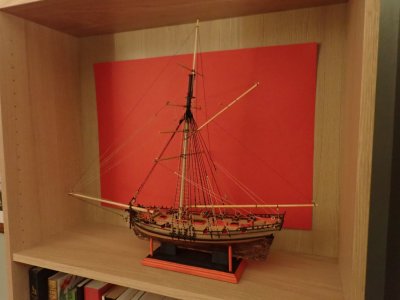
I’ve learned a lot and invented many techniques, mostly by my own experiments and accidents. Of course, a lot of what I thought I was inventing I was later to discover was already known to others but that doesn’t negate my joy in finding out for myself. It's not unlikely that I saw things on line and in books, 'forgot' them and then thought I'd invented them myself - my brain does things like that these days - but I have tried to give credit when I know I'm standing on someone else's shoulders.
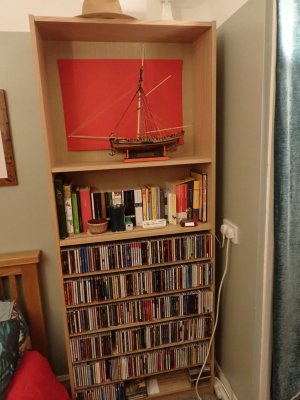
That's the other hobby, music. I listen a lot and now I'm learning to make my own. Sure, I'm excited about Alert right now, and I've been happy at many points during the build, but most of the 500 hours were spent in an emotion-free zone. Last week I sang a song to my son, accompanying myself on the guitar. It was a simple song played rather badly but the emotions! I was initially so struck with stage fright that I was sweating and shaking, and then when I got into the groove and felt myself begin to 'channel' the shade of Johnny Cash I was BURSTING with the joy of the experience and the sadness and bitterness of the song too! I'm afraid model-making can't match that.

And that's another glimpse of my arty-farty base. There will be more detailed pictures in a later installment. In fact, the rest of the pictures I took this morning are close ups of the details of Alert.
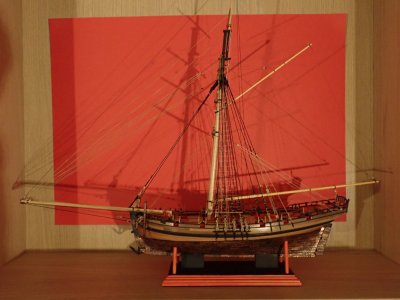
Stay tuned folks...
- Joined
- Dec 3, 2022
- Messages
- 1,547
- Points
- 488

If you look at Alert's base in the photo which ended my previous post you'll see that the base looks dreadful. It's really crude and clunky. Oddly, no-one mentioned this to me during the build. That was never going to be the finished item, but was only an empty stage waiting to be dressed appropriately.
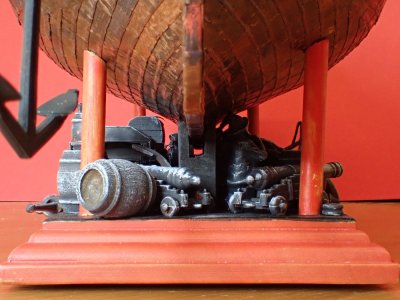
My idea was to show this work-a-day fighting boat in a fresh way to encourage the viewer to see it as a machine, made in a manufactory. Alert wasn't a pretty boat built for looking at but a cheap killing machine which floated on industrial foundations as much as the sea. So I built one of those scruffy corners of the shipyard where all the not-quite useless parts are kept just in case they might be needed one day.
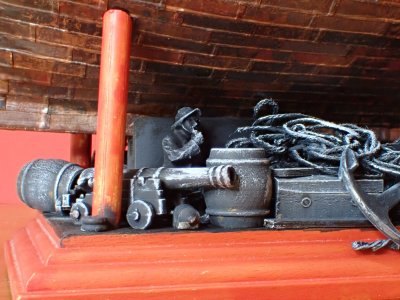
It might be old rubbish but it will nevertheless swiftly disappear if no-one keeps an eye on it.
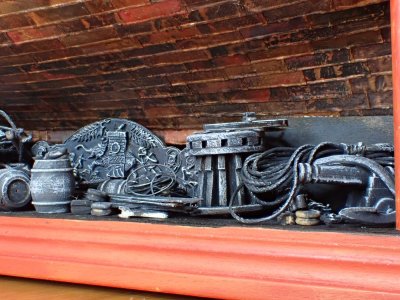
You can have fun spotting the various bits and pieces. Everything has a maritime connection in some way. Bit's of carving from scrapped vessels, lots of rope and wood.
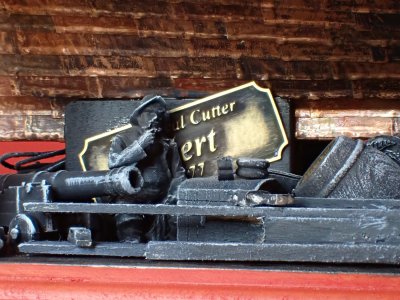
It looks like they once had some sort of ceremony requiring a big notice. Maybe that was left over from the launching?
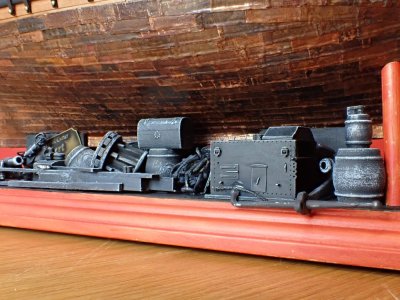
Sea chests came in different shapes and sizes. And rum came in barrels!
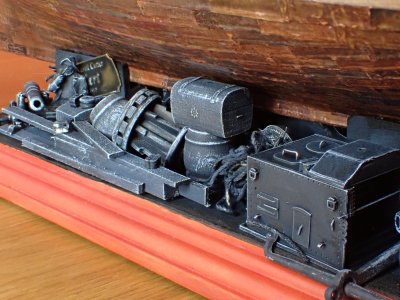
It's almost all done in grisaille style, like a pencil sketch. I wanted it to be a little less real than the boat itself. It's not good to have a frame that distracts from the picture.
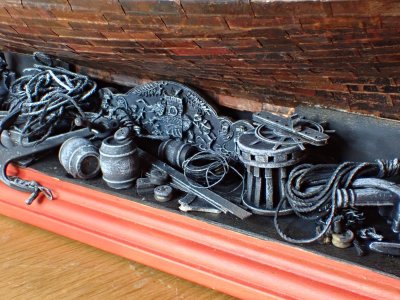
Right now, it's the newest part of the model so the base seems to me to be the best bit. I'm certainly very pleased with it.

My idea was to show this work-a-day fighting boat in a fresh way to encourage the viewer to see it as a machine, made in a manufactory. Alert wasn't a pretty boat built for looking at but a cheap killing machine which floated on industrial foundations as much as the sea. So I built one of those scruffy corners of the shipyard where all the not-quite useless parts are kept just in case they might be needed one day.

It might be old rubbish but it will nevertheless swiftly disappear if no-one keeps an eye on it.

You can have fun spotting the various bits and pieces. Everything has a maritime connection in some way. Bit's of carving from scrapped vessels, lots of rope and wood.

It looks like they once had some sort of ceremony requiring a big notice. Maybe that was left over from the launching?

Sea chests came in different shapes and sizes. And rum came in barrels!

It's almost all done in grisaille style, like a pencil sketch. I wanted it to be a little less real than the boat itself. It's not good to have a frame that distracts from the picture.

Right now, it's the newest part of the model so the base seems to me to be the best bit. I'm certainly very pleased with it.
- Joined
- Dec 3, 2022
- Messages
- 1,547
- Points
- 488

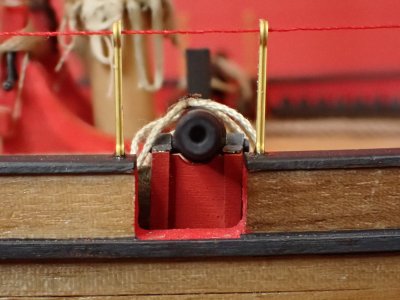
This was my first experience of rigging guns and now I know why it's not always popular with modellers. There are only a dozen of them here but that was quite enough, combined with the tiny scale, to put me off doing any more. How do you guys do 74s and stay sane?
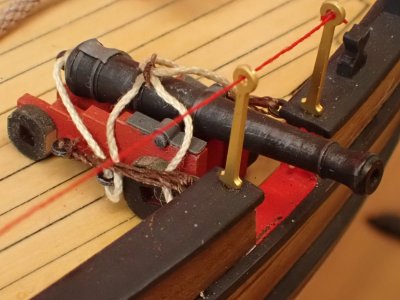
Note the lead apron protecting the touch hole. It's made from lead foil.
There's an element of cheating going on. No blocks. HUGE eyebolts. Yet from a distance and looking at the whole battery, I think I get away with it. The method of presenting the breeching for inspection was copied from HMS Victory and it occurs to me that it would have kept those important ropes dry and rot free on a low and open deck. I recently read about one 'beautifully presented' cutter in Napoleon's War which had its breeching ropes sewn into pipeclayed canvas sheathes. They never fired the guns in practice because of the dirt and the first time it came into action, the boat fired a broadside which disabled herself and killed a lot of the gun crews. The breechings had rotted in their sheathes, snapped in use and the guns recoiled across the decks like an iron tsunami.
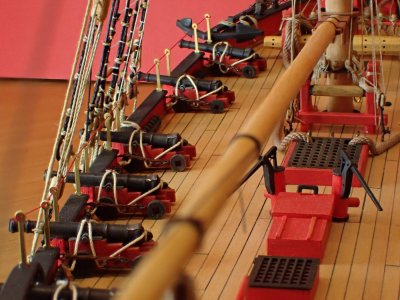
Shoddy as my individual guns look in macro, Alert's larboard battery looks quite good from a distance.
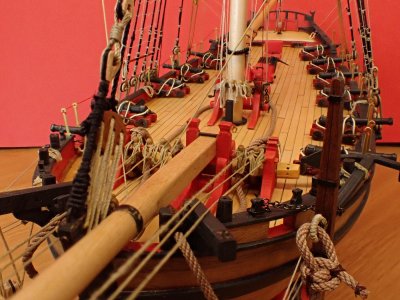
And all twelve guns overwhelm the eye!
Though there's a lot of detail on the deck, there's a lot missing. Had I but world enough and time, I'd have added the gun tools, spare spars, ropes, stores of all kinds, a crew (bought one but couldn't be troubled to paint it) and so much more.
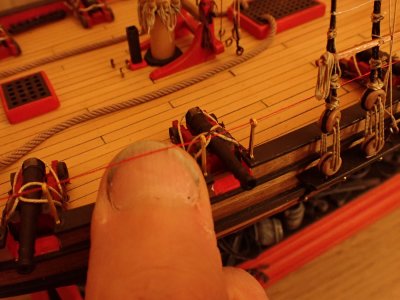
It said "Insert thumbnail" Maybe it's meant to remind people of the scale? (Thats grey paint from the base under my nail, not dirt.)
Last edited:
- Joined
- Dec 3, 2022
- Messages
- 1,547
- Points
- 488

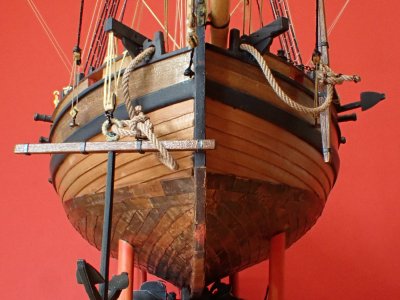
Most of the hull building happened before I started writing about it. It was as straightforward as I'd expect from Vanguard models. It surprised me that the hull below the wales was presented as carvel built (smooth with planks meeting edge to edge). I was keen to simulate clinker building (AKA lapstrake) and am pleased that I did. I like that result though I've since thought of some ways to do it better. If only there was a next time.
I found, by accident, a way to heat set Titebond, halving the time I spend planking. I posted this everywhere I could as I'd never seen it done before. It turned out that in Eastern Europe and some other parts of the world, everyone does it like that. Western Europe and America generally hadn't heard of it either. How strange.
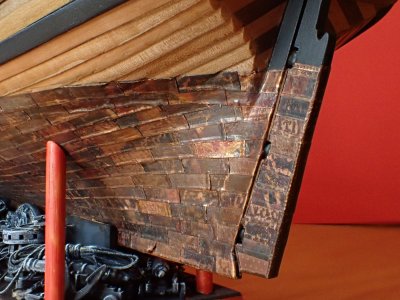
That's a better shot of the planking and the plating too. Coppering using chemical ageing (and the unfortunate decision to use CA to stick it on) was fascinating. However, the spectacular initial results are slowly being obliterated by the natural ageing of the copper to the more subtle colours seen here. This thing is making itself more authentic, day by day.
I love the way that occasional plates have been damaged, folded back accidentally during the build. I think that's likely to be quite realistic. I'm not so keen on the pencil marked waterline. D'oh! At least it shows that my coppering was straight and level.
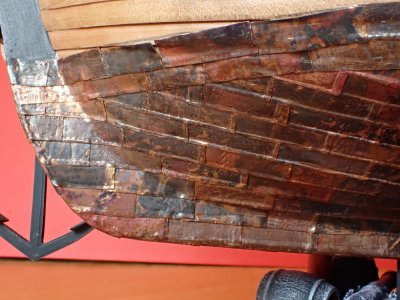
You have never seen a more gnarly bottom, and clinkers too! To my prejudices eye, that part of the model actually looks like it weighs a hundred tons.
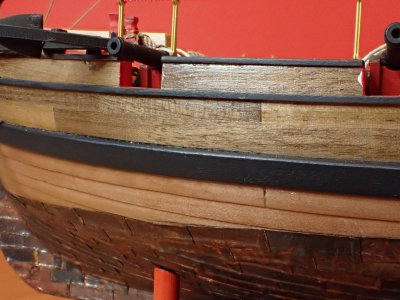
Above the wales the kit's hull is accurately carvel-built but I replaced the wood with walnut because i liked the look of it. Some aspects of the build were made more 'authentic' and some were made more 'pretty'. So what? It's my toy and I'll play with it however I like. Haha!
I've been hull planking in short sections ever since I looked at my first model boat and thought "where did they get planks seventy feet long?" I find it easier to do it that way as well as preferring the patchwork result. I edge bend the strips when they are full size and then cut them into scale length planks to suit their intended placement.
- Joined
- Dec 3, 2022
- Messages
- 1,547
- Points
- 488

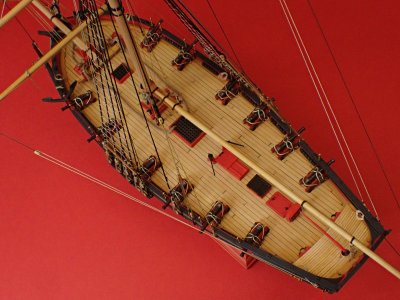
It's a smallish boat but quite a big deck area and I decided to cut my own deck planks from a maple offcut. Though I found the 4" table saw terrifying, I managed to produce consistently dimensioned planks. You'll ask me how I did the caulking but I'm afraid I can't remember. It's either paint or pencil.
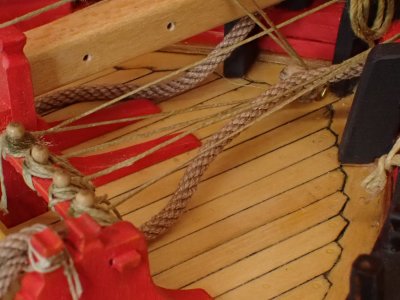
I was keen to master the carpentry required to joggle those deck planks into the nibbing strake. I didn't really master it, sometimes I mangled it and eventually I managed it. It's another of those things that's easier than you think.
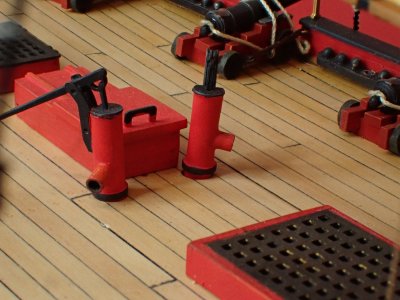
Simulating treenails in a subtle manner was another new thing for me. I used a sawn off hypodermic needle as a punch and later found that one has definitely been ‘discovered’ many times before. If you can't find them zoom in to the area at the foot of the pumps.
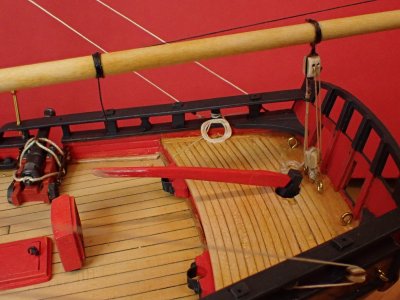
The deck is sealed with sanding sealer, tinted with shellac. Old school, alcohol based stuff. It was fun experimenting with them but IF i build again, I'd try polyurethane for it's durability.
I made that tiller and the binnacle and lots of little bits and pieces. Lots of little additions like waterways and scuppers helped make my boat unique even if it was made from a kit.
Micro-carpentry is fun. I also made tools out of good quality wet and dry paper glued to wood offcuts. Not just sanding sticks, but sanding edges, sanding cubes, whatever was useful. I found that with decent abrasives and scrap wood you can make tools that last for ages and work very well.
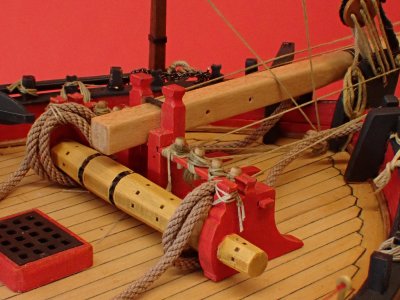
Squaring round timbers turned (ha!) out to be fun too. Basic hacking and filing with handtools has been immensely satisfying with carving my own finials on the rough tree rail being the highlight. Again, there’s much to learn about carving but I’m pleased with what I did. All of these new techniques, new to me, could be developed with practice.
The windlass drum is resin. I elected to paint it rather than making a wooden one. I think of that as a cheat in that I knew it could be made better but I didn't care.
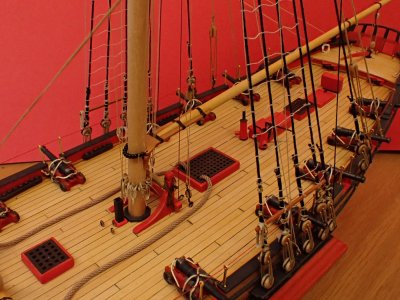
There wasn't much painting to do, which pleased me as I'm having a lot of problems with that. I'm accustomed to airbrushing everything and the paintbrush is hard to master. I used edge highlighting a lot. This is a figure painter technique that really helped my paintwork here. Its simple, just use a dry-brush technique to lighten the upper edges of the components like hatch coamings and bitts. It makes them pop!
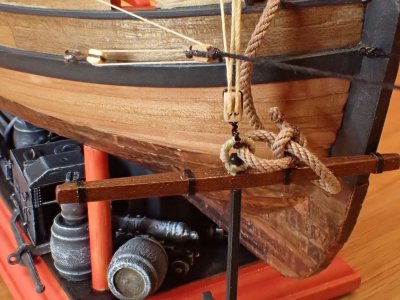
Deck furniture sort of leads into the ground tackle. It was the last step in the building of the actual model (followed by the basing). I like anchors. Big heavy things with big ropes and cranes an' stuff. MAN's business!
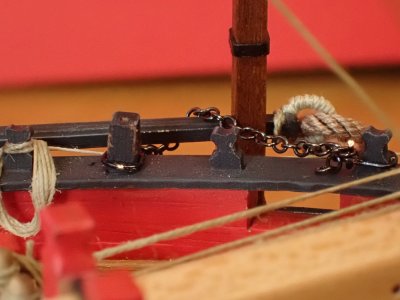
Chain and rope with quick releases too small to see in this scale.
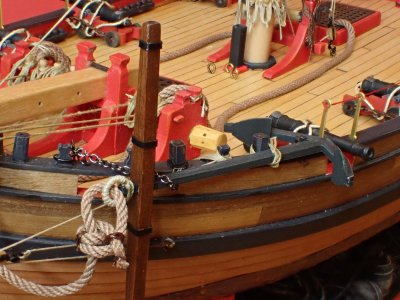
This is the second time I've done one anchor fully stowed ready to be dropped again and the other one only half weighed. It's a signature if you like.
- Joined
- Sep 10, 2024
- Messages
- 1,035
- Points
- 393

It's not as obscure in America as you might think (well, perhaps in modelling circles it is). In furniture manufacturing, when we have a panel that needs a veneer edgeband, but is either too small to run through the automatic banding machine or has a curve that doesn't lend itself well to strap clamping, i.e. concave, the best method we've found is to coat both surfaces with a thin layer of glue (PVA) and let them dry. Yup, let them dry to the point that they are no longer tacky at all. You,ve just created iron-on banding. Then, using a hot iron - I used one of the small ones meant for heat-shrinking covering film on model airplanes, but a household iron works as well - apply the banding. The skill required is to make sure you linger in an area long enough to melt the glue, but not so long as to scorch the veneer. I've applied a lot of banding that way and never had a piece fail in the field.I found, by accident, a way to heat set Titebond, halving the time I spend planking. I posted this everywhere I could as I'd never seen it done before. It turned out that in Eastern Europe and some other parts of the world, everyone does it like that. Western Europe and America generally hadn't heard of it either. How strange.
The advantage of letting it dry first is that most of the moisture is gone and the ironing process is faster because you don't have to boil the water out of the glue. It makes the chance of scorching the veneer much lower.
A hot iron can also be used to remove a part glued with PVA. That's why I prefer that glue over CA in most circumstances.
- Joined
- Dec 3, 2022
- Messages
- 1,547
- Points
- 488

Last installment - Rigging.
I looked forward to the rigging phase right from the beginning. When I got there, mojo was moribund but the rigging was still quite compelling. Seeing it grow day by day is great!
This is the most complex rigging I’ve ever done and I learned how to do it right with seizings, how to do it fast with cheatings, how to serve shrouds and set up that fascinating area where the shrouds and stays meet the mast.
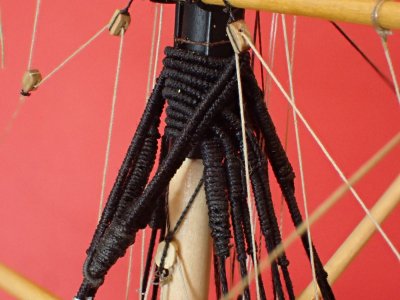
That's one of my favourite parts of the model. The long servings were done with the aid of a machine that my son designed and 3D printed for me, which makes it all a little bit more special. The sloppiness of some of the work, visible only at high magnification, is down to the user of the machine, not the designer.

Pan out a little and the crazy, messy orderliness of the systems starts to become baffling.
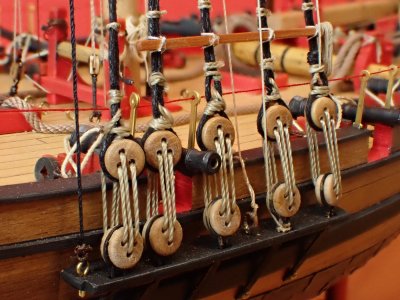
Here's the model boat builder's money shot. Ha!
Considering that's only the second time I've rigged deadeyes, I think its quite good.
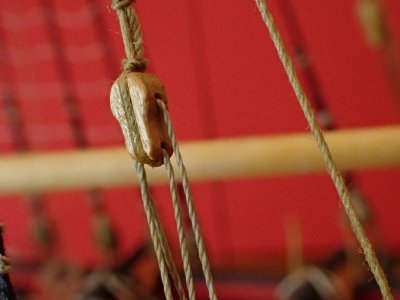
There was one place where my references called for fiddle blocks. These weren't provided in the kit. Did I make them? I thought I had but they look a bit too good so I probably found them in the spares box. That's full of the remains of a few failed builds and is a valuable resource, if an expensive one.
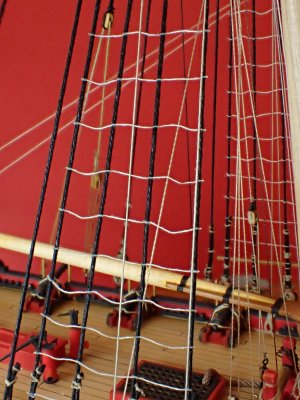
Ratlines? What does everyone moan about? They were easy to do to this standard.I kept them level by lining them up with the edge of my laptop screen, gauged the spacing by eye and only really had trouble with the tension. That did take some practice to get the hang right.
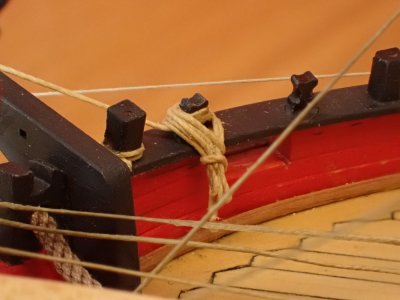
I like these hanks. Like the instrument panel in an aircraft, which is a key part of a model build, this is where the machine meets the man. I like to make them all a little bit differently to suggest the different sailors' touch.
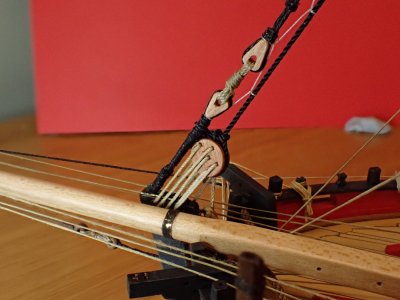
I definitely remember making those hearts! I made the brass band (toot toot!) that supports the bowsprit too.
Snaking the preventer was something I had to try, having read Patrick O'Brian's books.
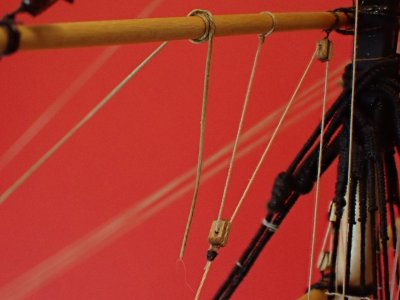
That loose end is deliberate. It's a bowline which would be attached to the sail if I had sails fitted. Instead, it's parked by being tied to the yard ready for the arrival of the new sails. These lines are cotton dressed with beeswax and I wish I'd started doing that right at the start of the rigging. It makes the rope so easy to handle. Knots stay tied without CA and can be undone if required. Old school but I think it's a good school. Will the lines get dusty? No, the model has a life expectancy measured in months, not decades so dust isn't an issue. Anyway, I think beeswax dries hard and isn't sticky if it's applied sparingly and polished well between the fingers first and then with nylon stocking material. (Don't ask!)
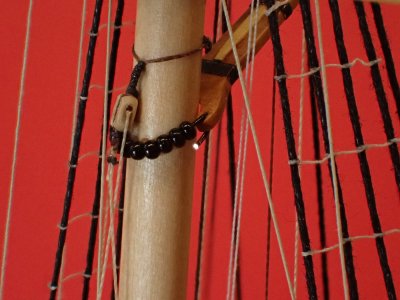
Parrel beads are a menace to thread on rope so I used Japanned copper wire instead. It's very handy stuff to have in your toolbox.
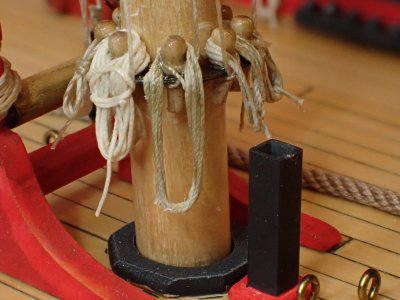
I can't resist including more hanks. Pity about all that CA snot. Beeswax would have avoided that. The mast is 8mm in diameter (0.31in)
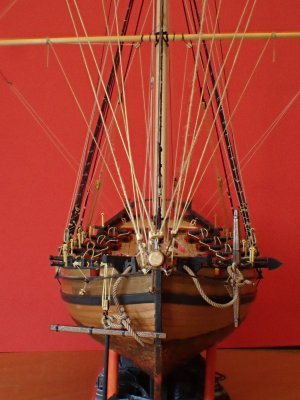
There's a lot of strings up the pointy end! Bow shots are cruel, showing all the irregularities. Oh well, nobody's perfect.
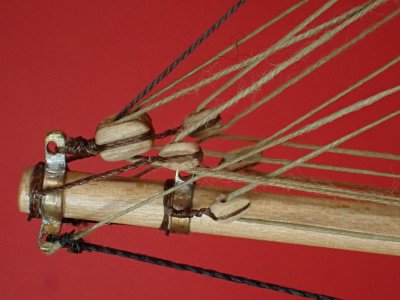
Bowsprit from the side. I made the brass ironwork from scratch. It's not very good but I'm glad to have done it. It's better than the kit photo etch for sure.
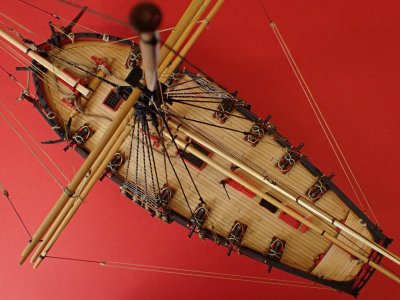
And that concludes this photo essay. Thank you very much, ladies and gentlemen, thank you very much.
I looked forward to the rigging phase right from the beginning. When I got there, mojo was moribund but the rigging was still quite compelling. Seeing it grow day by day is great!
This is the most complex rigging I’ve ever done and I learned how to do it right with seizings, how to do it fast with cheatings, how to serve shrouds and set up that fascinating area where the shrouds and stays meet the mast.

That's one of my favourite parts of the model. The long servings were done with the aid of a machine that my son designed and 3D printed for me, which makes it all a little bit more special. The sloppiness of some of the work, visible only at high magnification, is down to the user of the machine, not the designer.

Pan out a little and the crazy, messy orderliness of the systems starts to become baffling.

Here's the model boat builder's money shot. Ha!
Considering that's only the second time I've rigged deadeyes, I think its quite good.

There was one place where my references called for fiddle blocks. These weren't provided in the kit. Did I make them? I thought I had but they look a bit too good so I probably found them in the spares box. That's full of the remains of a few failed builds and is a valuable resource, if an expensive one.

Ratlines? What does everyone moan about? They were easy to do to this standard.I kept them level by lining them up with the edge of my laptop screen, gauged the spacing by eye and only really had trouble with the tension. That did take some practice to get the hang right.

I like these hanks. Like the instrument panel in an aircraft, which is a key part of a model build, this is where the machine meets the man. I like to make them all a little bit differently to suggest the different sailors' touch.

I definitely remember making those hearts! I made the brass band (toot toot!) that supports the bowsprit too.
Snaking the preventer was something I had to try, having read Patrick O'Brian's books.

That loose end is deliberate. It's a bowline which would be attached to the sail if I had sails fitted. Instead, it's parked by being tied to the yard ready for the arrival of the new sails. These lines are cotton dressed with beeswax and I wish I'd started doing that right at the start of the rigging. It makes the rope so easy to handle. Knots stay tied without CA and can be undone if required. Old school but I think it's a good school. Will the lines get dusty? No, the model has a life expectancy measured in months, not decades so dust isn't an issue. Anyway, I think beeswax dries hard and isn't sticky if it's applied sparingly and polished well between the fingers first and then with nylon stocking material. (Don't ask!)

Parrel beads are a menace to thread on rope so I used Japanned copper wire instead. It's very handy stuff to have in your toolbox.

I can't resist including more hanks. Pity about all that CA snot. Beeswax would have avoided that. The mast is 8mm in diameter (0.31in)

There's a lot of strings up the pointy end! Bow shots are cruel, showing all the irregularities. Oh well, nobody's perfect.

Bowsprit from the side. I made the brass ironwork from scratch. It's not very good but I'm glad to have done it. It's better than the kit photo etch for sure.

And that concludes this photo essay. Thank you very much, ladies and gentlemen, thank you very much.
- Joined
- Dec 3, 2022
- Messages
- 1,547
- Points
- 488

Smithy, sorry to disappoint you, but that base is a bit better than "quite good". It is great. I would never have dreamed of something like you've done, but when I see it, I can't imagine your vessel without it. It is superb. Well done.
Yes, I agree. That sort of creativity takes it into 'not bad' or perhaps even 'alright'.
15846
Last edited:
- Joined
- Nov 19, 2024
- Messages
- 14
- Points
- 58

Glad to see hour Alert done and that you are pleased with the result.
I had fallen behind and needed to spend some time catching up and I will need to go back and have another look at the pictures of your completed build.
I too like the base you created for Alert. More often than not, bases are simple sterile things, waterline vessels on simple or complex seascapes notwithstanding but then they are something altogether different from a ship of sail model such as this. However, to my eyes, I find the underneath a bit too cluttered and perhaps even distracts a bit from the ship itself. But then, too much or too little is very subjective dependant on the viewers point of view.
Otherwise, I do quite like the finished piece. You have managed to take what could be a dreary unimaginative build and brighten it with colour and texture in creative and believable ways. The Devil is in the detail which is why I must now go back and have another look at and get lost in some of those details.
Enjoy your musical adventures. Fair winds and following seas.
cheers, Graham
Congratulations, Smithy! A very nice ship model that you should be proud to display. Fair winds to you on your next adventure.
Count Australia in with that lotWestern Europe and America generally hadn't heard of it either
A masterpiece by any measure Smithy mate, and thoroughly enjoyed the banter throughout, unique as the ship itself.
Loved the base, immediately took my imagination on a journey to the previous life of the oddments stored there, and that sailor having a sneaky
5 minutes with his pipe is probably thinking the same thing
Mrs. Chippy
Last edited:
- Joined
- Jul 18, 2024
- Messages
- 475
- Points
- 323

Congratulations! It's a fine ship indeed and with lots of fabulous detail.


