It’s a thing of beauty, Smithy, and I award you full points for correctly using the word brobdingnagian in your discussion of your liliputian vessel.
-

Win a Free Custom Engraved Brass Coin!!!
As a way to introduce our brass coins to the community, we will raffle off a free coin during the month of August. Follow link ABOVE for instructions for entering.
-

PRE-ORDER SHIPS IN SCALE TODAY!
The beloved Ships in Scale Magazine is back and charting a new course for 2026!
Discover new skills, new techniques, and new inspirations in every issue.
NOTE THAT OUR FIRST ISSUE WILL BE JAN/FEB 2026
You are using an out of date browser. It may not display this or other websites correctly.
You should upgrade or use an alternative browser.
You should upgrade or use an alternative browser.
HM Armed Cutter Alert (1777) - Vanguard Models - 1/64 - Completed Build
- Thread starter Smithy
- Start date
- Watchers 34
-
- Tags
- alert vanguard models
- Joined
- Dec 3, 2022
- Messages
- 1,547
- Points
- 488

Photographing the whole thing makes my autofocusing camera scream and beg for mercy
I’ve tried different coloured backdrops but they all make either the dark rigging or the beige ropes disappear. Black kills the standing rigging, white makes the photo into a silhouette, a bright red, to my surprise today, makes the beige/brown ropes invisible.
What works well for you with a simple phone camera or compact? I will not be upgrading my equipment and am only prepared to splash out on a piece of coloured card.
(Please don’t guess if you haven’t actually done it yourself.)
EDIT:
Red works!
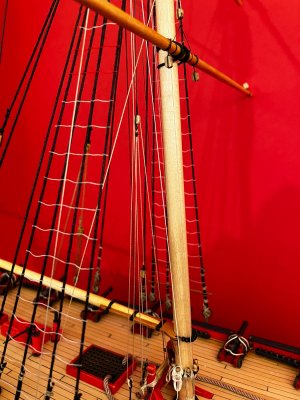
The red card fools my eyes by hiding the non-black ropes but the camera is easily able to differentiate between them and the background.
‘Eee Mother, the wonders of modern technology!’
Last edited:
- Joined
- Dec 3, 2022
- Messages
- 1,547
- Points
- 488

correctly using the word brobdingnagian in your discussion of your liliputian vessel.
Capital B, capital L please. Although
fictional places, both adjectives derive from proper nouns.


Sorry my dear, I just couldn’t help it.
- Joined
- Dec 3, 2022
- Messages
- 1,547
- Points
- 488

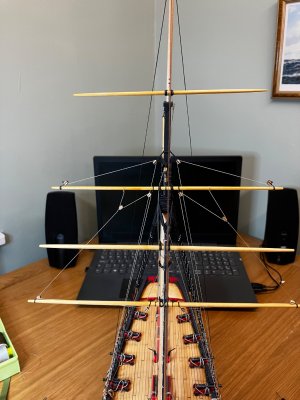
Two sessions today in my race to the line. That’s all the up and down rigging of the yards completed.
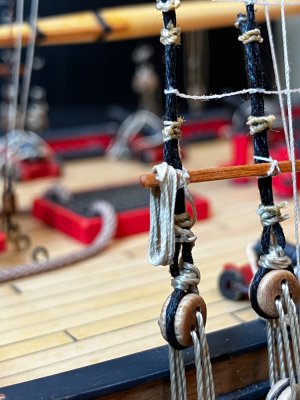
I was surprised to find that some lines were belayed to the shrouds but then remembered that I was supposed to tie some photo-etched cleats to them. Something I didn’t do. I’ve tied the rope into the general confusion around there and I don’t expect anyone to notice.
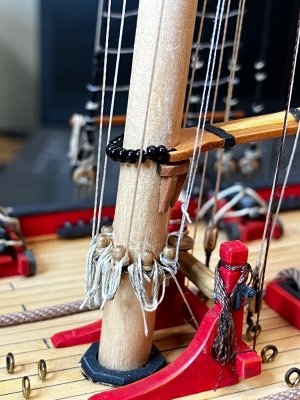
The foot of the mast is about full now.
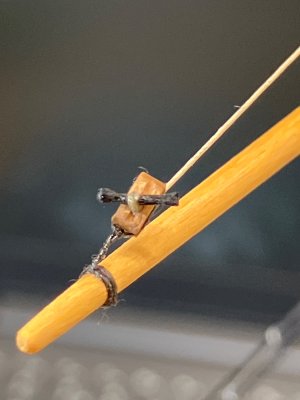
Here’s a little curiosity. This is a tack toggle pulled tight into a block. In action it fits into a loop at the corner of the sail which I’m not fitting.
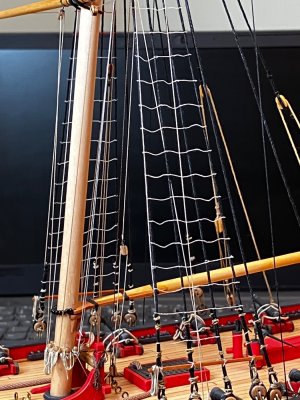
That was a lot of work and made my back and arms sore. Righteous aches from a job well done. (Guitar practice also makes my back and arms ache Cat, but in slightly different places, fortunately.)
Next come the various ropes running forward to the bowsprit and aft to the stern which I think of as the yard rotation rigging as opposed to the up and down stuff.
~~~~~~
Hm, two sessions, several posts including two biggish updates in a single day. I guess I’m starting to enjoy myself again.

- Joined
- Dec 3, 2022
- Messages
- 1,547
- Points
- 488

A rope that’s supported at both ends in a gravity field takes up a curve called a catenary. When it’s not in tension the curve sags downwards very obviously. Here’s a drawing from Alert’s instructions showing what I mean.
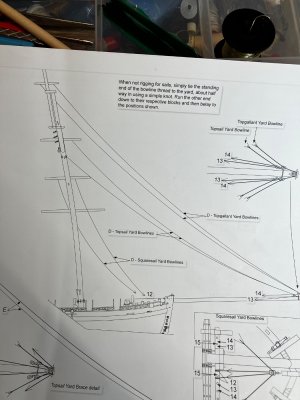
All of my rigging lines are both too light and too stiff to take up that shape naturally. Pulling them tight into straight lines is, of course, an option but is there a way to make nice smooth curves through the air like that?
I’ve posted the question in the rigging area of SOS and had a good look round down there but found nothing useful. I don’t actually remember ever seeing a model ship with curved rigging lines, but then I haven’t been looking for that particular thing. Has it been done?
- Joined
- Mar 22, 2024
- Messages
- 396
- Points
- 168

Very nice. A credit to you as a modelmaker and commentator both.
- Joined
- Sep 10, 2024
- Messages
- 1,035
- Points
- 393

Oops. The bunting tosser is going to be embarrassed when he tries to raise the ensign. It wasn’t a mistake, honest. It was a practical joke played by the riggers on the signalller.
View attachment 494975
The instructions for rigging are beautifully clear. Tie a line, cross it off, tie another, cross your eyes, make a cup of tea…
I never thought I’d need these Brobdingnagian tweezers but they were invaluable at one point. I’d dropped a block and it rolled under the desk.
Photographing the whole thing makes my autofocusing camera scream and beg for mercy.
It’s beginning to look very complicated. A viewer could be forgiven for thinking that this is difficult to do. In fact, if you can thread a needle, tie your shoelaces and follow a diagram, it’s a piece of cake, er, several pieces of cake. Fair enough, it’s a bakery, but that just means there are lots of pieces of cake. None of this is difficult, even for my clumsy fingers, the effect of complexity is achieved merely by repetition. Many easy things do not add up to a difficult thing.
Work of art? If a knitted sock is a work of art then so is my model.
Nevertheless, though the doing is a bit of a chore, I’m liking the result.
Smithy, I think your Alert looks great!
The drawing you showed for the sheet and clew rigging caught my eye. This is not in any way a criticism, but more of a question for anyone with more nautical knowledge than I. I was curious about the dearth of lines on the drawing. Is there another rigging plan with more sheets and clews, or is this kind of a way for Vanguard to keep the kit costs lower by not supplying as many blocks and line. First, (and I could be wrong here, please correct me), I've never seen a sheet rigged two yards below it's respective sail as the topsail sheet is in your drawing. I have always seen them rigged to the yard directly below the sail. And while there is a sheet for the to'gallant sail, there is no clew line. Not to mention that there is nothing at all for the two lower yards.
I have seen models without sails where any running rigging relating to the sails was stripped, but I've not seen one to my knowledge where it was kind of half and half. Just curious. Keep up the great work Smithy!
One idea would be to soak a long length of thread with PVA glue and then suspend it between two supports (e.g: two chair backs) allowing enough slack to get the rough curve you want. Once the glue dries, you cut it to the length you need for the run between the blocks (or however it is supported)but it should still hold it’s curve if treated gently. Would need to dress up the ends to make it appear that it’s actually longer than it is, but that should be easy enough. Did I describe that well enough to make sense?All of my rigging lines are both too light and too stiff to take up that shape naturally. Pulling them tight into straight lines is, of course, an option but is there a way to make nice smooth curves through the air like that?
Belay my last—just saw the more robust discussion in you other thread
- Joined
- Dec 3, 2022
- Messages
- 1,547
- Points
- 488

Smithy, I think your Alert looks great!
The drawing you showed for the sheet and clew rigging caught my eye. This is not in any way a criticism, but more of a question for anyone with more nautical knowledge than I. I was curious about the dearth of lines on the drawing. Is there another rigging plan with more sheets and clews, or is this kind of a way for Vanguard to keep the kit costs lower by not supplying as many blocks and line. First, (and I could be wrong here, please correct me), I've never seen a sheet rigged two yards below it's respective sail as the topsail sheet is in your drawing. I have always seen them rigged to the yard directly below the sail. And while there is a sheet for the to'gallant sail, there is no clew line. Not to mention that there is nothing at all for the two lower yards.
I have seen models without sails where any running rigging relating to the sails was stripped, but I've not seen one to my knowledge where it was kind of half and half. Just curious. Keep up the great work Smithy!
Here’s the rigging plan for the sails-fitted option.
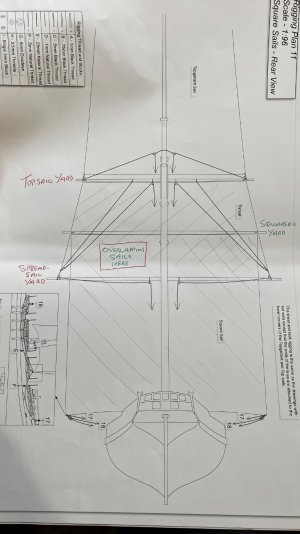
As you see, Alert is an odd one with those overlapping sails.
The ‘squaresail’ hatched in green is what I would call the main course.
The ‘topsail’ is the topsail (hatched in red) but instead of it being attached to the ‘squaresail’ yard, they fitted another yard, the ‘spreadsail yard’ to double the possible area of the topsail.
The topgallant is normal but huge!
Goodwin describes the lower part of the mast as being a main and top mast in one piece with a topgallant mast added on.
It’s all very strange. EDIT. Hold on a minute those sails CAN’T overlap. They would have to pass through each other to reach their respective yards. How bizarre. They must’ve used either the topsail or the squaresail depending on conditions.
Judging you from your question, you are more qualified than I to comment on the clews, tacks and sheets for this unusual arrangement of sails. Do you think it’s plausible? I’m following it because of its clarity rather than for accuracy but I’d be interested in your opinion.
Last edited:
- Joined
- Dec 3, 2022
- Messages
- 1,547
- Points
- 488

One idea would be to soak a long length of thread with PVA glue and then suspend it between two supports (e.g: two chair backs) allowing enough slack to get the rough curve you want. Once the glue dries, you cut it to the length you need for the run between the blocks (or however it is supported)but it should still hold it’s curve if treated gently. Would need to dress up the ends to make it appear that it’s actually longer than it is, but that should be easy enough. Did I describe that well enough to make sense?
PVA isn’t strong enough for this. I’ve tried it in other contexts (tank tow ropes) it will collapse at random points when bent during installation.
The curved lines, however they are made MUST be robust enough to survive occasional handling of the boat. Relocating, maybe dusting. And PVA in the thinned form on very thin lines just won’t last.
I’m experimenting with titebond right now but not with any great expectations.
- Joined
- Dec 3, 2022
- Messages
- 1,547
- Points
- 488


Titebond wasn’t keen to penetrate synthetic fibres.
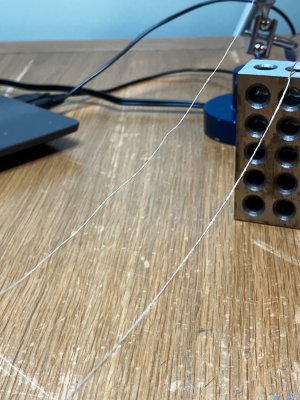
Better on cotton, closest to camera. Synthetic wasn’t softened by the wet glue.
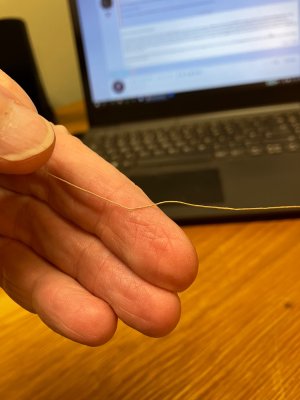
Synthetic fibre stiffened with wood glue is too fragile.
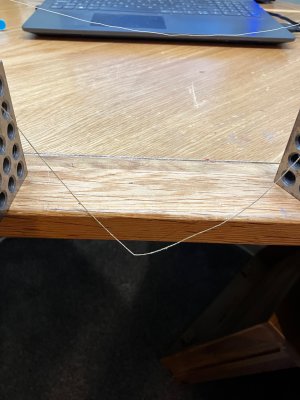
Cotton stiffened with wood glue is better but still inadequate and looks awful.
Ideally, I want to soften the thread not stiffen it.
Dumb and DumberAlas, my loyal penpal (and it’s really creepy what autocorrect makes of that word), in poison you would discover that I am as dull as a trainspotter’s anorak, with all the memorable charisma of… I'm trying to think, what was his name? You know in that one movie, the one that's like the other one but not as good? No, the other guy, the really boring one...
For nowGuitar practice also makes my back and arms ache Cat
- Joined
- Dec 3, 2022
- Messages
- 1,547
- Points
- 488

Rats!
I have unwittingly fallen into the Lazy Trap. I’ve passively asked for help before even trying to help myself. Other people have been tempted to help me even though they don’t know how to, and consequently can only make suggestions. This situation happens all the time in forums.
Fortunately, I have started doing experiments for myself, so we won’t get into the situation when I get childishly cross with everyone for not doing everything for me and everyone gets cross with me for rejecting their suggestions.
Results so far.
Beeswax. Adds weight but doesn’t soften line.
Lanolin: sticky mess total fail.
Alcohol: no effect
Shellac: softens cotton and adds weight. Kinks disappeared and catenary formed. Still drying when I went to bed. Not hopeful despite good start as I know that it dries brittle.
- Joined
- Dec 3, 2022
- Messages
- 1,547
- Points
- 488

PreachFor now
I have doubts about this one, but maybe heat gun/hair drier applied to synthetic?
And as a last resort, thin brass wire.
And as a last resort, thin brass wire.
- Joined
- Sep 10, 2024
- Messages
- 1,035
- Points
- 393

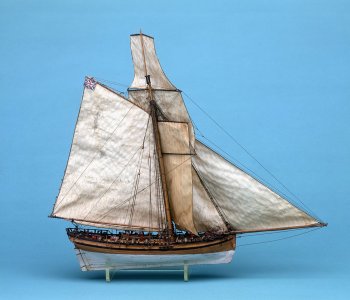
It’s all very strange. EDIT. Hold on a minute those sails CAN’T overlap. They would have to pass through each other to reach their respective yards. How bizarre. They must’ve used either the topsail or the squaresail depending on conditions.
Judging you from your question, you are more qualified than I to comment on the clews, tacks and sheets for this unusual arrangement of sails. Do you think it’s plausible? I’m following it because of its clarity rather than for accuracy but I’d be interested in your opinion.
I am not, by any stretch of the imagination, more qualified. I merely have a love of sailing ships of yore and enjoy learning all I can about them.
On my drive home from work, I was thinking about that whole configuration and how it might work. I then realized that I had never heard of a "spreadsail". Studding sails? Yes. Spreadsail? No clue. The ONLY hit I got from G00gle was from a stamp website:
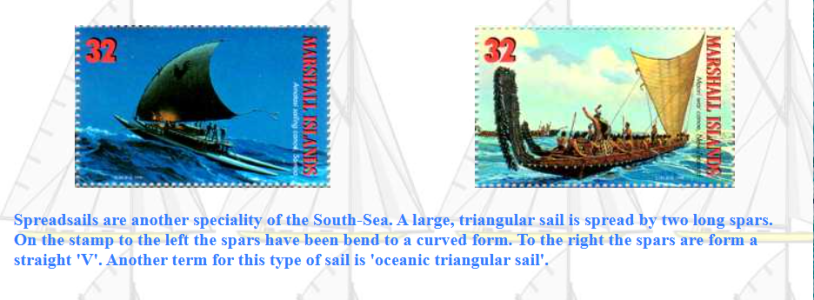
G00gle's AI (asinine intelligence) came back with a response like it knew what it was talking about, but following the resource link, it was quoting a paragraph about spritsails. It also appears from your plans, that the "spreadsail" yard was only used to reef the topsail and didn't carry any canvas of its own.
So that said, I think you are probably right in that they would use one or the other depending upon conditions. Perhaps just for maneuvering. With all the area on the staysail, jib and mainsail, the topsail may have seldom been used.
I found this image of her on SOS (cited as from a museum) ... and it's ... just wrong.

- Joined
- Sep 10, 2024
- Messages
- 1,035
- Points
- 393

Alcohol: no effect
You're obviously not using it correctly. After proper application to the tongue, it really won't matter to you HOW the lines look!

- Joined
- Dec 3, 2022
- Messages
- 1,547
- Points
- 488

I am not, by any stretch of the imagination, more qualified. I merely have a love of sailing ships of yore and enjoy learning all I can about them.
On my drive home from work, I was thinking about that whole configuration and how it might work. I then realized that I had never heard of a "spreadsail". Studding sails? Yes. Spreadsail? No clue. The ONLY hit I got from G00gle was from a stamp website:
View attachment 495059
G00gle's AI (asinine intelligence) came back with a response like it knew what it was talking about, but following the resource link, it was quoting a paragraph about spritsails. It also appears from your plans, that the "spreadsail" yard was only used to reef the topsail and didn't carry any canvas of its own.
So that said, I think you are probably right in that they would use one or the other depending upon conditions. Perhaps just for maneuvering. With all the area on the staysail, jib and mainsail, the topsail may have seldom been used.
I found this image of her on SOS (cited as from a museum) ... and it's ... just wrong.
View attachment 495060
Well, you may not be highly qualified @RussF , but I don’t have a clew! Ho ho ho!
The model in your photo at least shows how the sails could overlap if the topsail was only attached to the spreadsail yard at the ends. Obvious really but I still think they would interfere horribly with each other aerodynamically.
I too searched in vain on line and in my books for mention of a spreadsail yard. It would not surprise me if the builder of that old model made it all up based on a misunderstanding of his sources. Oh the perils of using someone else’s model as a reference!!!!!! (Multiple exclamation marks entirely justified in this case and standing in for swear words.) I need only to consider the cheating that’s gone on in the building of my own Alert to treat other modellers as very dodgy dealers.

Last edited:
