HM Armed Cutter Alert (1777) - Vanguard Models - 1/64

With the hope, no let's be optimistic, the promise of a safe CA in the post and a smile back on the chops of your humble servant here's what DID work today.

PB210006.JPG

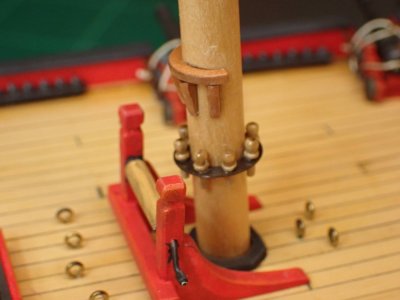
I accepted the simplified boom rest and brass pin rail (fife rail?) and was quite cheerful for a moment there until I saw what a mess of made of painting the black handle on the jeer windlass. How could I not see that splotch when I was painting it? Actually I know why, it's the result of an irreparable eye condition that I have so to hell with fixing it (and then fixing the red splotch on the handle and then fixing the black...) Let's just call it my secret squirrel signature! ROTF
 
With the hope, no let's be optimistic, the promise of a safe CA in the post and a smile back on the chops of your humble servant here's what DID work today.

View attachment 485463

I accepted the simplified boom rest and brass pin rail (fife rail?) and was quite cheerful for a moment there until I saw what a mess of made of painting the black handle on the jeer windlass. How could I not see that splotch when I was painting it? Actually I know why, it's the result of an irreparable eye condition that I have so to hell with fixing it (and then fixing the red splotch on the handle and then fixing the black...) Let's just call it my secret squirrel signature! ROTF
Good morning Smithy. Let’s hope the “safe” CA glue is kind to you. Way to go with windlass and fife rail. Looking good.
It is not a mistake, it’s a feature.
I really like this….my ships have plenty added featuresROTF.
Cheers Grant
 
Let’s hope the “safe” CA glue is kind to you
Fingers crossed.

While I’ve been waiting for the glue to arrive I’ve been attending to a fascinating task. It’s more fun than rattling down your shrouds. It’s more exciting than rigging your cannons.

IMG_1570.jpeg

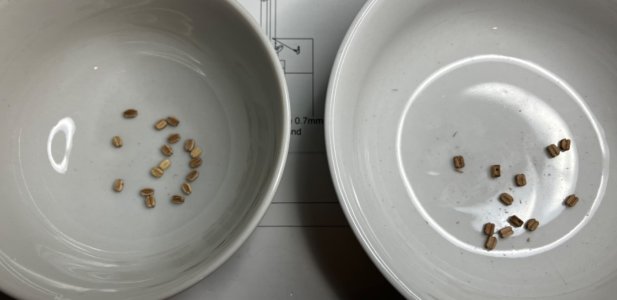
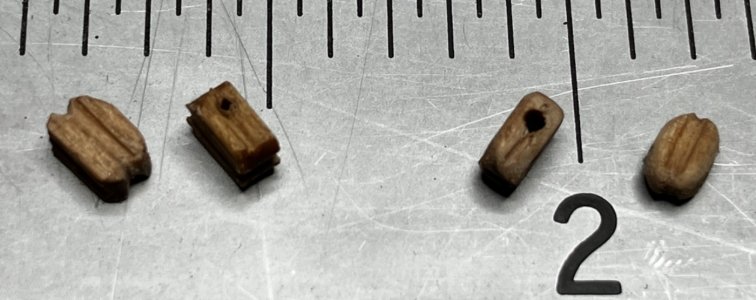
It’s shaping and broaching your 3mm single blocks. Do I need to say which are the ‘before’ and which the ‘after’ blocks?

IMG_1571.jpeg

Some down and some to go. (I can’t bear to count them.
 
Diluted titebond on Gutermann polyester. No.

Acrylic varnish ditto. No.

Shellac ditto. No.

Dilute titebond on natural fibre. No.

Acetone based nail varnish. No. (Smell is awful)

Please only suggest alternatives if you have personally used them with success. Guesses and ‘someone said…’ aren’t helpful. Now I’m off to read some books on the subject.
Diluted Acrylic matte varnish on natural fiber. It has been used successfully at the USNA Museum model workshop for a very long time, that's where I learned of it.
Water based varnish used over polyester (plastic) fiber, probably not.
 
Have you actually used it?

Anyway, keep up Peter, we have some properly house-trained CA arriving very soon. :D
I have actually used it, as have a number of other model shipwrights of my acquaintance. All very successful on natural fiber. Diluted a bit it does wick into the fiber but will not deteriorate over time.
I look forward to using the housebroken Locktite 403. I have used and liked the Loctite gel for some time. The applicator dispenser works very well, and the gel doesn't off-gas as egregiously as the thin stuff.
 
Last edited:
With the hope, no let's be optimistic, the promise of a safe CA in the post and a smile back on the chops of your humble servant here's what DID work today.

View attachment 485463

I accepted the simplified boom rest and brass pin rail (fife rail?) and was quite cheerful for a moment there until I saw what a mess of made of painting the black handle on the jeer windlass. How could I not see that splotch when I was painting it? Actually I know why, it's the result of an irreparable eye condition that I have so to hell with fixing it (and then fixing the red splotch on the handle and then fixing the black...) Let's just call it my secret squirrel signature! ROTF
That could be spots of lard or grease used to keep the pin from siezing in the wood! Maybe
 
PB230003.JPG
Sorry for the small photo size - it's a tad out of focus.

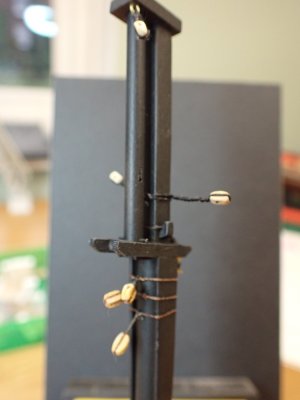
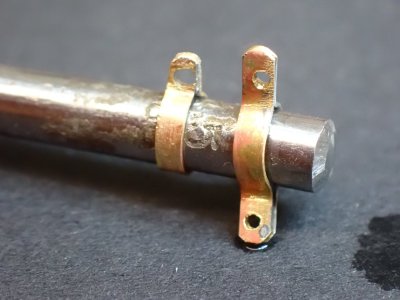
The mast, (or should I say mainmast since there was provision for a mizzen?) has now been dressed in all of the fittings that can be done before stepping it permanently. There are eight blocks, a few sheaves, fiferail and boom support. I haven't put the mast rings on because there won't be any sails and because I'm no fan of fitting any PE that I can manage without.

Loctite 403 hasn't given me any problems apart from being slightly more viscous than I'm used to. I've been experimenting with some of the ropes which I've saved from OcCre and AL kits. Some are natural fibre and some are plastics of one sort or another. So far I prefer the Gutterman polyester but it's very thin so if I stick with it, I'll have to make my own heavy duty ropes.

Next up is the bowsprit.

PB230004.JPG

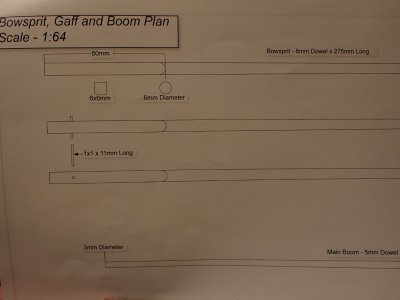
There's a trap built in to the shaping of the bowsprit.

It's awfully easy to taper the 8mm dowel down to 6mm at the butt end and then try to square that off into a 6mm square section. You can't because you've already taken too much wood away. A 6mm circle cannot contain a 6mm square, it's the other way round. I know this from bitter experience. Last time I blamed the kit but looking at this diagram just now it occured to me that I had fallen into this exact error on that boat. The solution is to square off the butt end first and this is why there's an 8mm dowel provided for a maximum 6mm bowsprit.

I'll take off the excess with my drill and sandpaper but I must admit to craving a lathe right now.

(Sergey, yes I have a disc sander and a drill but I don't want to use your method after spending an evening squaring off the butt end, it's too risky - manual sandpaper + electric drill will be fine.)

PB230005.JPG

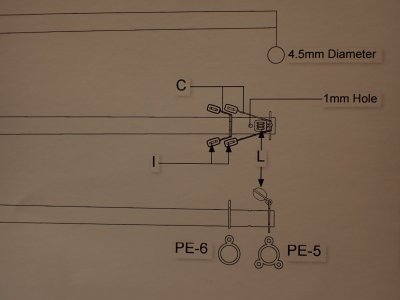
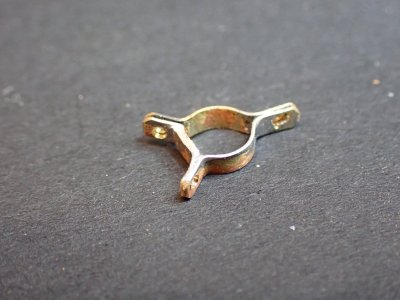
The other end of the bowsprit offers an interesting challenge. PE-5 and PE-6 are eye-bands or wythes. They are feeble flat plates which look awful and make no mechanical sense as there's little metal to resist the bending forces of the stays. P'shaw!

PB230006.JPG

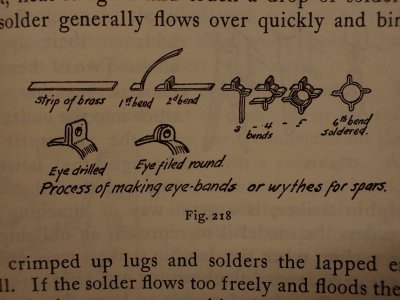
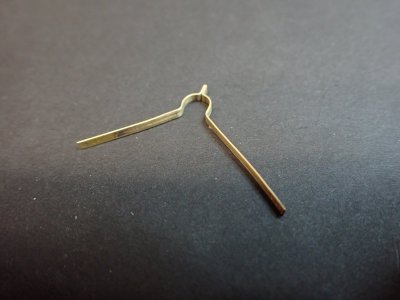
I propose to make my own using this method from the Model Ship Builder's Handbook by Davis. The hard part will be getting the size exactly right to fit tightly around the dowel so I'll make the wythes first and then shape the 'sprit ti fit.

I mention in passing how easy it would have been for the kit designer to make the PE in this way so that it would simply need a little bending and soldering. But Alert isn't designed to be a demanding build and Mr Watton had to have regard for builders who were unfamiliar with PE. You should see some of the things that the plastic battleship guys do with brass - ladders with handrails in 1/350 scale, radar aerials, cranes... I was not a PE virtuoso, but I like soldering so next post might be quite entertaining.
 
Ironwork

PB230008.JPG

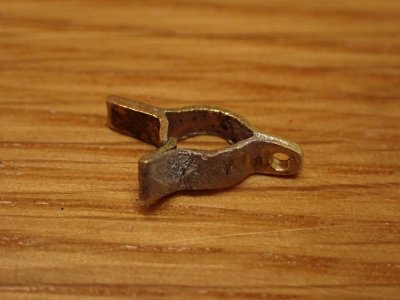
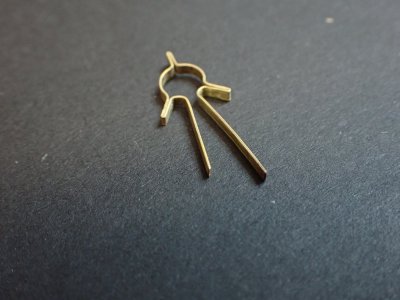
First attempt. Doesn't that look chunky! The lug at the back could almost pass for a casting.

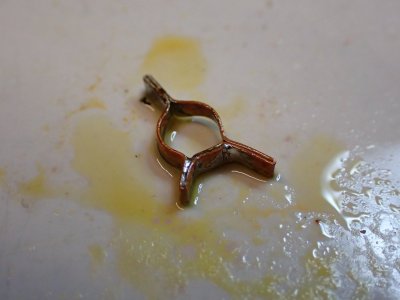
This was of course, a complete mess. The three lugs were randomly spaced around the circumference, the joint between the two ends broke easily and the mistake right at the beginning? The brass was too thick for the job. But I explored the process and found that while it wasn't as easy as Davis makes out, it was possible.

PB230009.JPG

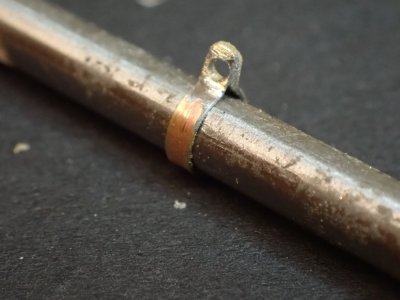
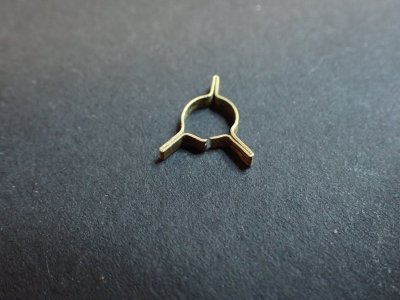
Second try. This time I went for the one with only a single lug and disregarding Davis for the moment, I made the joint at the lug.


PB230010.JPG

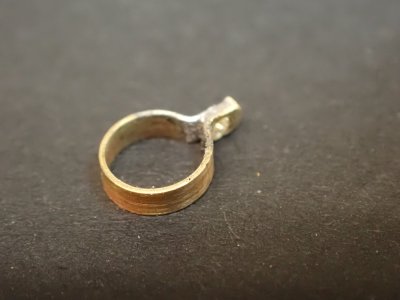
There was slight movement when the soldering torch melted the solder which momentarily lubricated the joint so the thing isn't quite round, but as you see above it still fits the 4.5mm drill bit I was using as a mandrel.

PB230012.JPG

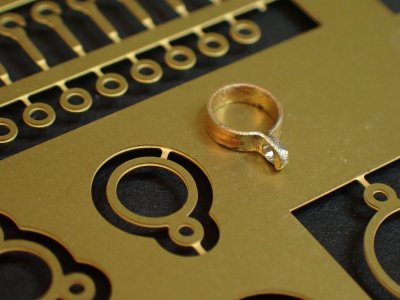
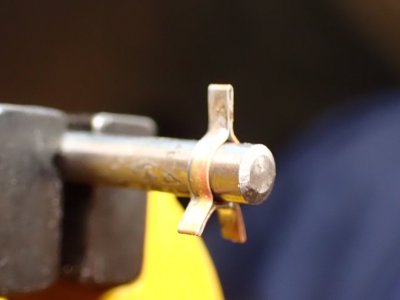
I think my eye band is a lot more realistic even if the PE one is perfectly formed. I've used the Vanguard Models version on another boat model and the flat eye band bent under the tension of the rigging. Mine being the correct shape, sort of, won't bend - promise.

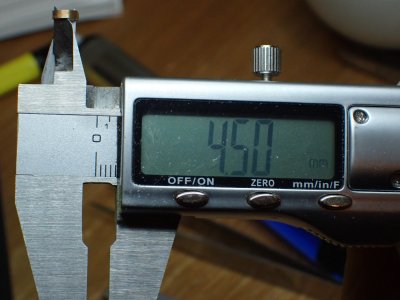
Mine looks a lot smaller in diameter than the PE one. It's an illusion but it's so convincing that I put the calipers on the pair of them. The PE was 4.72mm.

PB230011.JPG

Mine was dead on at 4.50. Fluke! So mine is a tad smaller than the PE but do you agree the comparison photo makes them look wildly different?

PB230013.JPG

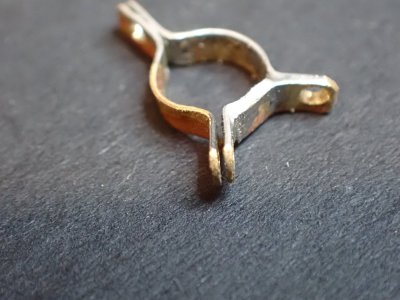
Here's the bending sequence for the three hole band. I'd gone back to the Davis method of putting the joint at the elbow of one of the lugs. As I write, I wonder why I did that when the previous ring went so well. Probably because that's what I did on the three hole ring before, some rigidity of thinking there. Silly me.

PB230014.JPG

Nevertheless, it was looking good. Nicely symmetrical this time.

PB230015.JPG

That joint is awful, but I pressed on regardless. Maybe I was tired? Hungry? I certainly wasn't thinking well.

PB230016.JPG

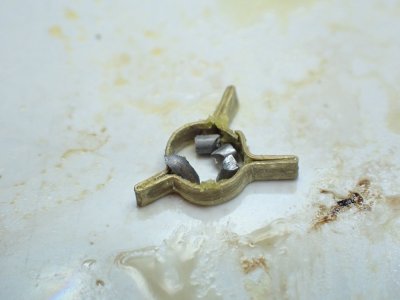
Not enough flux and far too much solder.

PB230017.JPG

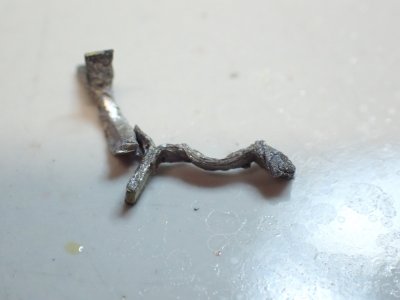
And then, when it was drowning in solder that refused to flow where it was supposed to, about a kiloton too much heat. Boom!

PB230018.JPG

That's better. PLENTY of flux and a lot less solder. Maybe not quite enough solder - the longer of the lugs looks a bit dry?

PB230019.JPG

It fit the mandrel well and didn't fall apart when I pulled it about a bit.

PB230020.JPG

Drilling went well. I drilled the lugs with the band on the mandrel and a block of hard wood behind the lug. I also 'centre punched' the brass with a large needle in a pin vice.

PB230021.JPG

Unfortunately the drilling was too much for the dodgy lug with not enough solder and it came apart. My first thought was to CA the lug back together but having the eye-band open will make fitting it to the bowsprit an easy job and when there's a line or two passed through the lug it will automatically close up, and that's when I'll glue it.

PB230022.JPG

There you are it's rough as a .... Rough as a .... Rough as a piece of mid eighteenth century ironwork, perhaps? I've been to Ironbridge and seen the famous Iron Bridge. It was built in 1781, four years after Alert and close up it looks about as rough-hewn as my eye-bands. There are dovetail joints in the iron with half inch gaps all round. It's gorge-eous from a distance and it's still standing, but seriously Mr Prichard and Mr Darby, where was your quality control? ROTF

Anyway, that's not the issue. Accurate or not, I made it with hand tools, persistence and butane and I'm very pleased with myself, thank you very much! Thumbsup
 
How about next time you start with something that's hard to solder - maybe something with 8 or 10 joints that are being soldered simultaneously.

Seriously, I'd call that whole thing a victory. Well done, Smithy!

I know a guy that uses a series of solders with different melting points so he can solder half a dozen joints in one piece of brass without melting the previous ones. That’s worth investigating.
 
I know a guy that uses a series of solders with different melting points so he can solder half a dozen joints in one piece of brass without melting the previous ones. That’s worth investigating.
 
[Silver solder]

Yeah, that stuff. There’s low melting point solders too.

Funnily enough I have some Silver solder in my ‘scratch’ box. I used to acquire solder of different sizes to use as pipes on model aircraft. Unfortunately, I don’t know which of the dozen different coils of solder are which. I may experiment…

Incidentally, it’s well worth looking on line at shops supplying the jewellery hobby. There’s a lot of useful tools etc there. Also marquetry, pen making etc etc.
 
Back
Top