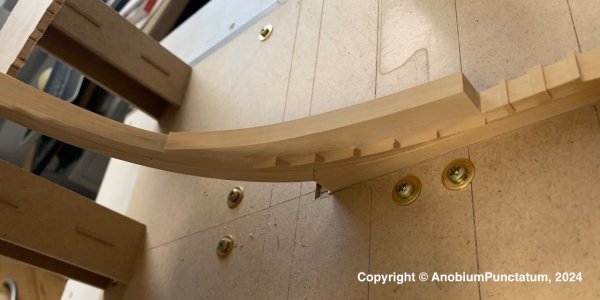
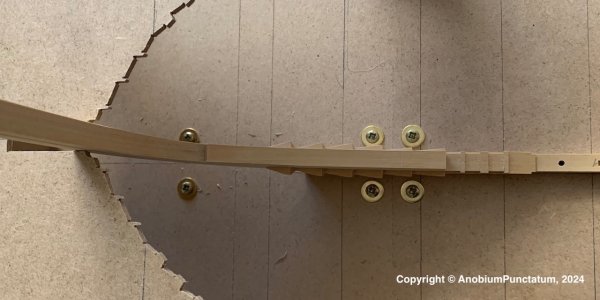
HM Sloop Fly, 1776 - scale 1/36 by own reconstruction and the books from David Antscherl

After a lot of preparation works I finally started to glue the keel parts together.
For the treenails I use the same boxwood as for the rest of my build. Without making the wood a little bit wet, the treenails are not really visible. If everything works, this will change after the hull gets his finish with oil or so on.
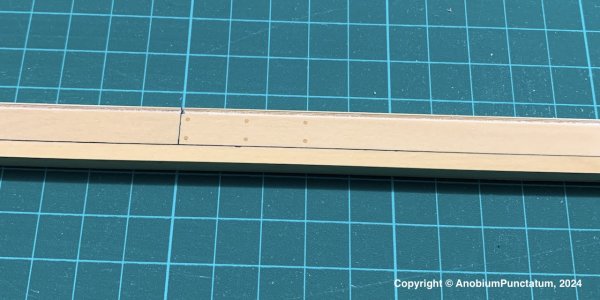
Fly-035.jpg

For the caulking I use a black cellulose from a hobby shop. It is really thin.
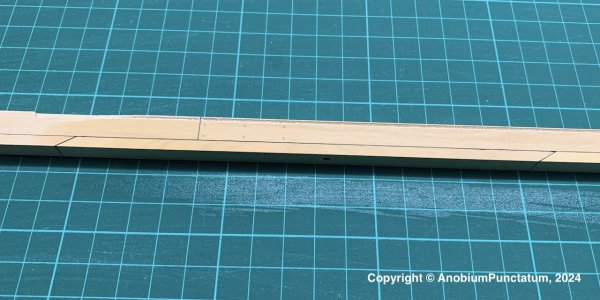
Fly-036.jpg
To be able to screw the model to the stand later, I milled three holes in the components.
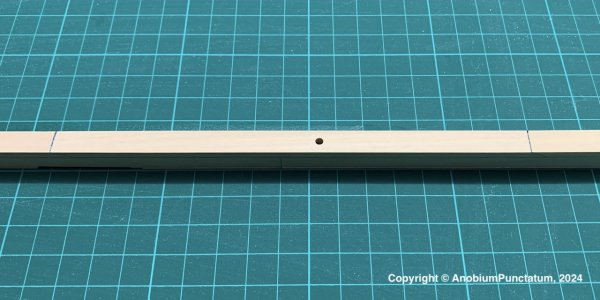
Fly-037.jpg

Before I could continue with the construction of the stem, a cut-out had to be milled into the upper stem. I built a small auxiliary construction for this, which was held together with some adhesive tape. This means I can use it again later.
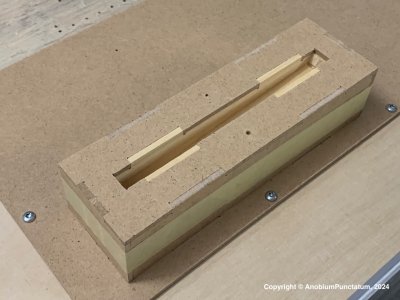
Fly-038.jpg

The next photo shows the jig with the component clamped in place before milling.
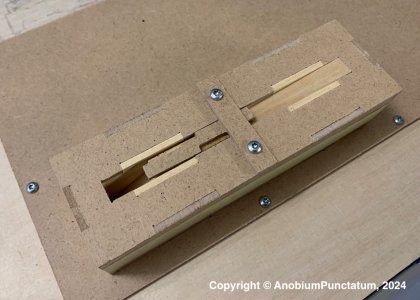
Fly-039.jpg

And finally the finished component.
Fly-040.jpg

Before glueing the parts of the stem to the keel, I checked the construction in another jig. This is really helpful, because I have very little tolerances with the milled parts.
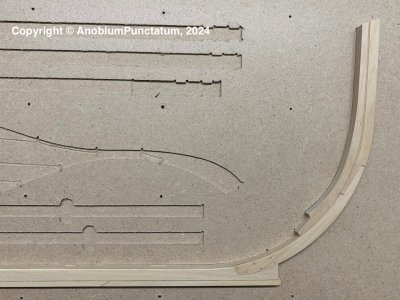
Fly-041.jpg

Then I glued all parts of the together. For the calking I used again the black cellulose. To mark the rabbet line between the upper apron and the stem I used brown chalk.
Fly-042.jpg
The components were then sanded with 100 and 180 grit sandpaper. At the same time, the taper of the construction was created, 14'' at the upper end of the upper stem 10.5'' at the leading edge of the keel. When the knee of the head is glued on, the front edge of the lower stem is tapered to 10''.
Finally, the rabbet in the area of the upper apron was completed.
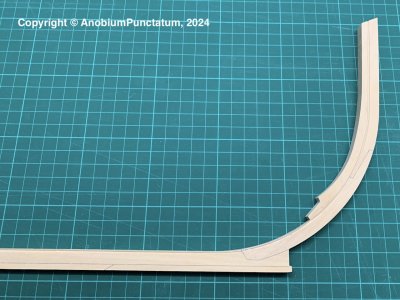
Fly-043.jpg

The last to pictures are showing the completed construction in the building jig.
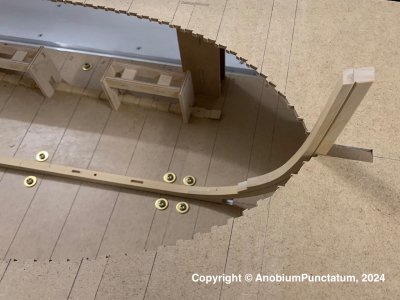
Fly-044.jpg

Fly-045.jpg
 
After a lot of preparation works I finally started to glue the keel parts together.
For the treenails I use the same boxwood as for the rest of my build. Without making the wood a little bit wet, the treenails are not really visible. If everything works, this will change after the hull gets his finish with oil or so on.
View attachment 492171

For the caulking I use a black cellulose from a hobby shop. It is really thin.
View attachment 492172
To be able to screw the model to the stand later, I milled three holes in the components.
View attachment 492173

Before I could continue with the construction of the stem, a cut-out had to be milled into the upper stem. I built a small auxiliary construction for this, which was held together with some adhesive tape. This means I can use it again later.
View attachment 492174

The next photo shows the jig with the component clamped in place before milling.
View attachment 492175

And finally the finished component.
View attachment 492176

Before glueing the parts of the stem to the keel, I checked the construction in another jig. This is really helpful, because I have very little tolerances with the milled parts.
View attachment 492177

Then I glued all parts of the together. For the calking I used again the black cellulose. To mark the rabbet line between the upper apron and the stem I used brown chalk.
View attachment 492178
The components were then sanded with 100 and 180 grit sandpaper. At the same time, the taper of the construction was created, 14'' at the upper end of the upper stem 10.5'' at the leading edge of the keel. When the knee of the head is glued on, the front edge of the lower stem is tapered to 10''.
Finally, the rabbet in the area of the upper apron was completed.
View attachment 492179

The last to pictures are showing the completed construction in the building jig.
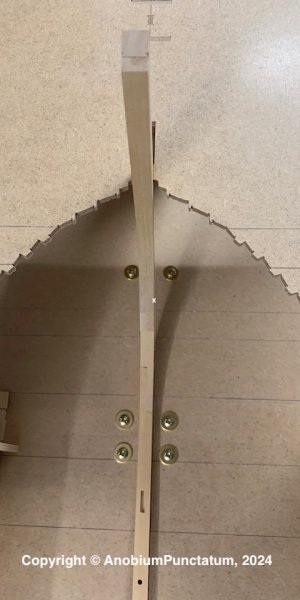
View attachment 492180

View attachment 492181
A nice and solid base, Christian. The treenailing and caulking are subtly visible.
Regards, Peter
 
Witaj
Twoja praca Christianie wygląda imponująco będę czekał z niecierpliwością na dalsze aktualizacje. Ja wkładając gwoździe drewniane wkładam je do kleju z wmieszana czarną farbką akrylową i po wyczyszczeniu fajnie wyglądają ,spróbuj na jakimś kawałku zobaczysz jak to wygląda . Pozdrawiam Mirek

Hello
Your work Christian looks impressive I will be waiting impatiently for further updates. When I put wooden nails I put them in glue with black acrylic paint mixed in and after cleaning they look great, try it on a piece you will see how it looks. Best regards Mirek
 
Last edited by a moderator:
Good morning Christian,
that looks very promising, great work. Question about caulking, why black? As far as I was able to find out from Gerard, black tar was only produced at the beginning of industrialization (tar from oil) until then it was made from tree resin and was more reddish brown to dark brown. I like to use tissue paper with 35g/m2, what type of cellulose do you use?
I'll weigh in here briefly. My research suggests that it was not merely tar that lined the joints of these large centerline timbers - it was tar soaked cloth or flannel (up to the waterline or roughly so). The color of that flannel would have influenced the final appearance in some way as well.

In any case my experiments landed on black (I think you ended up using a brown, Tobias) because it provided a very nice look for me at the scale of the model. What I mean by that is it is my observation that even our perception of color is influenced by scale. For example, I think my use of true black on the wales and cap rails is a mistake. I should have used a very dark gray or blue/black. It would have scaled better.
Hello Paul,
you are of course right that it was not just pure tar or resin. As you have already mentioned, various materials were dipped in the tar and then hammered between the floorboards. Now and then ash was added, which was added to the reddish heated tree resin. At Le Rochefort I also made the keel black, after which I received a message from G. Delacroix in which he gave the actual color scheme and the explanations for it.

IMG_2173.jpeg
 
@all Thanks for your Likes and Comments.

@Peter Voogt
The treenailing and caulking are subtly visible.
I hope that everything works later and the trenail get the same like darker color, which get, if the part is wet.

@Mirek
When I put wooden nails I put them in glue with black acrylic paint mixed in and after cleaning they look great, try it on a piece you will see how it looks.
I do not use any glue for the treenails. I hammer them into the pre-drilled holes

@dockattner
Just perfect, Christian. What a joy to see this level of modeling.
These are great words. I am always on the beginning of my journey. There I enough time to make mistakes.

@Tobias
Question about caulking, why black? [...] I like to use tissue paper with 35g/m2, what type of cellulose do you use?
The answer is quite simple: I followed the information given by David Antscherl: "Tarred flannel may be represented by thin black or dark brown paper in the joint" (The Fully Framed Model, Swan Class Sloops 1767-1780, volume 1, page 25). I tested both but liked the black paper much more. I do not know the wight of the tissue. It's around 0.05mm thick.

I know the debate about the right color from viking ship museum in Roskilde. The vikings used resin for their whole ships. In the beginning the resin is red brown to brown. When it's older it becomes dark grey to black.

@shota70
I will keep following with great curiosity
You are very welcome, my friend.
 
Hello Christian,
Simply fantastic what you are showing, please be so good and show not only your results of individual steps, but also (if possible) the way there. I think that it is also of great interest for colleagues to see how you create these fantastic components. Thank you already.

Hallo Christian,
Einfach fantastisch was Du da zeigst.Sei bitte so gut und zeige nicht nur deine Ergebnisse von Einzelschritte, sondern bitte auch ( falls möglich )den Weg dorthin. Ich denke, daß es auch für die Kollegen von größtem Interesse ist, zu sehen wie Du diese fantastischen Bauteile erstellst. Danke Dir jetzt schon.
 
Hello Christian,
It was a general request, not intended for a specific part. I think that with such a fantastic model, the craftsmanship of the parts should also be shown so that the “layman” can see how they are made.

Hallo Christian,
Es war eine allgemeine Bitte, nicht auf ein bestimmtes Teil gedacht. Ich finde,daß so präziese ausgeführten Bauteile, bei einem so fantastischen Modell, auch die handwerkliche Vorgehensweise gezeigt werden sollte, damit der „Laie“ sieht, wie sie hergestellt werden.
 
But mostly I make the fotos after finishing a part. I like to concentrate on my model during the build.
Taking the time to take a photo every now and then can be enlightening, Christian.
You then look at the part in a slightly different way, which sometimes produces 'surprises'. And sometimes prevents a re-do.;)
Sometimes it makes you focus even more on the details. But know where your limits are …….:)
Regards, Peter
 
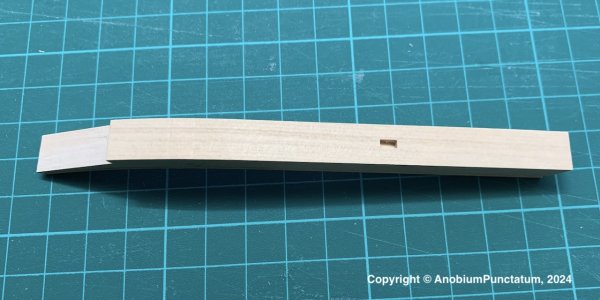
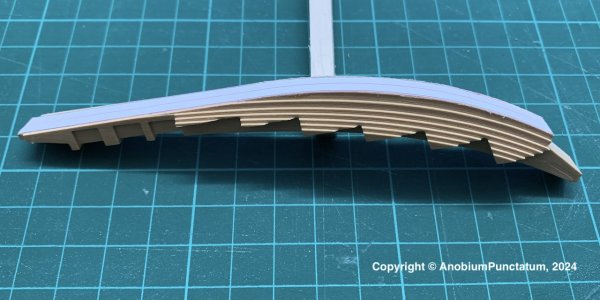
The fore deadwood was added next. Unfortunately, the component I presented in post 46 could not be used. When preparing the frames, I changed the construction of the steps of the deadwood slightly. In addition, a mistake had crept in at the transition to the rising wood.

After milling the steps, the two halves of the deadwood were glued together and a template with the preliminary taper of the component was glued to the underside. The steps on both sides were then sanded out. The next two photos show a comparison of the two intermediate steps. The final tuning is still missing, but this is only possible when the part is installed.
Fly-046.jpg Fly-047.jpg

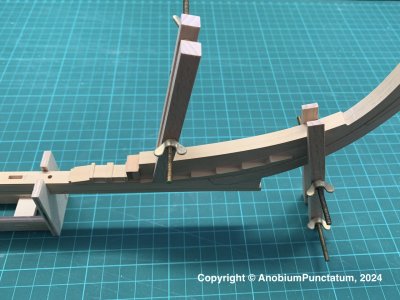
The two components of the deadwood were then glued to the keel. The clamps I had made in the summer were a good help in aligning the components.
Fly-048.jpg

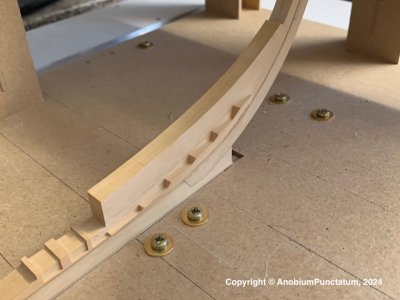
The last photos show the current state of the stem.
Fly-049.jpg
Fly-050.jpg Fly-051.jpg

This was the last part of my building report for this year. Therefore I wish you all a Happy New Year.
 
Witaj
Christianie świetna praca. Szczęśliwego Nowego Roku. Pozdrawiam Mirek

Hello
Christian great work. Happy New Year. Best regards Mirek
 
Last edited by a moderator:
Back
Top