HMB ENDEAVOUR - New 1/65 Artesania Latina Model

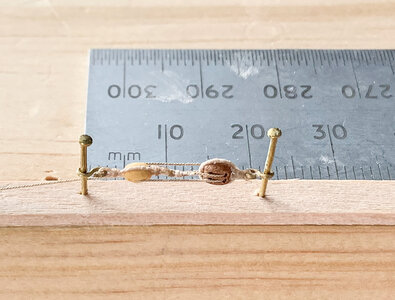
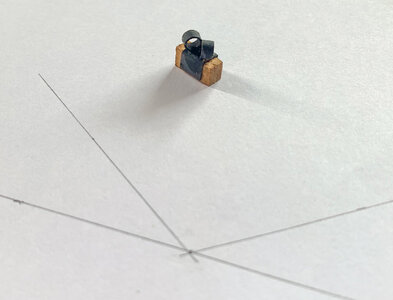
Well a little bit more trial and error with the Gutermann 2776 (0.12mm) colour 215 thread as rope and serving and I am pretty close to scale for the hook, single, double, hook combination at 20mm between 0.7mm nail centres.

The blocks are 3mm SB and 3mm Pear DB from Dry Dock while the tackle rope is 0.25mm Ropes of Scale.

IMG_0256.jpg
 
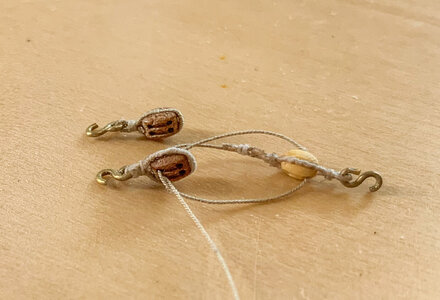
Still playing around with served rope. This time I tried Ropes of Scale 0.25mm rope served with Aurifil 80wt Sandstone cotton (the DB on its own). I think it looks more realistic than the Gutermann Thread which is 50wt (and not quite the right colour) on the running out tackle below. I think this will work with 2mm blocks and 0.3mm hook wire (in lieu of the 0.5mm wire used here) for a better scale appearance in 1/64 for the training and running out tackle of the ENDEAVOUR 4pdr cannons.

IMG_0264.jpg
 
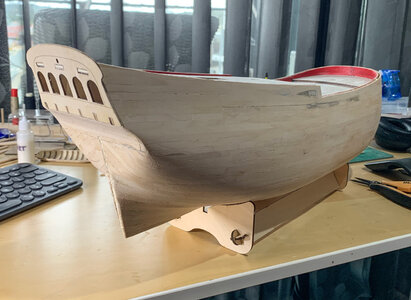
Well I have finally finished the first plank and preliminary sanding. There's a couple of small gaps to be be filled that revealed themselves when the planks were sanded back (bevelling not done as accurately as I should have).
I am using finely sanded plank material mixed with PVA, water and detergent to fill the gaps between planks.
The dark areas on the planks were a result of a previous fill with the PVA mix eating with a steel applicator. I have to do a little more shaping sanding around the deadwood area before getting onto the cherry whales I plan to use.
I am happy how the planking went keeping as close to the original line of planking as I could.

I am looking to remove the offending plank near the bow and replace it. Not exactly sure what went wrong there.....

IMG_0275 2.jpg

IMG_0274.jpg
 
Last edited:
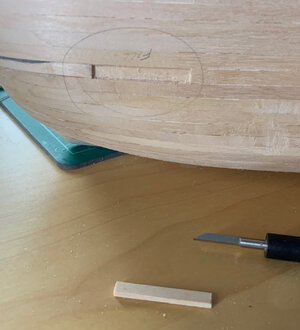
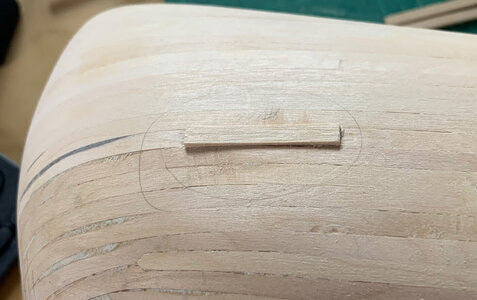
Rather than remove the entire plank I have chosen to remove the offending section using a small chisel and replace with a short piece of plank material. I did not remove the entire depth of plank so the new piece will be planed then sanded down. If this transition works well I will consider the small section right on the bow along the same plank.

IMG_0277.jpg

IMG_0278.jpg
 
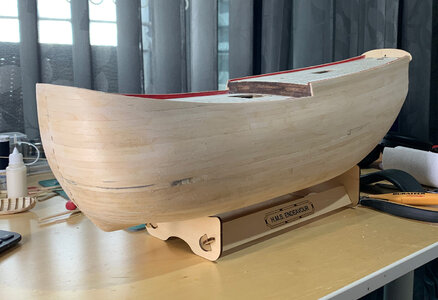
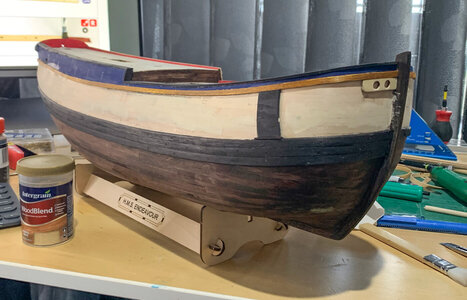
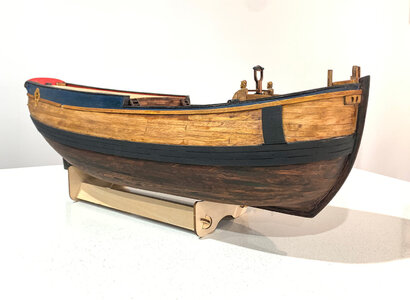
Lower hull stained to represent the 'brown muck' quoted by Banks on the journey to Australia. Whales are on and stained black. The instruction state that the deck strip should be shaped and painted yellow, however Marquardt and Parkin drawings show it as a plain beam. I doubt it was painted yellow as that would have faded to white quickly. I have instead stained it Golden Teak to give it a yellowed tint: perhaps such decorative elements as the carvings around the stern windows were made in teak for its robustness and it certainly has a yellow ish colouring.
The bulwarks are painted Navy Blue. I did stain Navy blue but it just didn't look right so I overpainted it in acrylic.
The Anchor protection is made from the whale material also pertained black before fitting. I have included a bolster as identified by Marquardt but its dimensions/shape are a bit of a guess.
The upper planking is covered in a thin film of "Baltic" woodblend filler. I will rub back and stain this upper section with "Old Baltic" stain by Feast Watson to represent an aged Fir timber look.
Once all the colouring is done, I will be rubbing the entire hull back with steel wool to get rid of the 'fir' created by staining before I put the first coat of flat varnish on.

IMG_0279.jpg
 
Lower hull stained to represent the 'brown muck' quoted by Banks on the journey to Australia. Whales are on and stained black. The instruction state that the deck strip should be shaped and painted yellow, however Marquardt and Parkin drawings show it as a plain beam. I doubt it was painted yellow as that would have faded to white quickly. I have instead stained it Golden Teak to give it a yellowed tint: perhaps such decorative elements as the carvings around the stern windows were made in teak for its robustness and it certainly has a yellow ish colouring.
The bulwarks are painted Navy Blue. I did stain Navy blue but it just didn't look right so I overpainted it in acrylic.
The Anchor protection is made from the whale material also pertained black before fitting. I have included a bolster as identified by Marquardt but its dimensions/shape are a bit of a guess.
The upper planking is covered in a thin film of "Baltic" woodblend filler. I will rub back and stain this upper section with "Old Baltic" stain by Feast Watson to represent an aged Fir timber look.
Once all the colouring is done, I will be rubbing the entire hull back with steel wool to get rid of the 'fir' created by staining before I put the first coat of flat varnish on.

View attachment 300632
Hey there
I have found that with painting that I get quite a lot of bleeding along the taping used and am using water based paint - mainly for ease of cleaning up.
Is acrylic better in this regard or should I look at a higher quality tape? What technique do you use for keeping the edges clean? I have tried painting the individual pieces before gluing but that also has its downsides.
Cheers
Hutch
 
Made some more progress however the weather has been appalling here in Eastern Australia with high humidity low temperatures and non stop rain. My first coat of varnish has been on for 4 days and its still tacky but it is slowly drying.
Have test fitted the deck fitting to see where things go before I mark up the deck and bulwark for holes for ring bolts and securing cleats plus holes for the bitt posts. I also need to remove the square ends on the bitt posts to make them upright on the sloped quarterdeck.
Some imperfections under the blue paint need to be dealt with too.

IMG_0282.jpg
 
Hey there
I have found that with painting that I get quite a lot of bleeding along the taping used and am using water based paint - mainly for ease of cleaning up.
Is acrylic better in this regard or should I look at a higher quality tape? What technique do you use for keeping the edges clean? I have tried painting the individual pieces before gluing but that also has its downsides.
Cheers
Hutch
Hutch,
Keeping a clean edge is difficult even with a dead smooth non porous surface let alone wood.
With wood, you will get bleeding through the grain with watercolour paints as well as thinned oil paints so the key here is seal the wood before painting. A clear matt varnish is a great base to seal to the wood and to paint on. I use acrylics (which can also be thinned with water and are water clean up).

When using tape, buy the best you can afford - masking tapes are not all the same. Make sure you keep the tape clean (put it in a dust proof container so it doesn't collect dust and grit on its edges).

Make sure the surface you are going to paint is clean - damp dust allow to dry then take a strip of fresh tape and run it along the line you ant to mask. Next take a softish rounded object and rub it along the edge of the tape to make sure its is pressed firmly to the surface. Don't use your finger as you will just put oil on the surface to be tainted.

When ready to pain, take a small amount on your brush and brush gently from the tape to the surface. Let it dry then repeat (the aims to put down pain int a quantity that will not seem under the tape and will seal the tape seam once dry. The second coat can be a little bolder when it comes to paint. Use a quality brush so that you do not get brush marks.

Once happy with the finish, pick up a corder of the tape on the painted side and pull back away from the line and at a very low angle in the direction of removing the tape. There are YouTube videos that show you how.

Any seepage can be gently scraped off with a sharp knife.
 
After leaving the hull out in the sun to help dry everything out, I found a couple more cracks open up in the seams between planks. Seems the planking material in this kit really does soak up moisture in the atmosphere. I have had to repute the lower hull, sand and stain again. Its now time to redcoat with varnish which may put me back another couple of days waiting for it to dry.

IMG_0283.jpg
 
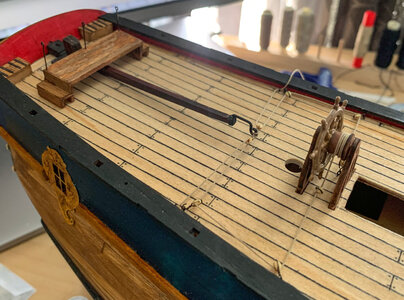
Finally started some rigging.... well the steering anyway now that the rudder is in using 3mm SB, 3mm wire for deck rings and iron hooks and 0.5mm Ropes of Scale. Still have to secure each end to the iron rings.
I did modify the ships wheel structure to more closely represent the original.
I also fitted the iron end of the tiller with an iron clamp on the end of the tiller rather than rope lashing per the instructions.
The rear platform has been fitted, stained and then rubbed back to look like its worn from use. Still have the iron rings and rope railing to fit.

IMG_0285.jpg
 
Last edited:
Finally started some rigging.... well the steering anyway now that the rudder is in using 3mm SB, 3mm wire for deck rings and iron hooks and 0.5mm Ropes of Scale. Still have to secure each end to the iron rings.
I did modify the ships wheel structure to more closely represent the original.
I also fitted the iron end of the tiller with an iron clamp on the end of the tiller rather than rope lashing per the instructions.
The rear platform has been fitted, stained and then rubbed back to look like its worn from use. Still have the iron rings and rope railing to fit.

View attachment 303171
Good morning Peter. Your modification to the wheel and tiller are great. It is always more fun doing these little details especially when they turn out brilliantly. I like what you are doing. Cheers Grant
 
HULL Construction: 22 Jan 2022
Each frame of the hull comes in multiple pieces. Unfortunately the laser cutting has made the pieces a very loose fit so care needs to be taken to:
1. Ensure the frame is symmetrical around the centreline and​
2. The gap between the sides is the right measurement to fit the deck beam to be fitted later.​
I chose to fit the deck beam when assembling the frame pieces to simplify the process, however this cannot be done on all frames to look ahead in the instructions to check which ones and be glued and which ones are to be temporarily taped together.
Assembly is fairly straight forward though care needs to be taken to assure the false keel is straight and that the frames sit symmetrically around the centreline.
Everything started to become more rigid once the four deck pieces go in. There will be a need to do quite a bit of fairing to get frames and longitudinal stiffeners faired for planking.
It's at this stage that the deck planking is fixed in place. I continued using the technique I used on PORT JACKSON for the main deck - run a permanent marker down the edge of the planking material and lay in full length strips stating at the centre and moving to the edge. For the ForDeck and Quarterdeck I lay in rim planking so that deck planks could be cut in to prevent sharp angled points.
The deck joins and nails were all marked in using a 0.1mm permanent marker.
Once interior bulwark planking was laid and painted red, it was time for planking.
This is a much larger vessel than my PORT JACKSON and the plank material is thicker so it is going to take time.

Oh yes. I was bored waiting for somme of the hull work drying so I made a start on the Foremast; but that's another storey

View attachment 290035

View attachment 290036
 
Thanks, Grant shoving this build. I got to my 50 Years Birthday, but it was given away later as a wedding gift. now I am 78 and stopped building. during moving from one house to another I lost a lot of material -mainly pictures -so with your permission I will take some of yours. ones again thanks- el capi Spain.

00998-MIN 50 AARS DAG (4).jpg
 
What's in the Box: 24 Dec 2021
My second build is underway. I am constructing the new HMB ENDEAVOUR in 1/65 scale by Artesania Latina. The kit has some amazing features for the price including detailed templates when it comes time to find the openings in the hull, etched stainless steel details for almost everything and highly detailed pewter castings for cannons, anchors, figureheads etc.
Everything is tightly shrink-wrapped in the multiple layers in the box and all the small parts come in handy compartmentalised containers.
The laser cut wood is mostly cleanly cut but there are a couple of burns where the laser did not cut all the way through.
The kit does not come with hardcopy instructions but a CD with a 516 page PDF of colour assembly diagrams and a separate PDF parts list. Only problem is, the supplied wood does not match the dimensions shown and sorting the various timbers is difficult as no quantities are provided so in some cases its a guessing game (e.g. 1.15mm is 1mm thick material while 1.28mm thick is 1.5mm material).
To keep the price of the kit down, all 280 x 4mm and 8 x 3mm single blocks are laser cut timber and must be cut out, drilled and shaped individually. Same goes for the all the cleats.
The thread is all Artesania's own and you get plenty of it.
There are nicely printed flags which appear to come on a fabric material and all the sails are lightweight, pleated and overlocked. Not sure I like the overlocking as I hemmed my own sails in my first build and that looked far neater and prototypical.
I have just boughtthis for my second model to do after I finish La Nini - got the masts and rigging to do. Looking forward to reading the log and getting some tips.
 
Thanks, Grant shoving this build. I got to my 50 Years Birthday, but it was given away later as a wedding gift. now I am 78 and stopped building. during moving from one house to another I lost a lot of material -mainly pictures -so with your permission I will take some of yours. ones again thanks- el capi Spain.

View attachment 303763
Your's appears to be the older version of the ENDEAVOUR. Not sure how different it is to the new version but some have said that there are significant differences/improvements with the new version. I think most of the improvements are in the small bits and pieces like etchings and castings.
 
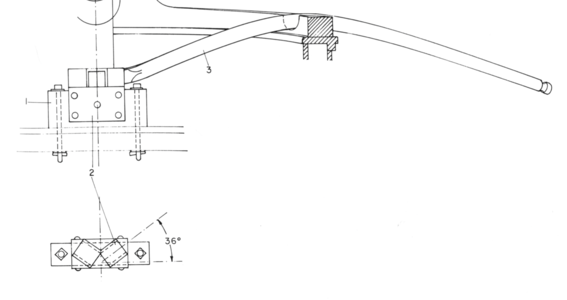
One of the items missing in the Artesania kit are the Bumpkins.
I soaked and bent some 3mm dowel (after tapering and turning stepped end). It was difficult as the dowel kept snapping even after prolonged soaking in boiling hot water, however persistence paid off. The stand into which the Bumpkins mount on the centreline was made from 3mm brass tube and flat brass bent and mounted onto a 5mm x 4mm base. I have 5 holes to drill in the face of the brass to fit brass rod which secure the "iron" to the "wood" then make up two more pins to hold the base to the deck.

IMG_0286.jpg

Screen Shot 2022-04-18 at 12.53.03 pm.png
 
Your's appears to be the older version of the ENDEAVOUR. Not sure how different it is to the new version but some have said that there are significant differences/improvements with the new version. I think most of the improvements are in the small bits and pieces like etchings and castings.
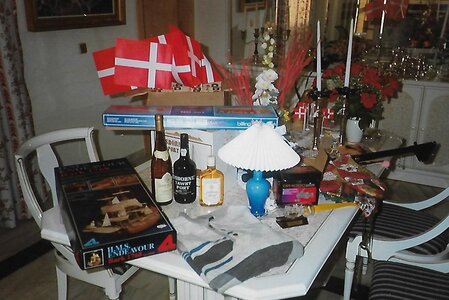
YES MAY BY. THE KIT I GOT IN 1994. but how long it has been on the selves NOBODY knows.it could be even from the late 1980.
eñ capi
 
What's in the Box: 24 Dec 2021
My second build is underway. I am constructing the new HMB ENDEAVOUR in 1/65 scale by Artesania Latina. The kit has some amazing features for the price including detailed templates when it comes time to find the openings in the hull, etched stainless steel details for almost everything and highly detailed pewter castings for cannons, anchors, figureheads etc.
Everything is tightly shrink-wrapped in the multiple layers in the box and all the small parts come in handy compartmentalised containers.
The laser cut wood is mostly cleanly cut but there are a couple of burns where the laser did not cut all the way through.
The kit does not come with hardcopy instructions but a CD with a 516 page PDF of colour assembly diagrams and a separate PDF parts list. Only problem is, the supplied wood does not match the dimensions shown and sorting the various timbers is difficult as no quantities are provided so in some cases its a guessing game (e.g. 1.15mm is 1mm thick material while 1.28mm thick is 1.5mm material).
To keep the price of the kit down, all 280 x 4mm and 8 x 3mm single blocks are laser cut timber and must be cut out, drilled and shaped individually. Same goes for the all the cleats.
The thread is all Artesania's own and you get plenty of it.
There are nicely printed flags which appear to come on a fabric material and all the sails are lightweight, pleated and overlocked. Not sure I like the overlocking as I hemmed my own sails in my first build and that looked far neater and prototypical.
Hallo @peter6172
we wish you all the BEST and a HAPPY BIRTHDAY
Birthday-Cake
 
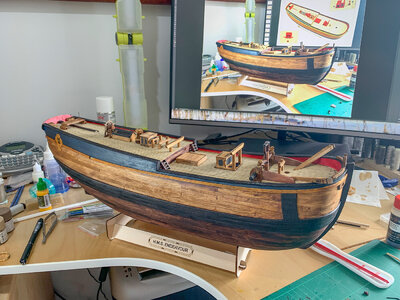
Handrails on and holes filled ready for sanding. Have made some preliminary progress with the transom; some cleaning up to do. I have also mounted the channels and started on making up the deadeyes; 24 down, 22 more to 'wire up' before assembling and fitting to the channels.
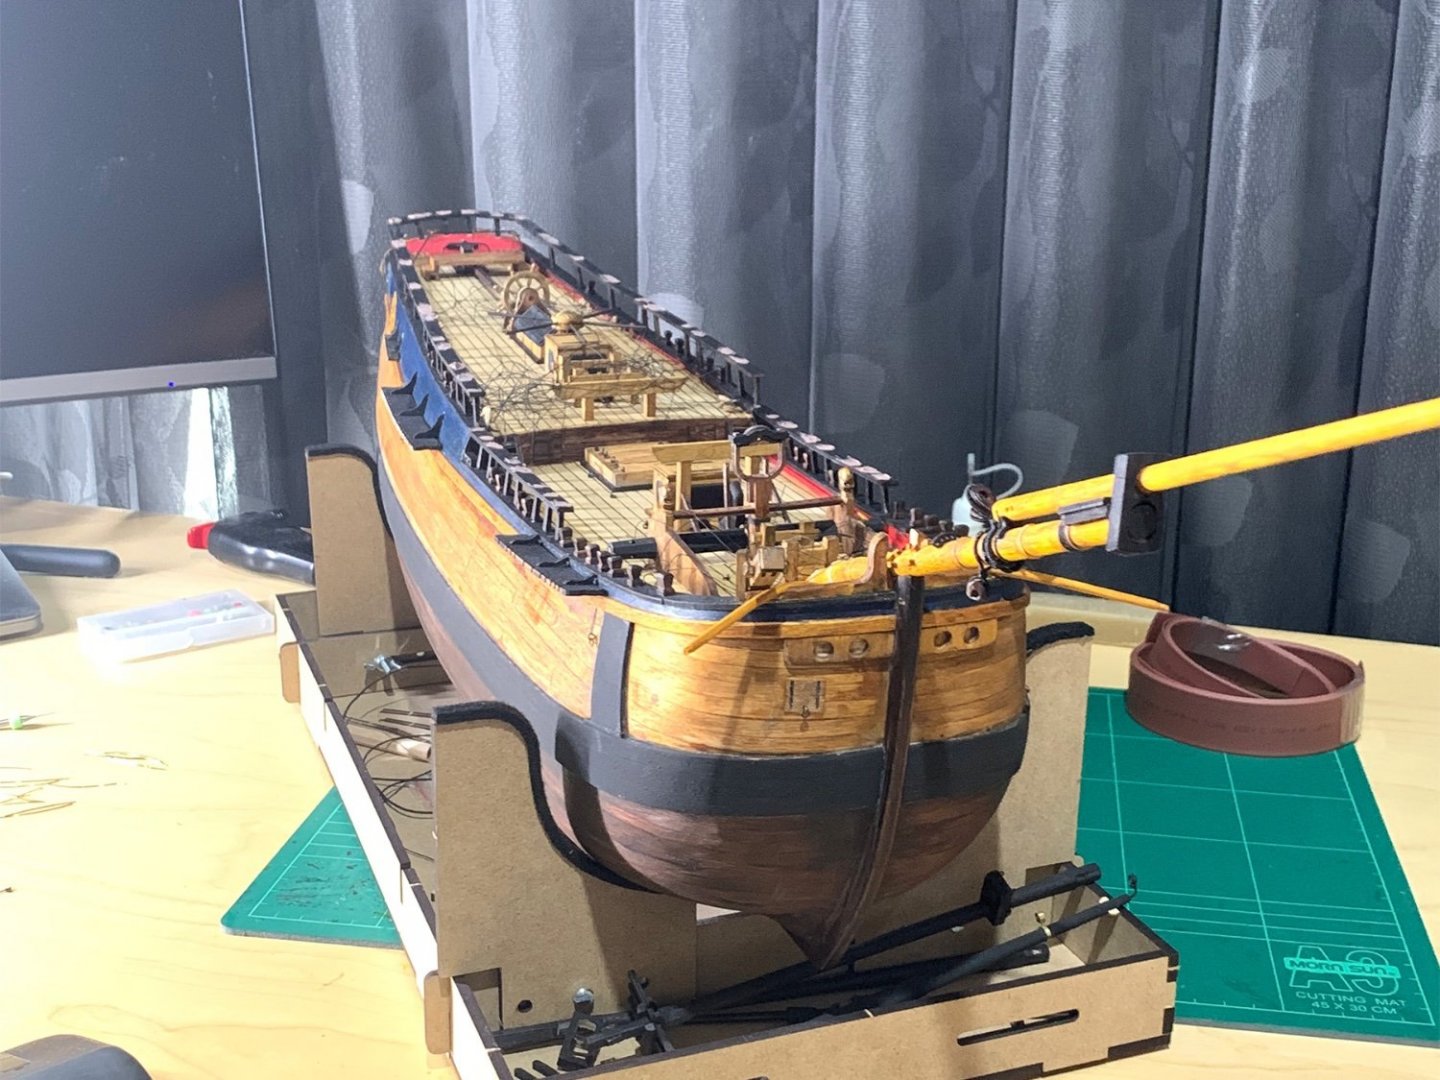
The boom has been fitted and 'bolted" in place under the foremost bitts. The catheads have also been installed as have the bumpkins. You may note that the ships bell has not yet been fitted but as its a swinging bell I did not want to to go astray. Some hatch covers have been installed on the STBD side too.
IMG_0303.jpg

IMG_0305.jpg
 
Back
Top