-

Win a Free Custom Engraved Brass Coin!!!
As a way to introduce our brass coins to the community, we will raffle off a free coin during the month of August. Follow link ABOVE for instructions for entering.
-

PRE-ORDER SHIPS IN SCALE TODAY!
The beloved Ships in Scale Magazine is back and charting a new course for 2026!
Discover new skills, new techniques, and new inspirations in every issue.
NOTE THAT OUR FIRST ISSUE WILL BE JAN/FEB 2026
You are using an out of date browser. It may not display this or other websites correctly.
You should upgrade or use an alternative browser.
You should upgrade or use an alternative browser.
Bonjour, vraiment sympa ce modèle ! bonne continuation.
- Joined
- Dec 30, 2021
- Messages
- 278
- Points
- 278

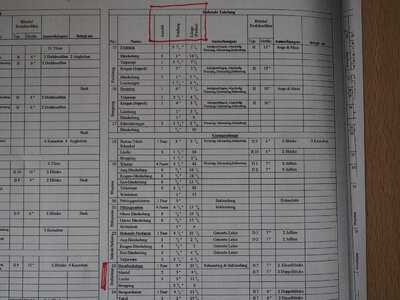
Grant, I have worked off another spreadsheet from another forum which includes Breast stays. It appears that they are roughly the same size as the backstays.Hello Peter. Yes the art of rigging is like working your way through a cypher. The only way I can help is by looking at the definition of the breast stay and seeing where on the mast it sits- I think 3 ft below the topmast cross trees. Then on the table it just refers to “back stay” However if you find which part of the mast (top mast) The breast stay connects to in the table this would be the breast stay. The table doesn’t specify each back stay- sort of by deduction. Confuses the hell out of me so this is just a suggestion.
On my Victory I went with Caldercraft (most accurate kit )sizing as below. Simplifies the matter but may help.
View attachment 318371
Cheers Grant
- Joined
- Dec 30, 2021
- Messages
- 278
- Points
- 278

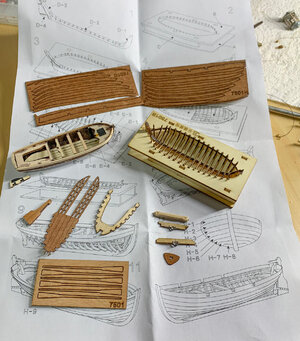
Well I have found a relatively simple solution to remedying the poor ships boats supplied with the Artesania ENDEAVOUR kit. I searched online and found a Chineses company that provides laser cut ships boat kits. Now while they are not specifically for the ENDEAVOUR, the J7501 Jolly boat fits the Longboat dimensions very closely and comes with far superior detail. There are four different boats and while delicate go together easily. The kit even includes piled planks in walnut veneer. I will post comparative pictures once completed

- Joined
- Dec 30, 2021
- Messages
- 278
- Points
- 278

- Joined
- Dec 30, 2021
- Messages
- 278
- Points
- 278

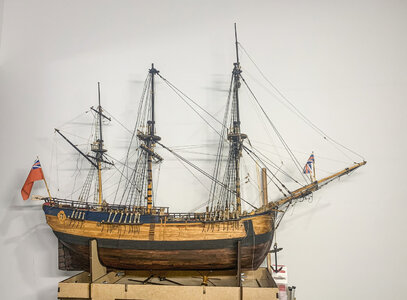
Ropes arrived and its back to rigging. Some progress has been made in the past 24 hours. Standing rigging is now at 75% while running rigging is at just over 50%. Who thought there were so many ropes and blocks in a three masted ship 
I should be able to make the 16 Sep deadline for the Canberra Model Shipwrights EXPO 2022.
I have a pet on my Jack to help it form naturally. Both are cloth flags which I prefer to the printed paper.
I should be able to make the 16 Sep deadline for the Canberra Model Shipwrights EXPO 2022.
I have a pet on my Jack to help it form naturally. Both are cloth flags which I prefer to the printed paper.

- Joined
- Jul 24, 2022
- Messages
- 79
- Points
- 78

Great thread here Peter,
I just started building this same model myself.
I am following with great interest.
Looking good!
I just started building this same model myself.
I am following with great interest.
Looking good!
- Joined
- Dec 30, 2021
- Messages
- 278
- Points
- 278

More progress today.
Finished the Fore topgallant stay, fore topgallant backstays, topgallant shrouds, Main Topgallant stay thimble, topmast yard jeers/tyes and Main mast backstays (2nd pair).
Tomorrow I will mount the Main Topgallant mast and make a start on the topmast futtock stave and shrouds.
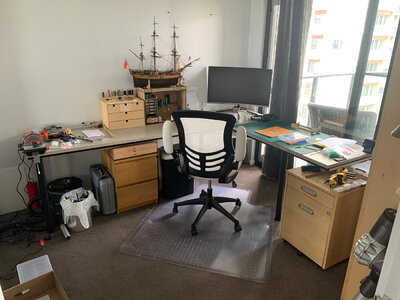
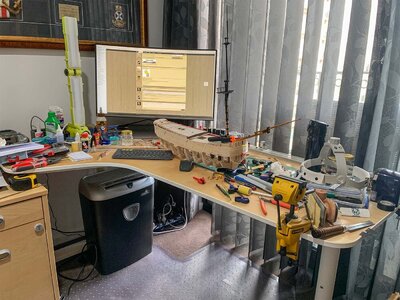
Meantime its time to upgrade my workspace ( Feb 11, 2022 ) to something better.
- Joined
- Dec 30, 2021
- Messages
- 278
- Points
- 278

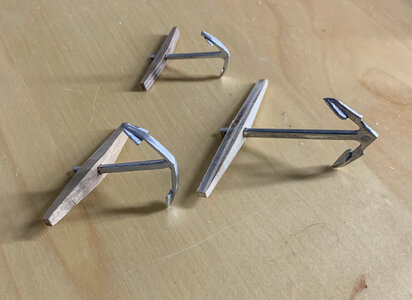
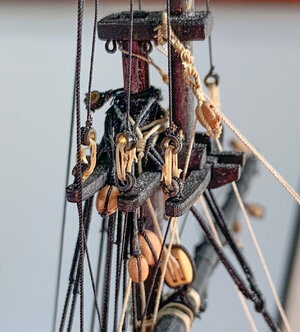
I purchased thimbles from Caldercraft in the UK for the Topgalleant shrouds as well as the topgallant backstays. I realised that making the 32 thimbles was going to take me a lot of time. One is turned in to show the thimbles depth.
These closeups really show the duqstthat gathers on a model too......
These closeups really show the duqstthat gathers on a model too......


- Joined
- Dec 30, 2021
- Messages
- 278
- Points
- 278

Yes! Standing Rigging complete (except for Main and Mizzen crowfeet and the rudder chains - waiting for more stores to arrive).
I am also at 70% on Running Rigging now that all the masts are in and only three more yards to hoist. Still need to finish off 4 cannons and the ships boats plus make some spare spars for masts and yards to sit atop the boats. Not sure if I will go so far as make the Yawl and Bank's skiff.
I am also at 70% on Running Rigging now that all the masts are in and only three more yards to hoist. Still need to finish off 4 cannons and the ships boats plus make some spare spars for masts and yards to sit atop the boats. Not sure if I will go so far as make the Yawl and Bank's skiff.
- Joined
- Jul 24, 2022
- Messages
- 79
- Points
- 78

Good afternoon Peter, quick question if you don't mind. I'm getting ready to start planking the hull on mine and wondered if you thought there may be any benefit to filling in the spaces at the bow and stern? Or did you find enough support for a relatively easy planking job?
Thanks
Thanks
- Joined
- Dec 30, 2021
- Messages
- 278
- Points
- 278

Absolutely. Hindsight is a wonderful thing and all future builds will involve filling the bow and stern with fillers if I do not full frame the model. The fill will make it much simpler to nail/pin the planks in position while gluing but you will need to form the bends on the bluff bow and the stern (bend and twist) first so as no to put too much strain on the hull and the glue.Good afternoon Peter, quick question if you don't mind. I'm getting ready to start planking the hull on mine and wondered if you thought there may be any benefit to filling in the spaces at the bow and stern? Or did you find enough support for a relatively easy planking job?
Thanks
I did not find it an easy planking job as I deviated from the instructions to form planks per the Marquardt drawings. This requires bending straight planks in two planes and twisting. Obviously spiling would resolve some of the problems or breaking the planking down into four zones (refer Underhills book which I am only reading now). The later employs prototype length planks and because of the shorter lengths the overall double curve shape of spiled single planks is avoided.
If you are going toping the hull then just follow the instructions but I would put fillers in anyway to ensure you keep the bluff bow shape.
- Joined
- Jul 24, 2022
- Messages
- 79
- Points
- 78

Thanks, I intend to deviate from the instructions as well. breaking the hull down into sections as suggested. But I have no experience with it so I really appreciate the insight. All previous models were planked and skinned with veneers. This will be new ground for me. But I hope to learn something from it.
Thanks again.
Thanks again.
- Joined
- Jul 24, 2022
- Messages
- 79
- Points
- 78

Going back through your thread here and noticed something. You didn't use the veneers above the whales did you?
- Joined
- Dec 30, 2021
- Messages
- 278
- Points
- 278

That's correct. I didn't want a walnut finish and I find the walnut veneers a little rough and brittle. I was careful with my first layer to make sure I laid it correctly so a veneer was not necessary.Going back through your thread here and noticed something. You didn't use the veneers above the whales did you?
- Joined
- Jul 24, 2022
- Messages
- 79
- Points
- 78

Very nice, I like the look. If my planking turns out as nice, I won't use them either. Something didn't look quite right about them as soon as I opened the box.


