HMS Agamemnon (1/64 Caldercraft)

A bit further on,

Thank you all for your reactions and for watching

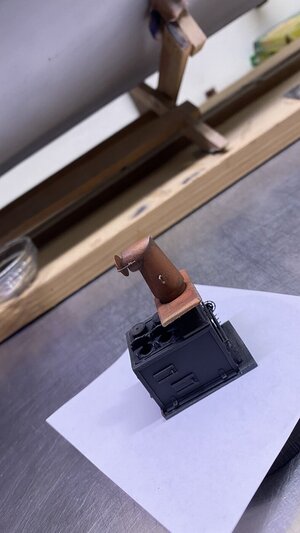
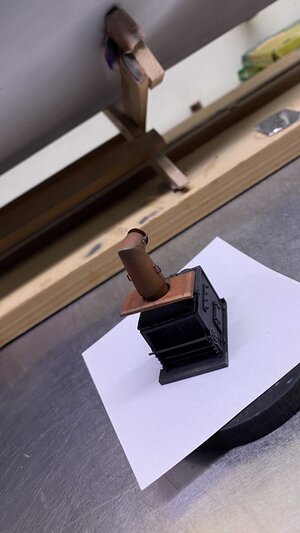
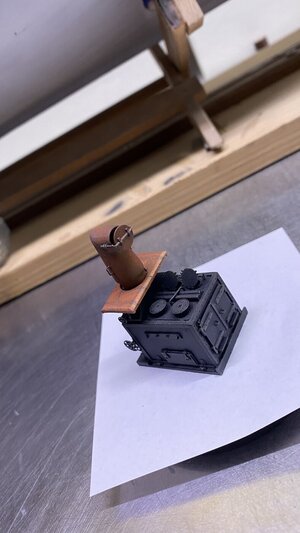
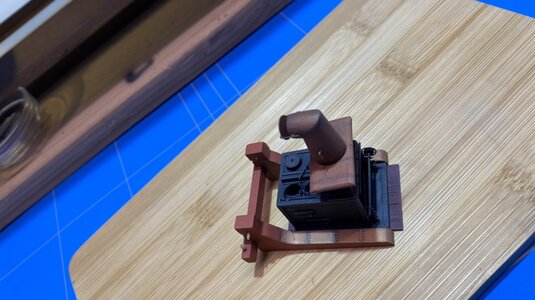
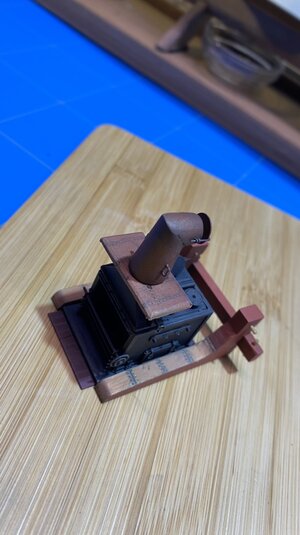
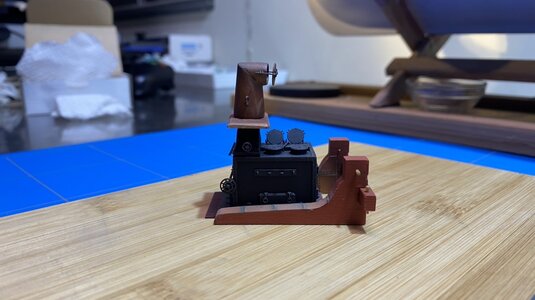
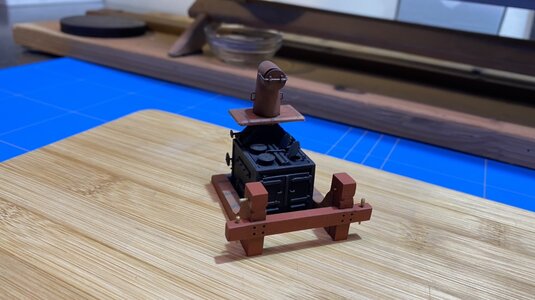
The Chimney,
The supplied chimney came as a solid piece of pewter, I hollowed out the top of the chimney with a dentist's router, so it looks a bit more realistic to me.
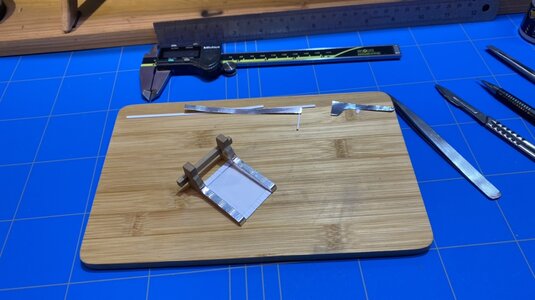
Then I made a lid from a sheet of brass, from thin brass strip then made the rest of the fittings.
The bottom plate was made from a piece of wood, which I covered with aluminium tape and then used a skewer to poke small points into it to imitate rivets.
Then I sprayed everything in the primer, and after that I gave it the necessary colours.

Below some photos.


9097CDF3-1FEB-41EC-BD87-53AEAB84F5F4.jpeg13B77124-9577-4F31-9CCC-8DC355B61A83.jpeg5AAA8AE8-BBF1-445F-887F-6C8F768F8B37.jpeg
 
Beautiful modeling Boris, I have always liked this kit, I have considered it many times but have not purchased it yet. I think it is probably the best large frigate model kit in this scale, and you are doing it great justice! Keep up the fine workmanship.
 
Thank you all for your reactions and for watching.

I haven't been able to do much modelling in the last few days due to the hustle and bustle of the holiday season.

So only a little progress.
Still working on the cooking appliance,
I made a start with the base of the appliance and on both sides I covered the bottom with small pieces of evergreen to simulate stones. I also lined the betting on the inside and top with aluminium plates which I made from aluminium adhesive tape, to simulate the copper lining.

I gave the bottom plate of the cooker and the betting a colour.
Apart from eight nails, I like it this way, because everything will be placed under the deck and will not be visible anymore.


3C02F026-C07A-4C6C-9DF1-51FE06603B38.jpeg28B2E526-D405-41A8-ACF0-E001DA330FA5.jpeg110A4B9C-753E-457D-9C61-791C34C9B8AC.jpegF53C8DA7-2214-4859-AD19-9200A57CB0CD.jpegD969DBAF-5BA2-4EEE-AEAD-3EBDA2FDFCA0.jpeg
 
I wish everyone a happy and prosperous New Year

Since the holidays are behind us, we can get on with modelling again.

After a lot of searching and reading, measuring and calculating.
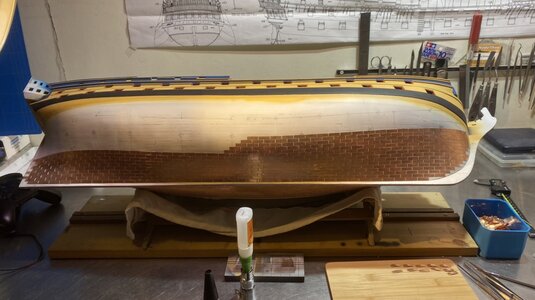
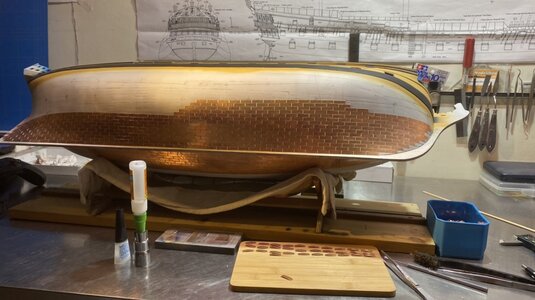
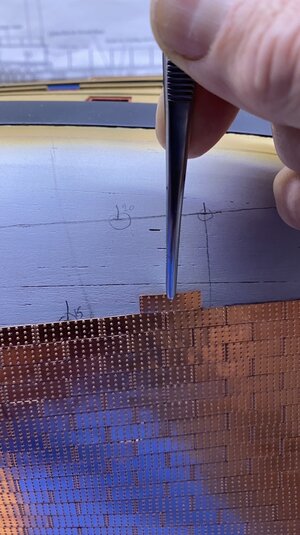
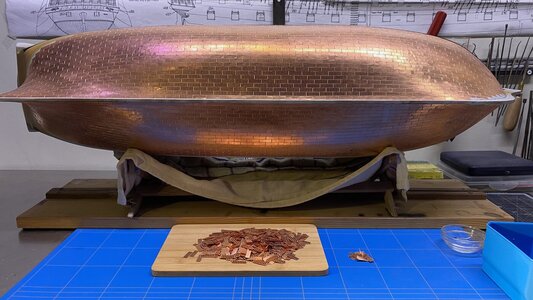
I started with the big copperplate puzzle.
In this case I started at the keel, and try to work my way up to the waterline, trying to follow the courses of the planking.

All with about 1000 tiles placed, there are still about 1500 pieces left.


BC42FD17-40B9-426F-9E16-169C38F71EE8.jpeg845B1DF6-9EF2-400F-BD3B-853C0A4C3B6D.jpegB8EE69CC-607C-46E2-AF8E-BE3981B642AD.jpeg
 
beautifull details on this oven - very good work Thumbsup

I wish everyone a happy and prosperous New Year

Since the holidays are behind us, we can get on with modelling again.

After a lot of searching and reading, measuring and calculating.
I started with the big copperplate puzzle.
In this case I started at the keel, and try to work my way up to the waterline, trying to follow the courses of the planking.

All with about 1000 tiles placed, there are still about 1500 pieces left.


View attachment 280959View attachment 280960View attachment 280961
Just as the shipwrights who built the original vessel put their life into their work, so do modelers do the same.
 
Thanks for the reactions and for watching.

The big copper plate puzzle is more or less done, all that remains is to make all the small fitting pieces that connect to the waterline.
All in all, counting and calculating has worked out quite well, and so far I have minimal losses (right-hand pile) and still have a fair amount of tiles left.

On to the last stage, the plinth that covers the top of the waterline and the keel on both sides, and as a final piece of the puzzle the rudder.

9413468D-2C8E-4145-9903-7B989A7B2EE5.jpeg1B50D56A-74FD-4A29-9287-3A43BCD90AA6.jpegFA6EC65C-DA5A-474E-8A6D-8A01629B64CC.jpeg
 
Thanks for the reactions and for watching.

The big copper plate puzzle is more or less done, all that remains is to make all the small fitting pieces that connect to the waterline.
All in all, counting and calculating has worked out quite well, and so far I have minimal losses (right-hand pile) and still have a fair amount of tiles left.

On to the last stage, the plinth that covers the top of the waterline and the keel on both sides, and as a final piece of the puzzle the rudder.

View attachment 284242View attachment 284243View attachment 284244
Agree with all the comments Boris- this is going to be a brilliant Agamemnon.
 
Thank you all for your feedback and watching.

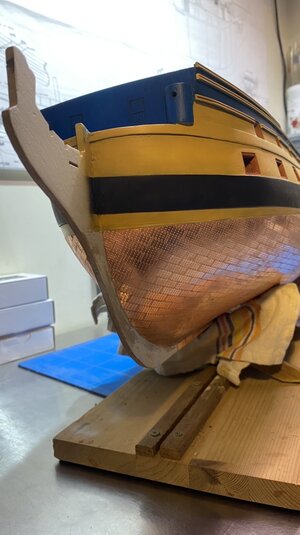
A bit further on, port side is finished except for the last part of the bow, this I will finish later to make it fit nicely with the starboard side.

The strip on top I will paint later on.
Only the starboard side to finish the waterline and the cover strip to place and finally the rudder.

Below some photos


AEAC8D8C-98EE-4669-8888-17ABFD7FA1A9.jpegB1203A07-3B7A-4FAD-9EC7-15271C9A4317.jpeg5771BDA2-C683-4A70-98CE-5EE7C428B87F.jpeg6E7CAB0D-AAF3-4DA7-B27C-6B76784257AE.jpeg
 
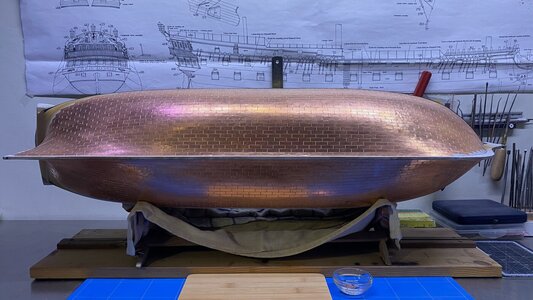
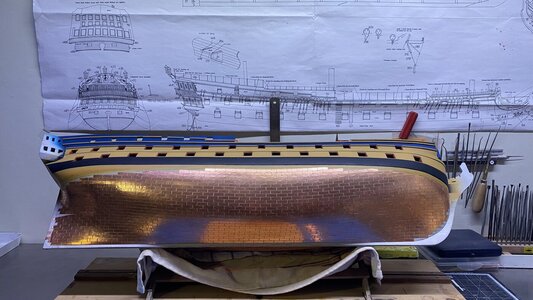
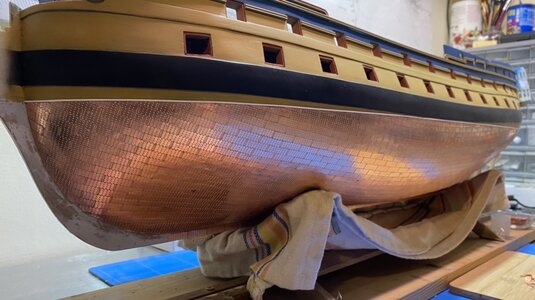
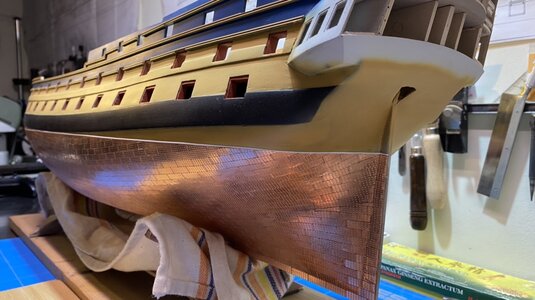
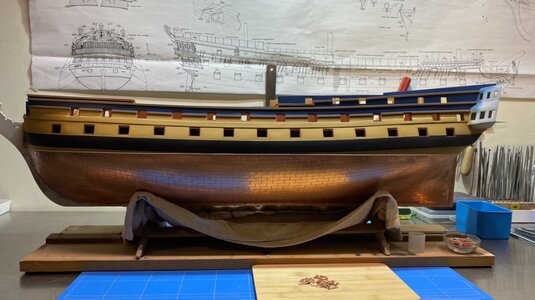
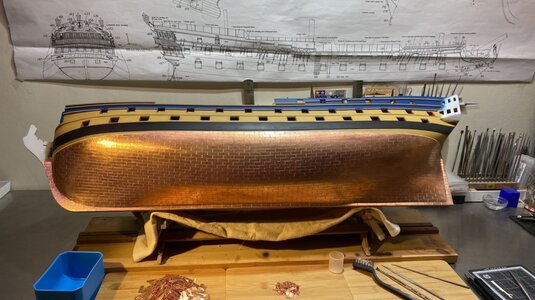
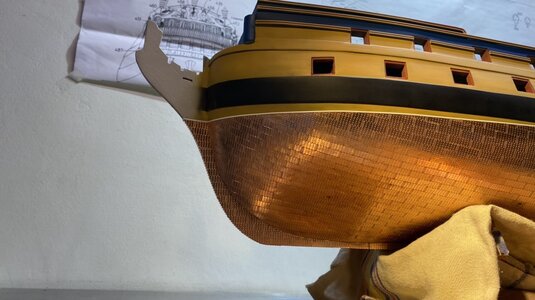
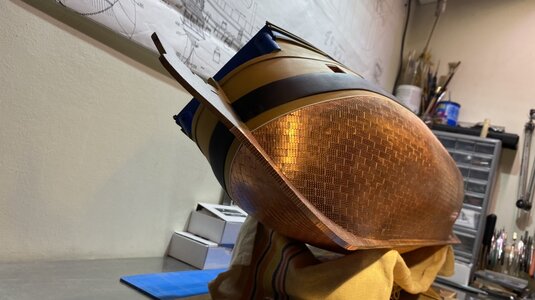
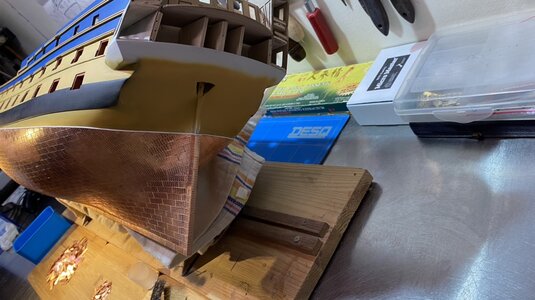
The chapter on gluing the underwater hull with copper plates is finished.

Only the rudder remains.

As I have never built a ship model of which the underwater ship had to be fitted with copper plates.
I must say that it is not as boring and difficult as I thought it would be.

I did notice that the necessary counting, calculating and measuring is important to make it a little easier for yourself.

And also noticed during the gluing, that by bending the tiles a little, they are easy to place, by sliding them over the underlying row.

All in all, I kept the cutting loss to a minimum, by using the cut off pieces as fitting pieces at the waterline if possible.
That way I have enough left over.

Now all that's left to do is colour the white trim and we can get on with the hull.

93138A46-8E84-451F-8197-1FCA22C898ED.jpeg863A7A4F-9674-47F4-AE21-9DE61610B80B.jpegC23684E5-99EA-436A-ACF8-57805CD35BE0.jpegE2F95DBB-F0A0-4E07-A0B4-E0654D28CF7E.jpeg
 
I have already commented on Modelbouwforum, but it is well worth repeating here as well. This is simply outstanding coppering work - just shows you what planning, patience and execution can result in. First Place Metal
 
I have already commented on Modelbouwforum, but it is well worth repeating here as well. This is simply outstanding coppering work - just shows you what planning, patience and execution can result in. First Place Metal
I concur with Heinrich- l have looked at many examples of the Victory (different ship) and this has to be one of the best hull coppering I have seen. Excellent Boris.
 
Thank you all for your reactions and for watching

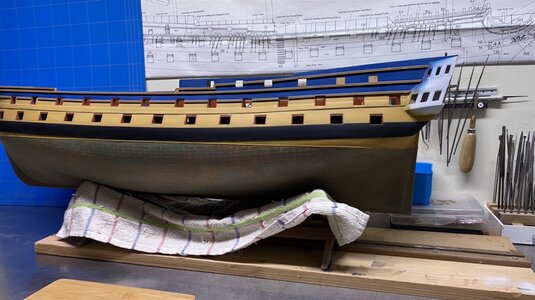
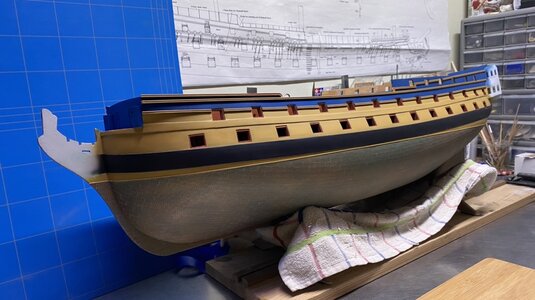
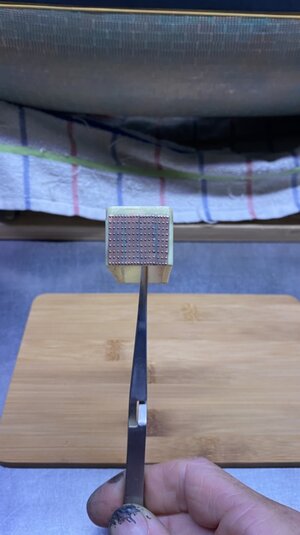
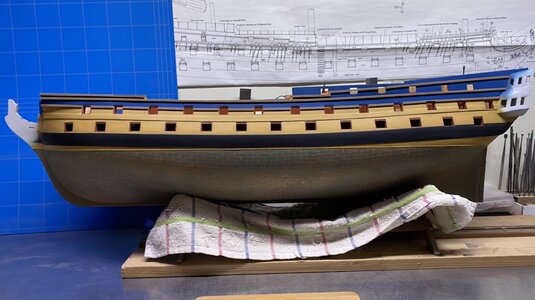
I have weathered the copper plates a little, as a test I kept a number of plates in a bowl of seawater for 3 weeks to see how the colour would turn out.

This is my reverence to work from.

7D78559B-B960-4209-B070-93167C673205.jpeg

I then also applied this to the rest of the underwater ship, accelerating the process with ammonia, after cleaning, I applied a number of filters of copper paint and blue/green paint, then sealed this with a layer of varnish.

C5F56716-A19F-4F88-AB58-066BCD41B39A.jpeg

28B627D0-F571-41C0-AE57-5FB209E4EA59.jpeg

C2EA915A-1983-4792-9D6F-9335DF16B3EC.jpeg

Then I touched up the rest of the paintwork.
 
Back
Top