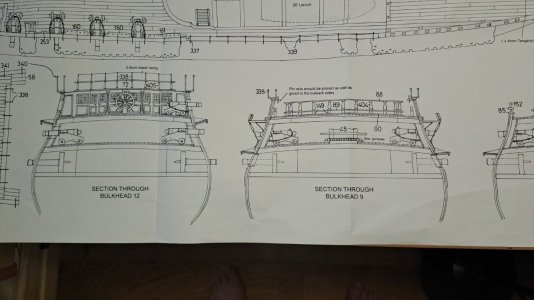
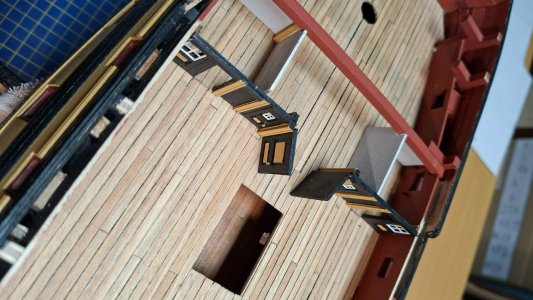
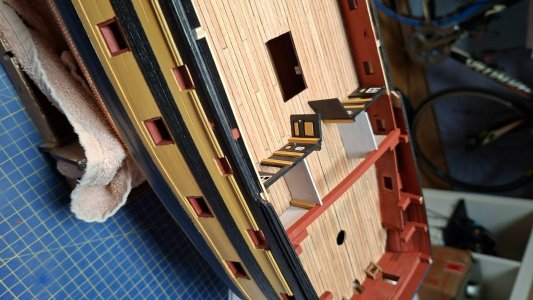
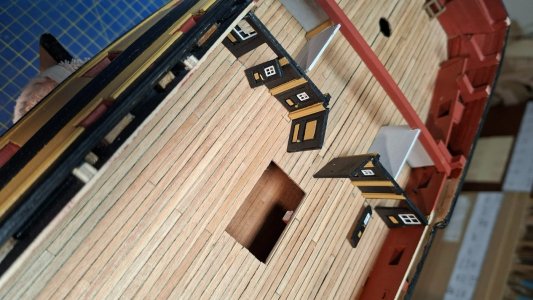
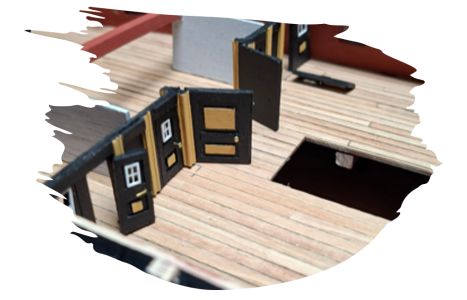
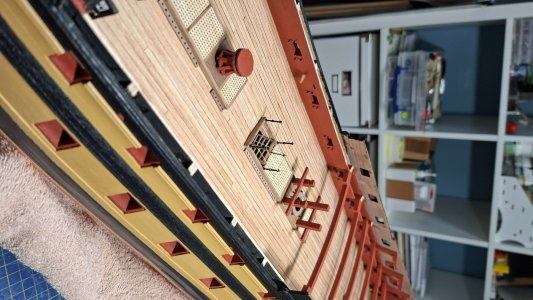
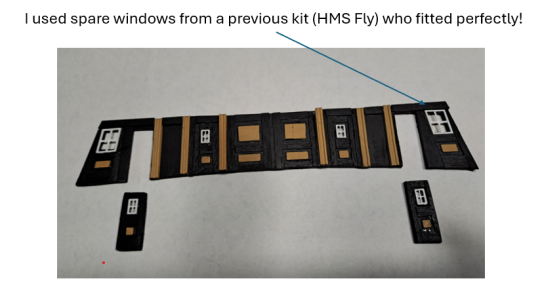
Nice. This is how I plan to make the wooden doors and panels on my model too. using different veneer pieces.View attachment 555047
View attachment 555053
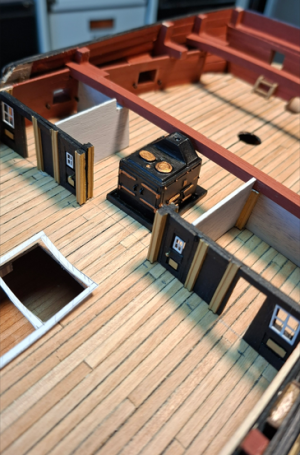
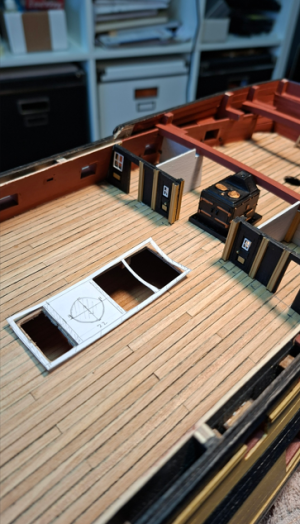
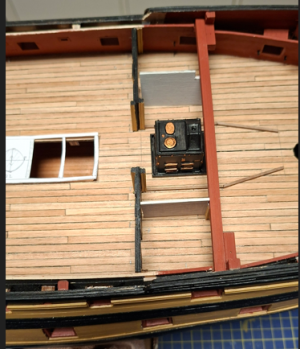
See Iutar's message #277 : I'm building it...see photo's.
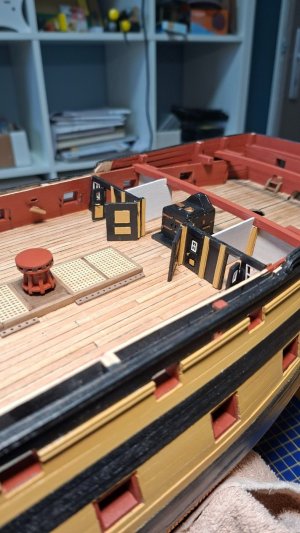
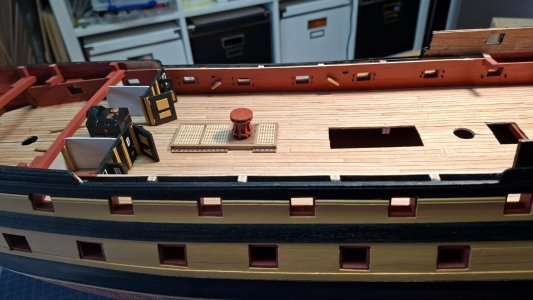
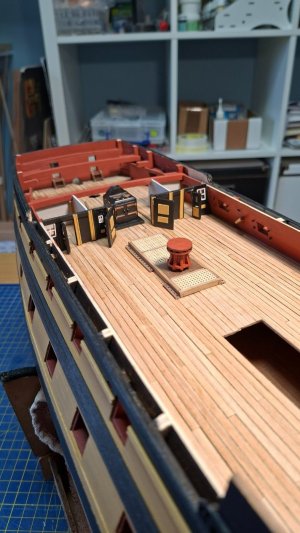
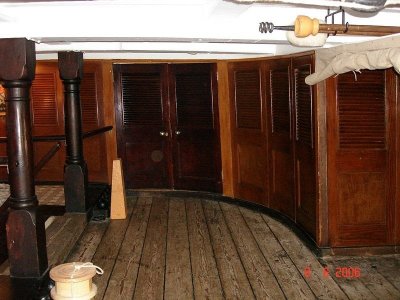
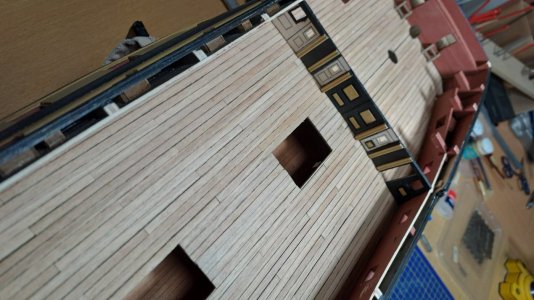
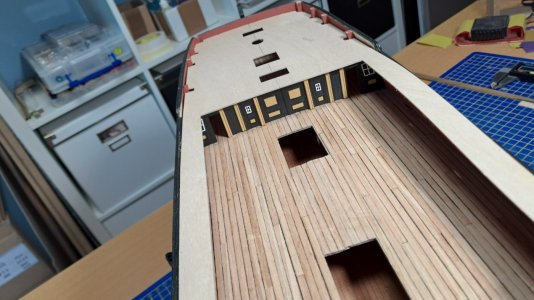
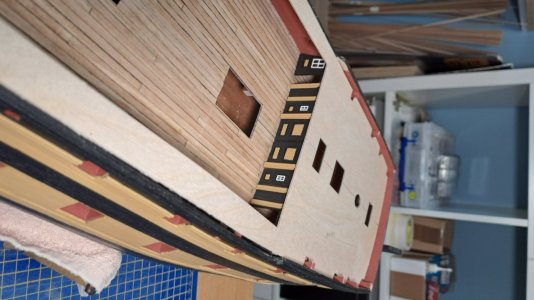
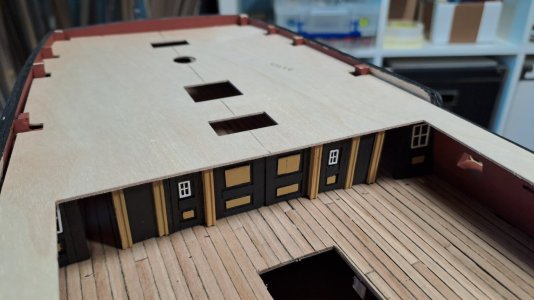
The most difficult part is fitting the wall because the Gun deck is curved and it is important to translate this to the wall.
Trail and error...
View attachment 555048
View attachment 555049
View attachment 555050
View attachment 555051
View attachment 555052
-

Win a Free Custom Engraved Brass Coin!!!
As a way to introduce our brass coins to the community, we will raffle off a free coin during the month of August. Follow link ABOVE for instructions for entering.
-

PRE-ORDER SHIPS IN SCALE TODAY!
The beloved Ships in Scale Magazine is back and charting a new course for 2026!
Discover new skills, new techniques, and new inspirations in every issue.
NOTE THAT OUR FIRST ISSUE WILL BE JAN/FEB 2026
You are using an out of date browser. It may not display this or other websites correctly.
You should upgrade or use an alternative browser.
You should upgrade or use an alternative browser.
HMS Agamemnon by Caldercraft
- Thread starter HMSFly
- Start date
- Watchers 33
-
- Tags
- agamemnon caldercraft
Dear Mark! First of all, not only the bottom line should follow the curve of the deck, but the top line as well.

Secondly, raise the center line higher, otherwise it looks unsightly.

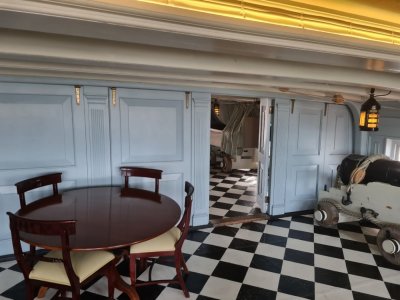
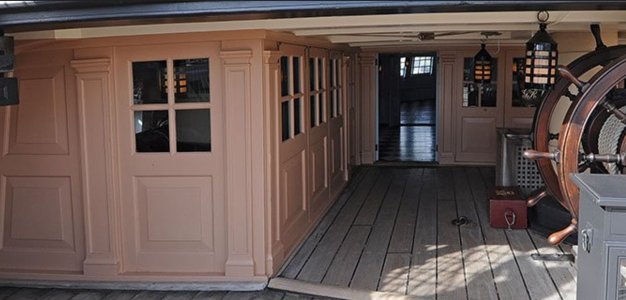
Third, adjust all lines to accommodate the curve of the deck.

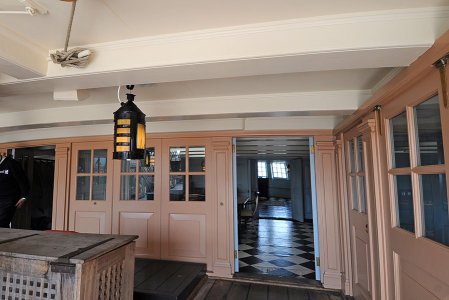
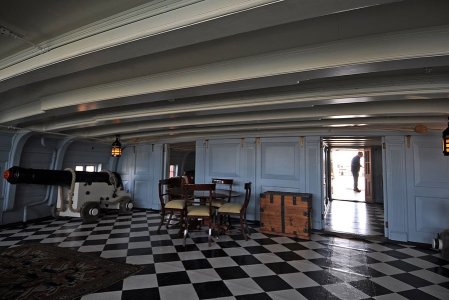
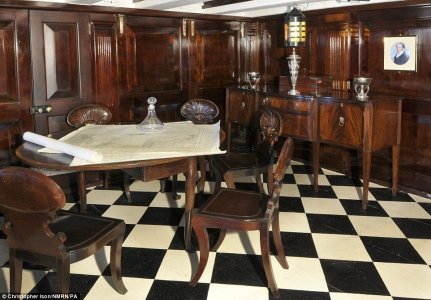
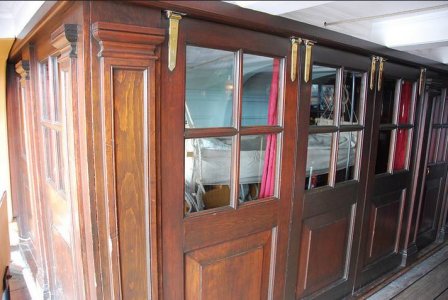
Fourth, what's this black color? Where does it come from? Bulkheads on English ships in the late 18th century were made of pine and impregnated with a special varnish and stain to match the color of fine bog oak. They were also painted red using waterproof iron ochre. Interior bulkheads were painted white or yellow.
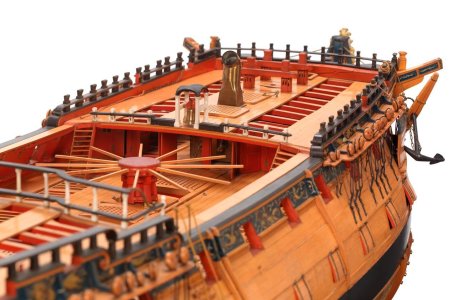
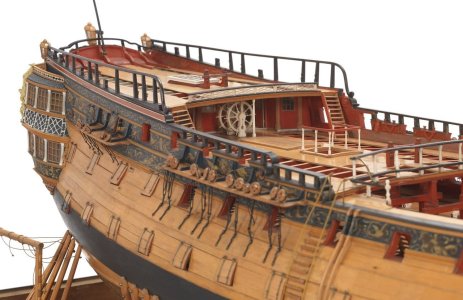
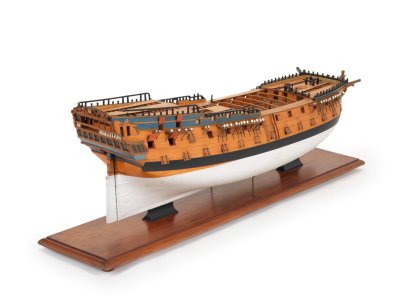


Secondly, raise the center line higher, otherwise it looks unsightly.


Third, adjust all lines to accommodate the curve of the deck.


Fourth, what's this black color? Where does it come from? Bulkheads on English ships in the late 18th century were made of pine and impregnated with a special varnish and stain to match the color of fine bog oak. They were also painted red using waterproof iron ochre. Interior bulkheads were painted white or yellow.


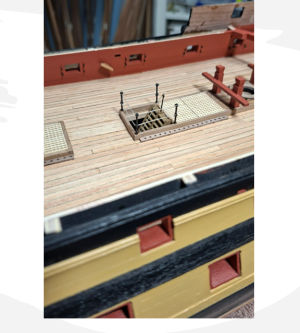
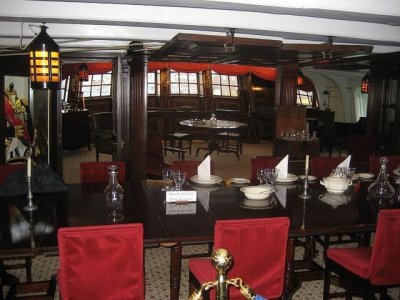
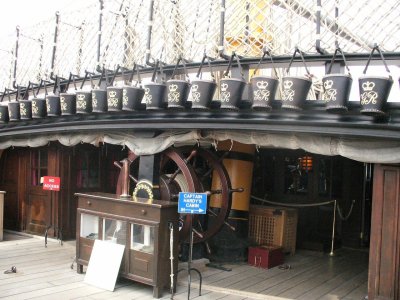
Dear Mark, don't forget about the floor tiles!I will "open" the doors...to show the oven...follow the blog...
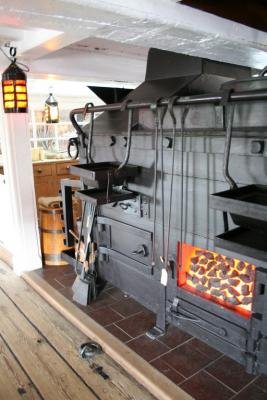
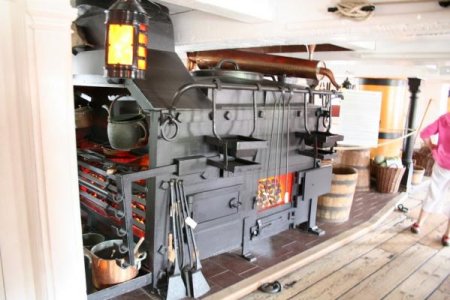
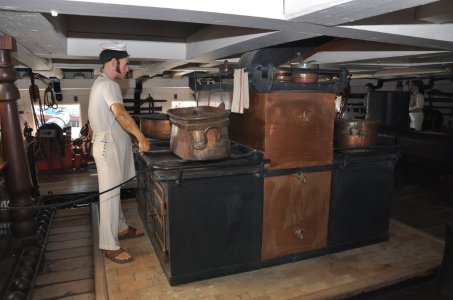
You can place a kitchen table between the stove and the mast.
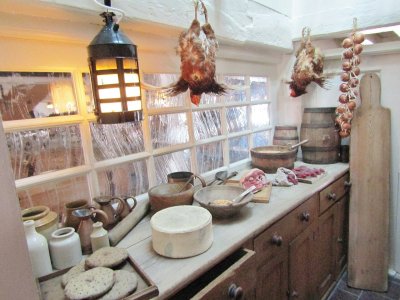
Since the bulkheads were collapsible, we can show off the bronze hardware. Mark, I highly recommend doing the bulkheads in a "precious varnished wood, bog oak" look; it will be absolutely beautiful!
Very cool pics. It is good to see how big those stoves were in real life. Man the cooks must have been so hot- imagine all the sweatDear Mark, don't forget about the floor tiles!
View attachment 555105 View attachment 555104 View attachment 555102
You can place a kitchen table between the stove and the mast.
View attachment 555100
Since the bulkheads were collapsible, we can show off the bronze hardware. Mark, I highly recommend doing the bulkheads in a "precious varnished wood, bog oak" look; it will be absolutely beautiful!
View attachment 555103
Dear Iutar,Dear Mark, don't forget about the floor tiles!
View attachment 555105 View attachment 555104 View attachment 555102
You can place a kitchen table between the stove and the mast.
View attachment 555100
Since the bulkheads were collapsible, we can show off the bronze hardware. Mark, I highly recommend doing the bulkheads in a "precious varnished wood, bog oak" look; it will be absolutely beautiful!
View attachment 555103
I agree with you, of course...as always. But I had a problem: the top deck is almost horizontal, with a very slight arc...so I had taken that into account, but I couldn't see any other solution than my solution... But I'm not finished yet...
Hi Mark,the top deck is almost horizontal,
Is this based on the kit? The upper deck rounded much more than the lower decks.
From the first and second page of the contract:
Lower Deck -Beams to round 4 ins
Upper Deck - Beams to round 7 ins
Forecastle - Beams to round 6 ins
Quarter Deck - Beams to round 6 ins
There would be a slight difference in the rounding on the bottom of the bulkhead compared to the top as a result.
Allan
Hi Allan,Hi Mark,
Is this based on the kit? The upper deck rounded much more than the lower decks.
From the first and second page of the contract:
Lower Deck -Beams to round 4 ins
Upper Deck - Beams to round 7 ins
Forecastle - Beams to round 6 ins
Quarter Deck - Beams to round 6 ins
There would be a slight difference in the rounding on the bottom of the bulkhead compared to the top as a result.
Allan
Yes its based on the kit... As a matter of fact I didn't change anything, just fitted the deck in his position and measured it....
Model kits make decks flat with no camber because it simplifies construction. The curvature of decks is subtle enough that it is easy to overlook an error on a model when they are flat. Changing the decks to have camber can be challenging to a new model builder. A flat plywood false deck can be stiff and not want to conform to cambered beams, and must be pre-bent by soaking it in water and letting it dry over a curved form. The curved form should have slightly more curve than the desired curvature, since the plywood will spring back a bit when removed from the form. Getting the curve close and not perfect is all you need. Glue and clamps or pins or weights will make sure it is final-formed and firmly attached to the beams.
The amount of camber does vary slightly between ships, and the lower decks, ones more likely to be wetted, have more camber than those much higher, such and the quarter and poup decks. Generally the camber should be around 1/4" for every 12" of beam, or about 2cm for every meter of beam.
The mahogany and birch plywood for this upper false deck on this model has only a slight camber, but that is all the curve you need to properly shape the deck, which is ready to accept a layer of planks. The original kit beams were replaced with curved ones to support the new shape of the deck.
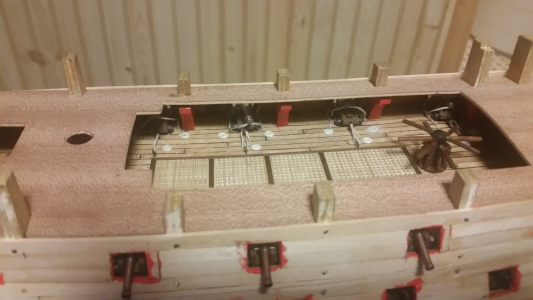
The more you research wooden ship design through books and forums, the more you find how kits have made shortcuts in the accuracy of features for the purpose of simplification. This is why the beginning ship modeler finds more and more of these inaccuracies, as they gather more and more information. Those who want more accuracy out of a kit will make changes and modifications, and the "bash" kits into models which have much more detail than as built right out of the box, and they will discover a new level of fun from doing so, increasing their skill with each carefully though out change.
Often times, these changes involve rework or complete replacement of parts and sections of the hull by scratch building. Once you figure out the scope and method of how you want to make a change, scratch building small changes is no longer feared and confidence in your work is built along with the model. Then you realize with some experience is that to make improvements,, all you need do is buy some more wood and maybe a new tool or two.
The amount of camber does vary slightly between ships, and the lower decks, ones more likely to be wetted, have more camber than those much higher, such and the quarter and poup decks. Generally the camber should be around 1/4" for every 12" of beam, or about 2cm for every meter of beam.
The mahogany and birch plywood for this upper false deck on this model has only a slight camber, but that is all the curve you need to properly shape the deck, which is ready to accept a layer of planks. The original kit beams were replaced with curved ones to support the new shape of the deck.

The more you research wooden ship design through books and forums, the more you find how kits have made shortcuts in the accuracy of features for the purpose of simplification. This is why the beginning ship modeler finds more and more of these inaccuracies, as they gather more and more information. Those who want more accuracy out of a kit will make changes and modifications, and the "bash" kits into models which have much more detail than as built right out of the box, and they will discover a new level of fun from doing so, increasing their skill with each carefully though out change.
Often times, these changes involve rework or complete replacement of parts and sections of the hull by scratch building. Once you figure out the scope and method of how you want to make a change, scratch building small changes is no longer feared and confidence in your work is built along with the model. Then you realize with some experience is that to make improvements,, all you need do is buy some more wood and maybe a new tool or two.
Last edited:
No, I did not forgot the beams but did not yet install them...To early.The picture seems to show the beams with a bend. Maybe you're doing something wrong, Mark? Have you forgotten the beams?
View attachment 555297
Agree, but again I made no mistake...I measured everything very very carefully... I will see what happens when I install the deck.. If necessary I always can add a piece of wood to complete or follow the arc...Model kits make decks flat with no camber because it simplifies construction. The curvature of decks is subtle enough that it is easy to overlook an error on a model when they are flat. Changing the decks to have camber can be challenging to a new model builder. A flat plywood false deck can be stiff and not want to conform to cambered beams, and must be pre-bent by soaking it in water and letting it dry over a curved form. The curved form should have slightly more curve than the desired curvature, since the plywood will spring back a bit when removed from the form. Getting the curve close and not perfect is all you need. Glue and clamps or pins or weights will make sure it is final-formed and firmly attached to the beams.
The amount of camber does vary slightly between ships, and the lower decks, ones more likely to be wetted, have more camber than those much higher, such and the quarter and poup decks. Generally the camber should be around 1/4" for every 12" of beam, or about 2cm for every meter of beam.
The mahogany and birch plywood for this upper false deck on this model has only a slight camber, but that is all the curve you need to properly shape the deck, which is ready to accept a layer of planks. The original kit beams were replaced with curved ones to support the new shape of the deck.
View attachment 555305
The more you research wooden ship design through books and forums, the more you find how kits have made shortcuts in the accuracy of features for the purpose of simplification. This is why the beginning ship modeler finds more and more of these inaccuracies, as they gather more and more information. Those who want more accuracy out of a kit will make changes and modifications, and the "bash" kits into models which have much more detail than as built right out of the box, and they will discover a new level of fun from doing so, increasing their skill with each carefully though out change.
Often times, these changes involve rework or complete replacement of parts and sections of the hull by scratch building. Once you figure out the scope and method of how you want to make a change, scratch building small changes is no longer feared and confidence in your work is built along with the model. Then you realize with some experience is that to make improvements,, all you need do is buy some more wood and maybe a new tool or two.
When you add the arch in a flat deck when the deck is a kit part, a gap will appear at the bulwarks, but that's easily covered with planking. The arch will affect the transverse bulkheads and railings above it. Several things will need a bit of adjustment but it will all look great. Your model is one of the best I've seen. So many features, especially the internal fittings and details!Agree, but again I made no mistake...I measured everything very very carefully... I will see what happens when I install the deck.. If necessary I always can add a piece of wood to complete or follow the arc...
Ahhh Mark. You have outdone yourself on this model. Glorious. Cheers GrantThe progress...based upon Iutar comments...
View attachment 556574
View attachment 556575
View attachment 556576
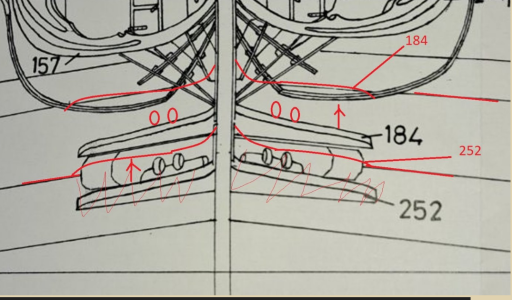
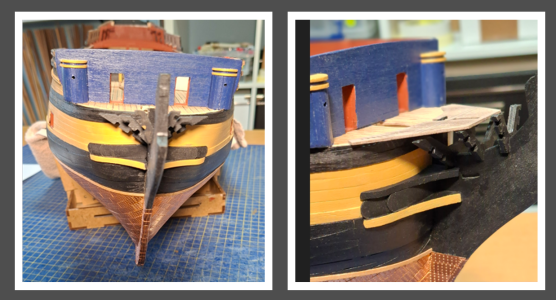
I started with the bow.
The challenge here is that I will ignore Caldercraft's building instructions (eg the position).
This is to follow Iutar's recommendations, which are technically and historically correct.
Easier said than done, of course: after a lot of measuring, fitting, etc., I opted for the solution below. Best compromise


