-

Win a Free Custom Engraved Brass Coin!!!
As a way to introduce our brass coins to the community, we will raffle off a free coin during the month of August. Follow link ABOVE for instructions for entering.
You are using an out of date browser. It may not display this or other websites correctly.
You should upgrade or use an alternative browser.
You should upgrade or use an alternative browser.
HMS Ajax 38 gun frigate. Euromodel [COMPLETED BUILD]
- Thread starter Ken
- Start date
- Watchers 36
-
- Tags
- ajax completed build euromodel
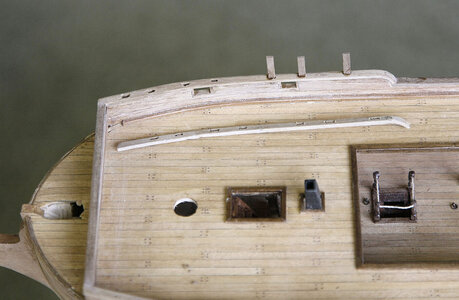
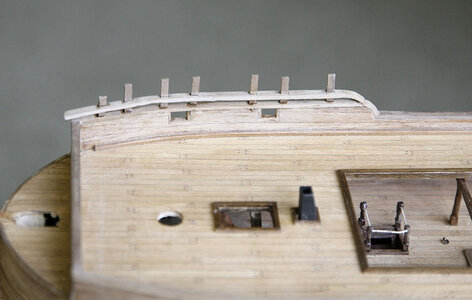
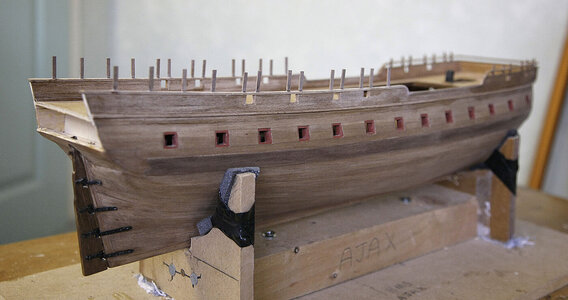
well done MATEHello All. Again still catching up, this time it's the top rails. Just some pictures to look at, I think that they are self explanitory, once I had worked out this method it went together quite well.
View attachment 217465
View attachment 217466
View attachment 217467
View attachment 217468
View attachment 217469
- Joined
- Dec 16, 2016
- Messages
- 1,128
- Points
- 493

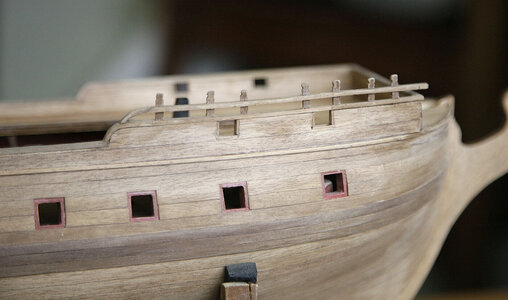
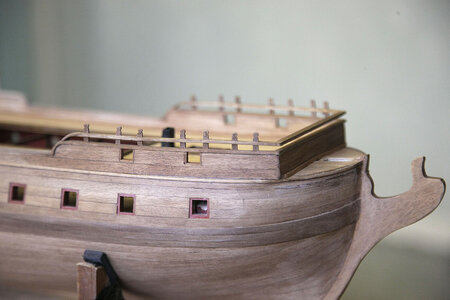
Hello Everyone. It’s my wife’s’ birthday today so I’ve not to spend the day in my workroom, but I have managed to slip away to post this quick update. I finished and fitted all the rails, a successful episode and I wouldn’t change my method in any way. The sun was shining for a change so I took Ajax into the garden to get some decent pictures, natural sunlight always looks better.
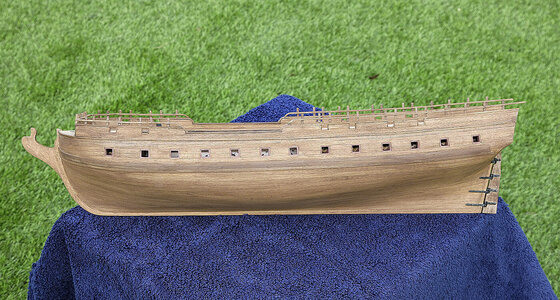
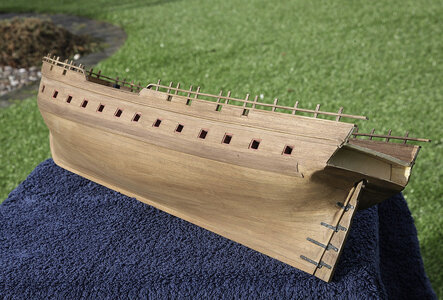
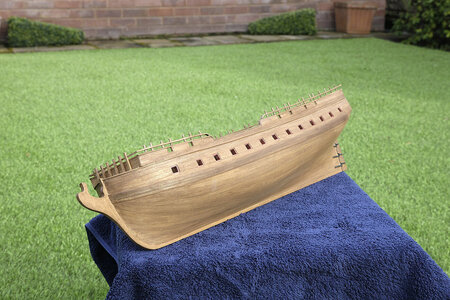
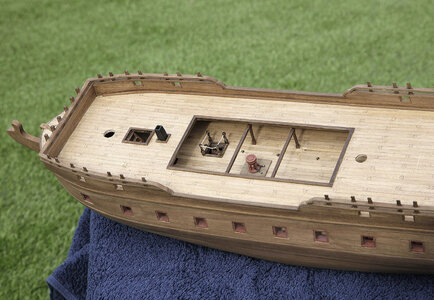


Happy Birthday from Spain and CONGRALATION for thefull Pics of your Ship.Hello Everyone. It’s my wife’s’ birthday today so I’ve not to spend the day in my workroom, but I have managed to slip away to post this quick update. I finished and fitted all the rails, a successful episode and I wouldn’t change my method in any way. The sun was shining for a change so I took Ajax into the garden to get some decent pictures, natural sunlight always looks better.
View attachment 217658
View attachment 217659
View attachment 217660
View attachment 217661


- Joined
- Dec 16, 2016
- Messages
- 1,128
- Points
- 493

Thank you. KenHappy Birthday from Spain and CONGRALATION for thefull Pics of your Ship.
- Joined
- Dec 16, 2016
- Messages
- 1,128
- Points
- 493

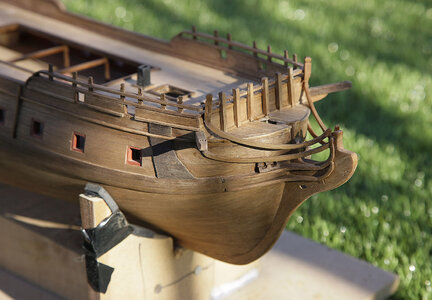
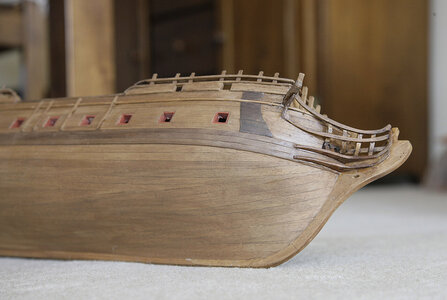
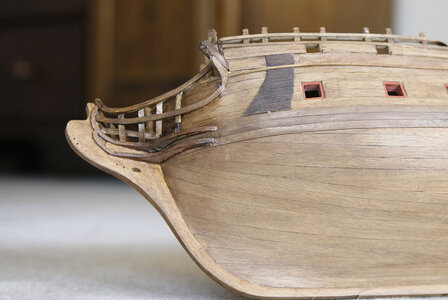
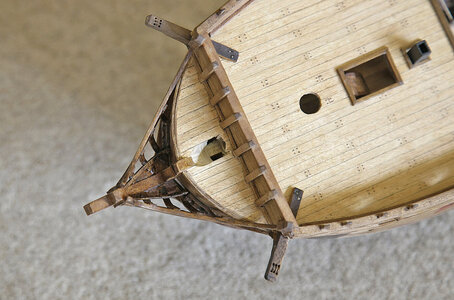
Hello Everyone. Once again thanks for your likes and comments. There’s plenty to show today as I’m still trying to catch up. First I made up and attached the knees at the bow, the plan didn’t show any shape for these only a side view, I ended up making a template that I got to shape then marked out and cut the four knees needed and fitted them. This next area was always going to be the most difficult part of the build for me, the head rails. I have never had to make them up from scratch before and I had no idea where to start, the plan was little help as it was done like a drawing, shaded in so that you couldn’t see them properly and with the sharp curve of the bow the side view on the plan gave no idea of the sizes or shapes required, this would have to be made up freehand just by eye. First I tried to make up the inner rails that they fix on to but not knowing their sizes or shapes this was a fruitless exercise and wasted hours in the attempt so I decided to made up the rails first then I would add the inner rails later. I tried to bend the wood strips into shape having soaked them overnight, the curve needed was quite severe and several broke but I eventually managed to get four sort of ok and glued them into place. I was so stressed out that I’d accepted after several hours work that this was the best that I could do so I settled for the result. On looking at them the next day my heart sank I realised that no way could I accept the result, so I ripped them out and started again. I hit on the idea not to bend them but cut them to shape. I made up templates from thin card and found that I could trim them bit at a time and get an exact shape for each rail. I glued wood together to get enough of a size to fit the template, I then cut them to shape and with a little sanding each rail came out perfect without having to twist or bend to fit and they were done in no time at all. I added the inner rail using thin strip rather than heavier wood so that it bent to the shape of the rails. It turned out better than I ever thought it would, I felt like I’d got out of jail free. The photos show my template method. You’ll also notice other work done, the catheads, side strakes and doublers for the anchor area and hawse holes. I feel as If I'm now really making progress having passed what I thought would be a nightmare for me.
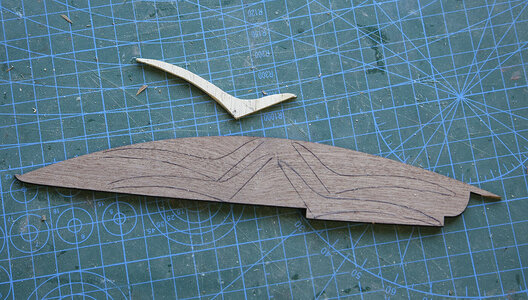
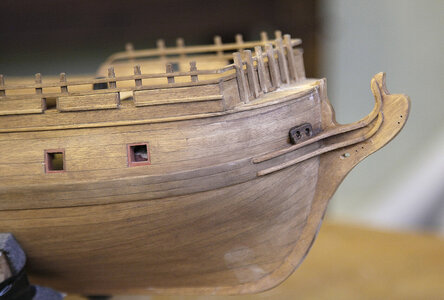
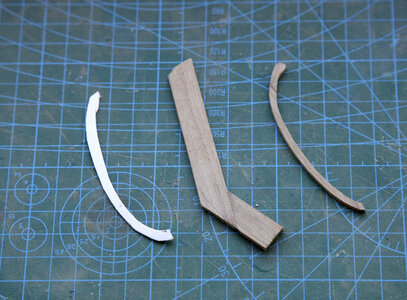


Looks great Ken!
Wonderful Ken! Inspiring persistence.
Yes Kenn, this part of the Bow is very diffecult to make, with it curves ets and eventywesting. The wood quality here is a most, and the depending of the kits that is recommended to me it out of two or 3 piecesWonderful Ken! Inspiring persistence.
Yes, Kenn, this part of the Bow is very difficult to make, with its curves etc and even twisting. The wood quality here is a most, and depending on the kits it is recommended out of two or 3 piecesYes Kenn, this part of the Bow is very diffecult to make, with it curves ets and eventywesting. The wood quality here is a most, and the depending of the kits that is recommended to me it out of two or 3 pieces
I have a piece of metal -got from a Painters shop -which could be curved and twisted to make a model to build after.
peaelcapi
- Joined
- Feb 2, 2018
- Messages
- 126
- Points
- 183

Great job Ken, very nice.
- Joined
- Dec 16, 2016
- Messages
- 1,128
- Points
- 493

Hi Dean, Thanks very much for your complimentLooks great Ken!
- Joined
- Dec 16, 2016
- Messages
- 1,128
- Points
- 493

Hi. That’s very kind of you to respond like thatGreat job Ken, very nice.
- Joined
- Dec 16, 2016
- Messages
- 1,128
- Points
- 493

Hi Paul, Thanks, it’s always nice to get complimentsWonderful Ken! Inspiring persistence.
Coming along beautifully. The color of the planking looks very nice. Cant wait to see it with a good finish. The woodgrain will come alive.Hello All. Again still catching up, this time it's the top rails. Just some pictures to look at, I think that they are self explanitory, once I had worked out this method it went together quite well.
View attachment 217465
View attachment 217466
View attachment 217467
View attachment 217468
View attachment 217469
Hallo @KenHello everyone. I am going to start a build log of HMS Ajax, a 38 gun frigate 1:74 scale by Euromodel.
I am currently doing a log of my Amati Riva build and I’m about a week or two from finishing, so this is just an introduction for now.
Euromodel have a slightly different approach to producing kits, they are halfway between a full on kit and a scratch build, they are renowned for being somewhat difficult to build for the less experienced, they are also thought to be very overpriced for what you get which I would agree with. You get pre cut frames, keel, decks and a stem. There are no CNC or laser cut parts, these are hand cut and you need to finish them off using the plans. For the rest of the wooden parts there is a fair amount of wood but you have to cut them out yourself using the plan. There is no photo etch, the only detailing comes from castings of the rear windows and galleries, anything else that you need you do yourself. You do get all the usual fittings, cannons, blocks, etc all good quality, and some very nice flags. The plans though are superb and are on very good quality paper, there are eleven sheets all at 1:1 scale well drawn and almost art in itself with every possible measurement that you could need or imagine. The problem with the plans for my level of experience is that they were drawn up to be used for scratch building, there is no reference at all to the kit and the two differ. There is no guide as to how you make up parts, not even the hull nor is there any sort of sequence given, just a very detailed two dimensional plan of what looks like the real ship. The instructions are a photo copy of hand typed notes, a sheet and a half of A4 which tell you nothing.
With all these negatives you may well ask why I chose this kit to do. I read a ship modelling book by Keith Jullier and was very impressed with his build of the Royal William, so much so that I bought the kit. I found ongoing logs of builds on MSW. So I started one of my own on that site, in doing so I thankfully receive all the help that I needed to complete mine, I think to a fairly high standard. It is shown here in the completed models section. Although it was very difficult and the kit had serious shortcomings it is to date the most enjoyable model that I have built and the one that has given me the most satisfaction. A few weeks ago I saw this kit of the Ajax on Ebay, remembering the pleasure that the last Euromodel gave me I decided that I was going to buy it, it went for £160 which included the postage, a bargain so a no brainer for me. When it arrived it was perfect, everything still sealed and all untouched so delighted. It appears to be at least thirty years old so I'll keep my fingers crossed as to the condition of the wood, but so far so good.
Ken
View attachment 211080
View attachment 211081
View attachment 211082
View attachment 211083
View attachment 211087
View attachment 211076
View attachment 211077
View attachment 211078
View attachment 211079
we wish you all the BEST and a HAPPY BIRTHDAY
Enjoy your special day

- Joined
- Dec 16, 2016
- Messages
- 1,128
- Points
- 493

Hi, Thanks. I’m with you when you say that I can’t wait to see the woods final finished at the moment I’m finding it hard just keeping the lid on my tin of varnish, but at least I’ve got that to look forward to.Coming along beautifully. The color of the planking looks very nice. Cant wait to see it with a good finish. The woodgrain will come alive.
I'll add in my birthday wishes. Hope you have a great day. I am really enjoying following your build.
- Joined
- Dec 16, 2016
- Messages
- 1,128
- Points
- 493

Hi Paul, As Bob Dylan sang in one of his numbers, ‘ I was older then, I’m younger than that now ‘I'll add in my birthday wishes. Hope you have a great day. I am really enjoying following your build.

