HMS Ajax 38 gun frigate. Euromodel [COMPLETED BUILD]

Great work Ken - I think the ship's wheel is well executed! Thumbsup
Hi Heinrich, Thanks for taking the time to compliment my build, you must be very busy with your BN crowd, they must be like trying to herd cats.
 
Hello Everyone. Again thanks for those likes. Today’s post is bringing my build up to date, this is where I’m at as of this morning, later today I’ll be varnishing everything that I’ve made so far, I can’t wait.

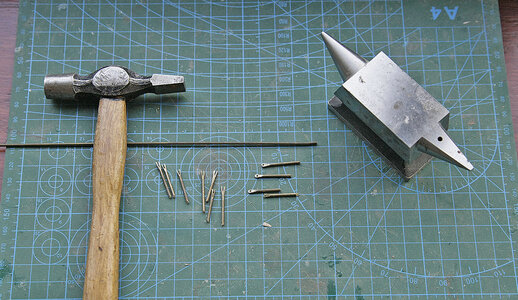
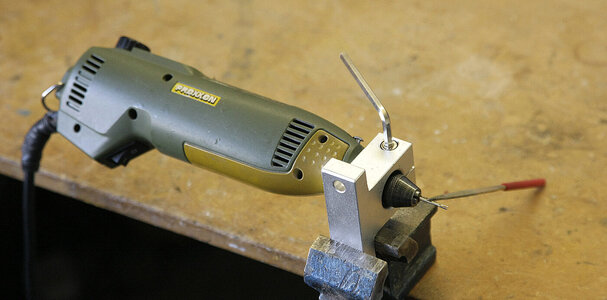
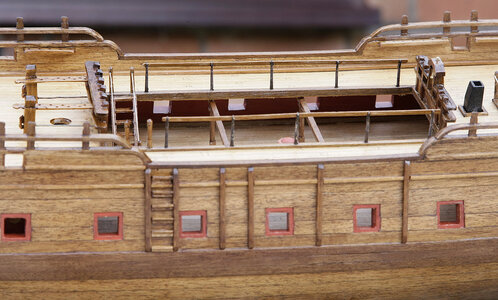
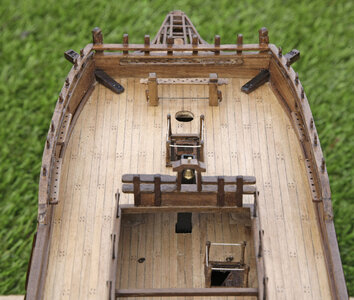
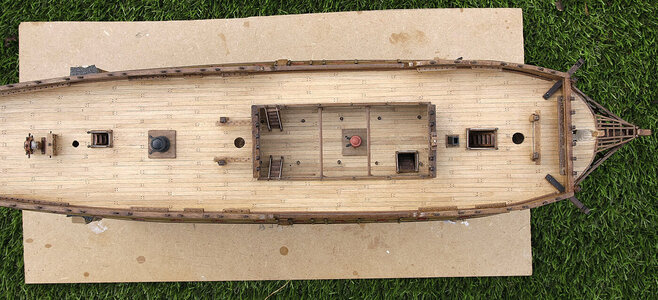
As I mentioned in my last post I thought that it needed some rails along the waist, they’re now done. I used a brazing rod, I flattened the end and either drilled it out for rope or cut a fork into it for a wood rail then filed the appropriate edge. I used my small proxxon drill and spun it to file a waist to give them some shape. I did both types of rail as I didn’t know which would look the best, I chose the wood rail version. I also made up and fitted hand rails for the stairs in wood to match the hatch rails.

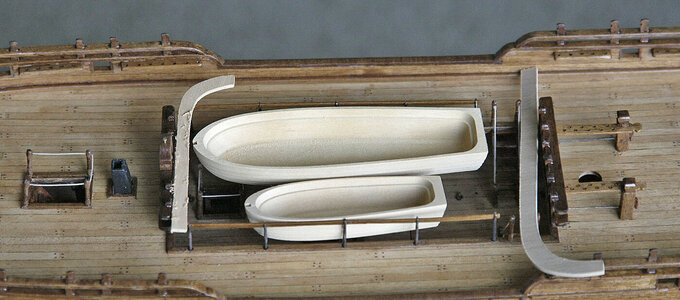
The plans show two ships boats, I think that they would be much too crowded and would dominate the waist, you would not see anything of the lower deck so I’m only going to fit one but hopefully detail well.

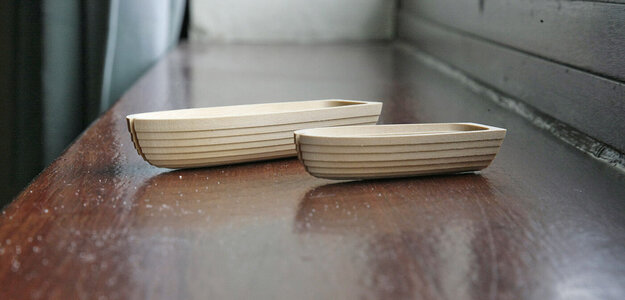
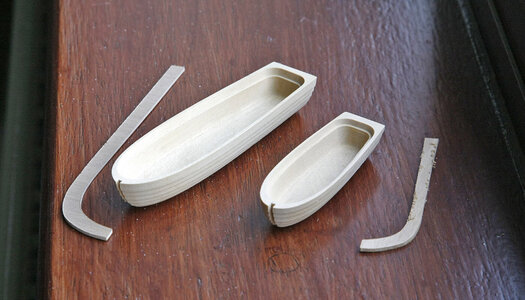
I’ve shown pictures of the boats supplied in the kit, I’m not very happy with them; they look more like dugout canoes. This is another case of just using stock items, these are exactly the same as came with my Royal William and I also didn’t use them for that build either. As you can see they are clinkered but there is no sheer, I doubt that the type of builder that chose to make this ship would ever use these as they could never be made to look right so why include them.

Does anyone have any knowledge or experience of plank on frame boat kits about 120mm long? I’ve made up templates of the boats that came with my Caldercraft Victory, I usually scratch build using these but I imagine that there may be some good stuff out there.

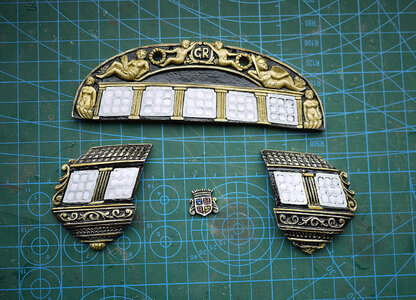
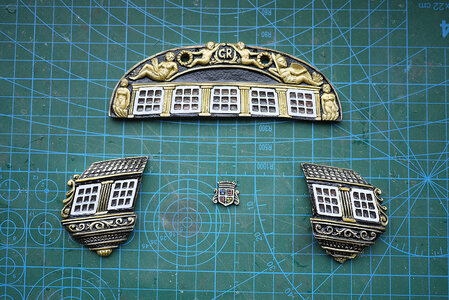
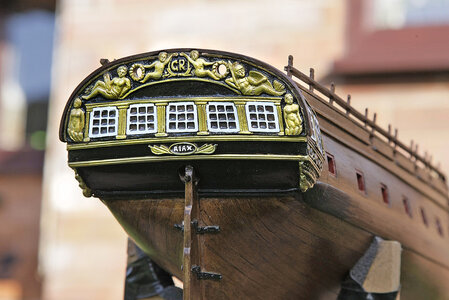
I’ve painted up the transom castings, I’m keeping the colour scheme very simple, black and gold, unlike Paul with his Vasa, my hand eye couldn’t manage his standard but I think that it will look ok. After painting I filled in the recess for the windows with a clear setting glue to give a sort of glass look, when it dried it looked better than just painting them. The casting wasn’t the best that I’ve seen but was acceptable, however the metal used was so brittle that it couldn’t be bent in the slightest. The rear transom on the ship is slightly curved, I tried to shape it but it just snapped in half, I glued it back together ok but had to make the transom on the model flat. I don’t know what metal they used for the casting but why use something that can’t be bent to the shape that’s needed especially an important area like the transom; again didn’t anyone try it out.

Ken

152.jpg

153.jpg

154.jpg

155.jpg

156.jpg

157.jpg

158.jpg

159.jpg
 
Last edited:
Hello Everyone. Again thanks for those likes. Today’s post is bringing my build up to date, this is where I’m at as of this morning, later today I’ll be varnishing everything that I’ve made so far, I can’t wait.

As I mentioned in my last post I thought that it needed some rails along the waist, they’re now done. I used a brazing rod, I flattened the end and either drilled it out for rope or cut a fork into it for a wood rail then filed the appropriate edge. I used my small proxxon drill and spun it to file a waist to give them some shape. I did both types of rail as I didn’t know which would look the best, I chose the wood rail version. I also made up and fitted hand rails for the stairs in wood to match the hatch rails.

The plans show two ships boats, I think that they would be much too crowded and would dominate the waist, you would not see anything of the lower deck so I’m only going to fit one but hopefully detail well.

I’ve shown pictures of the boats supplied in the kit, I’m not very happy with them; they look more like dugout canoes. This is another case of just using stock items, these are exactly the same as came with my Royal William and I also didn’t use them for that build either. As you can see they are clinkered but there is no sheer, I doubt that the type of builder that chose to make this ship would ever use these as they could never be made to look right so why include them.

Does anyone have any knowledge or experience of plank on frame boat kits about 120mm long? I’ve made up templates of the boats that came with my Caldercraft Victory, I usually scratch build using these but I imagine that there may be some good stuff out there.

I’ve painted up the transom castings, I’m keeping the colour scheme very simple, black and gold, unlike Paul with his Vasa, my hand eye couldn’t manage his standard but I think that it will look ok. After painting I filled in the recess for the windows with a clear setting glue to give a sort of glass look, when it dried it looked better than just painting them. The casting wasn’t the best that I’ve seen but was acceptable, however the metal used was so brittle that it couldn’t be bent in the slightest. The rear transom on the ship is slightly curved, I tried to shape it but it just snapped in half, I glued it back together ok but had to make the transom on the model flat. I don’t know what metal they used for the casting but why use something that can’t be bent to the shape that’s needed especially an important area like the transom; again didn’t anyone try it out.

Ken

View attachment 219644

View attachment 219645

View attachment 219646

View attachment 219647

View attachment 219648

View attachment 219649

View attachment 219650

View attachment 219651
Hello Ken - thanks for the mention - but I think the black and gold looks better than painting would. And your tiny windows...fantastic!
 
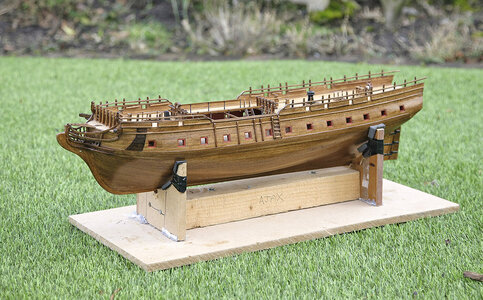
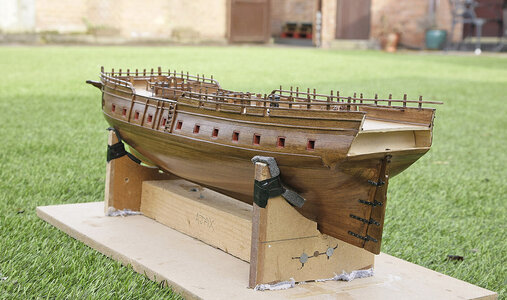
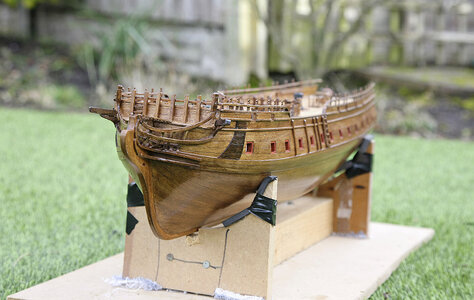
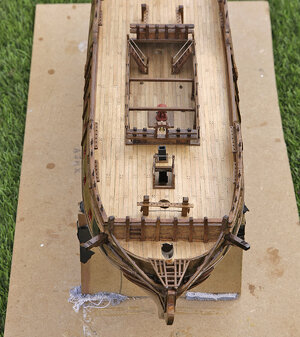
Hello Again. Yesterday I varnished the hull and deck. I used satin poly for the hull, I don’t like using acrylic varnish, it doesn’t flow, and it’s like painting with rice pudding so I again used the poly but to make it matt I mixed in some talcum powder which worked a treat. There was a nice spell of sunshine so took Ajax outside and photographed it

160.jpg

161.jpg

162.jpg

163.jpg

164.jpg

165.jpg
 
Hello All. Thanks again for your very kind comments and likes. Don’t get carried away though, It’s a good workman like build but I honestly don’t think that it’s any better than most of your builds and certainly not as good as some.

Have you ever seen a grown man cry, it’s not a pretty sight. After the elation of seeing my hull come to life with a perfect coat of varnish I am now in deep despair, you’ll understand when you look at the photos.

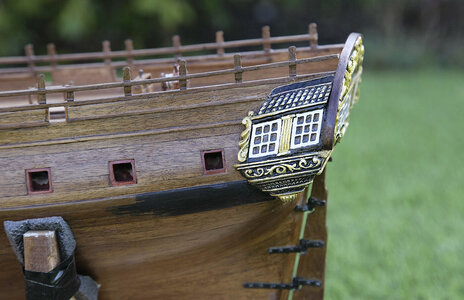
All was going well until I started to fit the stern castings, there are three, I had tried them for fit separately and they seemed to be acceptable. I glued the rear transom in place using epoxy then the side galleries, I fixed these galleries up against the hull as they naturally fitted with their shape. When they had almost set I realized that they sat at the wrong angle. The rear should be much more angled out to sit correctly with the stern casting, about 5mm out, I managed to prise them off before the epoxy had fully hardened. No damage done so after a good cleaning I set about trying to get them to fit correctly, no chance, when set at the correct angle they were about 5mm out both at the top and more at the bottom. These castings are brittle and won’t bend so couldn’t be shaped. I had already snapped the rear one earlier so my only solution was to cut them in half, just below the window to be able to fold it downwards. I then glued them on, there was still a 5mm gap at the top but I thought that I could re-make the roof area to compensate. It was now getting late, I was tired and frustrated so didn’t check things out properly before going to bed, big mistake!

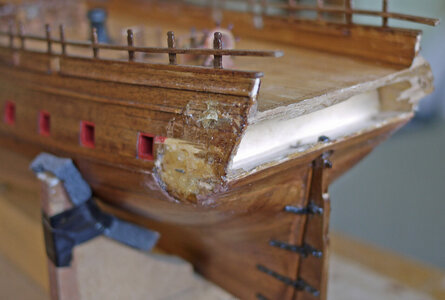
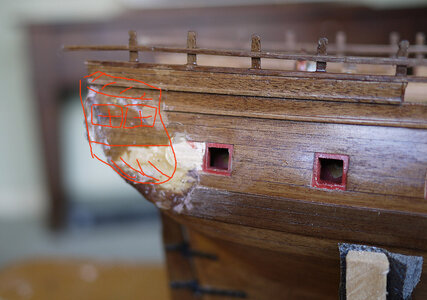
Next morning feeling more relaxed I looked at the model, something just didn’t look right, the way that the to be added rails for the rear transom wouldn’t meet the side rails, I checked the plan carefully and saw that whilst building up the stern I had omitted a panel, about 8mm deep just below the windows across its full width, this would have raise the casting to its correct height. There was nothing else to do but rip the castings off again, only this time the epoxy had hardened fully so in doing so it pulled a large area of the rear hull away. I now have to make a repair, the issue will be matching the already planked area, not only that but I had used a couple of different stains to get the colour that I wanted. The painted finish on the castings is shot and will need re painting and I still have the problem of getting them to fit properly as they wont as they are. The additional panel under the windows needs to be made to blend in without looking like an add on. A challenge, so my next post will be the Phoenix risen from the ashes.
One of the pictures shows where the side casting will need to go.

166.jpg167.jpg
 
Hello Again. Yesterday I varnished the hull and deck. I used satin poly for the hull, I don’t like using acrylic varnish, it doesn’t flow, and it’s like painting with rice pudding so I again used the poly but to make it matt I mixed in some talcum powder which worked a treat. There was a nice spell of sunshine so took Ajax outside and photographed it

View attachment 219933

View attachment 219934

View attachment 219935

View attachment 219936

View attachment 219937

View attachment 219938
Hi Ken I really like the finish on your model and was wondering how it was applied brush or spray also what's the ratio of the poly to talcum powder. I have been applying the poly as the build is progressing your method looks a lot better.
Thanks Tony
 
Hi Ken I really like the finish on your model and was wondering how it was applied brush or spray also what's the ratio of the poly to talcum powder. I have been applying the poly as the build is progressing your method looks a lot better.
Thanks Tony
Hi Tony. Thanks for liking my finish. It is satin poly just brushed on. However I do prepare the surface carefully before applying, I use a couple of coats of cellulose sanding sealer first, each coat sanded smooth, this seals all the grain, hardens the surface and gets rid of those fine hairs from wood. I use sealer on all the wooden parts, it dries ready to sand in about fifteen minutes. To use the poly as matt you’ll need to experiment for the finish that you want, I put in enough talc so that it’s a thin creamy consistency, it still brushes nicely and the finish is perfect, not 100% dull matt but it seems to leave a better wood finish, you can vary it to your taste unlike just buying matt.
 
Last edited:
What can I say Ken, .... great! Fast, accurate, experienced, attentive. Your way of building is what I would like to achieve for me. Once again congratulations.
 
Hi, RichardT has asked me if it’s ok for him to advertise an Ajax kit on my log. Just in case you were wondering I’ve said it’s ok by me.
 
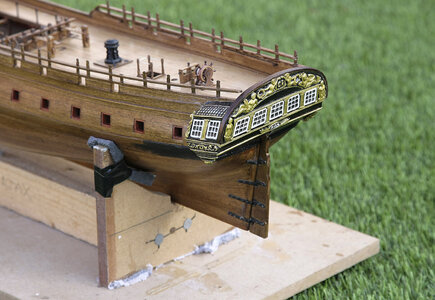
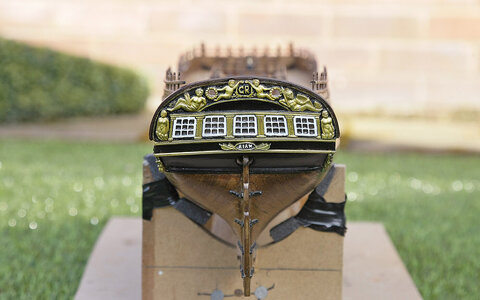
Hello Everyone. This is an update on my repair. All was not as it appeared, I told you that I had omitted a panel below the rear casting when in fact this was not the case, I now realise that when I’d built up that section I had allowed for it, meaning that it hadn’t been necessary to have ripped off the castings! I was glad that I did because fitted according to the plan they somehow didn’t look right, in an aesthetic way, the top of the rear transom was about 8mm below the top of the sidewalls and the view from behind was of the end of the sidewalls. As I wasn’t going for a historically authentic build I was now free to use builders licence and create my own design stern and build it as I thought would look more aesthetic. I raised the transom by about 8mm so that its top aligned with the top of the side rails by inserting the extra rear panel that I thought that I had missed. I repaired the damaged wales and planking then fitted the castings how I thought looked best. To get the shape I wanted I used a fair amount of filler which I can later shape to what I have in mind. I’ve shown pictures of my progress, I’m a little ahead of them and I'm delighted with the result. As you can see it needs stripping and repainting, at the moment I’m trying to pick out all the glue that I’d used to simulate the glass.

172.jpg

173.jpg

174.jpg

175.jpg
 
Ken,
Thank you for allowing me to post this message. I appreciate your consideration.

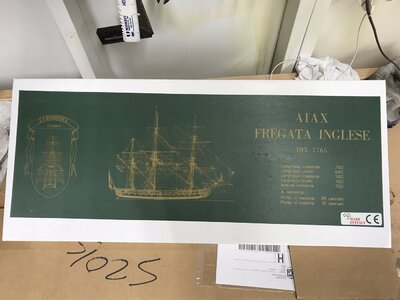
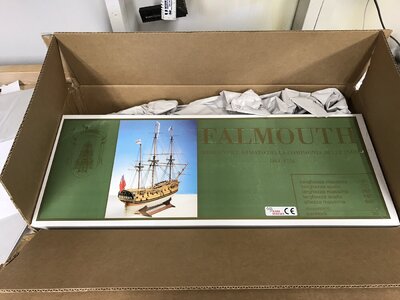
I have had these a few years. My intention to build them has changed due to increasing arthritis which is restricting me to smaller projects.

These are new, in sealed boxes and untouched.

Looking at the Euromodel site, the Ajax is listed at 652 Euro ($777 U.S. Dollars) The Mordaunt is listed at 721 Euros ( $859 U.S. dollars)

I am targeting $388 U.S. for the Ajax, plus shipping (or best offer)
For the Mordaunt $429 plus shipping.

Please PM private reply
I will hold on to any reasonable offer and select the earliest and highest reasonable offer.

Thank you all for your interest
Richard

ajax.jpegFalmouth.jpeg
 
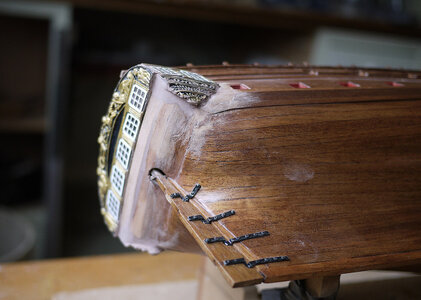
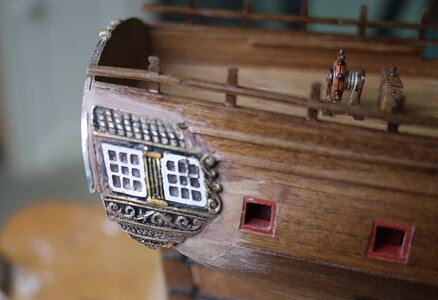
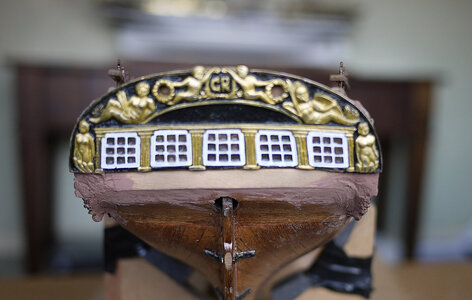
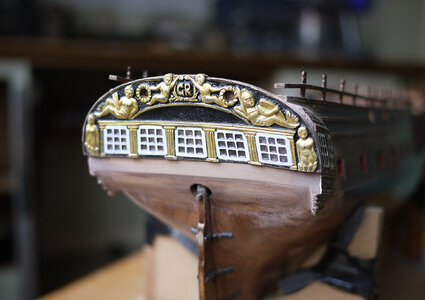
Hello Again. The refit is just about complete and I'm delighted with the outcome. I managed to pick out all the glue from the windows and clean up the castings as well as re profiling the filler that I'd used. I repainted, then added the clear glue to the windows, the only problem was that I had to paint with the galleries attached rather than laid flat on the bench which made it awkward, rather like wrestling with a small dog. I've yet to complete the decorations, I've some small castings to add but almost there. I've been told that the castings when new do bend to mould to the hulls shape, my issue had been caused by the age of the kit, over 30 years old and the metal had become brittle with time so wouldn't bend to shape. New kits are now so expensive that I'll have to start saving now for my next one to avoid similar problems.

168.jpg

169.jpg

170.jpg

171.jpg
 
Hello Again. The refit is just about complete and I'm delighted with the outcome. I managed to pick out all the glue from the windows and clean up the castings as well as re profiling the filler that I'd used. I repainted, then added the clear glue to the windows, the only problem was that I had to paint with the galleries attached rather than laid flat on the bench which made it awkward, rather like wrestling with a small dog. I've yet to complete the decorations, I've some small castings to add but almost there. I've been told that the castings when new do bend to mould to the hulls shape, my issue had been caused by the age of the kit, over 30 years old and the metal had become brittle with time so wouldn't bend to shape. New kits are now so expensive that I'll have to start saving now for my next one to avoid similar problems.

View attachment 221166

View attachment 221167

View attachment 221168

View attachment 221169
Beautiful work Ken.
 
Back
Top