-

Win a Free Custom Engraved Brass Coin!!!
As a way to introduce our brass coins to the community, we will raffle off a free coin during the month of August. Follow link ABOVE for instructions for entering.
-

PRE-ORDER SHIPS IN SCALE TODAY!
The beloved Ships in Scale Magazine is back and charting a new course for 2026!
Discover new skills, new techniques, and new inspirations in every issue.
NOTE THAT OUR FIRST ISSUE WILL BE JAN/FEB 2026
- Home
- Forums
- Ships of Scale Group Builds and Projects
- HMS Alert 1777 1:48 PoF Group Build
- HMS Alert 1777 1:48 Group Build Logs
You are using an out of date browser. It may not display this or other websites correctly.
You should upgrade or use an alternative browser.
You should upgrade or use an alternative browser.
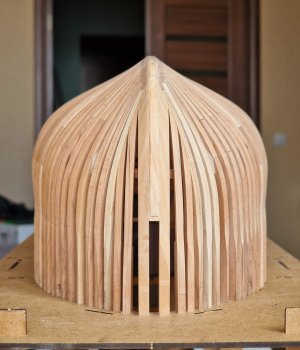
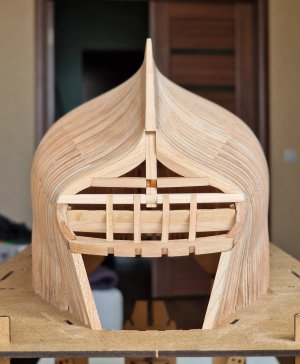
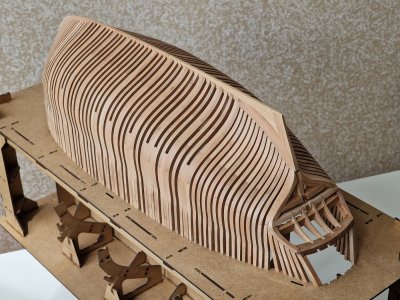
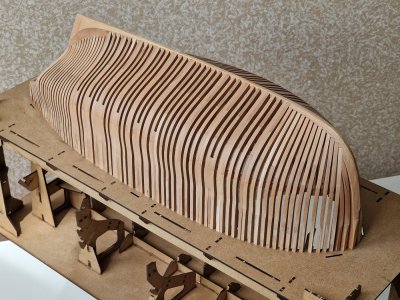
HMS Alert [1777] 1:48 POF by serikoff. (Two hulls: skeleton and fully rigged)
Congratulations, Sergey! Beautiful!
Wonderful work with great explanations and really good photos. It’s a pleasure to follow your excellent progress.
Thank you very much, there's more to comeCongratulations, Sergey! Beautiful!
Thanks for the kind words. It will be even more interesting later, as soon (I hope) the second l hull will enter the game.Wonderful work with great explanations and really good photos. It’s a pleasure to follow your excellent progress.

- Joined
- Oct 23, 2018
- Messages
- 881
- Points
- 403

Really interesting method, Sergey. I hoped that you changed the design of the after deadwood. This heavy piece of wood is the reason why I did not bought the kit.
Very nice and smooth sanded lines, Sergey.... continuation of the previous post!
2/2
View attachment 522506
View attachment 522507
View attachment 522508
View attachment 522509
View attachment 522510
View attachment 522511
View attachment 522512
View attachment 522513
View attachment 522514
View attachment 522515
View attachment 522516
View attachment 522517
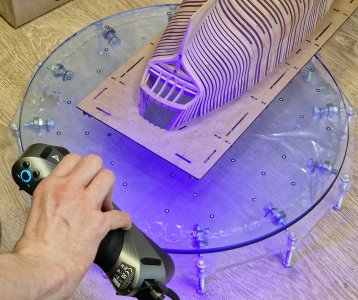
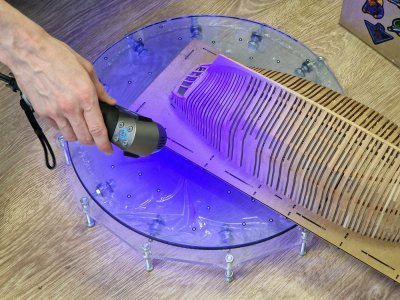
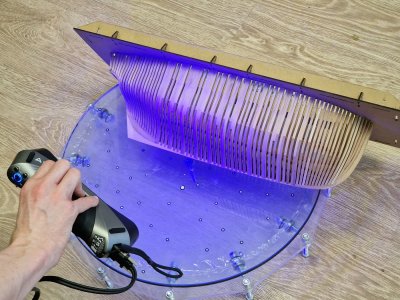
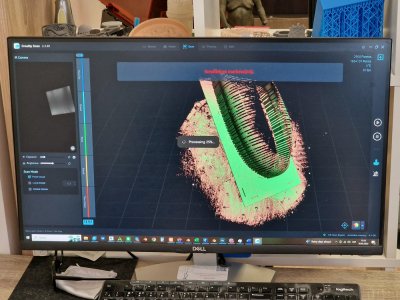
I'm taking him for a scan tomorrow!

Regards, Peter
I thought about it too, but it's hard to change anything at this stage. I brought the profile closer to the real one, but there is a zone that is not quite like in anatomy, but it's hard to imagine how to make it from this version into a more correct one. What would you change in this zone and how? (the translator sometimes writes something from himself, difficulties in translation)Really interesting method, Sergey. I hoped that you changed the design of the after deadwood. This heavy piece of wood is the reason why I did not bought the kit.
@AnobiumPunctatum
It is very interesting to see your construction from scratch. I always welcome construction from drawings and anatomy. But I do not have enough attention to make all the parts from scratch. The kit still speeds up the process, although I add inaccuracies, but this is a problem with all kits.
Last edited:
Thank you. This is the moment when the photos fully convey what is in fact.Very nice and smooth sanded lines, Sergey.
Regards, Peter
Thank you for your kind words. Well, in fact, there won't be much waste, but it allows you to position the hull correctly and since the stern is higher, you can't do it any other way in terms of parallelism of the frames.This sure looks like a great way to have access for accurately lining off the hull and then planking as well as marking out the ports, etc. The only downside seems to be a bit of a waste of the extra wood
Allan
This is not my equipment. I scanned at a company that does this, including 3D printing.That's a very clever rotating table. Is that your design, or did it come with the scanner?
4.4 Knees.
Well, let's continue... while I wait for the scan file, I decided to make knees.
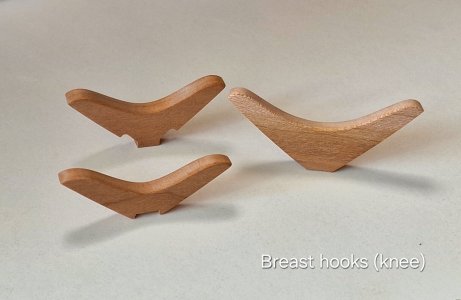
Let's just say... It is difficult to give any recommendations in construction, especially in their geometry. Here it is better to study what knees are, and how they looked, because in the set they are not all of the correct shape. And to achieve the correct geometry, you need to try on 100500 times after small corrections of the form, and only after that everything will fall into place.
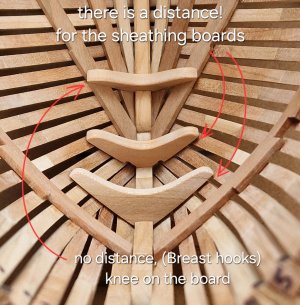
But here's one clue for you. Knees were placed after the inner plating with boards! That is, they were NOT put directly on the frames! Therefore, if we make a hull without boards inside, then there should be a distance between the knee and frames in the thickness of the board! And if the knee falls on the board, then naturally, this distance should not be.
So far, I have installed them dry, but did not glue them. Since I have not yet calculated all the positions of the lower deck parts.
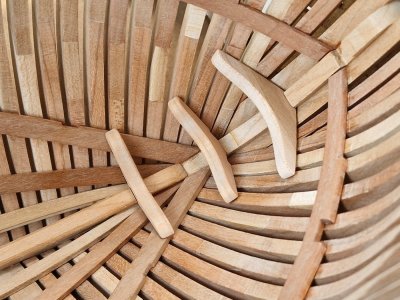
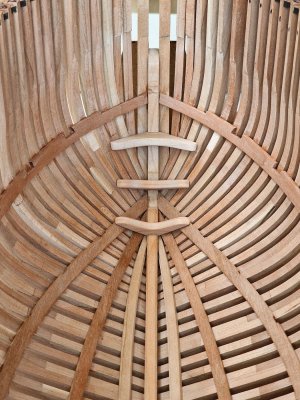
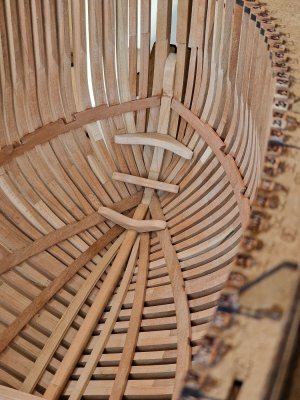
And if with the front knees everything is plus or minus clear, then the geometry of the back (the one from the kit) just makes you think... what is it?
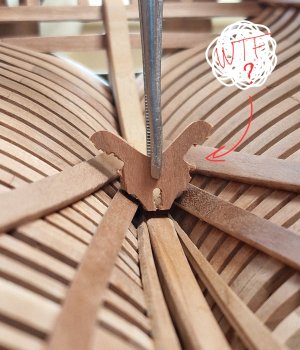
What side should it fit there? Well ok... I removed everything superfluous and posted it as it logically should have been.
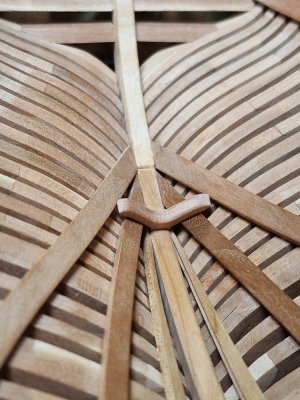
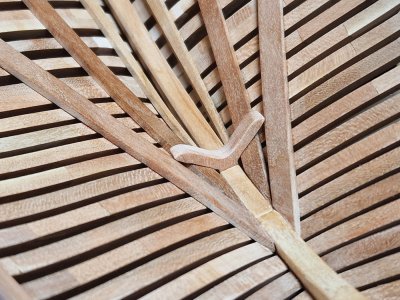
*And now, a little lyrical digression...
Before installing the lower deck, I need to do a bolt simulation. But! Before imitating bolts, I need to understand how it will all look like oil... And for this you need samples... And for this you need to make probes! I want to file imitation frames from the remains of the material in order to maximize the appearance of the case on the probe and cover it with different oils, different degrees of dilution and different amounts of layer... to understand which will look better. And this takes time, as the layers need time to dry out... And I did not have a very good time, since I can prepare the details of the decks in a couple of days, and it takes weeks to wait for the oil to dry. And in order not to waste time, I am thinking of continuing to study Victory. It's just that in the near future with the second case (the one that will be after scanning), too, everything is not so fast. Therefore, most likely, work on Victory will be more logical so as not to waste time. In short... dilemma

Well, let's continue... while I wait for the scan file, I decided to make knees.

Let's just say... It is difficult to give any recommendations in construction, especially in their geometry. Here it is better to study what knees are, and how they looked, because in the set they are not all of the correct shape. And to achieve the correct geometry, you need to try on 100500 times after small corrections of the form, and only after that everything will fall into place.
But here's one clue for you. Knees were placed after the inner plating with boards! That is, they were NOT put directly on the frames! Therefore, if we make a hull without boards inside, then there should be a distance between the knee and frames in the thickness of the board! And if the knee falls on the board, then naturally, this distance should not be.

So far, I have installed them dry, but did not glue them. Since I have not yet calculated all the positions of the lower deck parts.


And if with the front knees everything is plus or minus clear, then the geometry of the back (the one from the kit) just makes you think... what is it?

What side should it fit there? Well ok... I removed everything superfluous and posted it as it logically should have been.


*And now, a little lyrical digression...
Before installing the lower deck, I need to do a bolt simulation. But! Before imitating bolts, I need to understand how it will all look like oil... And for this you need samples... And for this you need to make probes! I want to file imitation frames from the remains of the material in order to maximize the appearance of the case on the probe and cover it with different oils, different degrees of dilution and different amounts of layer... to understand which will look better. And this takes time, as the layers need time to dry out... And I did not have a very good time, since I can prepare the details of the decks in a couple of days, and it takes weeks to wait for the oil to dry. And in order not to waste time, I am thinking of continuing to study Victory. It's just that in the near future with the second case (the one that will be after scanning), too, everything is not so fast. Therefore, most likely, work on Victory will be more logical so as not to waste time. In short... dilemma
Last edited:
4.5 Lower deck.
Today I made probes and covered with 4 types of oil, also in different dilutions... The results will be later, it is necessary for this time, but for now I began to prepare the details of the lower deck.
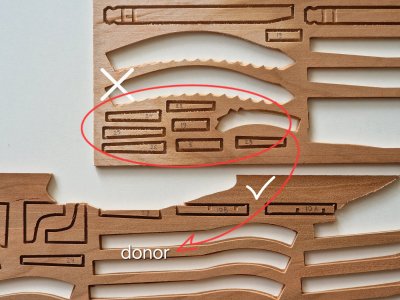
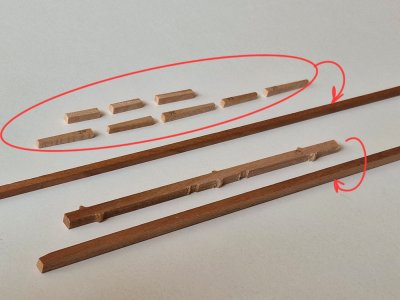
Some details were cut into the area with light wood and also with an unpleasant texture of the drawing, so I decided to redo them. They are not difficult, because it took a little time.
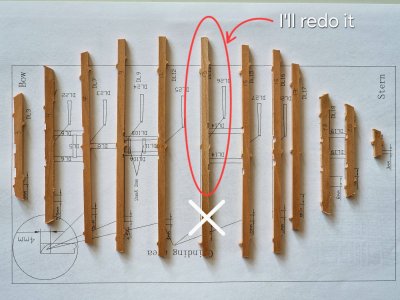
Also, remade one (medium) beams for the same reason.
And here I found the first significant discrepancy in the instruction manual.
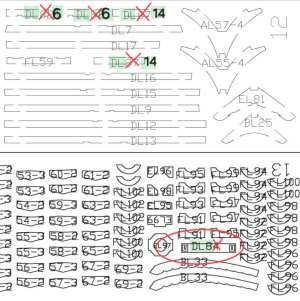
Who will collect a set from AliExpress then I will save you a lot of time searching for non-existent details. Instead of the necessary details DL 6, 14 and 8, other numbers are marked in the instructions. The image above indicates and visually shows typos in the instructions.
So that I had to waste time and deal with this moment. Well, in total, there are 31 parts on the lower deck (excluding boards and stairs).
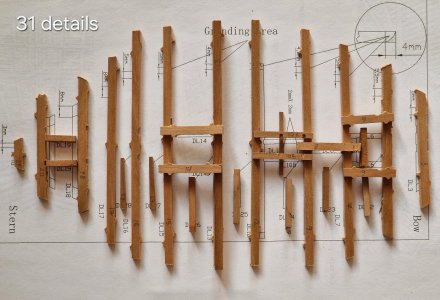
At the moment, I have eliminated all the holders and now all this beauty needs to be reserved for the hull, and naturally for each other.
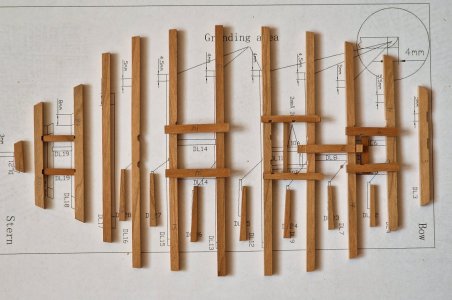
One point that before installing the lower deck - you need to make an imitation of bolts. And I will just look at the probes to see if I like everything, how this imitation looks. Plus, I really hope that everything will sit well and nothing will have to be redone, well, experiments with oil will be effective...
Today I made probes and covered with 4 types of oil, also in different dilutions... The results will be later, it is necessary for this time, but for now I began to prepare the details of the lower deck.
Some details were cut into the area with light wood and also with an unpleasant texture of the drawing, so I decided to redo them. They are not difficult, because it took a little time.

Also, remade one (medium) beams for the same reason.


And here I found the first significant discrepancy in the instruction manual.

Who will collect a set from AliExpress then I will save you a lot of time searching for non-existent details. Instead of the necessary details DL 6, 14 and 8, other numbers are marked in the instructions. The image above indicates and visually shows typos in the instructions.
So that I had to waste time and deal with this moment. Well, in total, there are 31 parts on the lower deck (excluding boards and stairs).

At the moment, I have eliminated all the holders and now all this beauty needs to be reserved for the hull, and naturally for each other.

One point that before installing the lower deck - you need to make an imitation of bolts. And I will just look at the probes to see if I like everything, how this imitation looks. Plus, I really hope that everything will sit well and nothing will have to be redone, well, experiments with oil will be effective...
Last edited:
Hello, Günter!Hello Serikoff,
that's quite a belly lady. It's amazing how round the model is. Great shots.
Best regards
Günter
The beams are more schematic, but in real life there is more distance between them, but yes, there is still some roundness
4.6 Imitation bolts and nails.
We continue to consult the anatomy and do as much as possible as in a book. Bolts fasten different parts of the case and you need to transfer their positions correctly. If you are guided by the image from below, the process is not difficult.
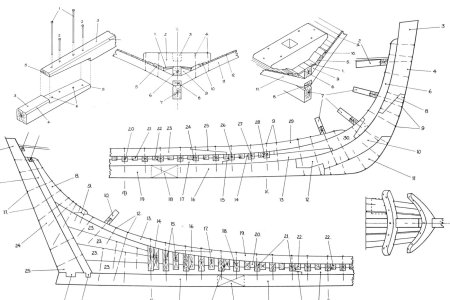
First of all, you need to make an imitation of bolts on the keelson and false keel. To do this, I used a slightly larger pen than for boards. Here are both for comparison. And visually it is clear that the cylindrical puncture is of different diameters.
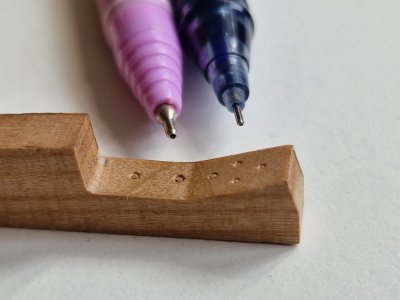
Checked what it would look like and...
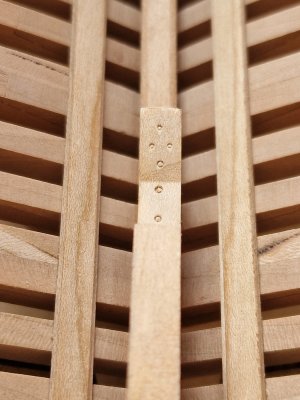
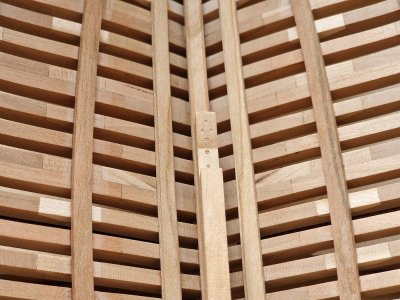
... made simulated bolts on the keelon, false keels and on the mast stop.
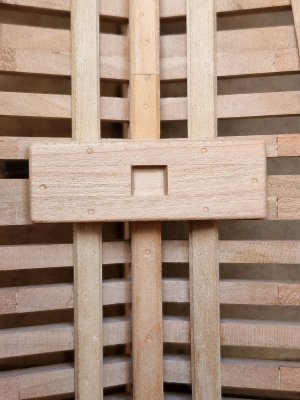
*By the way, the top photo shows the difference between a large and a small cylinder.
It was all done with a pink pen, where the diameter is larger). And now, on all boards you need to make an imitation with a blue handle (where the cylinder diameter is smaller).
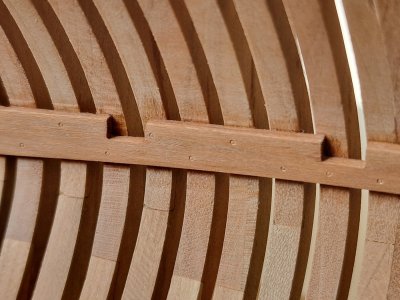
As you were able to notice, the nails beat one nail for each frame in a checkerboard pattern (either higher or lower). I redrawn the image a little from the anatomy and from this I already did all the imitation of nails inside the case.
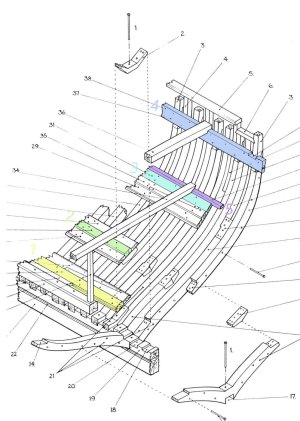
To make it easier to visualize, I marked each board from the set with color in the image in anatomy.
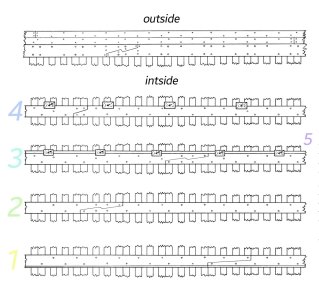
And I also visualized the places where the boards are connected. It is clear from the numbers that the 1st board is the bottom and the higher the number, this board is higher.
The 4th board, which holds the upper deck beams, has the simplest locks. Firstly, they were already so in the set (you can't redo it). And secondly, this belt was reinforced from the outside with Main wale (by the way, it is depicted in the diagram above (outside). And plus - this belt was very strongly strengthened by the knees, both horizontal and vertical. Therefore, there was more than enough rigidity here. And most importantly, this belt will be practically invisible due to the knees.
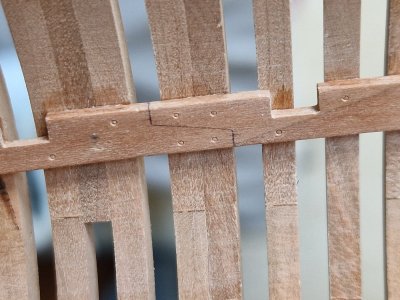
On the 1st belt, (at the lowest) - there was also not a difficult connection, but longer (this is in anatomy).
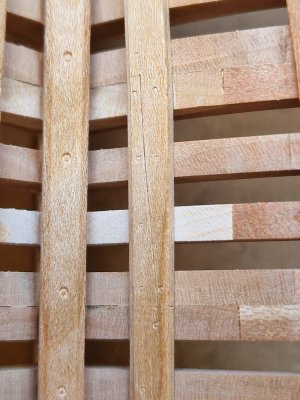
On the 2nd belt (not visible on anatomy), but logically there should have been a complex lock. Since this and the 3rd belt are very powerful and had to carry a heavy load. For this, complex castles were placed in such places.
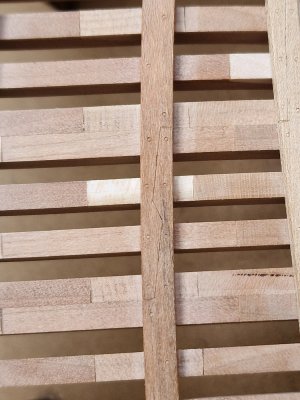
On the third belt, similarly the same lock, for the same reasons.
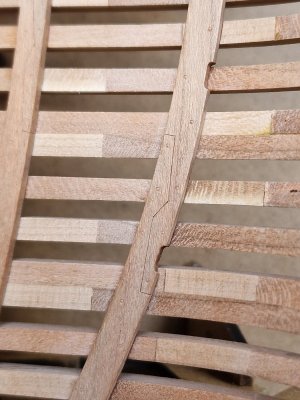
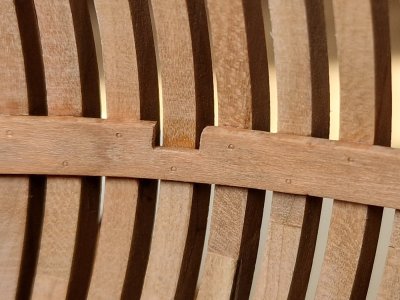
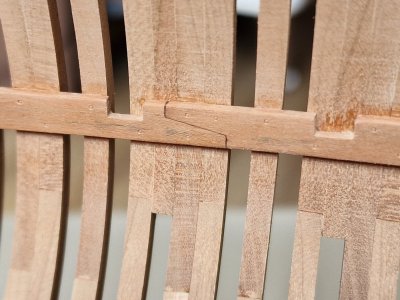
This is as you understand - an imitation of a connection (lock). It is done simply - the geometry of the lock is drawn, then a groove is pressed through with a straight scalpel. I do not recommend cutting (namely, pushing). Because when cutting - you can accidentally cut further than planned and also crooked.
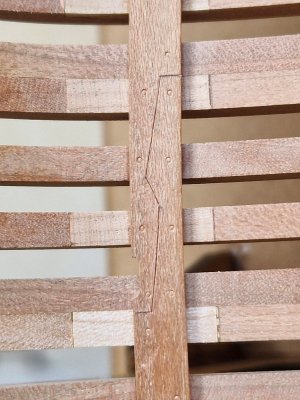
As for the connections, they all need to be placed in different places. This is necessary so that the case is equally strong everywhere and does not break at the joints in one column.
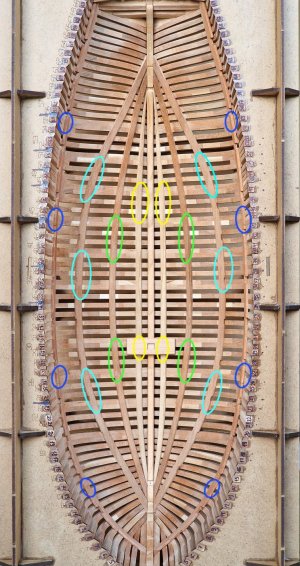
So the imitation nails on the inside boards are complete...
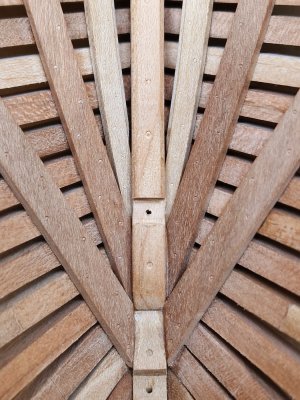
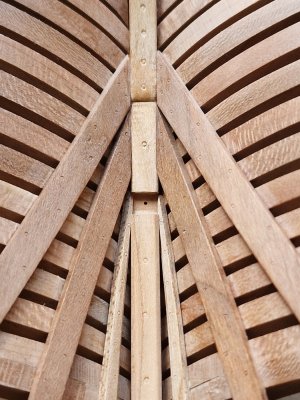
... and it took not so little time and effort (I'm already silent about the time that I could spend on real nagel and bolts...)
And my doubts crept in, but is it necessary to do imitation of bolts on the joints of the frames... according to a modest estimate, there should be more than 3,000 punctures with a pen... I will gather my thoughts and strength and I must decide... otherwise, you won't stop at half the road!
*Now everything is practically invisible, especially from a distance, but... this is before the oil coating. After the oil, everything will be clearly visible and imitation of bolts and nails and locks (already checked on the probes).

We continue to consult the anatomy and do as much as possible as in a book. Bolts fasten different parts of the case and you need to transfer their positions correctly. If you are guided by the image from below, the process is not difficult.

First of all, you need to make an imitation of bolts on the keelson and false keel. To do this, I used a slightly larger pen than for boards. Here are both for comparison. And visually it is clear that the cylindrical puncture is of different diameters.

Checked what it would look like and...


... made simulated bolts on the keelon, false keels and on the mast stop.

*By the way, the top photo shows the difference between a large and a small cylinder.
It was all done with a pink pen, where the diameter is larger). And now, on all boards you need to make an imitation with a blue handle (where the cylinder diameter is smaller).


As you were able to notice, the nails beat one nail for each frame in a checkerboard pattern (either higher or lower). I redrawn the image a little from the anatomy and from this I already did all the imitation of nails inside the case.

To make it easier to visualize, I marked each board from the set with color in the image in anatomy.

And I also visualized the places where the boards are connected. It is clear from the numbers that the 1st board is the bottom and the higher the number, this board is higher.
The 4th board, which holds the upper deck beams, has the simplest locks. Firstly, they were already so in the set (you can't redo it). And secondly, this belt was reinforced from the outside with Main wale (by the way, it is depicted in the diagram above (outside). And plus - this belt was very strongly strengthened by the knees, both horizontal and vertical. Therefore, there was more than enough rigidity here. And most importantly, this belt will be practically invisible due to the knees.


On the 1st belt, (at the lowest) - there was also not a difficult connection, but longer (this is in anatomy).

On the 2nd belt (not visible on anatomy), but logically there should have been a complex lock. Since this and the 3rd belt are very powerful and had to carry a heavy load. For this, complex castles were placed in such places.

On the third belt, similarly the same lock, for the same reasons.

This is as you understand - an imitation of a connection (lock). It is done simply - the geometry of the lock is drawn, then a groove is pressed through with a straight scalpel. I do not recommend cutting (namely, pushing). Because when cutting - you can accidentally cut further than planned and also crooked.

As for the connections, they all need to be placed in different places. This is necessary so that the case is equally strong everywhere and does not break at the joints in one column.

So the imitation nails on the inside boards are complete...


... and it took not so little time and effort (I'm already silent about the time that I could spend on real nagel and bolts...)
And my doubts crept in, but is it necessary to do imitation of bolts on the joints of the frames... according to a modest estimate, there should be more than 3,000 punctures with a pen... I will gather my thoughts and strength and I must decide... otherwise, you won't stop at half the road!
*Now everything is practically invisible, especially from a distance, but... this is before the oil coating. After the oil, everything will be clearly visible and imitation of bolts and nails and locks (already checked on the probes).

Last edited:
Kurt Konrath
Kurt Konrath
Your work with the simulated bolts in wood look fantastic.
I like your frame work and the structure of the hull.
I like your frame work and the structure of the hull.
Thank you very much. Looking at the result, I want to imitate the bolts on the frames... but when I remember that there are more than 3000 of them, my motivation drops. But your words add motivation.Your work with the simulated bolts in wood look fantastic.
I like your frame work and the structure of the hull.


