brilliantHello dear friends
I started milling and sanding pieces of ebony wood in order to make a desk and a chair for the officers' room.
At first I sanded and smoothed the pieces, then I marked with a pencil the areas which I later milled using the Mf70.
The intention is to build a desk with a 4-drawer cabinet and a socket/
longitudinal space where the officers will place maps or books.
I milled the area of the drawers to a depth of a 1.2 millimeter approximately, into which the front part of the drawer from pear or walnut wood will be inserted.
I milled the table and top panel of the cabinet in a way that creates a stepped cornice.
I'm in the middle of the process, I'm still supposed to prepare legs for the table as well as a matching chair.
For now, enjoy the process and the intermediate result.
View attachment 373559View attachment 373560View attachment 373561View attachment 373562View attachment 373563View attachment 373564View attachment 373565
-

Win a Free Custom Engraved Brass Coin!!!
As a way to introduce our brass coins to the community, we will raffle off a free coin during the month of August. Follow link ABOVE for instructions for entering.
-

PRE-ORDER SHIPS IN SCALE TODAY!
The beloved Ships in Scale Magazine is back and charting a new course for 2026!
Discover new skills, new techniques, and new inspirations in every issue.
NOTE THAT OUR FIRST ISSUE WILL BE JAN/FEB 2026
- Home
- Forums
- Ships of Scale Group Builds and Projects
- HMS Alert 1777 1:48 PoF Group Build
- HMS Alert 1777 1:48 Group Build Logs
You are using an out of date browser. It may not display this or other websites correctly.
You should upgrade or use an alternative browser.
You should upgrade or use an alternative browser.
HMS ALERT 1777 cutter POF by shota70 [COMPLETED BUILD]
My dear friend, this is great progress and I can only agree with Christian. I would be very happy to meet you again next year in Augsburg, with or without a model.
- Joined
- Apr 20, 2020
- Messages
- 6,242
- Points
- 738

Dear friends
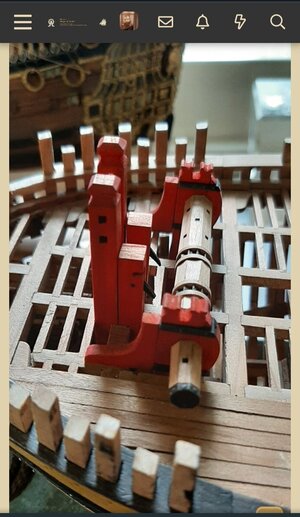
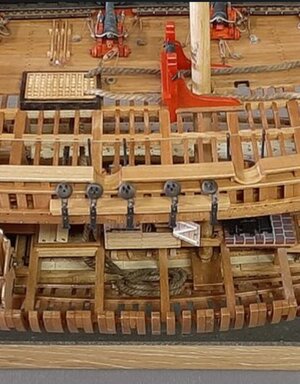
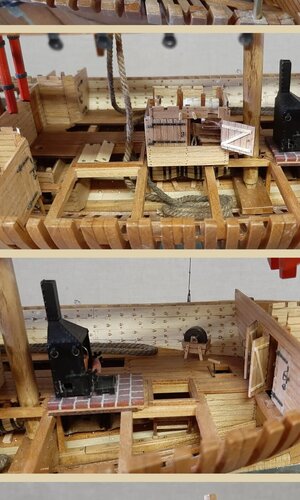
I need your help in understanding the rope that moves from the winch to the anchors on one side and on the other side to the belly of the ship.
I saw in Maarten's blog that one end goes down to the lowest deck and is placed in a snail shape and the other end is placed along the middle deck (The plan lacks a detailed reference to where the ends of the rope are located).
I would appreciate it if Maarten or any other member could explain the installation route of the rope.
In fact, we are talking about two parallel ropes for each anchor and which go down from the winch to two holes to the belly of the ship, where one is placed in the middle deck and the other in the lower one in the form of a snail?
Any explanation, photos and drawings are most welcome.
I ask this to plan when to lay the rope as the later it may be more complex.
Thank you


- Joined
- Apr 20, 2020
- Messages
- 6,242
- Points
- 738

thank you very much my dearest friendbrilliant
- Joined
- Apr 20, 2020
- Messages
- 6,242
- Points
- 738

Thank you very much my dear friend,My dear friend, this is great progress and I can only agree with Christian. I would be very happy to meet you again next year in Augsburg, with or without a model.
your guidance and support always come at the right moment.
I would be very happy to meet you and all the friends who come to Augsburg
- Joined
- Apr 20, 2020
- Messages
- 6,242
- Points
- 738

Thank you very much dear friend to the warm heavens!Beautiful Shota, too bad that by completing more and more of the deck structure so many fine details become more or less obscured.
I'm considering incorporating LED lighting to highlight the details and that's also why I made the openings in the side of the ship
- Joined
- Sep 3, 2021
- Messages
- 5,197
- Points
- 738

And now we're talking business, good for you Shota, looking forward to some lights in the coming updates!I'm considering incorporating LED lighting to highlight the details

- Joined
- Apr 20, 2020
- Messages
- 6,242
- Points
- 738

Hello dear friends
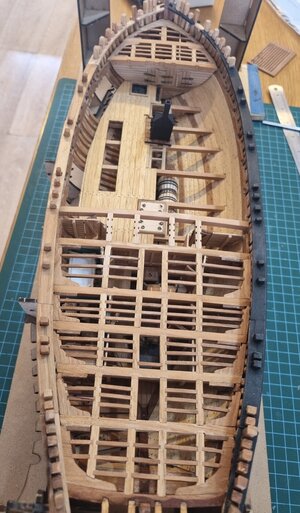
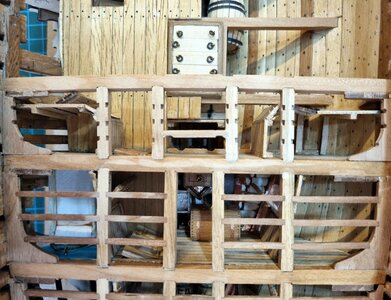
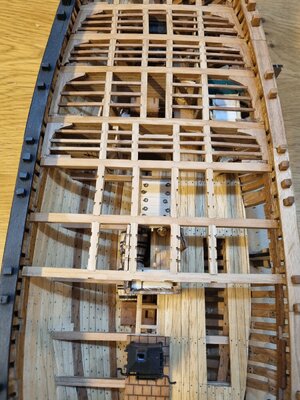
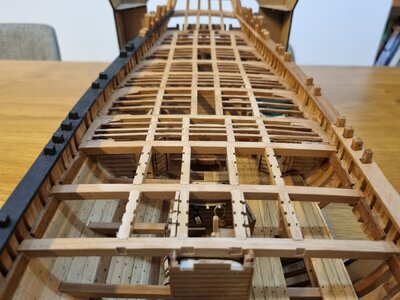
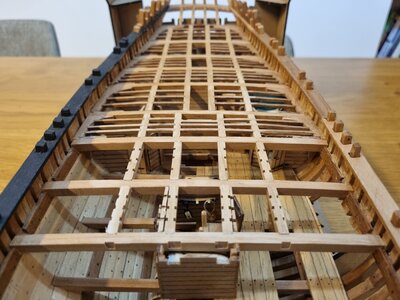
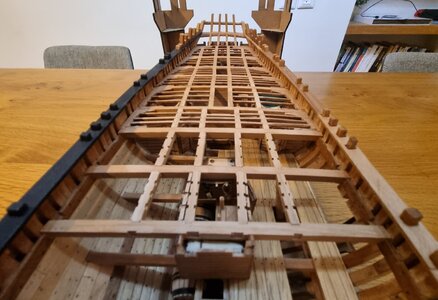
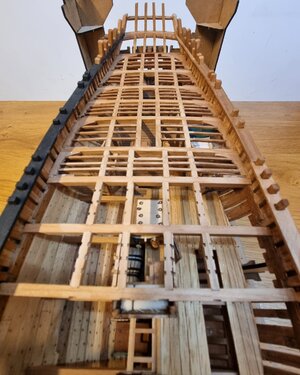
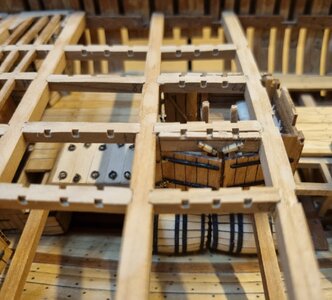
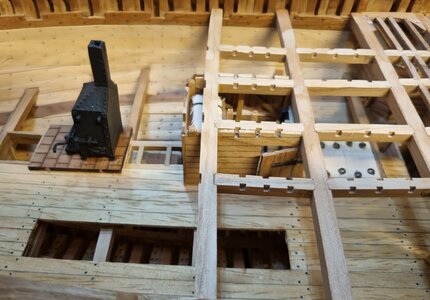
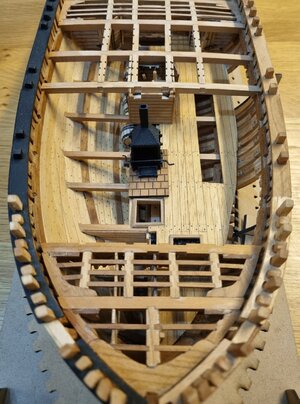
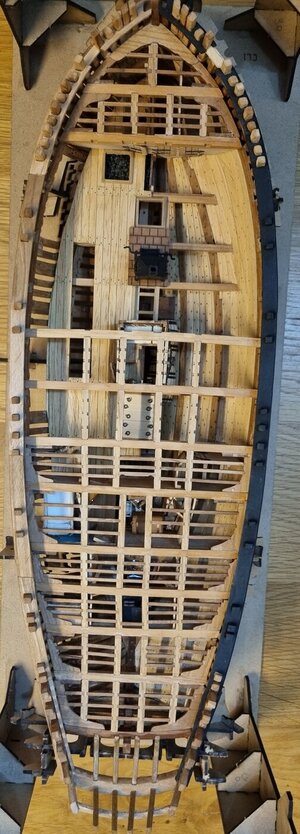
In the last few days I continue to work on the infrastructure for the upper deck: preparing the beams, the kringels and the knees (horizontal and balanced) that together formed the upper deck in the area above the warehouses/center of the deck.
This step, similar to its predecessors, requires before installation a constant check that the beams are installed at the exact intervals and in a parallel manner.
For example: I installed the beams 87-88 together with the kringles above the storage of the sails, in order to make sure that they are laid parallel and with the exact spacing.
I am attaching pictures for your impression, good night to all of us


Very impressive Shota. Your photographs really show off your fine workmanship.
Good morning Shota. Just Wow! Cheers GrantHello dear friends
In the last few days I continue to work on the infrastructure for the upper deck: preparing the beams, the kringels and the knees (horizontal and balanced) that together formed the upper deck in the area above the warehouses/center of the deck.
This step, similar to its predecessors, requires before installation a constant check that the beams are installed at the exact intervals and in a parallel manner.
For example: I installed the beams 87-88 together with the kringles above the storage of the sails, in order to make sure that they are laid parallel and with the exact spacing.
I am attaching pictures for your impression, good night to all of us
View attachment 376656View attachment 376657View attachment 376658View attachment 376659View attachment 376660View attachment 376661View attachment 376662View attachment 376663View attachment 376664View attachment 376665View attachment 376666
- Joined
- Apr 20, 2020
- Messages
- 6,242
- Points
- 738

Good morning Shota. Just Wow! Cheers Grant
Dear FriendsVery impressive Shota. Your photographs really show off your fine workmanship.
Thank you very much for all the warm and supportive words, it's nice to know that our work is liked by professionals in the field.
Thanks also to all the other friends for all the likes and smiles
Dear Shota, I wish you all the best and a very Happy Birthday  .
.
Have a great day with family and friends.
 .
.Have a great day with family and friends.
- Joined
- Apr 20, 2020
- Messages
- 6,242
- Points
- 738

thank you very much my dear friend HermanDear Shota, I wish you all the best and a very Happy Birthday.
Have a great day with family and friends.

- Joined
- Mar 1, 2022
- Messages
- 694
- Points
- 308

Dear Shota, I join joyfully the best wishes of long life and prosperity!
- Joined
- Aug 14, 2018
- Messages
- 829
- Points
- 403

My best wishes for your birthday Shota, your Alert is looking great, JJ..
I join the others in wishing you a wonderful birthday Shota  .
.
 .
.Wonderful Shota! All the best wishes for a wonderful birthday!
Happy birthday!!
- Joined
- Apr 20, 2020
- Messages
- 6,242
- Points
- 738

Happy birthday!!
Wonderful Shota! All the best wishes for a wonderful birthday!
I join the others in wishing you a wonderful birthday Shota.
My best wishes for your birthday Shota, your Alert is looking great, JJ..
thank you very much my dear friend's for your Greetings and best wishes for my birthdayDear Shota, I join joyfully the best wishes of long life and prosperity!


