HMS Alert by Jolley Roger

Joined
Sep 4, 2018
Messages
200
Points
253

Location
Johannesburg, South Africa
Here is the start of my buildlog for the Trident Model HMS Alert.
It seems i'm one of the lucky ones that received an Alert before the DHgate shutdown threw a spanner in the works.
The kit got delivered by Fedex, took 4 days from China to SA, then the local Fedex managed to bungle it up for another 10 days, three phone calls later and they managed to get it delivered to me in one piece. What a relief!
I guess most of you have seen the unboxing and review by Uwek (Alert unboxing), so I won't bore you with the same details.
I'm in no rush to build this kit, expect it will take me a year or two to complete, so everybody else will catch up with their builds in no time. Hope you get your Alerts Soon!

I've just about completed the cradle - i can just reiterate what has been said before - everything fits very well, a very light bit of sanding here and there and it slots right in, very impressive.
IMG_20200822_153456.jpg
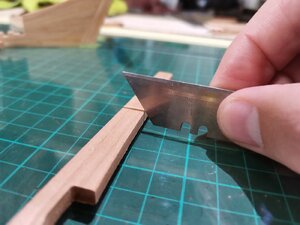
A quick dry fit of some keel components, with minimal cleanup, shows how accurate the CNC milling is
IMG_20200822_155050.jpg
My workshop floor just about covered in wood! Gonna keep me busy for a while...
IMG_20200822_154748.jpg
 
Last edited:
The cradle is now done - I have named it the Dragon's lair in recognition of its Chinese heritage :)IMG_20200828_090110.jpg

The bearding has been done using the line as provided by the jig
IMG_20200828_090156.jpg

I used an old utility knife blade to use as a scraper to cut the rabbet line
IMG_20200828_154543.jpg

While the pieces were fairly small and easy to handle, I dry fitted the horseshoe plate. The CNC'd grooves is slightly smaller than the metal part provided, so I traced the outline with a sharp pencil and very(very) carefully cut it to the correct size...
IMG_20200828_154046.jpg

Before gluing the keel together I dry fitted the wing transom(i think that's what its called) to make sure I don't have to struggle with it later on. It did take a bit of filing to get it to fit snugly.IMG_20200828_154336.jpg

I'm using the cutout from jig CL52 to make sure all the keel parts fits into the actual jig. A bit of filing required here. Almost liking cutting keys!
IMG_20200828_162348.jpg

Next, I will glue all the keel components together.
 

Attachments

  • IMG_20200828_154543.jpg
    IMG_20200828_154543.jpg
    130.9 KB · Views: 10
I've bought to pieces of thick glass to use when gluing components together to make sure they are nice and flat.
I would have preferred if the jig was made out of MDF as well, as the plywood was warping all the time.
Here's the keel sitting in its jig, with some weight on top of it.
IMG_20200901_152353.jpg

and the keel after the glue has dried and removed from the jig
IMG_20200901_152920a.jpg
 
Do you think it's worth reinforcing the board's base?- attaching (screwing) it to a thicker board for greater stability?
Hi Stuglo,
It might be worth it if you have a bad warp.
I just used a hot iron and steamed it every now and again, then stored it between the glass plates until needed. We are between seasons over here in SA, so the humidity is fluctuating a lot, might have something to do with the warping.
 
Not so much
Hi Stuglo,
It might be worth it if you have a bad warp.
I just used a hot iron and steamed it every now and again, then stored it between the glass plates until needed. We are between seasons over here in SA, so the humidity is fluctuating a lot, might have something to do with the warping.
Not so much warping but helping rigidity when rotating etc
Humidity Ha! Ha!- its 40c with 90% humidity today. Thankfully rare, 1k from sea and humidity is usually high. On the other hand, rarely very cold (snow last time 60years ago)
 
The rising wood take some work to get it shaped correctly. Once this is done the template provided makes sure you place it in the correct location. Very nice idea from Trident.IMG_20200903_130644.jpg
IMG_20200903_130719.jpg

Wing transom shaped and fittedIMG_20200905_113651.jpg

and the whole assembly sitting snugly in the cradleIMG_20200905_113635.jpg

and now time to start with the frames, some stickers provided as well to help with the shaping process. Happy days!IMG_20200905_113855.jpg
 
I may have said this before, but I think that anyone considering a POF project, will find building this most educational as a way of understanding how it is done. The work of Jolly Roger, will set the standard- well done
 
I've picked up a small problem with the cradle.
Part CL25 of the cradle on the starboard side is about 1mm closer to the keel than the port side. I was wondering why i had difficulty fitting the ribs on the starboard side until I had a closer look.
IMG_20200915_105937.jpgIMG_20200915_110038.jpg

I decided to measure it and there is a definite 1mm size difference on the 'overhang'.
IMG_20200915_110742.jpgIMG_20200915_110903.jpg

So now how to fix this glitch? Will try and debond the glue and cut the slot in the cradle part 1mm closer.
Let me know if you guys have a similar issue?
 
Back
Top