HMS Druid P.O.F. - Unicorn Models by Donnie [COMPLETED BUILD]

Hi Genarro and Pianoforte,
yes, get it from ZHL models. The kit arrives very soon. They also now include the upper deck beams as part of the kit now. You can choose Cherry or Pear. But the kit has several kinds of wood that is used. The frames are from a Rosewood if I remember.

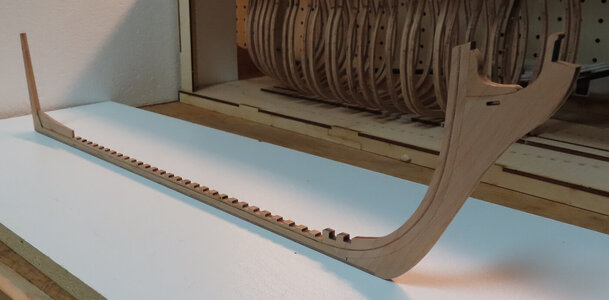
The latest. Completing the Keel. There is a 2 x 6 strip of Dark Walnut to use. If you see that I think I made the Keel square as it is standing unassisted on aboard.

keel-layout-30.jpgkeel-layout-31.jpg
 
Get it from ZHL MODELS. He sells it with a free life boat, upgraded deck beans design and CNC Boxwood figurehead.

If you look on eBay,, other sellers do not offer those items.

Beside ZHL customer attention is excellent.

Just a suggestion.... I got mine, but still is a ship and a half far away to be started. :)

This log is a blessing for us.... the Druiders.... :)

Cheers
Daniel
Thanks for the tip. Much appreciated.
 
Please see POST #38 as I have added some FRAME WORKFLOW images to that section. I did this so that if anyone is starting and visiting the log for the first time, they will see the progression. My apologies for this being a little out of order.
 
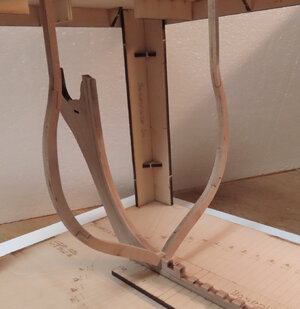
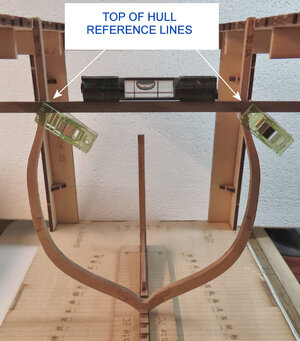
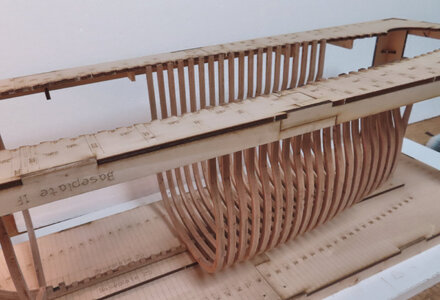
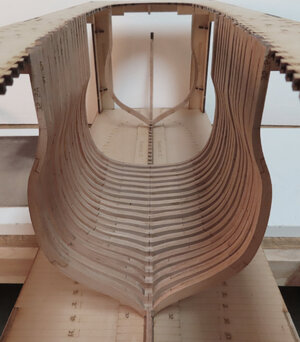
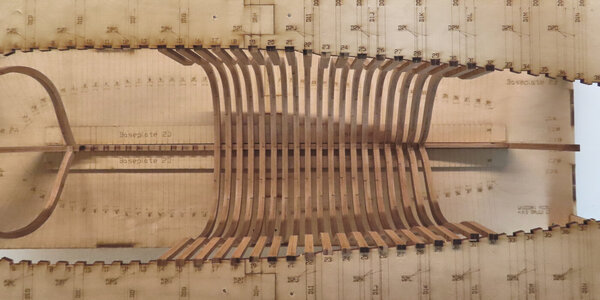
So, I chose one frame near the Stern to see how things were going to be level. So, I took a strip of walnut and lined the strip onto the REFERENCE marks that are engraved into the frames. These marks are where the frames will be cut off from the jig. As you can see, just temporarily setting the frame into the keel results in a really nice fit - vertically plumb and also just as important (if not more important) is that the frame is level - the frame should not sit lopsided or favor one side or another, but should set true in all respects.

HKF-03.jpg


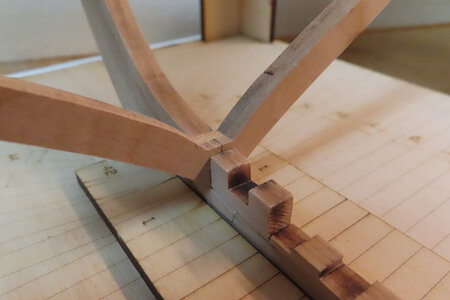
The outer edge of the frame notch lines up just right on the Bevel.
You can also see the reference line on the frame where the sanding for "fairing the hull".
Nothing is glued in yet. The two baseplates holding the keel are not glued in yet either, but just using masking tape to hold in place for now.


HKF-04.jpg
 
So, I chose one frame near the Stern to see how things were going to be level. So, I took a strip of walnut and lined the strip onto the REFERENCE marks that are engraved into the frames. These marks are where the frames will be cut off from the jig. As you can see, just temporarily setting the frame into the keel results in a really nice fit - vertically plumb and also just as important (if not more important) is that the frame is level - the frame should not sit lopsided or favor one side or another, but should set true in all respects.

View attachment 209601


The outer edge of the frame notch lines up just right on the Bevel.
You can also see the reference line on the frame where the sanding for "fairing the hull".
Nothing is glued in yet. The two baseplates holding the keel are not glued in yet either, but just using masking tape to hold in place for now.


View attachment 209602
Hi Donnie,
A very nice example of check-check double check!
Also your added reply 38. Thanks for showing. This is also usefull for other POF buildings, like the BN.
Regards, Peter
 
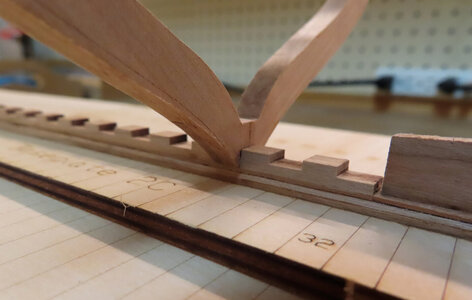
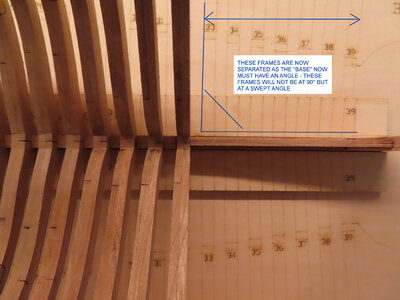
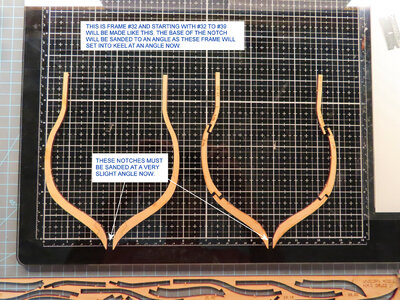
Latest. I am now installing Frame #32 (frames #32 to #39) are all separated into two (HALVES) this is because at this point on to the stern, there will be a slight angle sanded into these notches as the Frames will now set or sit with a slight angle to the Keel. More images to follow to help explain.

HKF-08.jpg


HKF-09.jpg
 
Thank you all. Well. No working on model for at least next three days. Actually I had a very bad muscle spasm from using the spindle sander. Sitting in awkward position too long Saturday. Well, I didn’t think it was too long at the time, but the next day Sunday, that group of muscles cramped in my hip which now sent me to the doc for steroids today. I thought I could take care of it myself, but now the forth day, I can’t take the pain anymore.
 
Back
Top