True story StephanYou have elephants, and you have Grant, which is kind of the same thing. Just don't visit the nearby china shop.

 |
As a way to introduce our brass coins to the community, we will raffle off a free coin during the month of August. Follow link ABOVE for instructions for entering. |
 |
 |
The beloved Ships in Scale Magazine is back and charting a new course for 2026! Discover new skills, new techniques, and new inspirations in every issue. NOTE THAT OUR FIRST ISSUE WILL BE JAN/FEB 2026 |
 |
True story StephanYou have elephants, and you have Grant, which is kind of the same thing. Just don't visit the nearby china shop.

Good morning. They are used to keep the secret supply of the Captains rumEverything is done correctly. But...
I'm just wondering what that drawer at the bottom of cabinets is for?
View attachment 557718
 . I did notice on drawings and photos of cabins of British ships from this era that there are no draws there. I decided to used a little of Grants fun....they just looked better
 Thank you very much indeed Brad. Cheers GrantLove the square parquet flooring you executed so well!
I missed a few months of your posts but am caught up. Wonderful work and photos to document it.
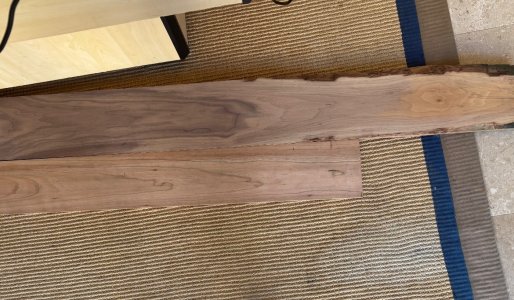
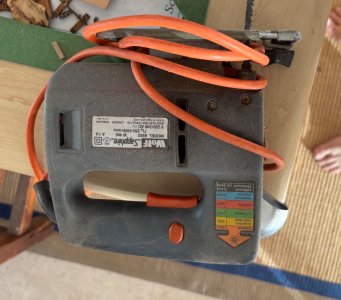
 ) into 300mm x 20mm strips or there about
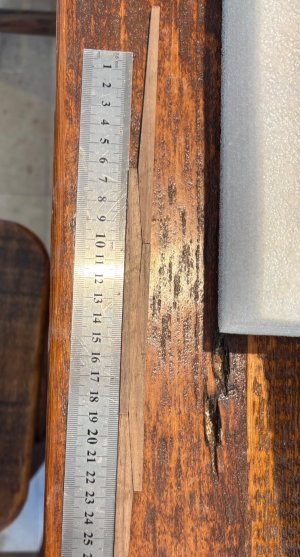
  . I used my mini table saw to trim these down to 300mmx14mmx3mm. Luckily I have plenty blades I can see me shredding a few.
 .
.
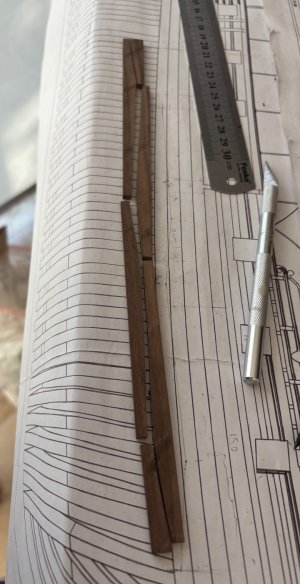
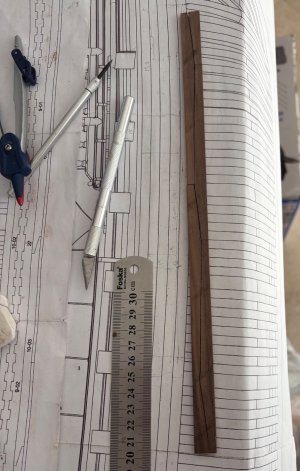
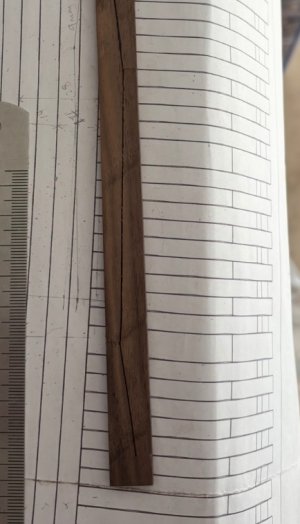
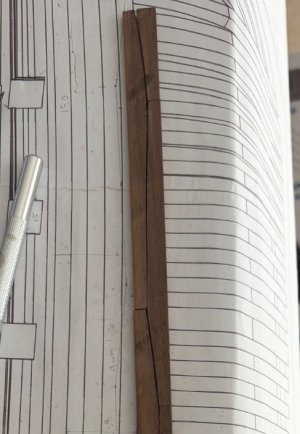
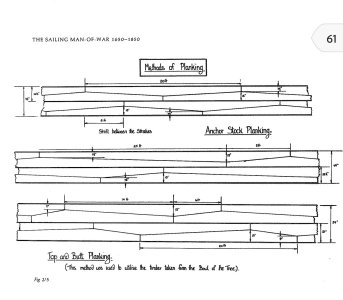
Processing those by hand is no joke, Grant! Well done!Good evening. I bunked the office today and attempted to cut wood for top and butt planks for my wales.
OH boy - it is a bit of a hack.
I bought some walnut and cherry off cuts:
View attachment 559392
I cut with a jigsaw (a big one) into 300mm x 20mm strips or there about
. I used my mini table saw to trim these down to 300mmx14mmx3mm. Luckily I have plenty blades I can see me shredding a few.
View attachment 559393
Nice toes.
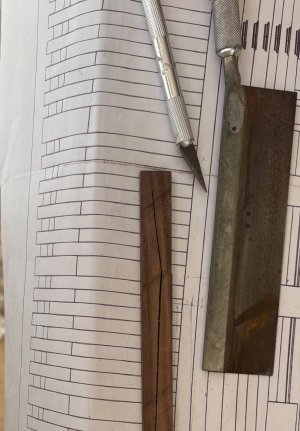
Now the hack part…..I used a xacto blade and hand saw to cut the top and butt pattern.
View attachment 559395
My first attempt:
View attachment 559396View attachment 559397
If I can’t get these right I will have to resort to the kit planking for the wales.
Close ups :
View attachment 559400View attachment 559401
Cheers Grant
View attachment 559391

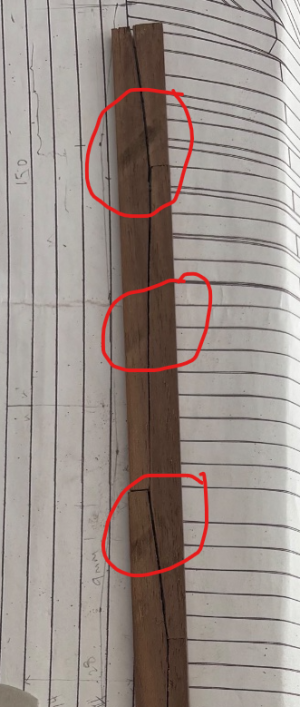
True story, but Just swap a few pieces around to mitigate that concern. As Paul said, you can perfect the fit once they start to go on the hullWell done Grant! That's not an easy task with an X-acto because the blade always wants to follow the grain of the wood.
My only comment/suggestion/criticism would be to try and make each plank separately rather than make matching planks from the same strip of wood. The reason is that any figure that spans across two planks will reveal that they were cut together and make it look like the joint was just scored into it, disguising all the effort you put into cutting them out and fitting them together. It will make them look like one of those one-piece decks with plank lines laser-etched into it and any cross-grain dark streaks going all the way from one side of the deck to the other across plank joints. Very unnatural.
View attachment 559422
I’m still finding my scratch feet Stephan. Making these made me realize I have some way to go. My tool shed definitely needs some decent modeling additions as my hand skills just don’t “cut” itThere is a scratch builder in you. I see you shed growing with tools
Good morning Paul. True story and thank you. I really enjoyed hacking that plank of walnut tho. Getting that plank down to 3mm was entertaining and any carpenter would be shaking their head in dismay.Processing those by hand is no joke, Grant! Well done!
A tip: don't fall in love with the fit until you get them on a curving ship's hull. There will still need to be some finessing.
 .
.Good morning Russ. Thank you for this post. I did attempt to make each piece individually however that was like a comedy show- a very poor one. My hand skills are not up to scratchWell done Grant! That's not an easy task with an X-acto because the blade always wants to follow the grain of the wood.
My only comment/suggestion/criticism would be to try and make each plank separately rather than make matching planks from the same strip of wood. The reason is that any figure that spans across two planks will reveal that they were cut together and make it look like the joint was just scored into it, disguising all the effort you put into cutting them out and fitting them together. It will make them look like one of those one-piece decks with plank lines laser-etched into it and any cross-grain dark streaks going all the way from one side of the deck to the other across plank joints. Very unnatural.
View attachment 559422
 .
.
It's hard and labor-intensive work, but it must be satisfying already that you've been able to create all these lovely shelves from such a big plank, Grant. And as always, the finishing will enhance the visible result. That is about 3 actions: sanding, sanding and sanding. For sure you will get some nice fitted planking with the butt pattern.Good evening. I bunked the office today and attempted to cut wood for top and butt planks for my wales.
OH boy - it is a bit of a hack.
I bought some walnut and cherry off cuts:
View attachment 559392
I cut with a jigsaw (a big one) into 300mm x 20mm strips or there about
. I used my mini table saw to trim these down to 300mmx14mmx3mm. Luckily I have plenty blades I can see me shredding a few.
View attachment 559393
Nice toes.
Now the hack part…..I used a xacto blade and hand saw to cut the top and butt pattern.
View attachment 559395
My first attempt:
View attachment 559396View attachment 559397
If I can’t get these right I will have to resort to the kit planking for the wales.
Close ups :
View attachment 559400View attachment 559401
Cheers Grant
View attachment 559391
Thank you Gunther. I may well give this method a go. At the moment I’m open to any ideas as I am hacking these out a bit. Cheers GrantHey Grant,
That looks really great. Amazing. But it also looks like a lot of work.
I saw here at Wolfram zu Mondfeld (model making) that he made a template for the planking so that several planks can be worked on at the same time. Sanding. Would that be something for you?
View attachment 559485
Thanks Peter. Yep there is plenty elbow grease with sanding coming. I think I should make these 0.5mm thicker to compensate for the sanding. I’m thinking about painting my wales black if I cannot get the wood looking good. I thought of buying black ivory but this was so expensive especially as I am going to have plenty redo’s here. Cheers GrantIt's hard and labor-intensive work, but it must be satisfying already that you've been able to create all these lovely shelves from such a big plank, Grant. And as always, the finishing will enhance the visible result. That is about 3 actions: sanding, sanding and sanding. For sure you will get some nice fitted planking with the butt pattern.
Regards, Peter
Good morning Daniel. Thank you. I know walnut so that why I decided to buy it. The only thing I don’t enjoy is the colour variations in the wood. Luckily I am painting my wales black or staining them with Indian ink so this won’t be a problem. I need to get this top and butt pattern right first which is proving challenging for me at the moment.Cheers GrantWalnut is one of my favorite woods for planking and I know how hard that wood is to work with. Great looking results so far Grant.
 .
.